I've always admired Leica cameras, especially their flagship Leica M. The iconic and minimal design, excellent build quality, consistent shooting experience, and brand legacy have always intrigued me.
I've primarily shot with Sony mirrorless cameras over the years (with some small pit stops with Canons and Fujis)1. I used to prioritize camera features over everything else. The latest Leica M EV1 is a bit more opinionated and like other M models lacks features that cameras a fourth the cost have.
I won't bore you with the details, but it doesn't even have a video mode. It doesn't have IBIS (in-body image stabilization, basically standard on any high-end mirrorless camera), the screen doesn't even tilt, it doesn't have weather sealing, and of course it doesn't have autofocus. And it has the ergonomics of a brick; people usually buy third-party cases and grips to make it tolerable.
Leica M models have always had premium pricing and this latest M EV1 is no exception, selling for around $9,000 for just the body. With that stratospheric price they've only been a warm thought for me, not something I could justify spending on myself for a hobby. That is, up until now. My lovely wife Katherine recently got me one for my 40th birthday.
This article isn't really a camera review; I'll leave that to the professionals. This is more of a reset in how I'm approaching photography now.
Overoptimizing my hobby
I haven't shot much at all in the last seven years; phone shots aside of course. I sort of ruined my relationship with photography by making it too buttoned up and having too high a bar for my output. It went from being a fun way to capture what I see and experience to being too precise and too tiring to create anything that felt good enough to publish and share.
When I first got into photography in the early 2000s, I was shooting with a few Sony point-and-shoots like the P9, W1, and T1. I then got my first DSLR camera, a Nikon D90. Then I shifted to mirrorless with the NEX-5 in 2010 before exploring some Canon and Fuji cameras. These photos were much more casual, largely just posting them on Flickr, Facebook, and the occasional product shots for my blog posts. It was definitely a simpler time.
I changed that in the 2010s as I began shooting with increasingly more prosumer Sony mirrorless cameras (a7S, RX1R, and a bunch of a7R models). I shot this Japan trip entirely on the RX1R. Trips became less about enjoying travel and more about the pursuit of content that I could manicure into bespoke photosets — basically mini-websites I would design and build myself from scratch to tell the story of my trips. It began as a fun way to stretch not only my photography skills but also design and web development skills with each photoset and countless subsequent redesigns.
The stakes got higher with each trip. I had to make an even better photoset. I got more gear to help with it. Bigger, heavier lenses. ND filters, variable grad ND filters, Kaesemann circular polarizers. Travel tripods, carbon fiber tripods, and monopods. Reflectors. Diffusers. Studio lighting. Phone-controlled smart intervalometers. A water-cooled and overclocked faster photo-editing machine made for Lightroom.
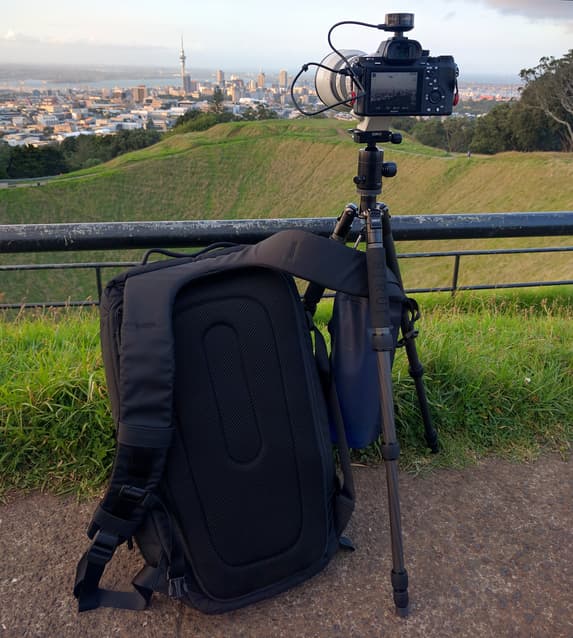
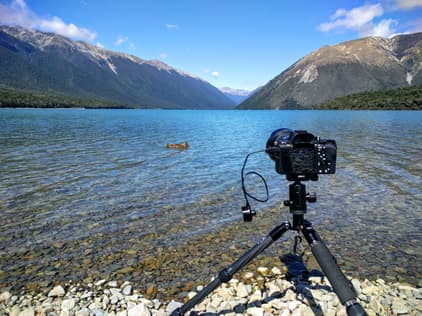
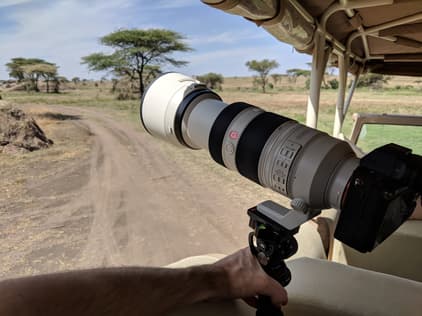


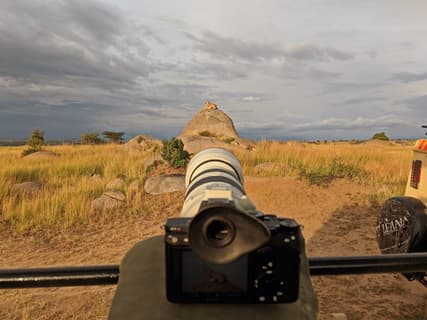
Shooting with my Sony gear years ago in New Zealand (2016) and Africa (2018).
After the photos were captured the work began. I would spend months of spare time reviewing thousands of photos; one trip resulted in over 800GB of photos, videos, HDR shots, and timelapses. The hours in Lightroom got longer and longer, endlessly paging through shots, dragging sliders back and forth, then back again to find some aesthetic sweet spot I'd never quite find.
I also had to deal with the aftermath of this hobby: terabytes of RAW photos and videos. I've gone through a handful of different organization and backup setups. The vast majority of this content I would never touch again after a decade.2
The bar I'd set for those photosets kept climbing until nothing felt worthy of the effort. When Covid came around I wasn't going on any big trips, so I focused my spare time on other endeavors like learning iOS development and building a side-project app.
When the world recovered and travel ramped up again, I found myself content with shooting with only my phone (albeit in RAW, paired with the Darkroom app).
I had optimized my photography hobby to death. I never lost complete interest in photography. I still loved that feeling of holding a camera and snapping off a shot with an interesting composition, but letting it consume my life as much as it did felt wholly unappetizing.
Leica
I had always told myself that if I ever got back into photography, it had to be different: a more compact camera setup, no marathon editing sessions, and publishing individual shots instead of curated travel photosets.
I'm not going to sit here and posture that that sort of shooting ethos can only be done with a pricey Leica. You can do that with many far more affordable cameras, your phone, and even a disposable film camera. As far as I'm concerned, digital cameras have pretty much all been amazing for close to a decade now. Everything we've added since feels so very incremental, often just adding minor creature comforts. For example, I shot this leopard photo eight years ago and I can't think of anything a modern camera would have done to significantly improve upon it.
I like to surround myself with and use simple, elegant, and well-designed tools. They're a source of inspiration. They're often stripped down to only the essentials to focus on the task at hand. I love my heavy and large Heath mugs. My solid copper Baronfig pen. I love glancing at my iMac G3 and original iPod while working in my office. If I were more into audio gear, I'm sure I would have a few Teenage Engineering items like the elegant TP-7 field recorder.
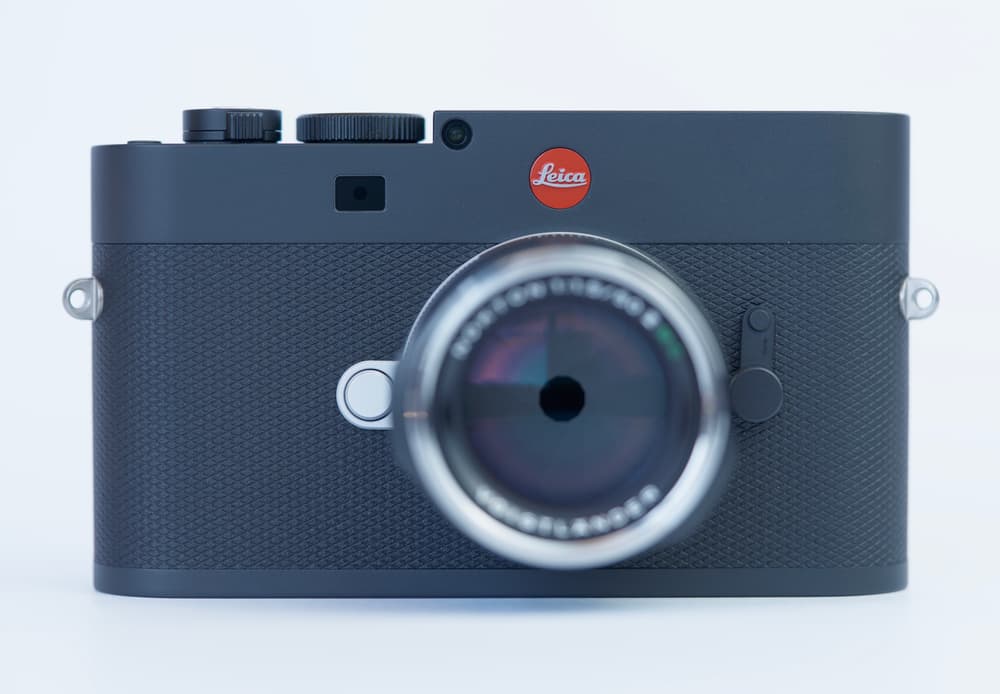
I've always appreciated Leicas from a distance. I've rarely used them. Just the occasional checking out a friend's Q or shooting a single shot with an M10. But I remember the feeling. The sturdy, cold metal frame with no humps or sculpted grips, just a clean rounded rectangle. The typeface on the frame and in the menus. And of course the shock that what I was holding was full-frame and remained remarkably compact.
Even looking at my Leica M now as I'm writing this, I'm most inspired by the amount of restraint they've had over the years. Pick up an M from four decades ago and you can still tell it's the same camera and formula. Sure, this particular model is the most controversial, opting for an EVF over an optical rangefinder, but aside from that there's so much they've held off on touching over the years. That alone is a near-impossible feat for any product to achieve today, especially in software in our current age of AI development where it's all too easy to keep adding more and more.
The M EV1
I took notice when Leica launched the M EV1 last year. It drops the optical rangefinder and replaces it with an EVF (electronic viewfinder), something previously only available as a bulky $955 add-on. That single change was huge news in the world of Leica M enthusiasts. It dramatically simplifies the shooting experience if you ask me.
It's that change that made the M EV1 really catch my attention and feel more approachable. It's also the most controversial part of this camera. Some enthusiasts say it's not a true Leica M. But to understand that, you need to understand a bit more about what a rangefinder is, and why the new M EV1 is no longer a rangefinder camera. It's also important to note the M EV1 is not a replacement for the regular M models; it's its own distinct product line. It's basically an M11 with an EVF.
What is a rangefinder?
While all Leica M models are manual-focus only, all previous generations were also rangefinders. With most high-end modern digital cameras you're accustomed to, when you look into the EVF, you see exactly what the sensor sees: a real preview of your exposure and depth of field. And since it's a real preview, that also means there's no parallax. That's something you'll hear often when it comes to previous Leica M models. Parallax refers to the optical rangefinder being physically offset from the lens, so that at closer distances what you see in the viewfinder differs from what the lens captures.
Since the rangefinder is entirely separate from your lens, it also means you don't have the same focal length. For example, if you're shooting with a 50mm lens, the area you'll capture will only be a small portion inside what you see in the rangefinder viewfinder. To deal with that, rangefinder Leicas employ framelines (illuminated projected lines to indicate frame rectangles) inside the viewfinder to indicate where various focal ranges would capture. Some people really appreciate the rangefinder style of composing your shot as you can also see what's about to enter your frame.
Leica M rangefinder example
It's a bit of a tricky concept to talk about, so I built this interactive preview to illustrate how rangefinders work.
Here's how it works:
- Framelines: Leicas have a few different sets of frameline pairs. The ones you see depend on what lens you have attached. If you have a 50mm lens, your Leica M rangefinder will load the framelines for 50mm and 75mm lenses. The outer framelines are for the wider focal length, so in this case 50mm.
- Composition: What appears within the framelines for your lens is roughly what will be captured when you take a photo. The actual frame is usually a little larger than the lines show. The viewfinder here is not a real preview of your photo. It won't show exposure or bokeh the way an EVF does, since an EVF previews through the lens.
- Focusing: There's a small, rectangular focusing rangefinder patch showing a ghosted/double image in the middle of the viewfinder. You place that patch over your subject and focus until the two images align and that patch is sharp. If they're not in focus, you'll see two images on top of each other, offset horizontally. It can be a challenge to nail, and rangefinder photographers tend to find areas of contrast in the subject to focus on, then recompose as needed.
In this demo, I provided a few example photos so you can see how focusing can become more challening when there's less contrast in the middle of the frame.
Optical rangefinders make it hard to frame your composition with wide-angle lenses, telephoto lenses, and physically large lenses. Lenses wider than the viewfinder's widest framelines need an external viewfinder, large lenses block a corner of your view, and telephoto lenses leave you with only a tiny sliver of a preview.
The Leica M EV1 is not a rangefinder
Now it becomes a bit clearer why adding an EVF is such a big deal. It's still manual focus, but now you see exactly what the lens sees. To aid in focusing you may rely on digital features like focus peaking (highlighting high-contrast edges in a bright color) and magnification to nail focus. This means you're free to use a lens of any focal length you want without worrying about a particularly challenging focusing and viewfinder experience.3
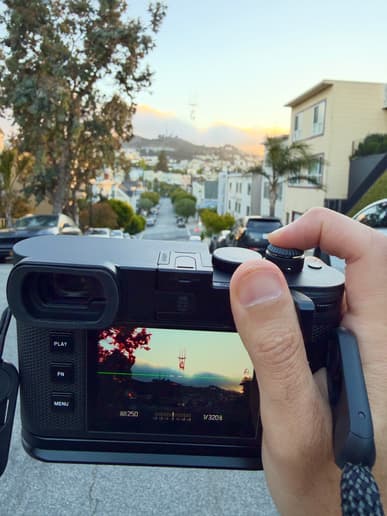
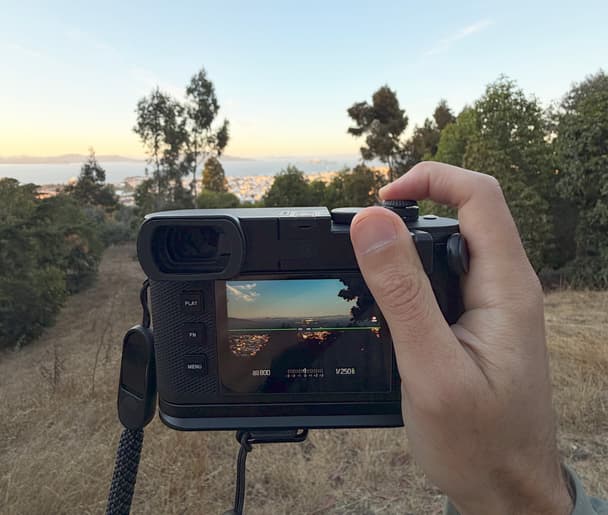
EVF aside, I personally think the Leica M recipe is still there. Great build quality paired with iconic, minimal design inside and out. And with recent rumors of Leica being acquired by a private equity and venture capital firm, I was even more keen on buying a Leica in case future models diminish in quality with a new owner.
Unboxing
This is my first Leica, so I can't really tell you how this compares to unboxing an M11 or a Q3, but it's significantly more elevated than unboxing a Sony a7 body. It's closer to unboxing a watch than a mirrorless camera. It's more along the lines of something you keep for years, if not pass down through generations, rather than a gadget you replace when the new version rolls around.
Before you get to the actual camera box, there's a thin cardboard layer with a label indicating the model. Unfortunately this outer box is too thin to provide any real protection to the inner box. My inner box arrived dented, as B&H Photo does a poor job packaging five-figure orders.
It pops open from all sides like a clamshell revealing its pearl. Sorry, I know that sounds cheesy but it was a neat feeling seeing it for the first time. It was clearly an intentional effect and feeling that Leica was going for.
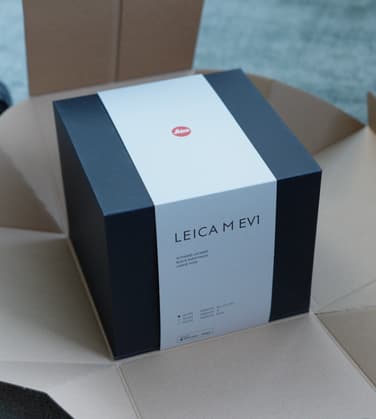
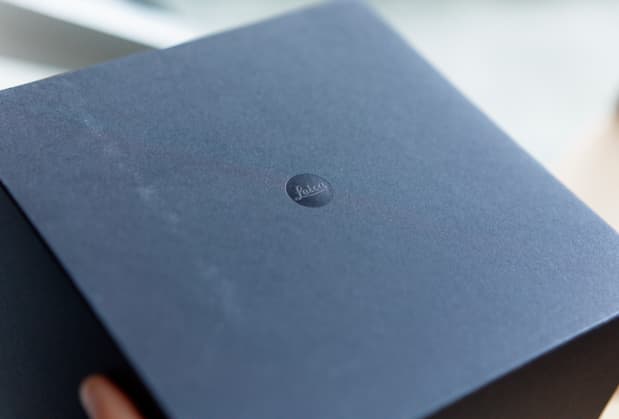
The inner box is a matte black cube wrapped in a sleeve printed with product details. You can tell someone paid attention to the layout and typography on this sleeve between the "LEICA M EV1" font perfectly sized to span the sleeve's width, and the red Leica logo placed at the same location as the tone-on-tone Leica logo debossed into the lid below.
Lifting the lid of the matte black cube is a slow, two-handed affair similar to Apple's product packaging with tight clearances to make the opening more of a ritual.
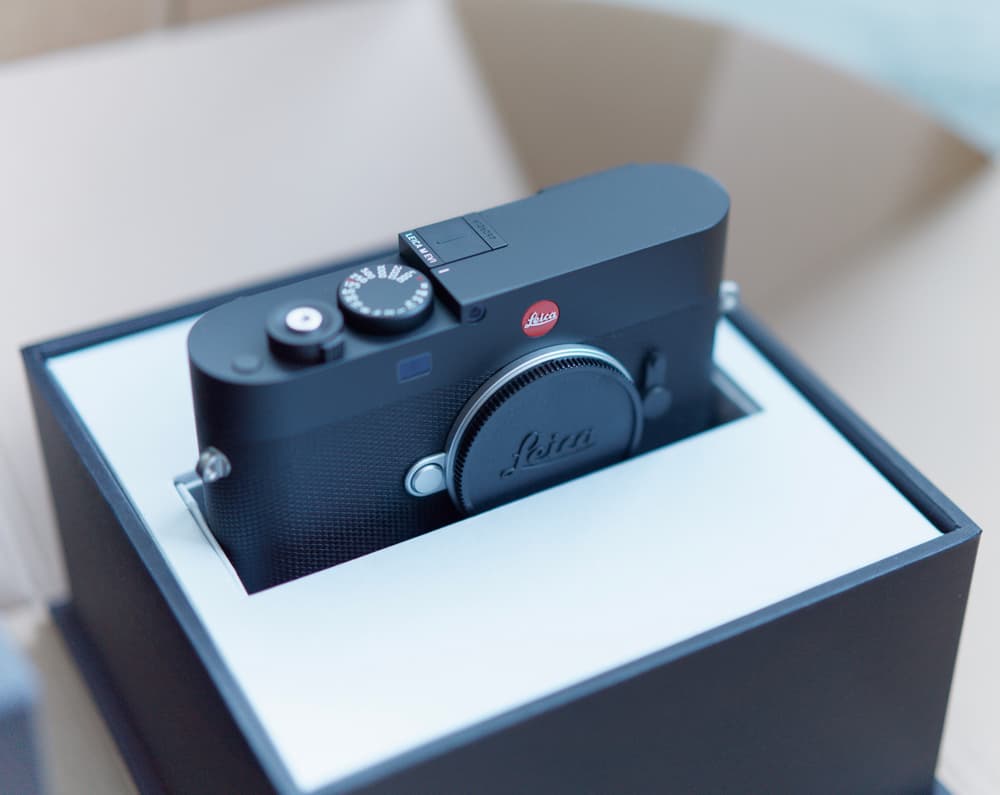
The M EV1 body is the first thing you see upon lifting off the top of the box. There's no protective overwrap shielding it from view. The M EV1 is poised upright on a white pedestal, looking more like a gallery display piece than a digital camera.
The bright red Leica logo first drew my attention to the timeless, restrained rectangular form with gently rounded edges. There's no traditional protruding viewfinder hump like you see on other cameras. Instead the viewfinder is fully within the body to maintain its graceful figure. That design detail really makes it feel more stealthy. A few more notches in the direction of a point-and-shoot feel; a few notches away from feeling like you're a professional photographer. My old Sony RX1R that I loved had a similar style.
The smooth matte black paint finish looks great in person, especially coming from years of the slightly bumpy, textured finish on Sony a7 bodies.
The top of the body is all black, with the exception of a small model name written on the hot shoe. The rest of the body is wrapped in diamond-checked leatherette like the Q. I personally prefer this pattern over the faux-grain leatherette on the M11.
Lifting the magnesium and aluminum alloy body out, I was immediately amazed at how light it is for a full-frame camera body. Of course there's no battery or lens in it yet to weigh it down, but this is already a night and day difference from my Sony body. I carefully placed my fingers in places that wouldn't leave noticeable fingerprints, but I quickly learned the camera does a nice job of avoiding that anyways.
Looking around the M EV1 body, I quickly noticed another thing. There are no little plastic flap doors on the side hiding a ton of ports and memory card slots. Instead, there's just a single USB-C port on the bottom, and the SD card slot lives inside the battery compartment. It's stripped to the essentials. No ports for video out or flash sync; that's not the vibe for a camera geared toward street photographers.
The only less-than-ideal thing is that the USB-C port is on the bottom, which means you have to do some gymnastics to charge it, or place it screen-down on a soft surface to avoid scratches. Definitely reminds me of the Apple Magic Mouse charging location. And the USB-C port is exposed with no flap or door protecting it. A not-so-subtle reminder this camera is not weather sealed, which I definitely found surprising for such an expensive camera.
Below the body there's a folded white card that verifies the camera has been hand-assembled and met Leica's stringent QA and mechanical testing in Wetzlar, Germany.
Continuing below, there are two compartments housing the battery, strap, and USB cable. Leica continues with the trend of not having any small plastic pouches to rip open. Everything is already at home in its own little compartment.
At this point I was pretty motivated to pop the battery in and get things going. But due to my own paranoia, the first thing I do with any new camera is place a screen protector on it. After researching a bit, I actually found that a third-party screen protector (the brand "Expert Shield") had better reviews than Leica's own display protector accessory, so I went with that.
Battery design detail
Leica's quest to avoid unnecessary doors on the M continues with the battery compartment. Instead of having a battery door, the battery itself serves as the bottom of the camera once the battery is inserted. The battery sits in there, spring-loaded. One satisfying pull of the machined silver release latch, however, does not pop the battery out onto the floor. Instead the battery jumps out about an inch but requires one more press before it can be removed. It's an absolutely brilliant mechanism, although it did confuse me at first.
With the battery and screen protector installed, I first made sure to get the latest firmware update. It was a smooth process initiated from the Leica FOTOS app. I was glad I didn't have to install some clunky software on my computer to update the firmware.
Lenses
It may not be immediately apparent, but the Leica M mount system is one of the best things about this camera. There are a few reasons for that:
- The M EV1's built-in EVF means you don't need to feel limited in your lens selection, be it ultrawide or telephoto lenses.
- The M mount has been around since 1954(!), so you have a deep bench of new and old glass to choose from. Then there's the Leica Thread Mount (LTM) that has been around since 1930 and you can easily use LTM lenses on an M with a slim adapter.
- There's also a great selection of third-party lenses for the M mount like Zeiss, Voigtlander, and Minolta as well as some more niche Chinese brands like 7Artisans, TTArtisan, Light Lens Lab, and Thypoch.
- And finally, since we're talking about manual focus lenses here, it's much easier to find an affordable and thin mount adapter so you can use lenses made for other camera mounts too.
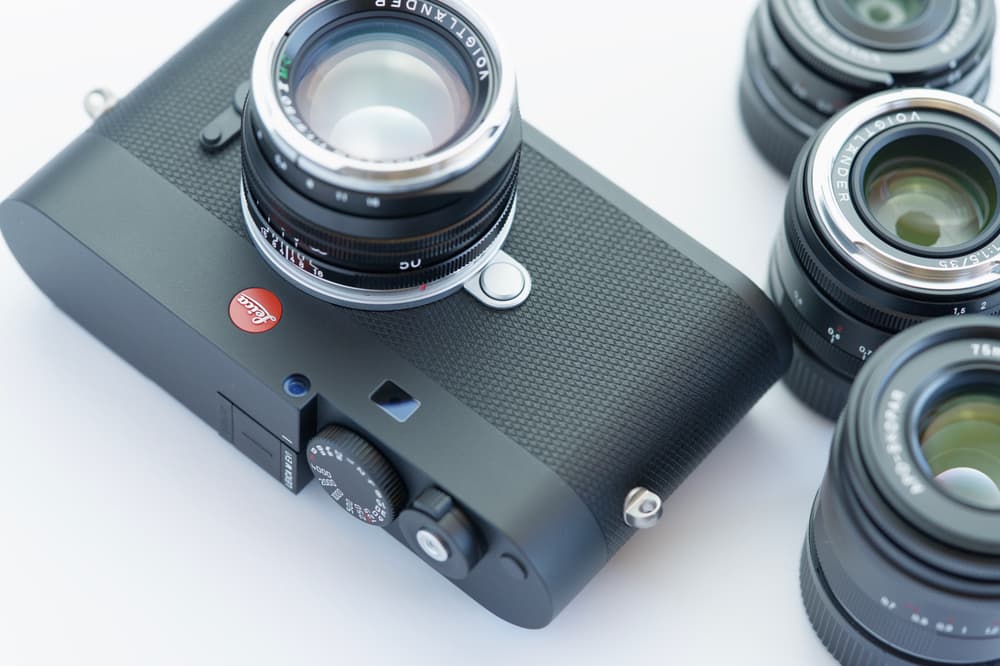
Lens selection is a task often guided deeply by personal preference and taste. How much do size, weight, cost, and speed matter? What do you shoot most often? Are you chasing pristine edge-to-edge sharpness and frame-wide consistency? Do you prefer modern rendering, or are you more drawn to vintage character that may include some vignetting, spherical-aberration glow, visible focus transitions, and lively "creamy" bokeh?
This notion of character is something you hear a lot about with Leica, in no small part due to there being a rich history of older lenses where many of these rendering characteristics were initially engineering limitations. There were some exceptions, like the Leica Thambar 90mm f/2.2, built with intentional spherical aberration for more flattering (less clinically crisp) portraits with a dreamy glow. Even today, you'll see M mount lens manufacturers maintain separate vintage or classic lines of lenses in addition to more modern options. Modern lenses usually reference ASPH or APO optical technologies that correct spherical aberration and chromatic aberration, respectively.
I typically shoot landscapes, architecture, nature, and city life. Occasionally people and close-up objects too, but generally not portraits. Even with my landscape shots I do often like to have a medium-telephoto option at hand so I can capture more detail and not strictly be shooting something like a 28mm or 35mm scene.
I also wanted to prioritize relatively compact lenses. My whole thing with this Leica setup is changing my shooting habits coming from my large Sony setup, so I don't want to be adding huge lenses that will make me less likely to bring the camera out at all. I'm also not chasing absolutely flawless edge-to-edge image clarity. This is just a hobby for me. I will gladly trade some clarity for a smaller and lighter lens. I also knew off the bat that I was only considering prime lenses, not zoom lenses. Zoom lenses aren't really a thing with Leicas anyway.4
Fortunately, just about every Leica M lens feels dramatically more compact than the equivalent full-frame Sony FE lens I've been used to. There are a few reasons for that:
- Manual focus only means no room taken up by autofocus motors, no internal focusing group designed to be moved by them, no optical image stabilization, or any other electronics. Just a simple mechanical aperture ring.
- M mount lenses historically traded quality for size. In the past, Leica M mount lenses were happy to accept a little vignetting, corner softness, and field curvature in favor of fewer optical elements. Of course, today there are slightly larger modern lenses you can opt for if you want to prioritize the best image quality.
The four primes I picked
I landed on a set of four prime lenses: 28mm, 35mm, 50mm, and 75mm. The easiest decision was a fast 50mm for strong bokeh and great low-light performance. With every camera I've ever owned, a fast 50 has been my most used lens. It's a versatile focal length, and being able to shoot wide open for stronger background separation is always welcome.
I wanted to keep things light, so I paid attention to each lens's weight. With some M mount lenses you might see that they're offered in both aluminum and brass versions. I went aluminum where I could to save weight. And since I wasn't sure whether I'd prefer modern-style lenses or classic-style ones with more character, I got some of both.5
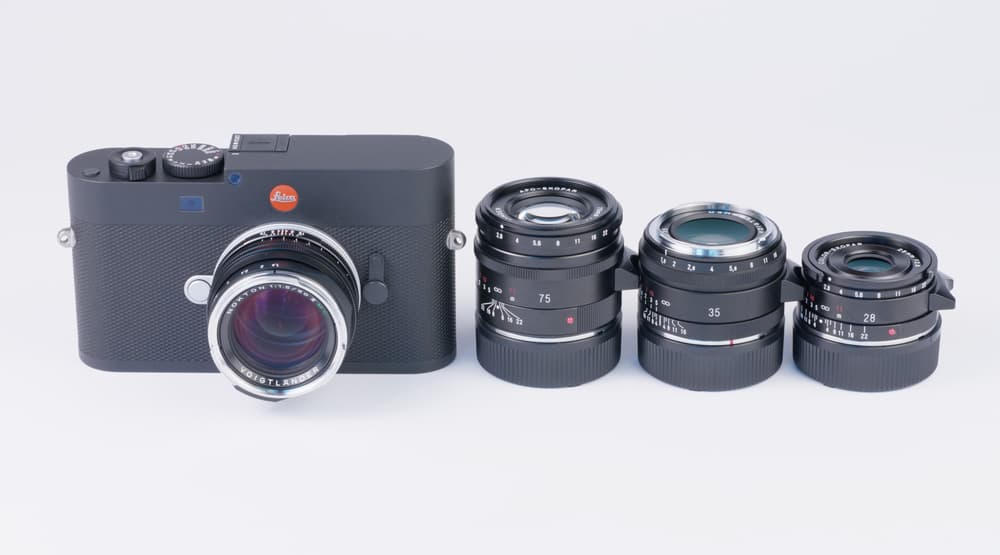
The 28mm, 35mm, and 75mm next to the M EV1. All remarkably compact.
- Voigtlander Nokton 50mm f/1.5 II MC: Fast, compact, and with smooth bokeh. I use this lens most often.
- Voigtlander Nokton 35mm f/1.5: Another fast Nokton, also in the Vintage Line like the 50mm.
- Voigtlander 28mm f/2.8 Color-Skopar: Remarkably compact. This thing is tiny. Makes the Leica M just about able to be put in a jacket pocket.
- Voigtlander 75mm f/2.8 APO-Skopar VM: The smallest and lightest M mount medium-telephoto prime I've seen at just 1.7 inches long and 191 grams. I absolutely love shooting with this.6
None of these are lenses are made by Leica. I didn't start out thinking I would go down this path. I considered starting with a lens like the Leica 50mm f/1.4 Summilux-M or 35mm f/2 Summicron-M, each going for $4,000-$5,000. While researching lenses I kept seeing strong recommendations for Voigtlander's offerings; some even best the equivalent Leica glass (for example the APO-Lanthar series is highly rated for absurdly sharp, low-aberration, modern lenses).
I decided to go with all Voigtlander7 lenses to start. I'd rather have more focal lengths to play with than feel constrained if I had only purchased one or two Leica primes.
In hindsight I was a bit too quick to pull the trigger all at once on these. I were to do it again I probably would have gotten the 50mm and 75mm and taken more time to explore a variety of lenses, particularly some older used lenses.
The beauty of the M mount is its maturity. You can find all sorts of inventory available for it from Leica and many other brands. A few lenses I have on my list to checkout later:
- Older pre-ASPH Summicron-M 35mm lenses, particularly the 4th-generation 7-element versions (1979-1997) that are colloquially referred to as King of Bokeh.
- A 90mm like the Leica APO-Summicron-M 90mm f/2 ASPH, Voigtlander APO-Ultron 90mm f/2, and Voigtlander APO-Skopar 90mm f/2.8. Some of the older Leica 90mm lenses are rather affordable but they are pretty heavy at over 600 grams depending on the generation.8
- Various 50mm lenses to get a better sense of the different styles. Mandler has a highly rated and affordable 50mm f/1.4, and on the complete opposite end of the spectrum there's the expensive and revered older 50mm Noctilux f/1.0 (there's also a $14k f/0.95 modern ASPH version).
There are a lot of places to keep an eye on when looking for well-maintained pre-owned lenses: KEH, FredMiranda forums (trusted hobbyists, I've sold on there before), r/photomarket, and even Facebook (Marketplace can be risky but I've seen some solid options on there, and there are various Leica groups for buying and selling).
Lens coding
There is one minor trade-off you have to make when you use a third-party lens. Since these Leica M lenses are all entirely mechanical, they have no way to electronically tell the camera what lens is attached.
Instead, what they do is employ what is essentially a tiny barcode on the lens. Modern Leica M cameras (starting with the M8 in 2006) have a small optical reader on the bottom right of the lens mount to read those six black or white markings. The camera then uses that to determine what lens is attached so it can save that to EXIF data, and apply any lens-specific image optimizations.
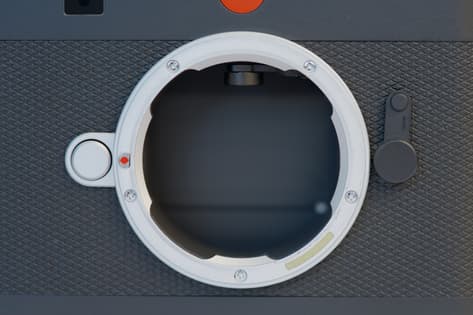
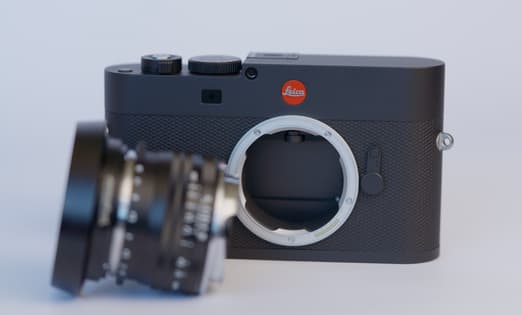
Newer Leica M lenses come with these markings built in (this is called a "coded lens" vs an uncoded one), but for third-party lenses you have to code them manually.9 This means you get a black Sharpie and mark the lens in a specific area with the required pattern to match the Leica-equivalent lens you're shooting with.
You need to know the exact position to mark, so you can either purchase a template or 3D print one yourself. There are lens code tables to help you figure out the markings you need to draw. For example, for my Voigtlander 50mm f/1.5 lens, all I needed to draw was a single black line in the first position for my camera to think a Summilux-M 50mm f/1.4 ASPH is attached (the closest equivalent to my Voigtlander 50mm).
Aside from that annoyance, there are some downstream effects of the photo EXIF data showing that a different lens was used. Photo editing software will try to apply a lens correction for the Leica lens it thinks was used, which you wouldn't want to apply to when using different third-party lenses. Fortunately it's just EXIF data and this isn't too hard to automate to fix if you so desire.
Lens filters and hoods
With any new lenses I purchase I consider what kind of filters I need and if I need a lens hood. Personally, I have always put on a UV filter the moment I unbox a new lens while it's pristine and dust-free. UV filters are a bit controversial among photographers. You don't get a UV filter to change your image, you get it to protect the glass on your expensive lens from damage. It's much easier to replace a cracked or scratched UV filter than an entire lens.
The controversial part among some purists is that you're ever so slightly affecting image quality by putting another piece of glass in front of your lens. I'm a bit stuck in my ways about this, though at least now I always avoid stacking filters10. That's why you don't want to get a cheap UV filter if you plan to use one.
Many Leica shooters will only use a lens hood for protection and not bother with a UV filter. To that, I say why not both? When possible I like having a hood as well, but it's not easy when shooting with a circular polarizing filter (CPL) that you need to constantly rotate to adjust its position, particularly if you're alternating shooting between landscape and portrait orientation.
As for CPL filters, I try to use one whenever I'm outdoors, especially when there's sky, water, or glass and other surface reflections involved. A good CPL filter makes a big difference and is a great tool to have on hand.
I ended up getting these filters (in 39mm and 43mm for my lenses):
- B+W Master UV Haze MRC Nano 010M filter
- B+W Master High Transmission Kaesemann Circular Polarizer MRC Nano Glass Filter
- Urth metal lens filter caps: for compact protection storing filters, instead of carrying around a larger plastic case. After living with these for a while I give them a mixed review as it does had quite a bit of time to unscrew and screw which is a bit annoying when you're out shooting.
My 28mm and 75mm Voigtlander lenses came with lens hoods, so I purchased the Voigtlander hood for my 50mm11. For the 35mm I wanted to try a square lens hood and cap from a brand called Tahusa. I ended up loving it, in particular the metal lens cap, which is the perfect upgrade over those cheap little plastic lens caps that are far too easy to bump off.
Shooting
The Leica M EV1 is the most demanding camera I've owned. There's no grip to hold onto, no IBIS to lean on, and no autofocus to bail me out, so I'm constantly thinking about my settings (e.g., aperture, focus, and shutter speed) before every shot. What I get in return is a camera small enough to carry everywhere without much thought.
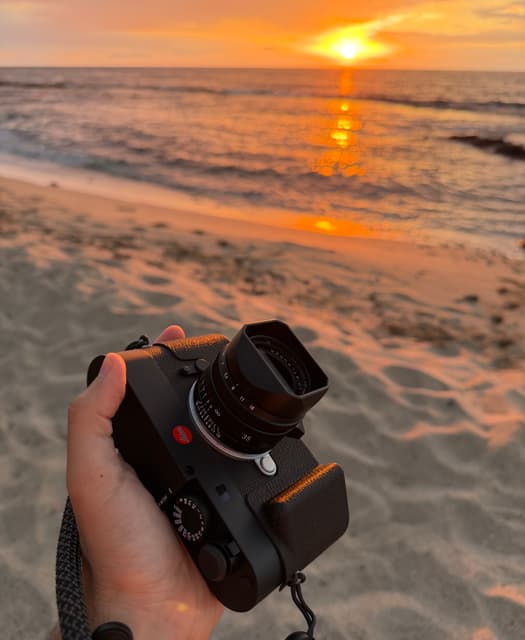
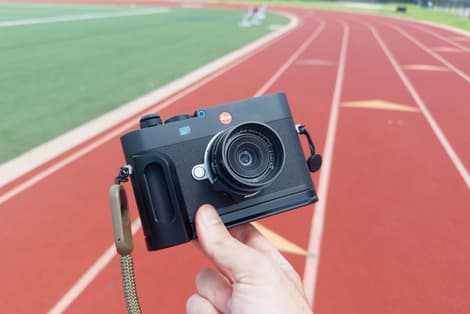
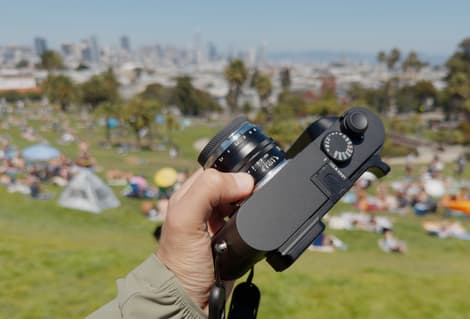
The M out with me in HI, TX, and CA.
The first thing I had to come to grips with (pun intended) was the camera's complete lack of ergonomics. There's a tiny sliver of a thumb rest on the back, and nothing on the front to keep your fingers comfortable while holding on. I got wrist pain after roaming around with it for a while. Even the shutter button, designed for a threaded mechanical cable release, feels too low. As a result shutter presses never felt satisfying.12
I've had occasional wrist pain13 for a decade now, so sorting this out was going to be my first challenge. I ended up getting some comfortable rope straps from Peak Design, both a longer strap and a shorter wrist strap. There are many other strap options out there and I spent entirely too long looking at fancy leather straps before prioritizing what I actually cared about.14 I don't love how bulky the anchor connectors are, but they do work well.
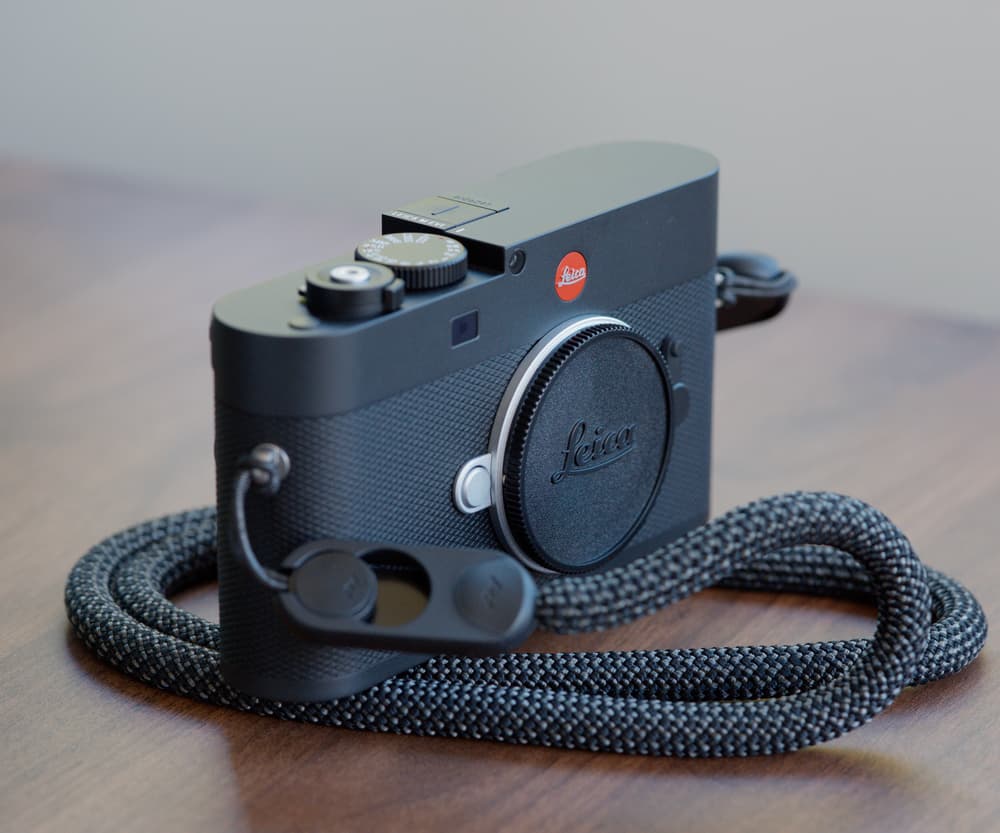
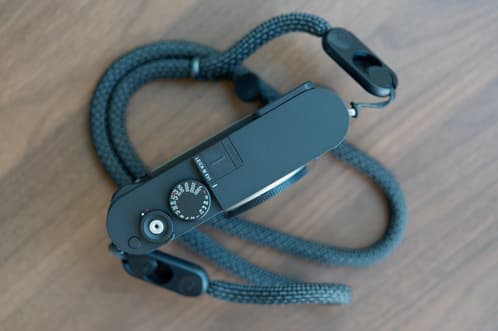
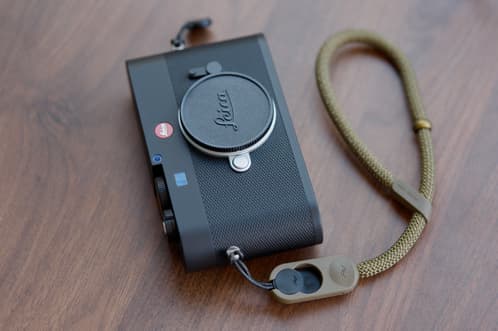
Peak Design Form Rope strap and, bottom right, the Form Rope wrist strap.
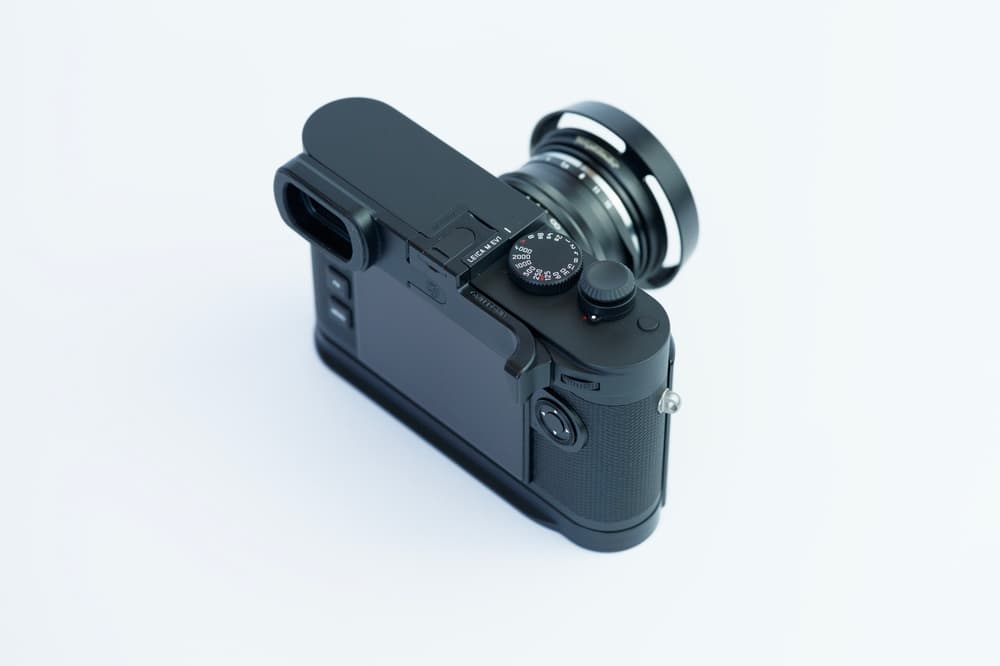
While first looking for a front grip I quickly discovered a brand called Owlkrown that makes a variety of well-crafted Leica accessories. I ended up purchasing a few products like their shutter topper to add a better feel to the shutter, a front grip, thumb grip, and EyeKup (reduces glare). There are other options out there but I loved the build quality with these, and the front grip's base doubles as both a hidden AirTag holder and an Arca-compatible tripod mount.
I don't love how much larger it makes the Leica feel, but it is absolutely worth the boost in ergonomics. It's so much easier to hold and shoot for longer periods with these add-ons. If I had to get only one, I'd start with the thumb grip.
On another one, when I take the M out shooting in a busy area I like to cover up the bright red Leica dot. While Leicas are especially recognizable and make you an obvious target for theft, I've done this for years with even my Sony cameras. A little piece of easily removable black gaffer tape is all it takes. Others permanently swap out the emblem with either a nondescript replacement or a black version of the Leica logo.
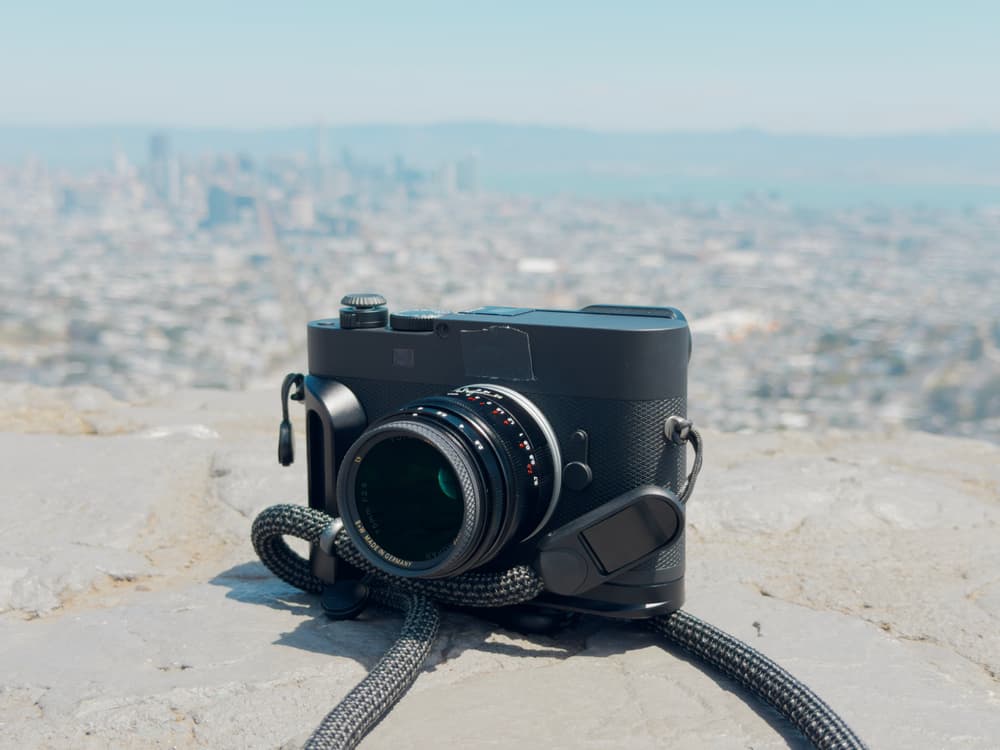
Hiding the Leica dot with gaffer tape, especially in busier parts of the city.
Focus
Let's start with the electronic viewfinder (EVF) since it's what's so different and controversial about this camera. As you'd expect, you look through it and see a live preview—with accurate exposure, ISO, depth of field, focus, et cetera—of what you're going to shoot. It's a crisp, high-resolution 0.5-inch OLED display, though it only runs at 60fps so panning can feel a little less fluid than if it was refreshing at 120fps like I expected for a high-end camera.15
Beyond the refresh rate, the EVF display itself is great, though it would be nice if there was a way to see what's just outside your frame to help with composition like you get on rangefinders. Fuji, for example, approaches this with a hybrid viewfinder that combines an optical viewfinder with an EVF to create what they call an Electronic Rangefinder (ERF) so you get the best of both worlds: OVF with framelines to compose your shot and an EVF preview of your focus and exact composition.16
The M EV1 is just a regular EVF. It's still a strong addition that unlocks a lot, as I mentioned earlier. A minor issue I've had with the EVF at times was some glare, especially while wearing glasses and when shooting with the sun behind me. I mitigated that with the Owlkrown EyeKup, which adds some depth to the viewfinder to reduce glare significantly.17
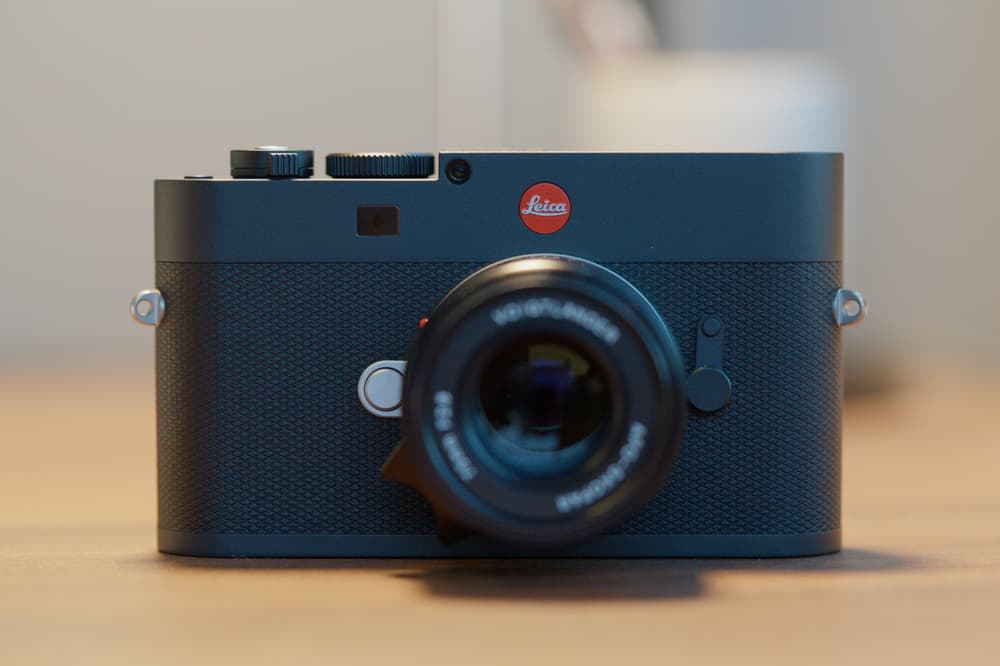
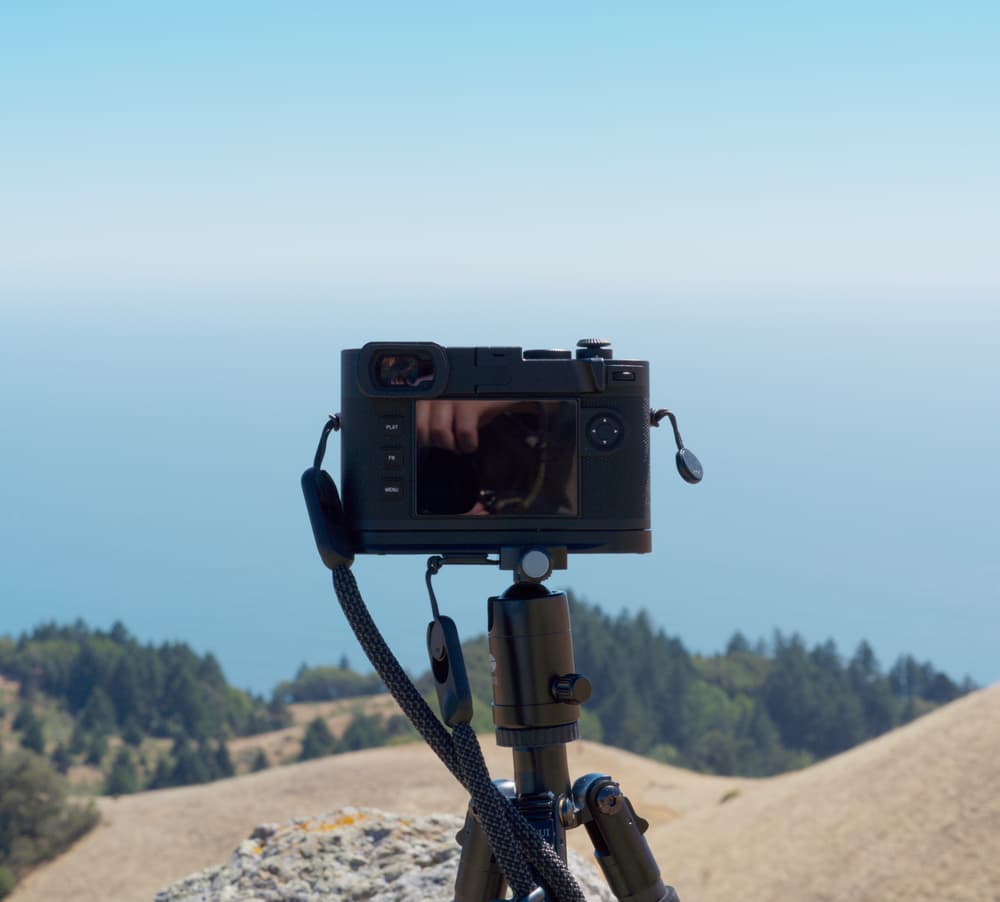
The addition of the EVF brings more possibility, making it much, much easier to use longer focal lengths without having to suffer through missed focus or needing to add a viewfinder magnifier.
But who is the EVF good for? Is it really an improvement if you're not shooting with longer lenses? To understand that, I think we have to dive into the subjective nature of focus when it comes to photography.
Leica M cameras historically have been all about street photography where shooting speed is often critical to capturing a fleeting moment. Manual focusing is not generally compatible with that if you want tack-sharp photos. I want to say that the EVF is for people who want sharp photos and demand precision, but it's more about being there to assist when you need it. Not that it's a required way to shoot properly or anything like that.
This is where it gets subjective: what counts as acceptable focus varies from photographer to photographer. A slightly out-of-focus photo can still be a powerful capture and tell a story about a moment in time without provoking a second thought about the focus itself. Out-of-focus shots can evoke different emotions or convey a certain mood about how the photo was taken.
Some street photographers employ a manual focusing technique called zone focusing. It creates a zone of acceptable sharpness where your subject will be in focus. You control how deep this zone is by setting the aperture. Shooting with zone focusing means you don't need to raise your camera to your eye each time, so it's more discreet and draws less attention to the photographer.
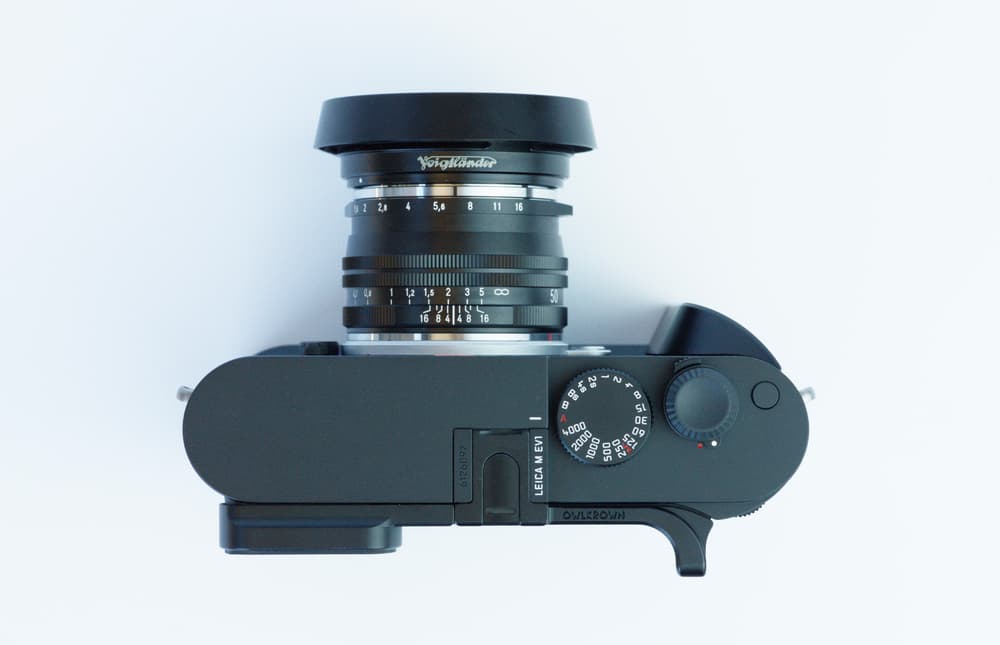
Lens showing distance and depth-of-field scales.
It's a rather neat technique and once you learn how it works you'll understand what all the lines on your lenses mean: the focus distance and depth-of-field markings. This shooting method is not unique to Leicas. However, the key phrase here is that it helps you with acceptable focus. You won't easily get tack-sharp photos shooting with zone focusing.
I'm not saying focus isn't important, just explaining how we got here with the Leica M: a manual-focus-only camera in 2026, without IBIS, that only just got an EVF.
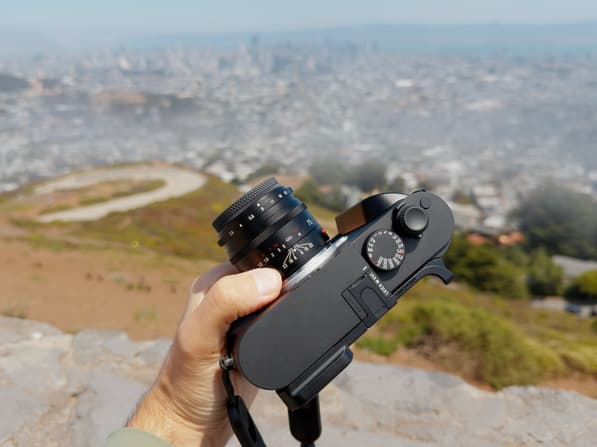
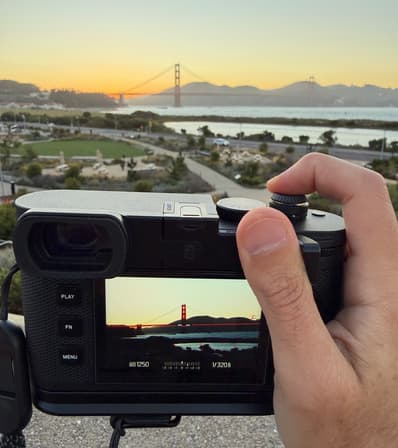
The EVF is there for when you want to prioritize capturing sharp photos in any condition. I find it remarkably useful with any type of lens. Even if I'm not trying to spend 10 seconds finding flawless focus for a single shot, it's still a great, quick preview. Of course, you can still skip the EVF and zone focus or shoot at the hyperfocal distance.
This is still a manual-focus camera, so if you're seeking perfect focus, it's slower. It's just like driving a manual transmission car. On the right road, it can be a blast. In the wrong conditions, however, it's a huge nuisance. You know what I mean if you've ever crept up an extremely steep San Francisco hill in traffic doing repeated hill starts with the help of your parking brake.
How I shoot
I find shooting with manual focus to be a welcome ritual. I love the tactile controls and shooting with the M EV1 makes it clear how much I've missed having a lens with a physical aperture ring like my old Sony RX1R had.
When I pick up the camera I usually start by setting the aperture to where I think I might need it in advance, as well as the focus. I don't really use zone focusing but as I'm walking around I like to set the focus to roughly where I expect I'll need it. When I'm shooting landscapes this typically means setting it to the hyperfocal distance and then fine-tuning from there.
When I find my subject, shooting usually looks like this:
- When I move the focus ring, I have the M EV1 set to automatically punch in 3x or 5x (controllable with the thumb wheel).
- The focus peaking feature helps as I do this, but using it effectively is a bit of an art and it's not bulletproof.18
- When I've achieved focus, I usually half-press the shutter to go back to a 100% preview to ensure I like my composition, then shoot.
I'm very comfortable with this flow, but it's not the fastest, so it isn't ideal for every situation.
Manual focusing with focus peaking on the M EV1.
I've now shot over 1,500 photos with the M EV1 and while I definitely have the hang of it, I have dealt with some annoying bits.
On the M EV1 when you're focusing and you need to punch in to make it easier to find focus, it zooms into the magnification point that you manually set by either touching the screen or using the directional pad (which is another bit of feedback: I wish it had a joystick instead).
This is all fine and good if your magnification point is just in the center of the frame and that's also where your subjects tend to be. If that's not the case you need to manually move the magnification point, or deal with focusing and recomposing. I generally do the latter so I don't have to deal with constantly moving the magnification point.
It's not a huge issue but it's definitely an inconvenience when you realize other cameras like the Nikon Zf can detect subjects (for example for a portrait, it will select eyes) and automatically set that as the magnification point. And then they have a focus indicator to tell you when that point has been correctly focused, or is in front of or behind the subject. Needless to say, the M EV1 lost some points there from me. I'm holding out hope that a firmware update one day could change this.
Aside from that magnification annoyance, focus peaking could be better. It does not work well in low-light situations, with low-contrast subjects, and accuracy also varies depending on the lens and aperture19. I can't blame the M EV1 here entirely, though; these are largely limitations of focus peaking itself. What I can blame the M EV1 for is how laggy the EVF's live view gets in low-light situations.20
Unexpected things
There are a few unexpected things I've had to get used to with the M EV1 aside from manual focus. First off, there are the things I thought I would miss but ended up being non-issues: having a fixed screen that doesn't tilt, and not having a video mode. I just love that Leica has been able to put a stake in the ground and say that this is a tool for photography, that's it. Why bother making a mediocre video mode if that's not their focus?
-
Being constantly aware of your shutter speed
There's no in-body image stabilization (IBIS) or any form of in-lens optical stabilization, which means that handheld shooting got a bit harder. You need to be extra aware of your shutter speed to ensure your shots stay sharp. This is especially true with the longer focal lengths you can now use with the M EV1 and its EVF as compared to rangefinder M models.
This is, of course, common knowledge but it's easy to forget how powerful modern IBIS systems have become. For comparison, the IBIS system in the Sony a7R VI can give up to around 8 stops (realistically 3-5). That's a pretty significant improvement, especially if you shoot in low light.
-
Being constantly aware of your ISO
Similarly, it feels like ISO on the M EV1 loves to jump to high ISO very quickly. In what seems like adequate light to me it will often jump to 6400. For now I keep it capped at ISO 4000, but I wish it were easier to change the Max ISO setting for Auto ISO in the menus as I often want to adjust it depending on what I'm shooting.
The M EV1 lacks a dedicated ISO dial like the M11 had (it was removed to make room for the EVF), so you're more reliant on Auto ISO working well so you don't need to dig into menus constantly.
That being said, I don't actually mind some noise grain in the shots.
-
Finicky metering
I also found that the exposure metering feels a bit more finicky, even with the new Multi-field setting only available on the M11 / M EV1. Slight changes in the composition more dramatically affect the exposure than I'm used to with my Sony.
I can control it more with the Spot metering setting, but I expected the default Multi-field metering setting to just work.
Color science
Punchy and dimensional, with selectively rich colors
I've talked about Leica lenses and the character they can bring to photos, but what about the contrast and color produced by the camera itself? Leica color is often referred to with some reverence, but it's tricky to describe. Older digital Leicas like the M240 tend to be known for warmer tones, with more recent models like the M10 being slightly more neutral21. The M11 and M EV1 share the same sensor and lean more magenta, so much so that Leica even added a White Balance Adjustment setting in a recent firmware update.22
As for contrast, the M EV1 feels punchier with deeper darks, albeit with photos feeling a tad darker compared to what I've become accustomed to with Sony cameras. Leica seems to bias toward protecting highlights, so to me images look about 0.5 to 1 stop darker. That's not a huge deal as I can adjust the exposure compensation accordingly.
One minor note I should add is about micro-contrast, something Leicas are often known for. It's the subtle separation of fine detail and texture that adds to a dimensional look or "3D pop." However, that is mostly a property of a lens23, not the camera's sensor, so I'm not digging into it much here. Again, this is not a scientific review, just my quick take.
Comparisons
This is by no means a scientific comparison, but I shot a few different scenes with my Sony a7R IV with a 55mm lens set to f/2.0 and did the same with my M EV1 with a 50mm set to f/2.0. I also kept all settings at default and reset my Leica's white balance adjustment. The photos shown below are the JPEG previews embedded in the RAW files directly from the camera. They haven't been processed by me in any way. More on what that means in a bit.




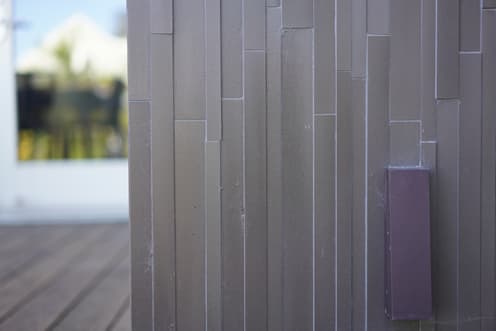
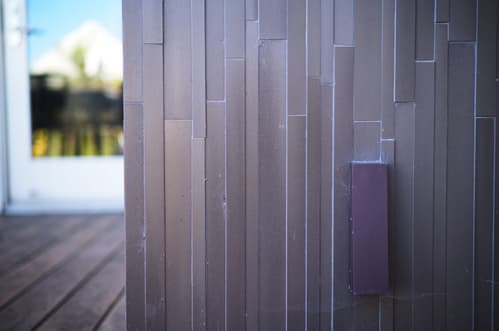
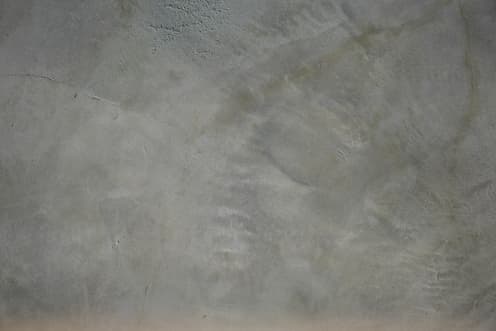
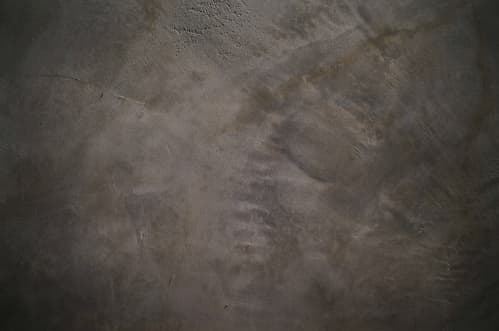
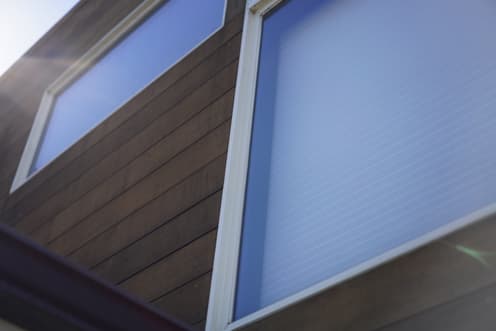
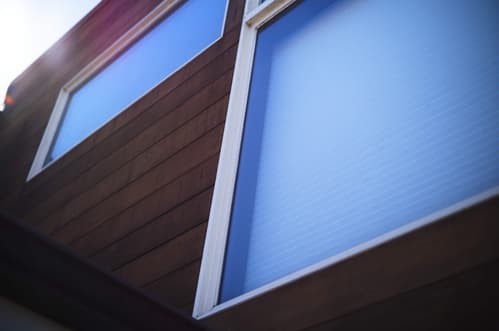
For the most part, the Sony shots feel more clinical and neutral, perfect for a workflow relying on post-processing. Leica's punch and deeper blacks do mean I often find myself lifting the shadows to bring back detail.
These comparisons were done with in-camera processed JPEG previews, not RAW files processed in a traditional pipeline like you would with Lightroom, Capture One, Aphera, and others. That's where things can change much more significantly depending on your profile, for example Adobe Color, Portrait, Landscape, Vivid, et cetera.
Post-processing
Doing more with less
As I mentioned in the beginning of this article, I had previously optimized my photography hobby to death. I had set such a high bar for myself for what a good shot was that I spent so much time in Lightroom Classic culling and editing. Zooming in all the way to remove imperfections. Using masks to selectively adjust light, shadows, and saturation on parts of an image... post-processing was a burden and it started to feel like it was all about editing, not capturing.
I've vowed to change my relationship with photography as I get back into it with the Leica. As part of that, I began looking for a better way to cull and post-process my photos. I didn't want to touch Adobe Lightroom anymore. I looked at Capture One24... wrong direction, way too many controls. The opposite of what I was looking for.
Along the way I discovered a new photo editor called Aphera from a few folks I had seen around online for some years. It was exactly what I've been looking for.
It does less, better. I love that it's opinionated. For example, when you click into a photo detail view there's no sidebar filled with sliders to endlessly tweak every little thing. While that advanced functionality is available, it's tucked away out of sight until you really need it. Instead, you have a few controls and presets25 you can fiddle with, all via keyboard shortcuts.
After importing my photos26, I tend to quickly cull through the shots, zooming in to check focus, then usually assigning a star rating if it's decent. Then I'll filter the view to only show the decent shots and go through them, adjusting things like exposure, shadows, and contrast, and sometimes tweaking a preset to achieve the look I'm going for. All done relatively quickly with my keyboard.


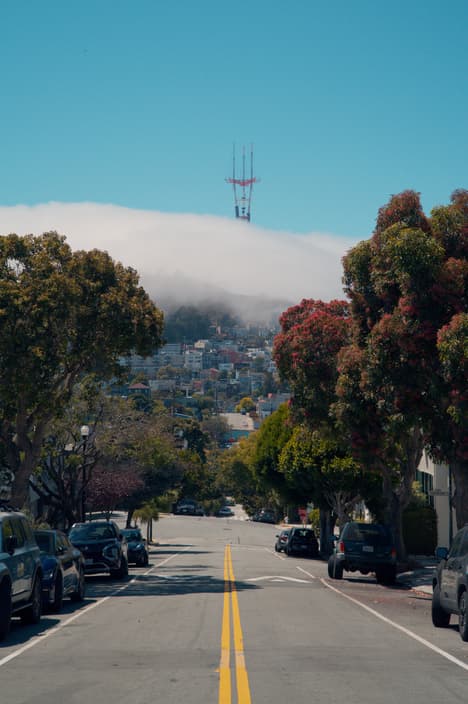

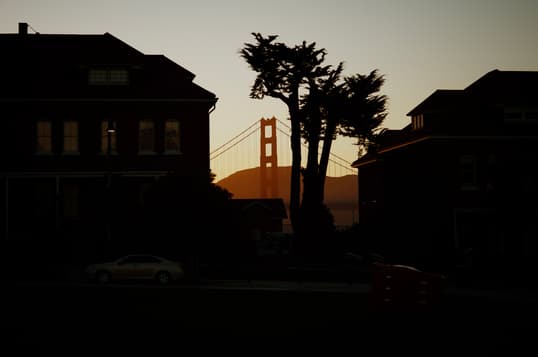
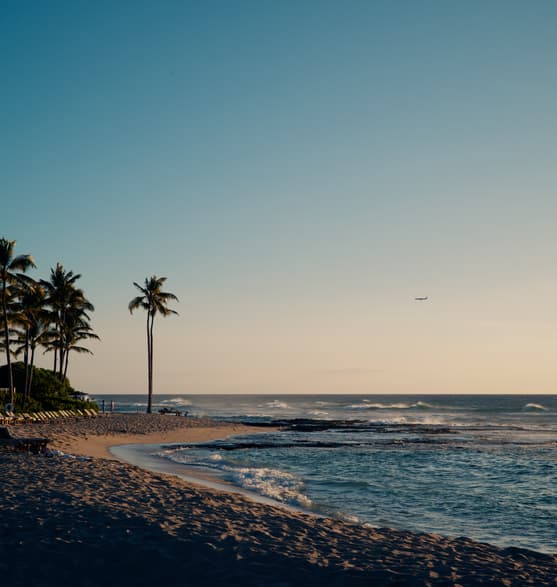

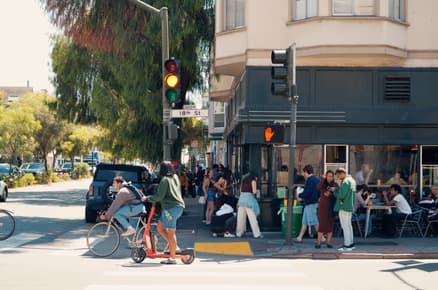
I've been using it for several months now and can't see myself ever going back to Lightroom. The team behind Aphera is small and extremely responsive. I've emailed them quite a few times about feature requests and issues, and they've been quick to ship updates.
The only annoying part about this process isn't related to Aphera. It's importing photos from the Leica. When you connect the M to a Mac, it does not appear as a regular USB storage device. Instead, it only uses PTP mode, requiring you to use the native macOS Image Capture app to fetch the photos. It's a minor inconvenience but once your SD card has tons of photos, Image Capture isn't the fastest as it tries to load metadata and previews for all the shots before you can interact.27
I did also want to mention the Leica FOTOS app. It connects to the Leica over Wi-Fi to let you update firmware, manage photos, and also geotag photos. It even has a Darkroom app integration. It's quite a nice little app compared to the horrendous Sony mobile apps I'm familiar with. Geotagging, however, isn't exactly automatic. I tend to have to go out of my way to ensure the Leica and my iPhone are connected over Bluetooth. It's great when it works though.
Sharing
The final piece of this photography reset is arguably the most important: creating a new way for me to share one-off photos that feels effortless. The travel photosets I used to make were lovely artifacts after a trip, but I don't plan on creating photosets like that again. They were a ton of work, from custom-designing and building them to continuing to set a high bar for each photoset so that every photo was worthy of sharing.
I decided to build my own photostream. It's a place for me to share single photos whenever I please.
Previously, all my photosets were static files. I'd create a new MDX post file, which would generate the post during the build process on deploy. Not quite an effortless process. My goal with the photostream was to be database-backed instead so I could just log into an admin dashboard and upload new photos without any deploys.
Here's the current shape of what I built:
- Design: The design is a basic masonry-style photo grid where every photo keeps its original aspect ratio without cropping. I wanted to keep the chrome pretty minimal. I don't ever really care to see loads of EXIF data and details for photos, so I treated that info like an optional, expandable header title pill that shows more info when needed.
- Smooth motion: I spent a good bit of time on the animation that occurs when opening a photo from the photostream grid and closing an open photo to go back to the grid view. I needed absolutely no flicker when attempting to swap views. To achieve this, I actually ditched my usual approach of running more intricate animations with the Motion library and opted for a more bare-bones Web Animations API approach to animating transforms. This was done using the FLIP method in a way where the browser never needs to recalculate the layout during the animation, and the grid is memoized. This means that on a modern browser on a modern machine, opening and closing a photo should run at about 120fps.
- Liquid Glass-ish: With the header buttons, I attempted to make a Liquid Glass-like effect. It only works on desktop Chrome for now (with a regular blur fallback), but it uses signed distance fields (SDFs) to create an SVG filter to provide the refracting effect.
- Tech stack: I built this with TanStack Start, which the rest of my site uses. I recently migrated away from Next.js and Vercel and moved to hosting directly on Cloudflare Workers. I wanted to try something new and kept hearing good things about running TanStack Start on Cloudflare. Just recently the team at Lovable also migrated their sites to TanStack Start on Cloudflare from Next.js.
I also spent time diving into overall performance:
- Each photo has a tiny blur preview embedded to reduce the loading feeling upon first open before the larger image loads. Original images are stored on R2 while smaller variants are generated via Cloudflare Image Transformations.
- Lots of caching and preloading throughout. I wanted to make sure, for example, that if I'm on a photo detail view I could hold down the left/right arrow keys and have it rapidly flip through photos, even if the photos themselves weren't loaded.
- I initially built this with a Neon Postgres database, accessed via Cloudflare Hyperdrive for connection pooling, but I later simplified and rebuilt it to use Cloudflare's D1 database, hooked up with a Cloudflare Workers KV cache. The KV cache means most requests never hit the database at all, and photos still load even if the database goes down. Everything (D1, KV, R2, and a container) is bound directly to a Worker, so I don't have a separate database host or connection pooling to deal with.
Setting up something like this is a lot more than just the frontend. To be able to upload large original-sized processed JPEGs that can exceed 30MB (not that I always do, but I wanted to support it), I had to create a Cloudflare Container running Sharp where images have sensitive EXIF data stripped (like GPS data; I don't want to accidentally upload my home address), and tiny blur preview images are generated along with the resized JPEG that's used for the image transformations.
I also built an admin dashboard to manage everything, including bulk EXIF editing controls, and automatic database backups, though Cloudflare D1 already has a nice Time Travel feature. I also needed to add some Leica-specific logic to override the lens the EXIF data says was used, which is not accurate when using a third-party lens like my Voigtlanders, even with the 6-bit lens coding. I could have also done this directly in the RAW files, but it felt easier to just do it when uploading. Without this fix, my Voigtlander 50mm would show up as a Leica Summilux 50mm.
Overall, I'm really pleased with this sharing setup; it's exactly what I was looking for. Lightweight and elegant. No real burden to generate any other content aside from just uploading the photo with minimal metadata.
Closing thoughts
Hard to justify, easy to love
This was not meant to be a clinical review of the Leica M EV1, but more of a dive into how I'm trying to reboot my relationship with photography. The M is astonishingly expensive at well over $10k for a primitive setup with a few lenses. It doesn't do nearly as much as cameras at less than half the price.
It does, however, accomplish exactly what I want. It's more than capable of handling the type of photography I shoot while being remarkably compact and well-built. Most camera reviews divide functionality by cost. By that math, the M EV1 will consistently lose.28 That's not how I think about it. As a designer, I tend to place a lot more value on the build quality, aesthetic, and heritage of a product.
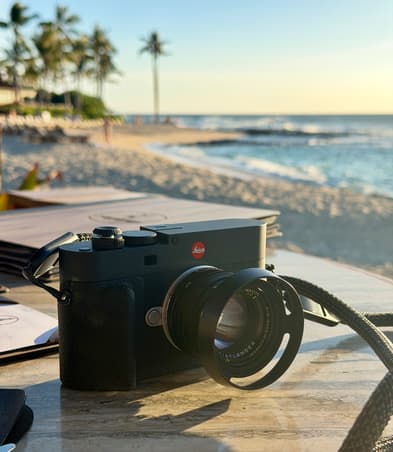
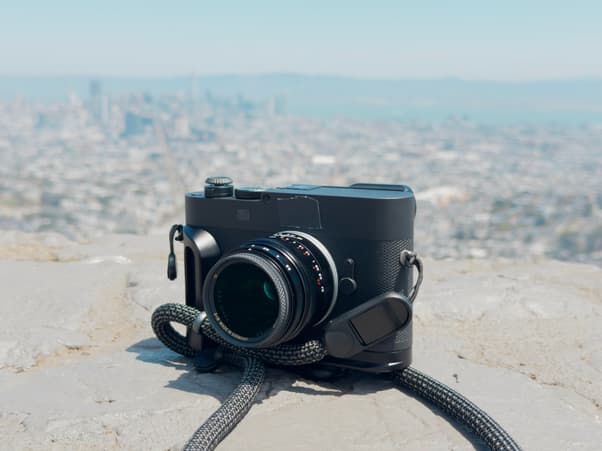
I love to have well-designed tools around me. Even just sitting on my desk unused, the Leica brings me the same joy as using my treasured Heath ceramic mugs, sitting in my decade-old Eames lounge chair, writing with my favorite Baronfig pen, or looking at my original iPod and iMac G3. I view this camera like those objects, as something I hope to own for a decade or more, not as tech that I'll immediately sell and upgrade to the next version.
However, I don't think Leica can rest on its laurels much longer. Photographers are beginning to think the company is becoming more of a luxury and lifestyle brand than a camera company. Updates are too incremental, with headlines focused more on special editions and limited colors than on a marked increase in functionality. You're definitely paying for the heritage and craftsmanship over bleeding-edge specs with Leica, but the gap is starting to get too wide.
The M EV1 is not perfect, but I've loved using it for the past several months. It's so much smaller than my Sony setup that I take it out with me much more often (including with a few lenses). I've landed on a setup I'm really happy with, especially combined with my new approach to lightweight culling and editing with Aphera, and sharing photos with my new photostream.
There is, however, one downside no one mentions. The manual-focus-only Leica is great if you are the photographer. But when you're with family and want someone else to use the M to take a photo of you... good luck. I think it took about 20 shots to get one that was passable.
No AI was used to write this post (Verified by Pangram), only to flag typos and grammatical issues.
1 I've tried to make Fuji work. Similar formula—compact camera and lenses, albeit not full-frame—but it just feels like all plastic.
2 I only recently started pruning my RAW archives: deleting unneeded files and converting RAWs to smaller JPEGs.
3 One side effect of spherical aberration is something called focus shift. It's where the sharpest point of focus moves as you stop down the aperture. This is another benefit of an EVF over a rangefinder. You see a live preview so you can adjust as needed.
4 Leica tries to match the framelines in the optical viewfinder, so the few zoom lenses Leica offers are actually multi-focal, not continuous zoom, switching between three different focal lengths (for example the Tri-Elmar-M 28-35-50mm f/4 ASPH.)
5 Though to be clear, these are new lenses, so not exactly the same output you'd get from pre-ASPH older lenses.
6 Shooting with a 75mm on a rangefinder Leica M11 would have been more of a hassle but it really pays off with the M EV1.
7 Voigtlander is owned by Japanese optical-glass maker Cosina.
8 The Voigtlander 75mm is 191 grams for comparison.
9 For older Leica lenses you can either manually do the 6-bit coding too, or select the lens manually in the camera's Lens Detection menu.
10 For example, removing a UV filter when putting on a polarizer, instead of applying the polarizing filter on top of the UV filter, which also doesn't help vignetting.
11 Which I now almost never use because I'm usually shooting with a polarizer on when I'm outside.
12 I purchased an Owlkrown shutter topper to get a more satisfying and responsive shutter feel.
13 It's why I use a Glove80 keyboard, wrist brace for long sessions, a vertical mouse, and use voice AI dictation tools often.
14 Something comfortable that doesn't need to be worn in first, and rounded so it wouldn't matter how I wear it.
15 The cheaper and older Leica Q3 has a 120fps EVF which makes this a particularly annoying situation.
16 You can toggle between only the OVF or EVF, or merge them so you see a small EVF preview window in the corner. And while less interesting, some Fuji cameras that don't have this ERF have a Dual Display mode where you can see both a magnified view of your focus point alongside a preview of the entire composition with just an EVF.
17 I also now tend to remove my glasses and look directly through the EVF as I can see up close just fine and this gives an even better preview. It's quite annoying to do frequently but worth the hassle at times.
18 Focus peaking is a feature to help visualize the focused parts of an image by adding colored outlines (you can change the color but I like it in red) to the parts of the image that are sharp.
19 The more you stop down, the more of your composition triggers focus peaking, so it's hard to tell what's truly the sharpest of the bunch.
20 Unfortunately, I think this is due in large part to the M EV1 using the older Leica Maestro III processor instead of the IV found on the M11-P, Q3, and SL3.
21 And the even older CCD-based sensor on the M9 had a large following for it's film-like tones.
22 Easy enough to fix. I ended up adjusting mine to be seven clicks toward yellow (left), seven clicks toward green (up).
23 It's closely related to a lens's Modulation Transfer Function (MTF), which measures how well a lens keeps tiny details looking distinct instead of letting them blur together.
24 Leica also pushes Capture One and provides a free trial.
25 You can also import LUTs to use.
26 I usually store my imported RAW files on my SSD array which is automatically backed up via an open-source tool called restic.
27 Now I usually just take the SD card out and plug it directly into my MacBook Pro or Mac mini via an external reader.
28 It's why I stopped caring about mass-market consumer product reviews like Wirecutter. They really don't value aesthetics and design the way I do. And that's fine, it's just not for me. I remember them recommending a hideous collapsible water bottle and calling it quits.