Data is eating me alive. Every gadget these days can shoot photos and record video. The move to smaller but faster SSDs hasn't helped with storage. I captured 275GB of photos and videos on my last trip. Just one trip! And I'm just a hobbyist photographer with a mere 12MP camera. If you shoot with any regularity and a 20MP+ camera you'll easily be clocking more than a terabyte a year. Where on earth do normal people store that much data? The cloud?
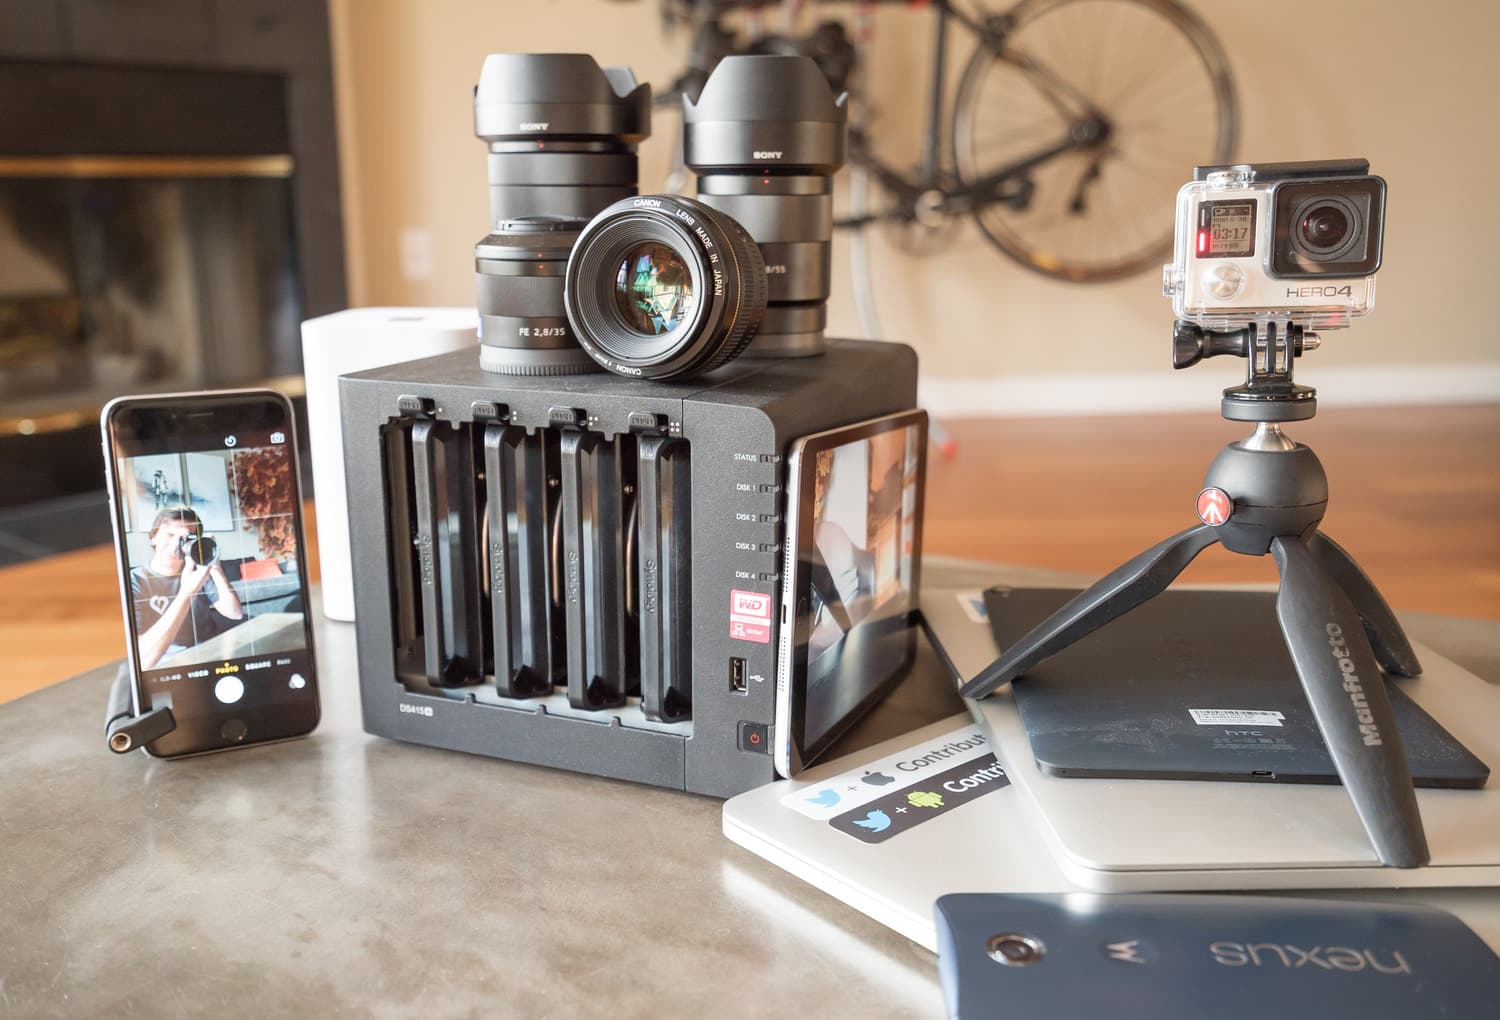
With so many devices creating data, where should you store it all?
Update (May 2019)
This post is almost 4 years old now, but still as relevant as ever. I still prefer Synology NAS devices: their software has proceeded to get better over time and this combination of hardware and software is extremely reliable in my experience.
Instead of writing a new post that is basically the same except for a few parts, I'll just put what new info you need to know in this update section.
Parts
Since this post I have migrated from the 4-bay DS415+ NAS to a smaller 2-bay Synology DS218+ NAS. Why a smaller model? Well I moved to New York from San Francisco and wanted to downsize my possessions a bit. I ended up building a much smaller mini-ITX desktop computer to replace my massive custom Lightroom PC, and then I decided to also downsize my NAS to something a bit smaller.
Combined with the advancement of hard drive storage density over the years I was able to create a larger effective storage array with only 2 mirrored disks. I got two 12TB Seagate IronWolf drives for this (though they do make more expensive 14TB models at this time). I also added an 8GB stick of RAM (for a total of 10GB). This model has a very easy to access RAM slot — no disassembling the NAS like I had to do with the DS415+.
Update (Aug 1, 2019): My Seagate drives were significantly less than a year old before one disk began failing and the Synology DSM software alerted me to replace the drive. I know these things happen from time to time, but a failing driving within a year was a bit scary. I decided to play it safe and replace it with a 12TB Western Digital Red drive (though Seagate warranty did send a replacement drive that I will keep as a spare). One of the benefits of Synology SHR (well frankly, RAID itself was made for this and the original acronym stood for redundant array of inexpensive disks.. hinting at just any drives you had lying around) is that the drives used for your storage volume don't all have to be identical.
I was worried that the two identical Seagate disks were from the same batch and if one began failing so soon, it could be possible the other disk from the same batch could be on the way out too. There is also a debatable stance that it's actually better to buy disks from different manufacturers for a RAID array to be safer.
Software & settings
Today my primary cloud backup services for the NAS include the following:
-
BackBlaze B2 used via the Synology Cloud Sync app to backup my photos shared folder. This is a complete backup that also lets me manually browse individual files on the Backblaze site instantly.
-
Amazon Glacier used via the Synology Glacier Backup app to backup the entire NAS.
-
Google Nearline via the Hyper Backup app. At this time the Hyper Backup app does not natively support Google Cloud Storage as a provider, but you can set it up under Amazon S3 if you enable the S3 Interoperability mode on Google Cloud Storage. Then you just set the Custom Server URL to
storage.googleapis.comand provide your Google Cloud credentials and it will just work. Update: In my experience doing this alone did not respect the bucket-level Nearline storage class I had set. I had to create a lifecycle rule on the Google Cloud storage website that would automatically change any objects in that bucket to the correct Nearline storage class I wanted, instead of the regular and much more expensive multi-region standard class that the files kept getting marked as. Hopefully Synology will eventually add proper Google Cloud support to Hyper Backup. -
Dropbox sync'd to my NAS via the Cloud Sync app. I don't have any photos on there but I have my Lightroom catalog stored there so I'm using Cloud Sync to store a copy on my NAS in case I ever get locked out of Dropbox. Unfortunately, it is just sync, not versioned backup, so if I accidentally delete it in Dropbox, it will be deleted from the NAS too (Dropbox has file restoration of course but ideally I would have this solved on my end as well to be safe). So I occasionally move versions of the catalog file to a folder on my NAS manually. I could probably automate this with a script on my desktop one day. I had thought about using Hyper Backup for this but that app is intended for backing up data local to the NAS to cloud providers, instead of having the master copy live on a cloud provider like I have with my Lightroom catalog.
-
Amazon S3 <=> Google Cloud sync: While not directly related to the NAS, I have manually set sync tasks on Google Cloud Storage to backup some of my Amazon S3 buckets (used for hosting the photos on my site via Cloudfront). Google can do this entirely on its own on a daily cadence and it's quite handy.
Lightroom setup
My Lightroom usage is also pretty much the same. I just happen to use Windows 10 computers for Lightroom: my desktop PC and my Thinkpad X1 Carbon laptop. The reason I prefer keeping all my computers on the same OS is that I want the remote NAS volume path to remain the same across devices. While on Windows it may be something like X:\Photos\…, on MacOS the path is in the format of /Volumes/Photos/… so you can't exactly share a catalog across machines easily without changing the path each time you swap machines (if you need to access stuff on the NAS on both machines).
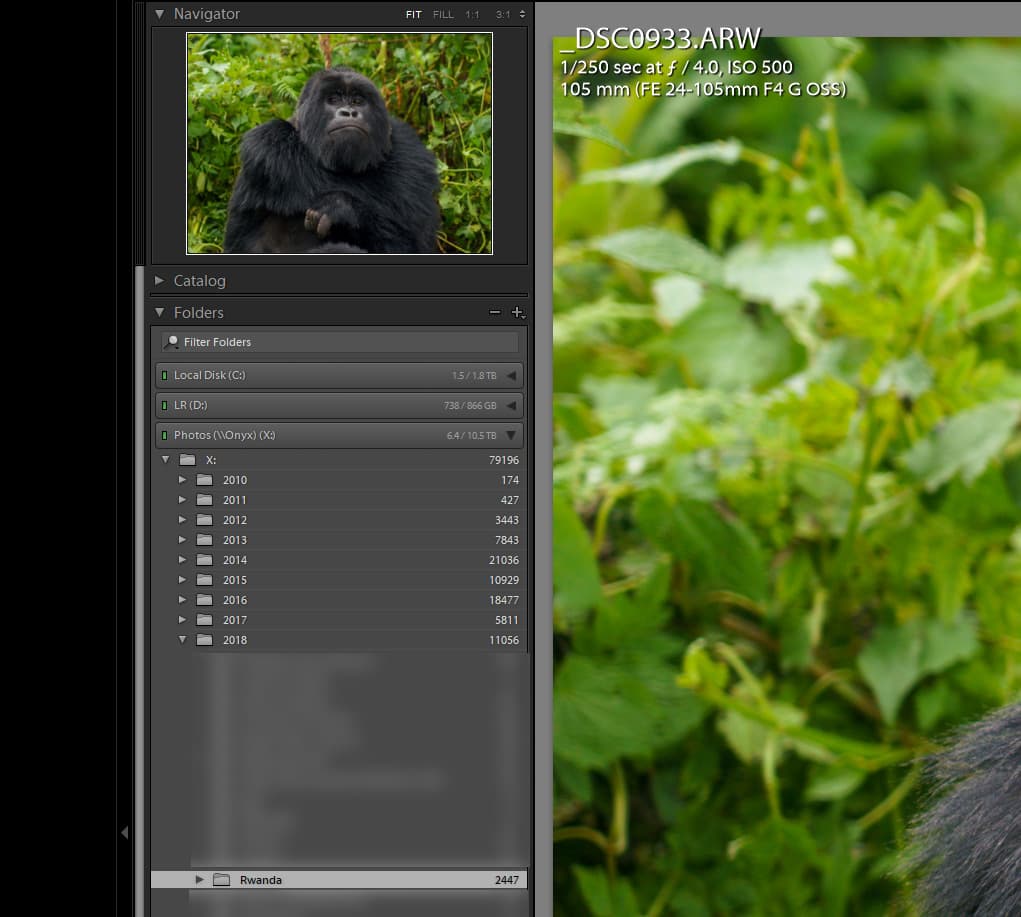
Accessing NAS inside Lightroom Classic
I store my Lightroom catalog (the catalog only, not the photo RAWs) on my computer's SSD, sync'd by Dropbox. The same limitation applies that I can only open one instance of Lightroom at a time and must wait for the catalog sync to complete before doing so. But beyond that the NAS appears just the same inside Lightroom Classic and I can access photos from it as well as transfer images to/from it all within Lightroom.
My workflow also remains basically the same: I import photos directly to my computer's SSD where they stay for the duration of all my editing, for performance reasons. Then when I'm done editing the photos, such as when I've exported the images I need and published a photoset, I'll drag the folder of photos stored locally from inside Lightroom on the PC to the mounted NAS volume visible inside Lightroom.
(Though I will often also have Lightroom Classic sync a collection to CC so I can do some basic photo culling on my iPad Pro.)
I first wrote about this storage struggle in 2013. If you haven't read it yet, take a quick skim first. I expressed my frustration about running out of space on my laptop's SSD and my desire to store photo previews locally but have the RAWs archived and accessible in the cloud. This would allow me to easily reference photos whenever I wanted locally and know exactly which one I needed to retrieve when necessary.
I didn't quite get to that fantasy but I survived with a combination of Lightroom Smart Previews and Amazon Glacier with the Arq app. Whenever I needed to edit a file I could download it — well, after I waited the 4+ hour Glacier delay, usually longer if I wanted to pay less — then tell Lightroom where it was. It worked, but it was definitely not a great workflow.
I began to miss casually accessing and editing older photos. In my first post I said that retrieval of RAWs was not terribly important after I had archived them. I was wrong. I began shooting more since that post. Friends and coworkers would ask me for photos I had taken of them and constantly having to find and download single remote files was annoying. Especially if I didn't have the previews in Lightroom anymore and had to download the whole set to find one shot.
My storage needs also doubled since that original post — pretty much since I started shooting more video as I added a GoPro to my travel gear (which began because of my brief drone obsession). That thing can eat space like no other! There's also no easy way to keep a local copy of video without having to export a smaller version that would take a while to generate and still take up a lot of space. My cloud-only dream for storing my media was not working.
Arq wasn't made for exactly for this use case so I found file and directory management a bit cumbersome. Arq is a bulletproof utility but I was seeking a new avenue for my photos and videos.
Cloud-only was not the solution I was looking for. It should not be my first line of defense. I want everything local and then backed up to the cloud. I began looking at a NAS (Network Attached Storage) solution.
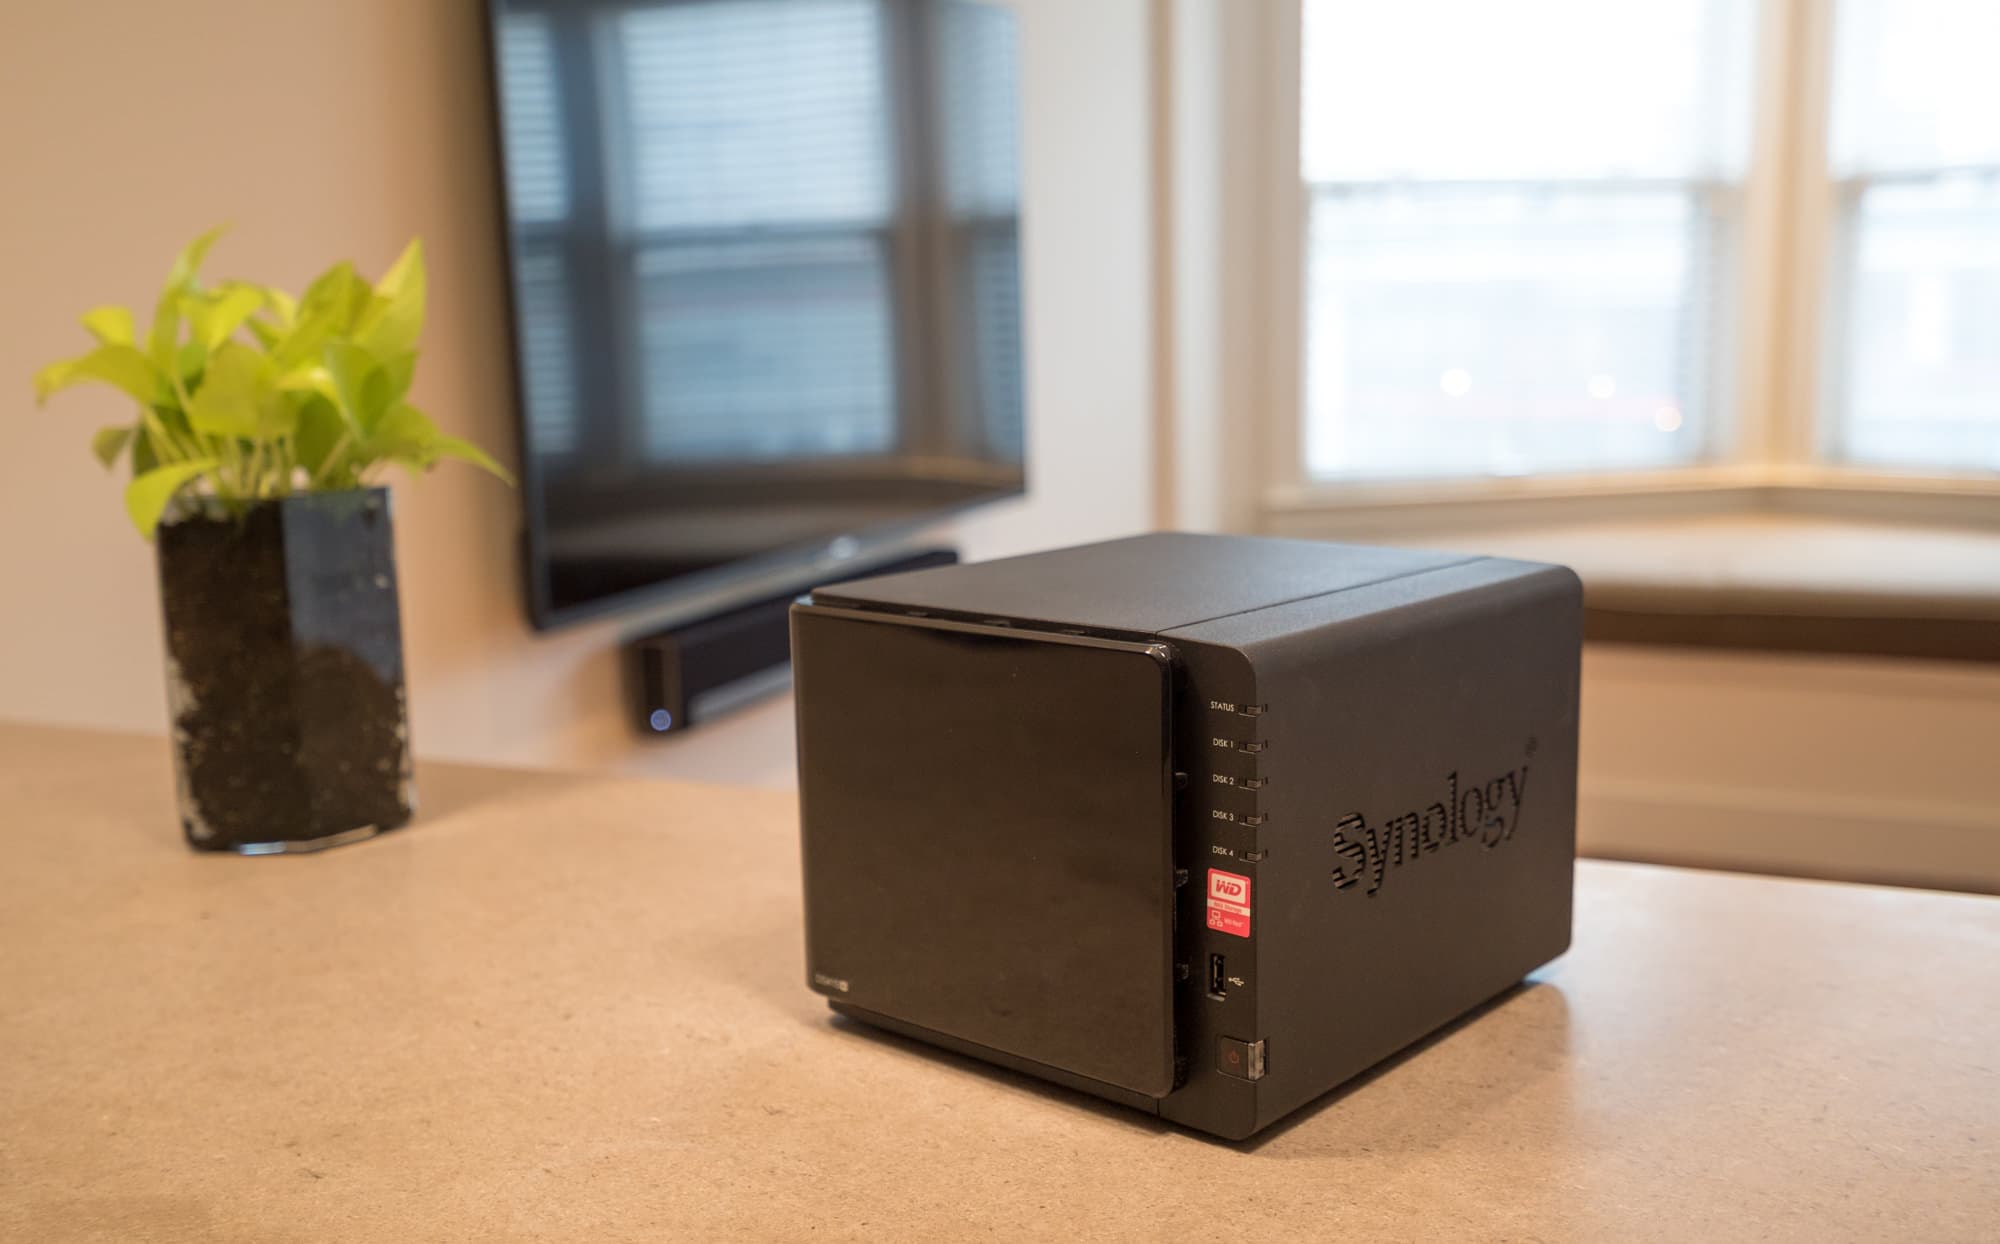
What about Google Photos?
It's good. Really good. 😍
While I was writing this Google announced a completely revamped photos product; this time finally listening to people that wanted it entirely separate from the Google+ social network.
So what do I think about Google Photos?
It's the perfect companion to the NAS storage solution I talk about in this article. Google Photos adds delight and intelligence to your massive collection of photos along with the convenience of easily being able to access them on mobile devices for casual photo editing and sharing.
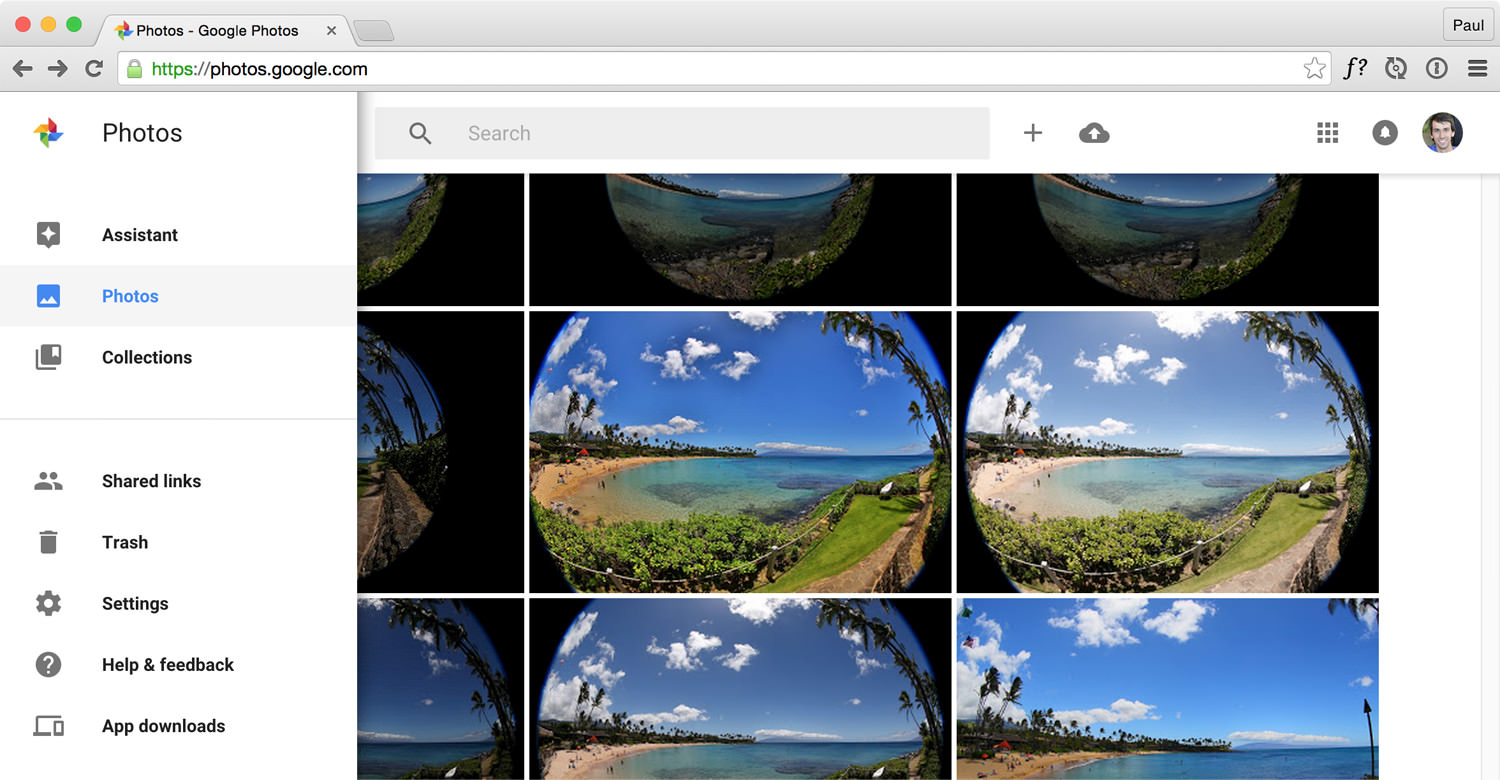
Google Photos on Web with my Hawaii photos (Canon 8-15mm fish-eye seen here)
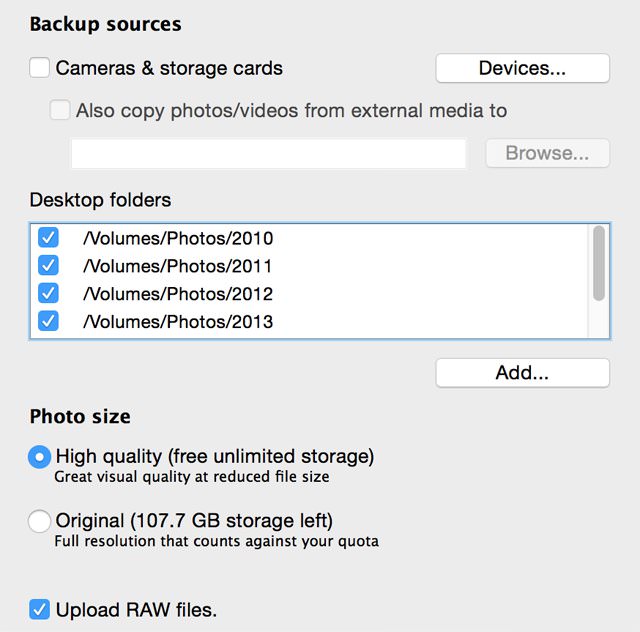
Google Photos Backup Mac app
Super easy to tell Google Photos to upload the RAWs stored on my NAS.
First off, I welcome Google Photos as another backup destination for my photos. You know what they say about backups: 3—2—1. Have at least 3 copies of your data in 2 different formats with at least 1 copy offsite.
Just don't trust any one service, even as glorious as Google Photos seems, to store your lifelong memories. You should have more copies.
With the free "High Quality" setting Google Photos does not support keeping the entire original RAW file and will resize to 16MP and compress. The good news is that you can pay to have Google Photos keep your original RAW files. I tested this by uploading and then downloading .ARW files from my Sony A7s from the Google Photos website. I uploaded a 13.2MB file and was able to download the exact same file. I even ran a diff and it reported no changes. However, there is a known bug where you will not be able to download the original if you try to retrieve it from the Google Drive website, so keep that in mind.
The bad news is that I have over 1TB of photos and the next pricing tier after 1TB ($9.99/mo) is 10TB and that costs a whopping $99.99 per month. So I use Google Photos with the free compressed setting. I don't actually mind since I have my own file backup solution and I use it more for that added layer of intelligence, convenience and utility.
Just one piece of advice — don't upload GoPro timelapses to it. It will entirely demolish the browsing experience and make it harder to find photos by scrolling with all the pollution in the photo list. I capture a ton of GoPro timelapses on my trips which means I have folders with thousands and thousands of these photos. I hope Google Photos updates to allow you to collapse items like a Lightroom stack.

In fact, before Google Photos came out I was working on installing a self-hosted photo gallery CMS called Koken on my NAS to create my own local photo gallery; similar to the idea for RAWbox. The idea was that I would modify it to know where my RAW files lived so that when I was browsing a collection, I could click on an "Open in Lightroom" button.
People, Places and Things
A decade ago we all had geotagging and face detection in consumer photo software, which we all thought was neat — and then there was very little innovation to photo organization. Of course, Google Photos has these table stakes features. Though its face tagging implementation is pretty basic and you cannot associate names to make searching for people easier with massive photo libraries.
But it goes beyond that with great places detection and an entirely new feature: things.
First, how is places detection better? It knows where my non-geotagged photos from my big DSLRs and mirrorless cameras were taken (at least some of the time). It can recognize some 255,000 landmarks and I think it's safe to assume that if you also have geotagged mobile phone photos taken around the same time, it will infer the location from that as well.
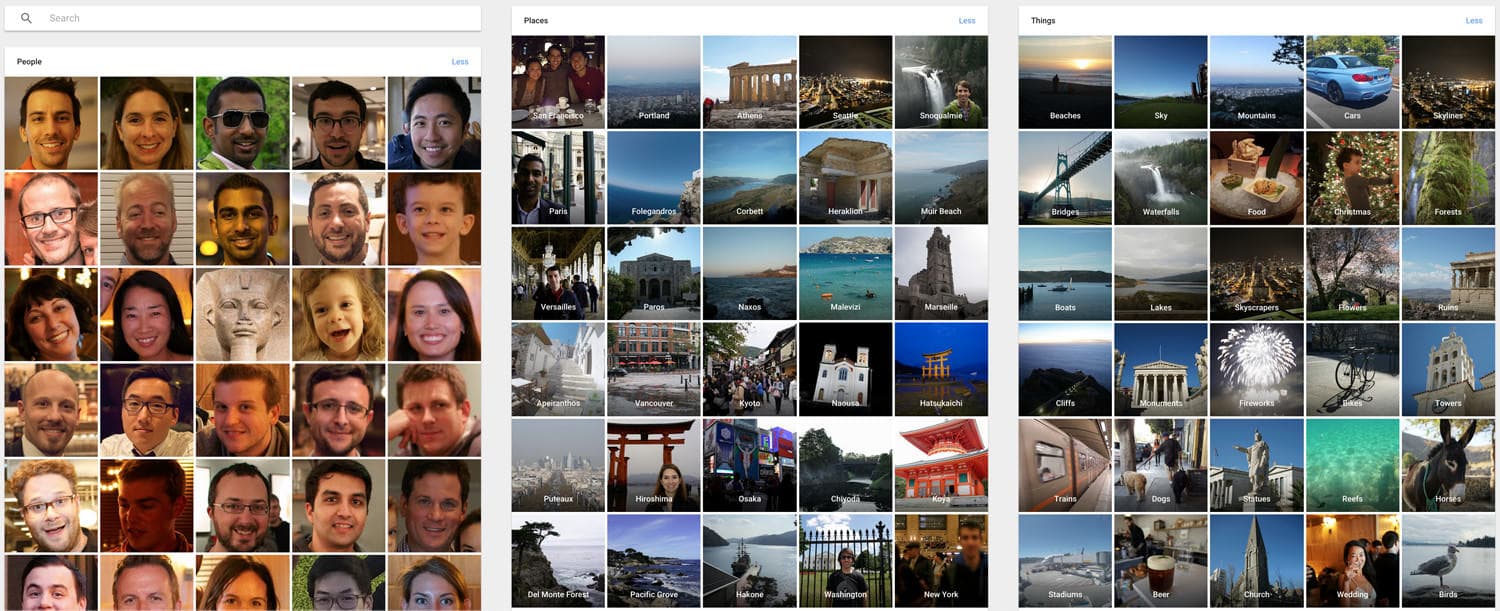
Next, anytime you tap on search you will be presented a list of things that Google has found in your photos and videos. And it's really good at identifying objects. I can't recall the last time I wanted to look for a set of photos based on the main object in the photo, but I had some fun scrolling through several of the thing clusters. The food cluster was by far the most interesting for me as I tend to take various photos of dishes at restaurants or while cooking.

Assistant, Stories and Sharing
Now for the main course: Google Photos Assistant. It's a little media management butler that's always thinking about what cool things it can create for you — automatically — with your media. It's amazing. I get a little excited every time I see a notification on my phone saying that Assistant has made something new for me.
It can do simple things like create HDR images, GIFs and stylized photos all the way to collages, stitched panoramas, stories and movies. As you would expect, Google makes it easy to share these creations by giving you the control to share private links that you can always take offline at anytime.
I've really, really, really been having a ton of fun with Assistant. Imagine coming back from a trip and a collection with videos has already been created for you, ready to share with friends?
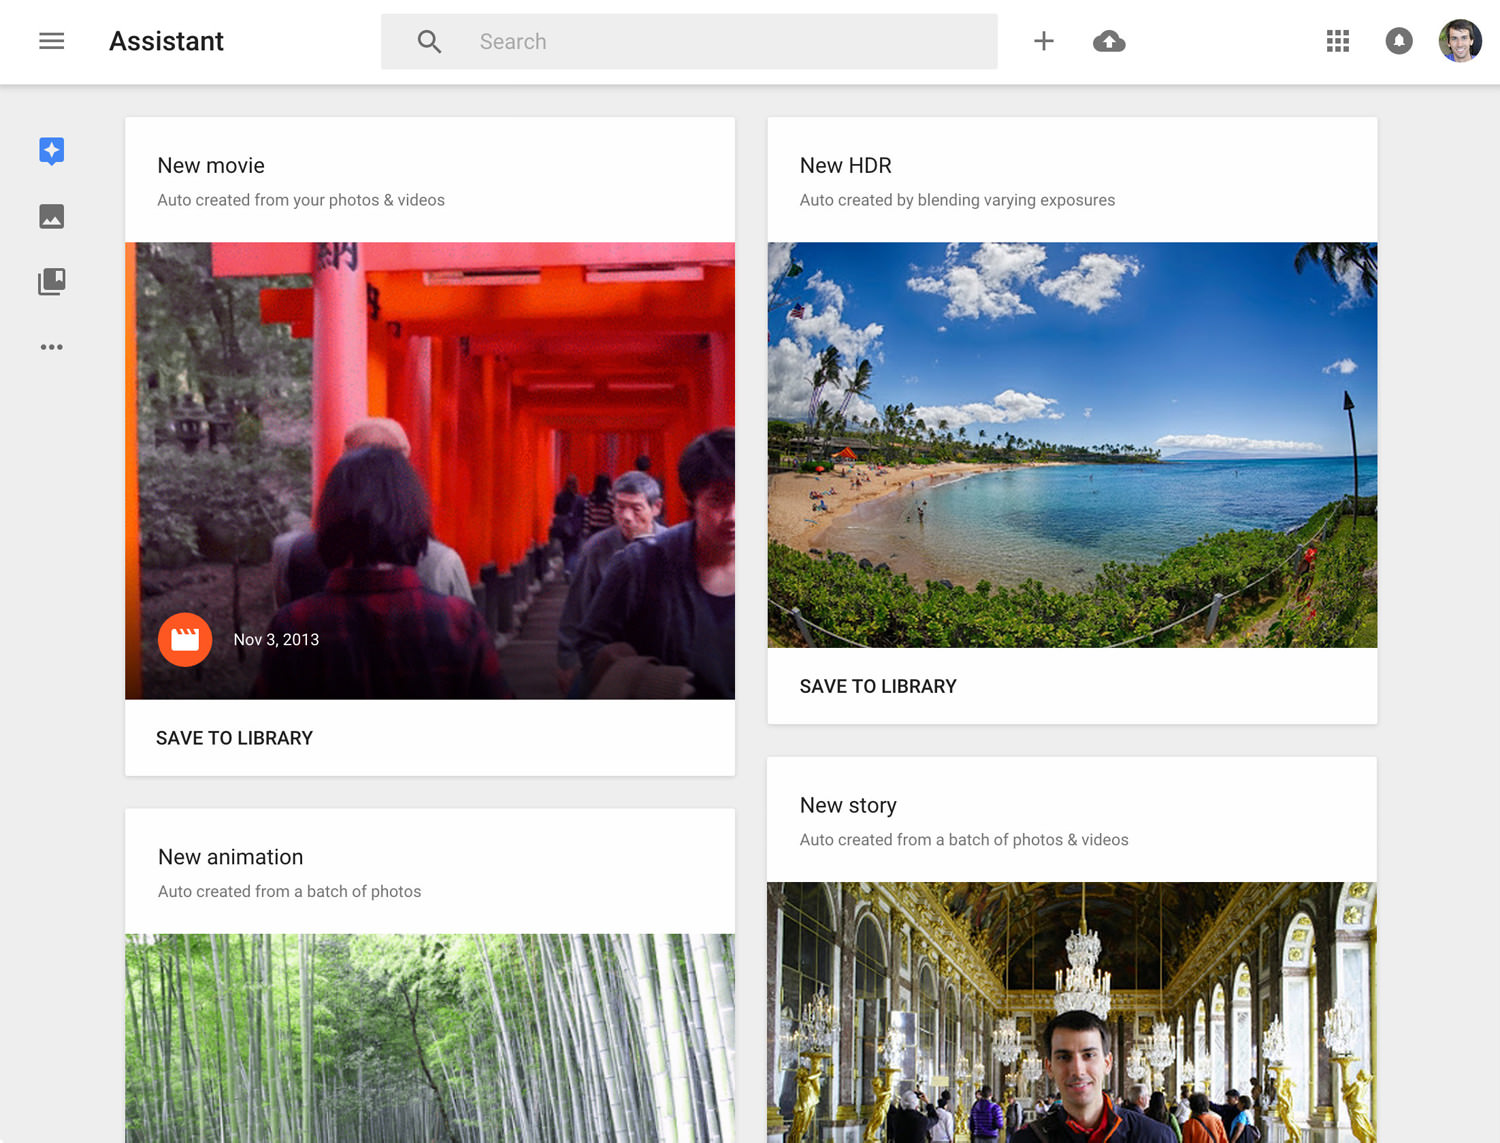
Assistant showing me new items it has created
When creating these stories (either by yourself or automatically via Assistant), Photos tries to be smart and help you make a more interesting collection by not using every single photo or video. It culls what it thinks are the best ones and does a pretty decent job. Of course it's easy enough to manually edit many facets of the story to your liking.
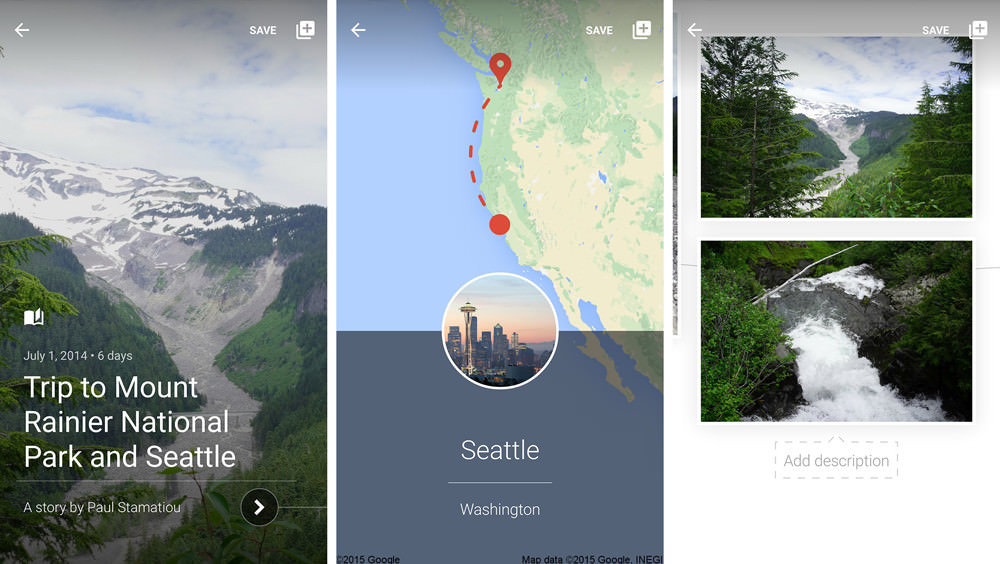
I've been up to Seattle a few times to work with some of the Twitter Video team.
I could continue heaping praise about Google Photos but I think you get the point. It gives you the ability to easily do cool things to your photos, have them online and easily accessible on any device and let you share your camera roll creations with whomever you want, whenever you want. If you haven't tried it yet, please go do that now. I'll wait.
While I'm a more prosumer user, it's not a one-stop solution for me but I still readily use and value it. Very, very well done Google.
Why NAS?
Stammy, why would you even consider a NAS? Wouldn't it be risky to store all of your precious photos on a device in your house that could fail, be stolen, lost in a fire, or simply erased due to one heinous configuration or command line mix up?
Well let's put aside the disk failure issue. Modern 4-drive NAS systems can tolerate a lost drive and alert you promptly to replace it. You'd have to have pretty bad luck to lose more than one drive at the exact same time.
Those other concerns — physical loss or other destruction of the NAS — had originally steered me clear from local storage but are no longer an issue. I can simply configure it to backup to a service like CrashPlan, Glacier, Nearline, S3 or more. Internet speeds no longer seem to be a big issue; it's now fairly easy to find a 100mbps+ connection in the United States.
In this regard, just think of the NAS as a glorified local cache.
Off-the-shelf NAS or build your own?
Now that I knew I was going to get some physical storage of my own, there were two options. My first inclination was to just build a small Linux box with a RAID array using the popular FreeNAS operating system. Years ago I had built my own Intel Celeron based NAS with great success. All for just $200, including my custom built case: DIY $200 PC: Part 1, Part 2, Part 3.
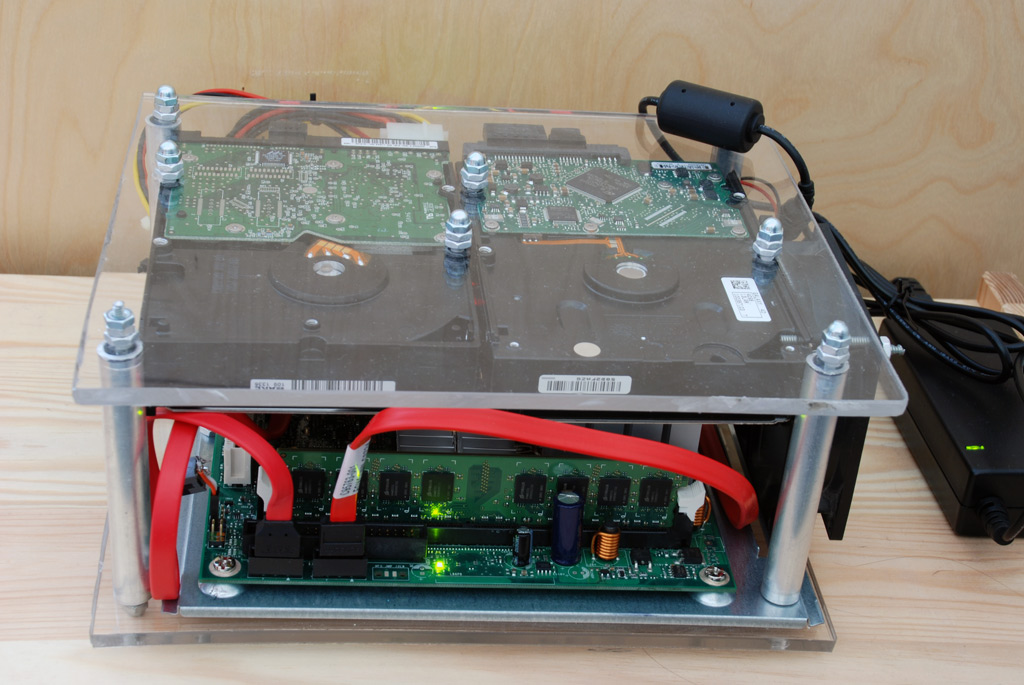
Yeah, this was in college and pretty cheaply made.
It was no-frills — just a Linux installation and a Samba setup to access the drive on the network. Definitely not enough horsepower to do anything beyond that; no longer an issue with today's hardware. However, finding a nice small, quiet case and keeping the software up-to-date sounded like more of a burden than an opportunity. I would have to spend a few weekends to configuring it to do simple things like email me if the RAID array was not healthy. Weekends that were better spent writing this article instead. :)
I began looking at 4-bay consumer NAS systems. There were largely two companies in this space: Synology and Drobo. It only took a few Google searches to learn that Synology was the better choice with better features, software and disk performance. I stopped considering Drobo after finding a few horror stories of entire disk array corruption and data loss. Synology also seemed more open and had a larger community of folks tinkering with them; Drobo doesn't even have SSH installed by default for example.
While it wasn't my original requirement, I quickly learned that new consumer NAS systems are much, much more than storage. They have great software, automatic updates, mobile apps to control and access your data and more. I could easily use the extra space beyond just Lightroom for a myriad of purposes. Definitely the way to go.
This kind of setup is not cheap. You're looking at over $1,000 all said and done. When you consider the cost of good camera gear (where a good lens is easily $1-2k) and the airfare to travel and take these photos.. spending another $1,000 to make sure my photos are safe is justifiably cheap insurance.
Synology DS415+
What to buy, unboxing and assembly
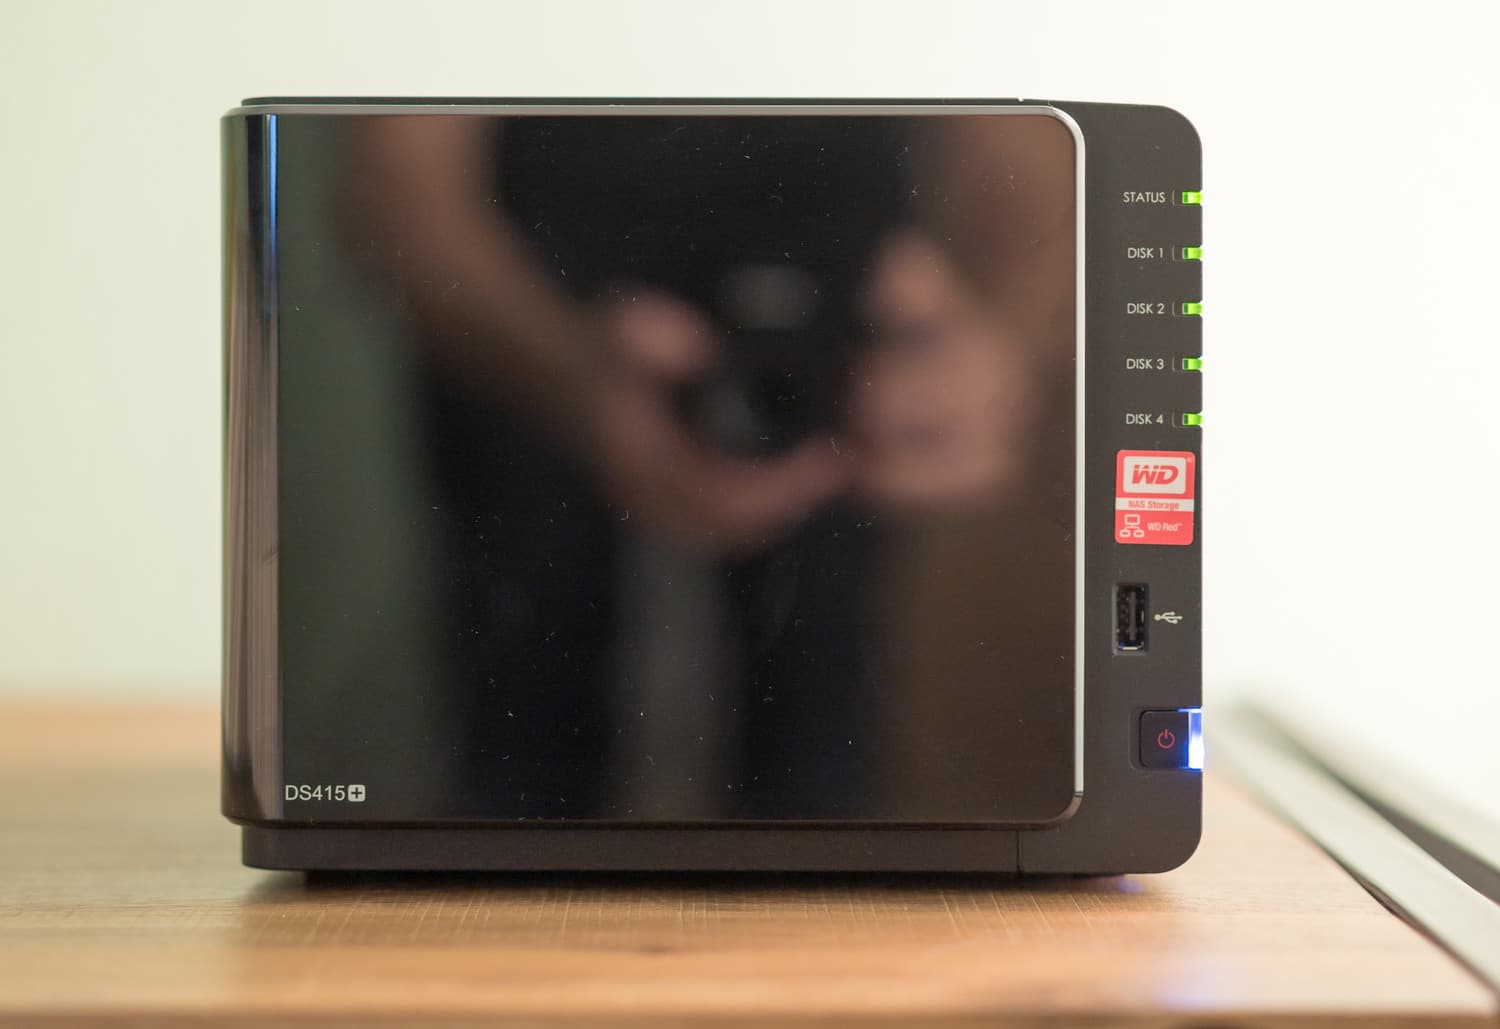
I decided to get the latest Synology four bay NAS, the DS415+. I didn't need an 8-bay NAS and the DS415+ seemed like their most powerful consumer-oriented 4-bay system. In particular it has the new 2.4GHz quad core (most comparable systems are dual-core) Intel Core C2538 Avoton processor. And if encryption is important to you, you'll be pleased that this processor supports AES-NI hardware encryption so you don't take a huge performance hit.
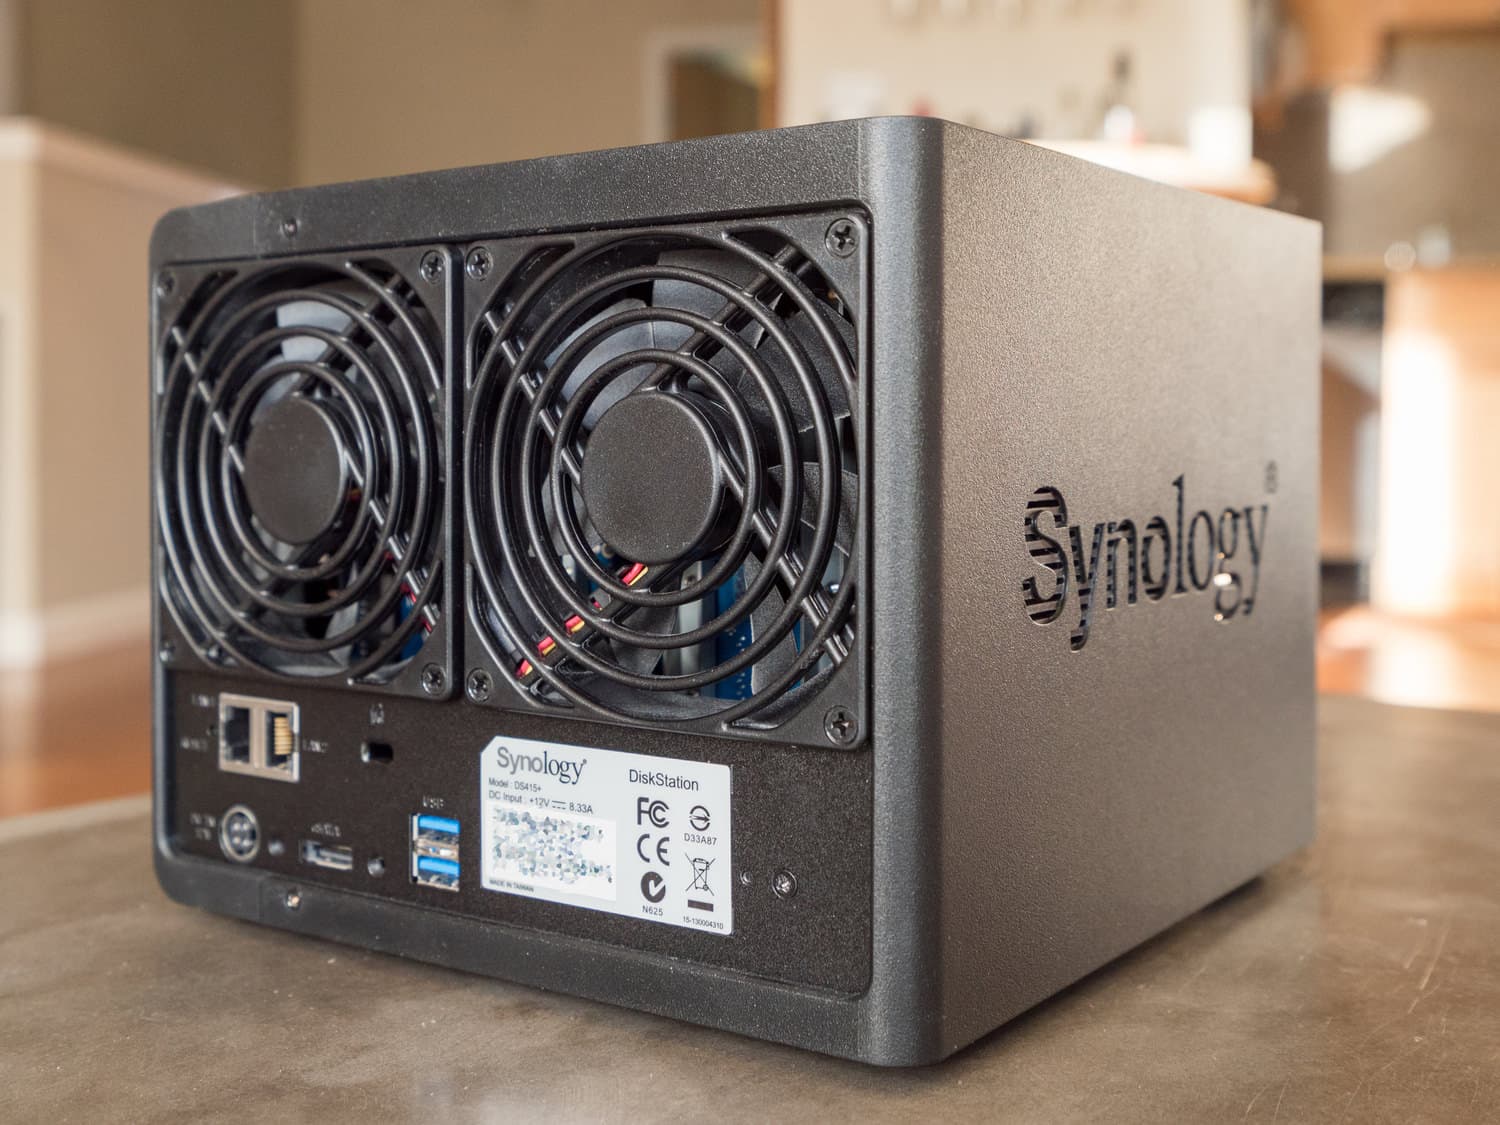
As you would expect with such network attached storage, you can find dual gigabit ethernet ports, an eSATA port and two USB 3.0 ports. The USB ports let you connect additional external hard drives for things like recurring backup tasks or simply to share that volume on your network. And yes, you can plug in your printer and share it on the network... but who still has a printer these days?
Once I decided on the NAS itself I only had one other decision to make: how much storage?
With current 3.5-inch hard drives coming in capacities up to a whopping 6TB, you can fill up a 4-bay NAS with 24TB of storage. Of course depending on the RAID configuration you decide to go with that means something closer to 18TB of actual storage (for RAID 5 and Synology Hybrid RAID as an example). However, while I take a lot of photos, I am not a professional. I do not shoot events or portraits for hours each day. Having that much storage would be overkill for me and I wouldn't come close to filling that up within 5 years.
I figure that by the time 5 years rolls around I'll probably want a newer and more performant NAS and hard drives; heck, in 5 years we'll have affordable multi-terabyte SSDs in the 1.8-inch form factor.
I decided to go with 3TB drives. The jump up to 4TB drives was pretty significant in cost so that helped me with the decision. Four 3TB drives gives me 12TB of pure storage, but after a RAID 5 setup and formatting it's closer to 8-9TB. I have about 1TB of photos and videos to put on it immediately so that gives me plenty of headroom to grow.
Update Jan 2017: Synology has since released the DS416 and DS416play models. They're basically the same as the 415+ but feature a faster albeit dual-core, not quad-core, processor. All info in this guide should work with the new model as well. I'd recommend both of them, but the DS416play version is a bit faster (and they're both cheaper than the DS415+ price I had listed below when I got mine!).
There's also the even more expensive DS916+ model that has a quad-core Pentium processor and 8GB RAM if you plan to do a lot of video transcoding.
-
Synology Disk Station DS415+ — $578
As mentioned above, this was the more powerful quad-core, 4-bay NAS I chose. -
4 x WD Red 3TB hard drives — $476
These Western Digital Red edition drives were an easy choice — they're made for NAS systems and ideal for working with RAID controllers. For example, head-parking in the drive is completely disabled and it low TLER (Time Limited Error Recovery) error correction settings, which is prime for a NAS system.
And as an added benefit they're also a bit quieter than their desktop Green edition counterparts. -
Optional
-
Crucial 8GB DDR3 memory upgrade — $55
Since I planned on using the DS415+ for a few memory hungry uses — CrashPlan and Plex media server which transcodes video on the fly — I decided to also upgrade the 204-Pin SODIMM RAM stick. But this is very much optional — the included 2GB of RAM should be more than sufficient for most folks. -
Thunderbolt to GigE Adapter — $28
If your primary machine is a Mac lacking an Ethernet port, you will want to get this so that your initial file transfers are fast and don't take days over Wi-Fi. -
25-foot Cat-6 Ethernet cable — $8
While the NAS does come with Ethernet cables, if you will be directly connecting your laptop to your router to do the initial file transfers, you'll want something long enough so you don't have to sit on the floor next to your router. -
SUBTOTAL — $1,145
Note: I mentioned a RAM upgrade in this parts list as optional. I do that mainly since the installation process was a huge, huge pain in the ass. Taking the case off of this thing is very hard. There are little clips keeping it on that you need to prop open with a slender knife. I ended up breaking a few of them while wrestling with the thing for half an hour. I'd suggest not bothering with the RAM upgrade unless you know you'll really be stressing this system.
Another Note, Jan 2017: If you get the DS416 or DS416play model, do not buy RAM. You cannot upgrade the RAM on these models since it is soldered directly on the motherboard.
Unboxing
Upon unboxing and holding the DS415+, I was pleasantly surprised that it was a bit smaller than I had imagined it would be. It reminds me of my old Shuttle SFF computers, which are a tad larger. The Synology's case feels sturdy and substantial, though it is still plastic and has huge Synology logos on both sides (which double as vents).
However, I was a bit disappointed with the power supply. I understand why they have it external — to reduce heat inside the unit — but it's a 4-pin plug with a thick cable so it's hard to position. It feels like it wants to fall out... which is the last thing you want for your NAS. It reminds me of the huge power brick the first Mac Mini had that always fell out, but I digress.
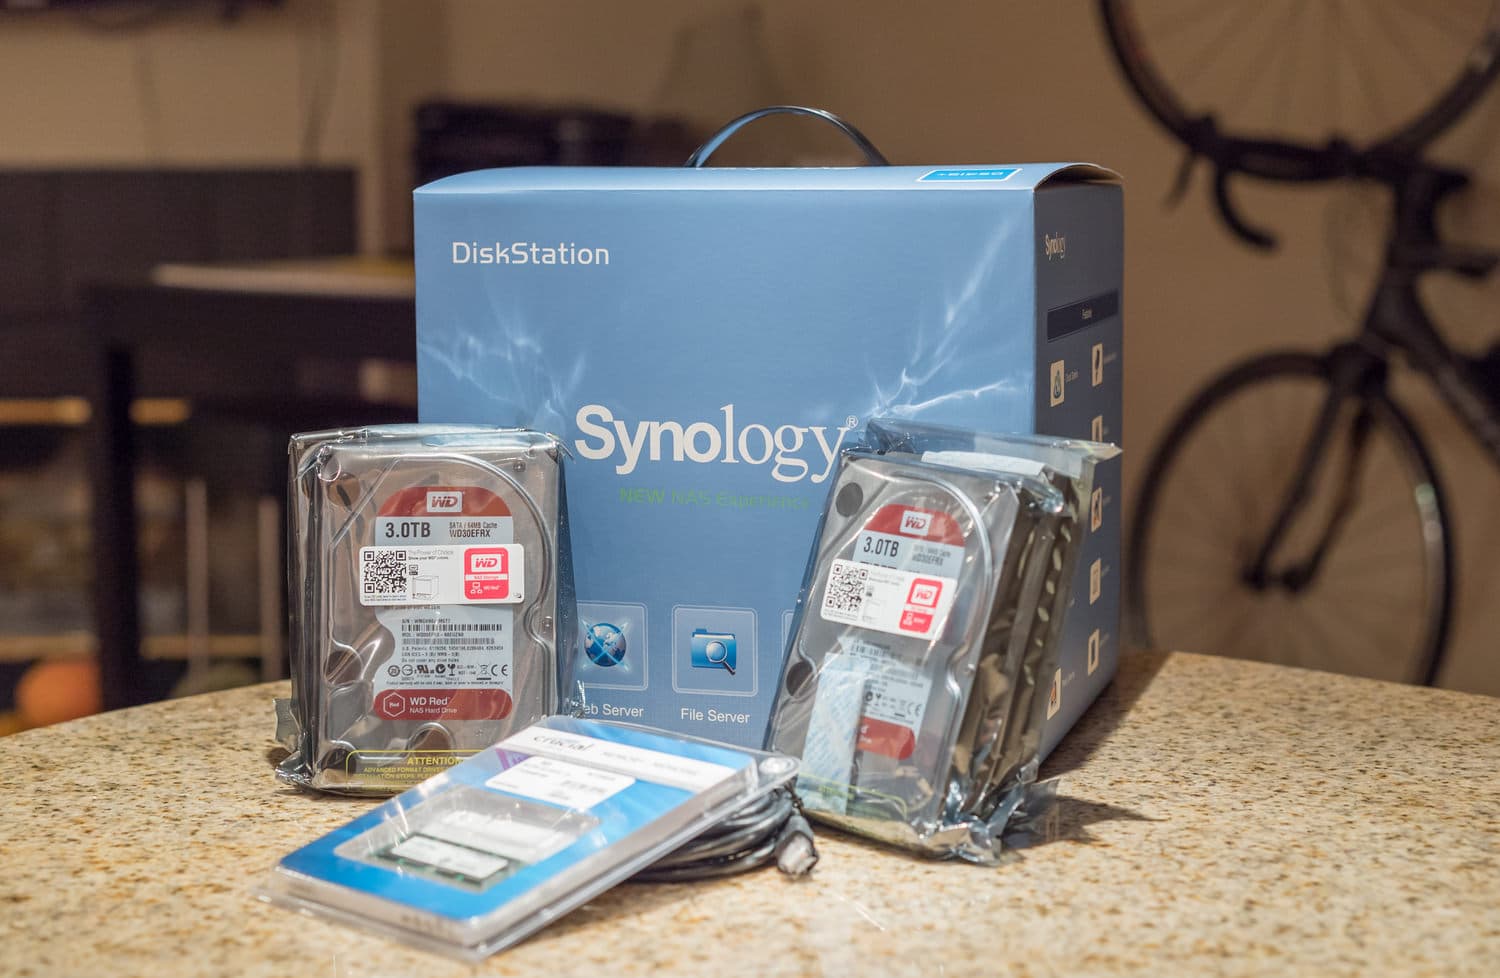
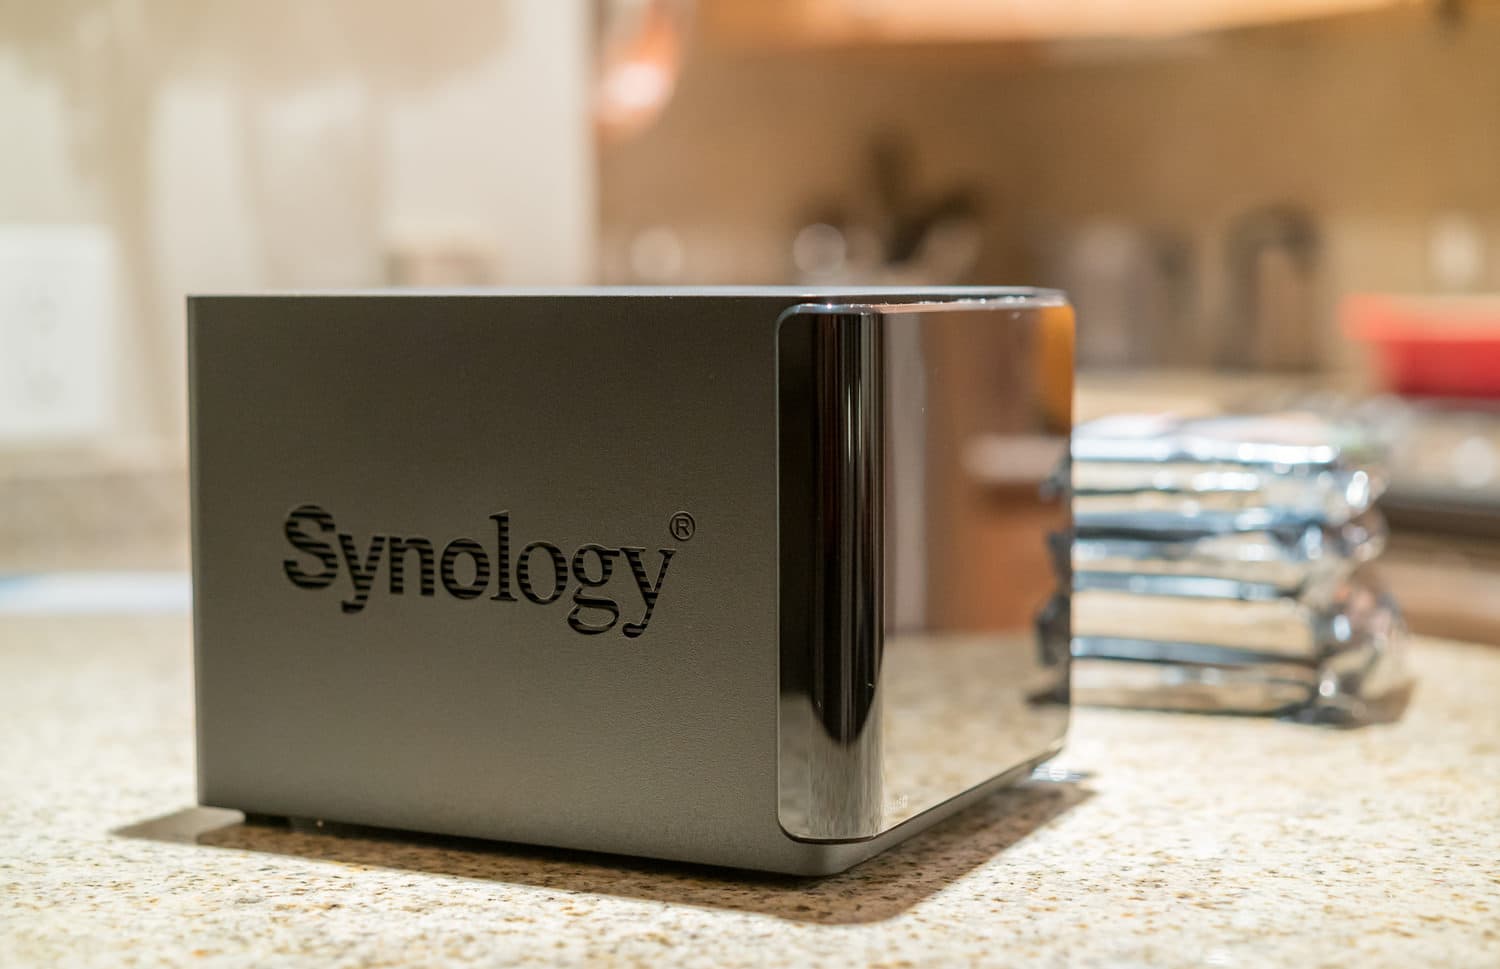
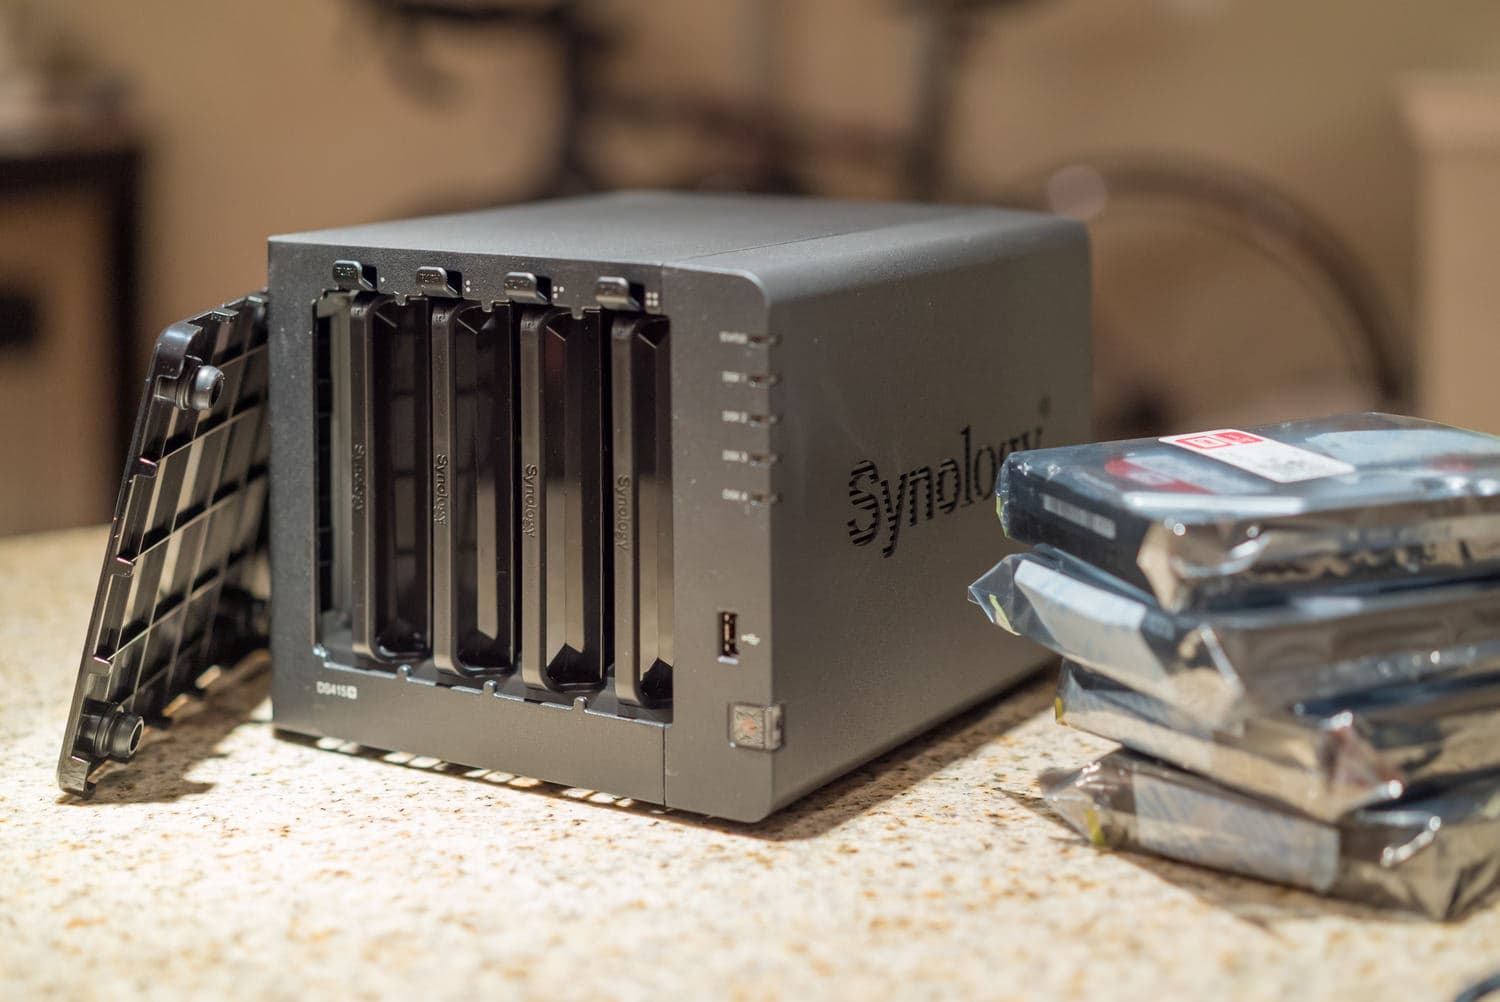
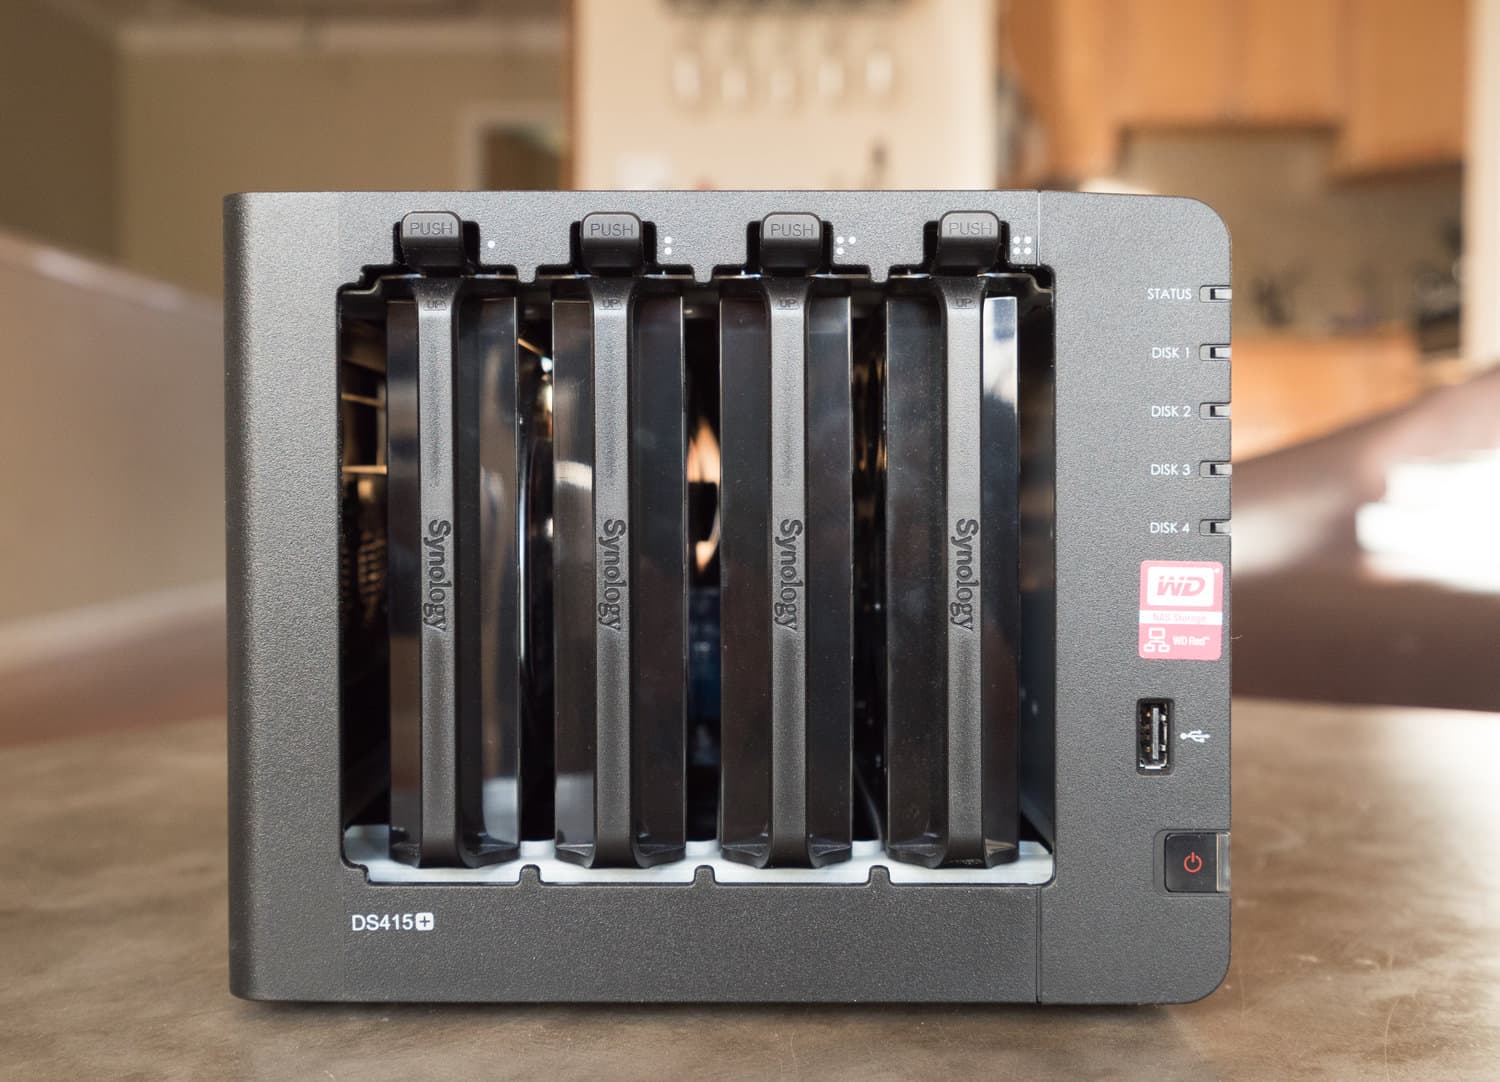
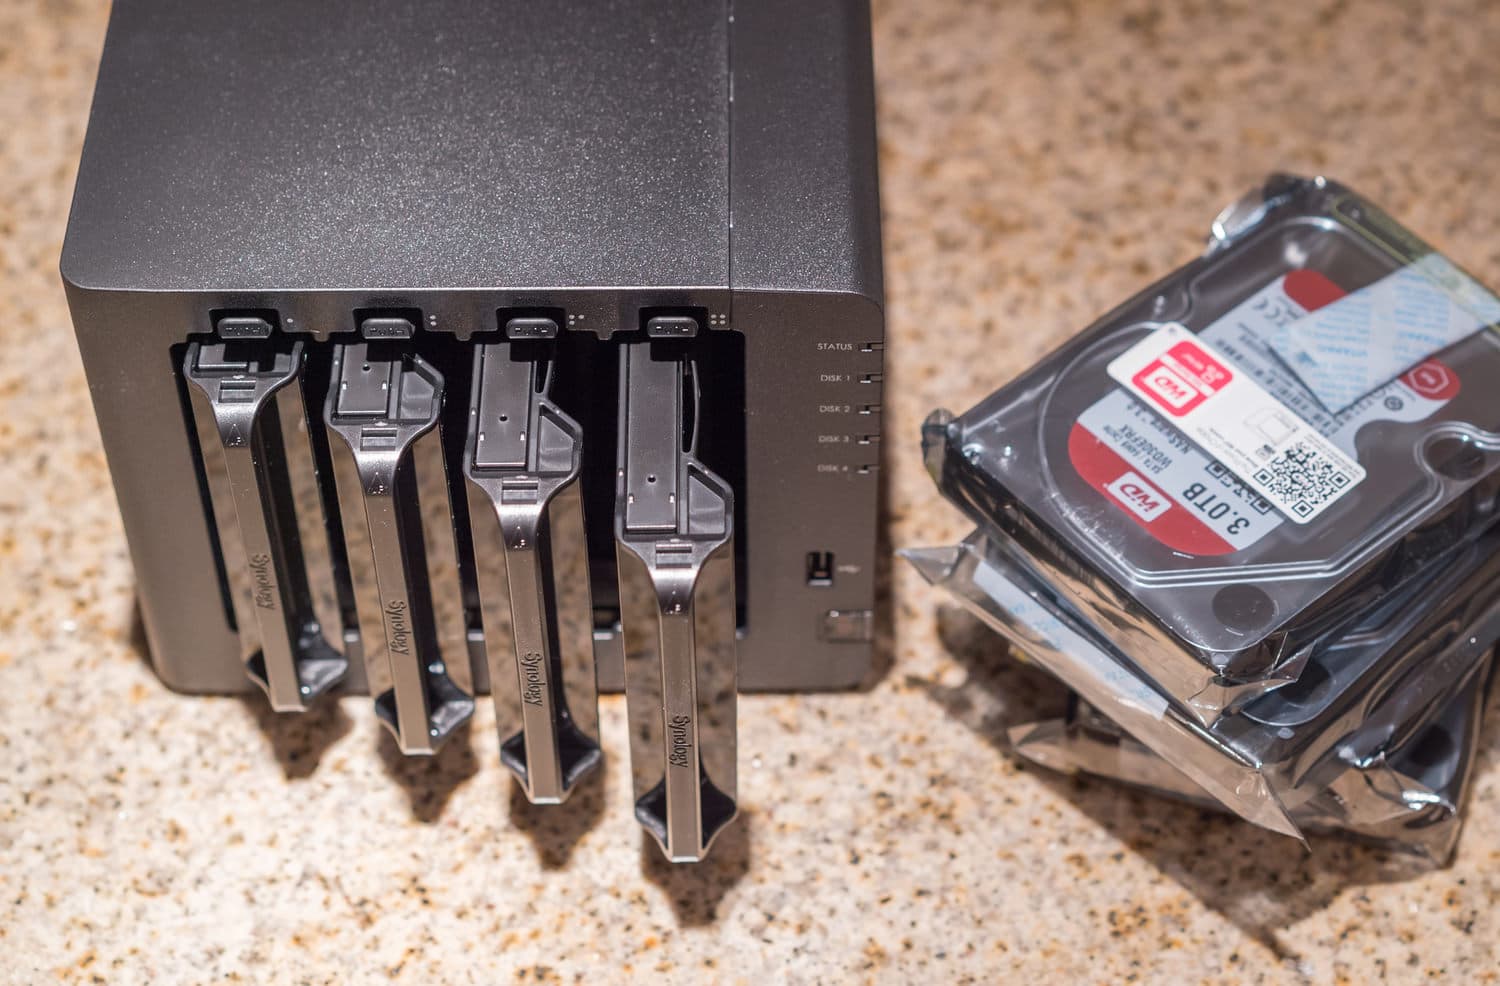
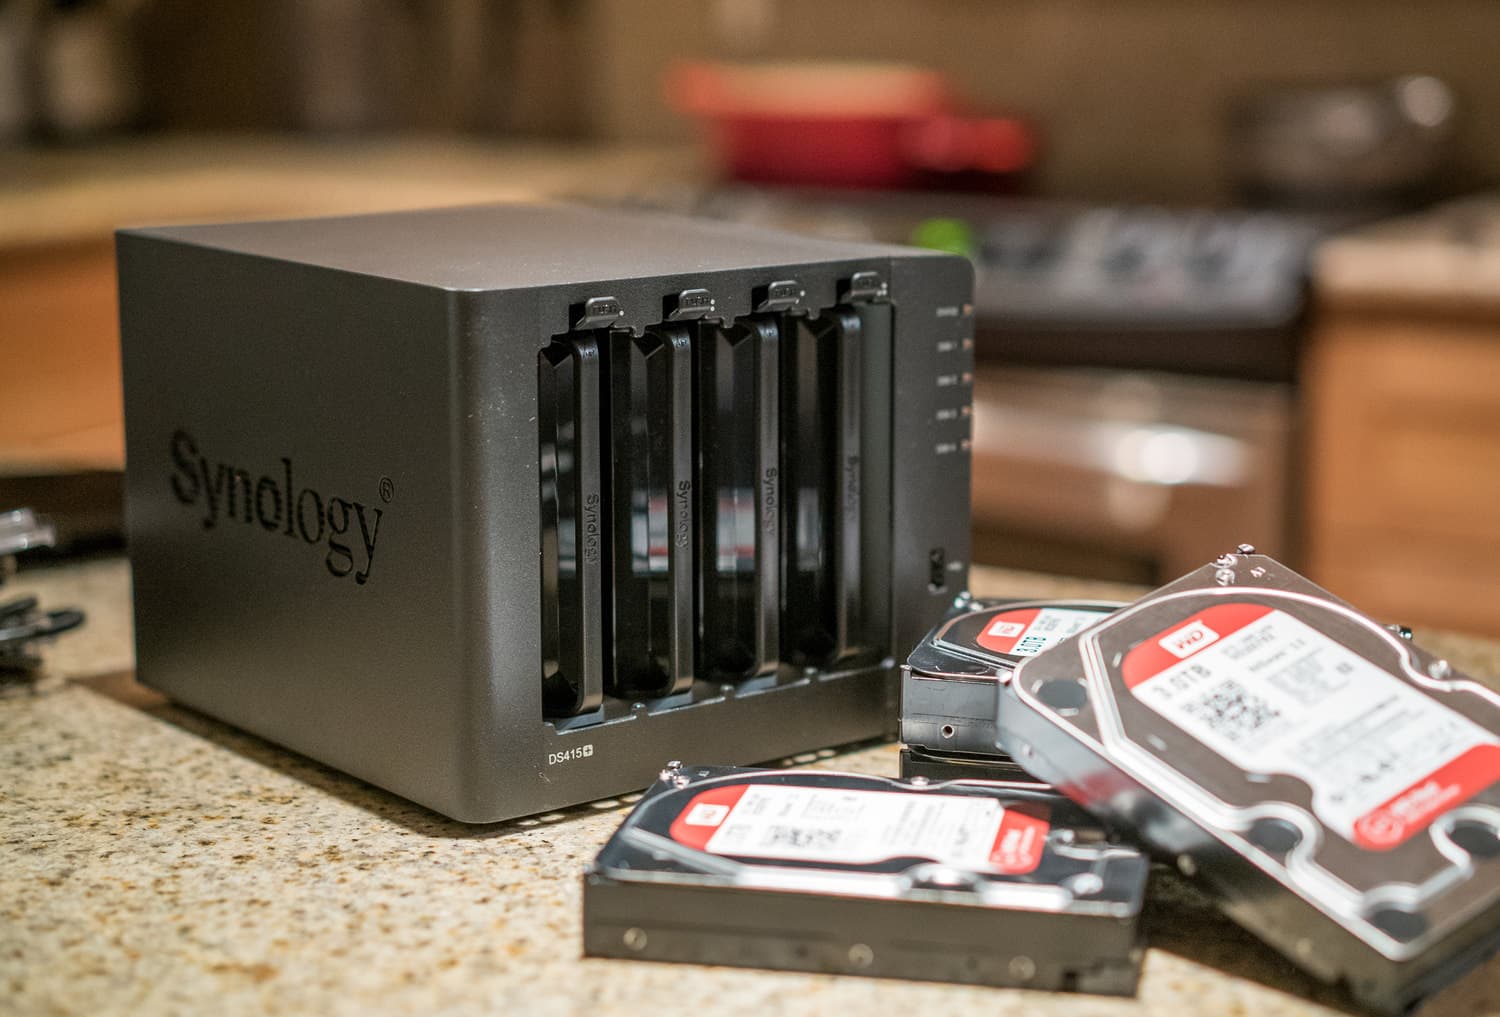
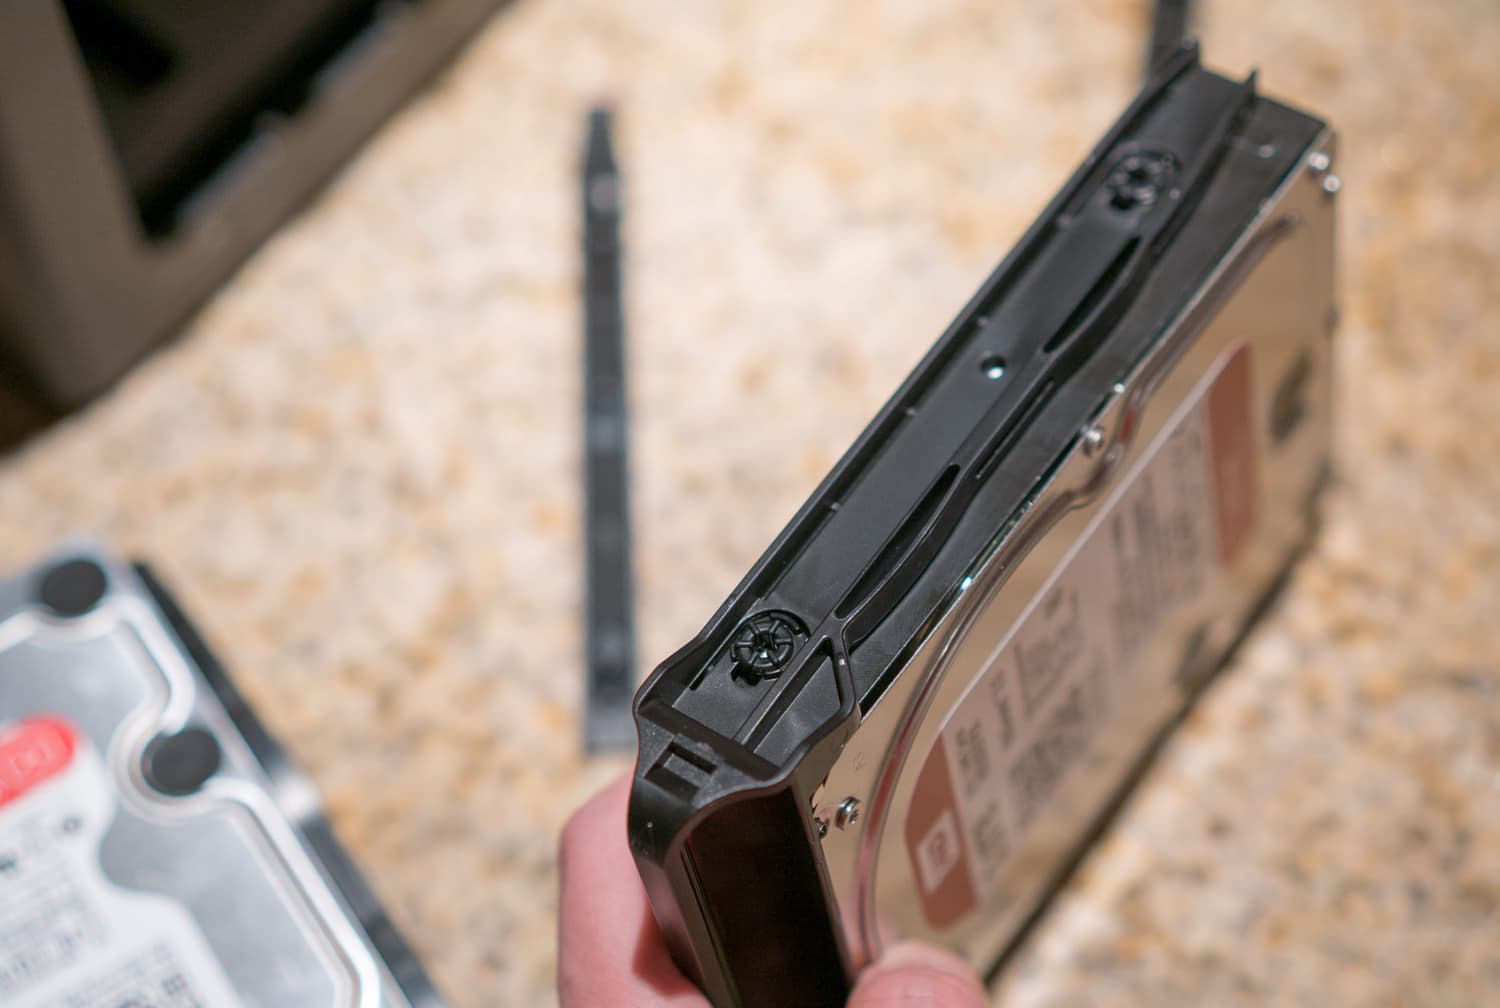
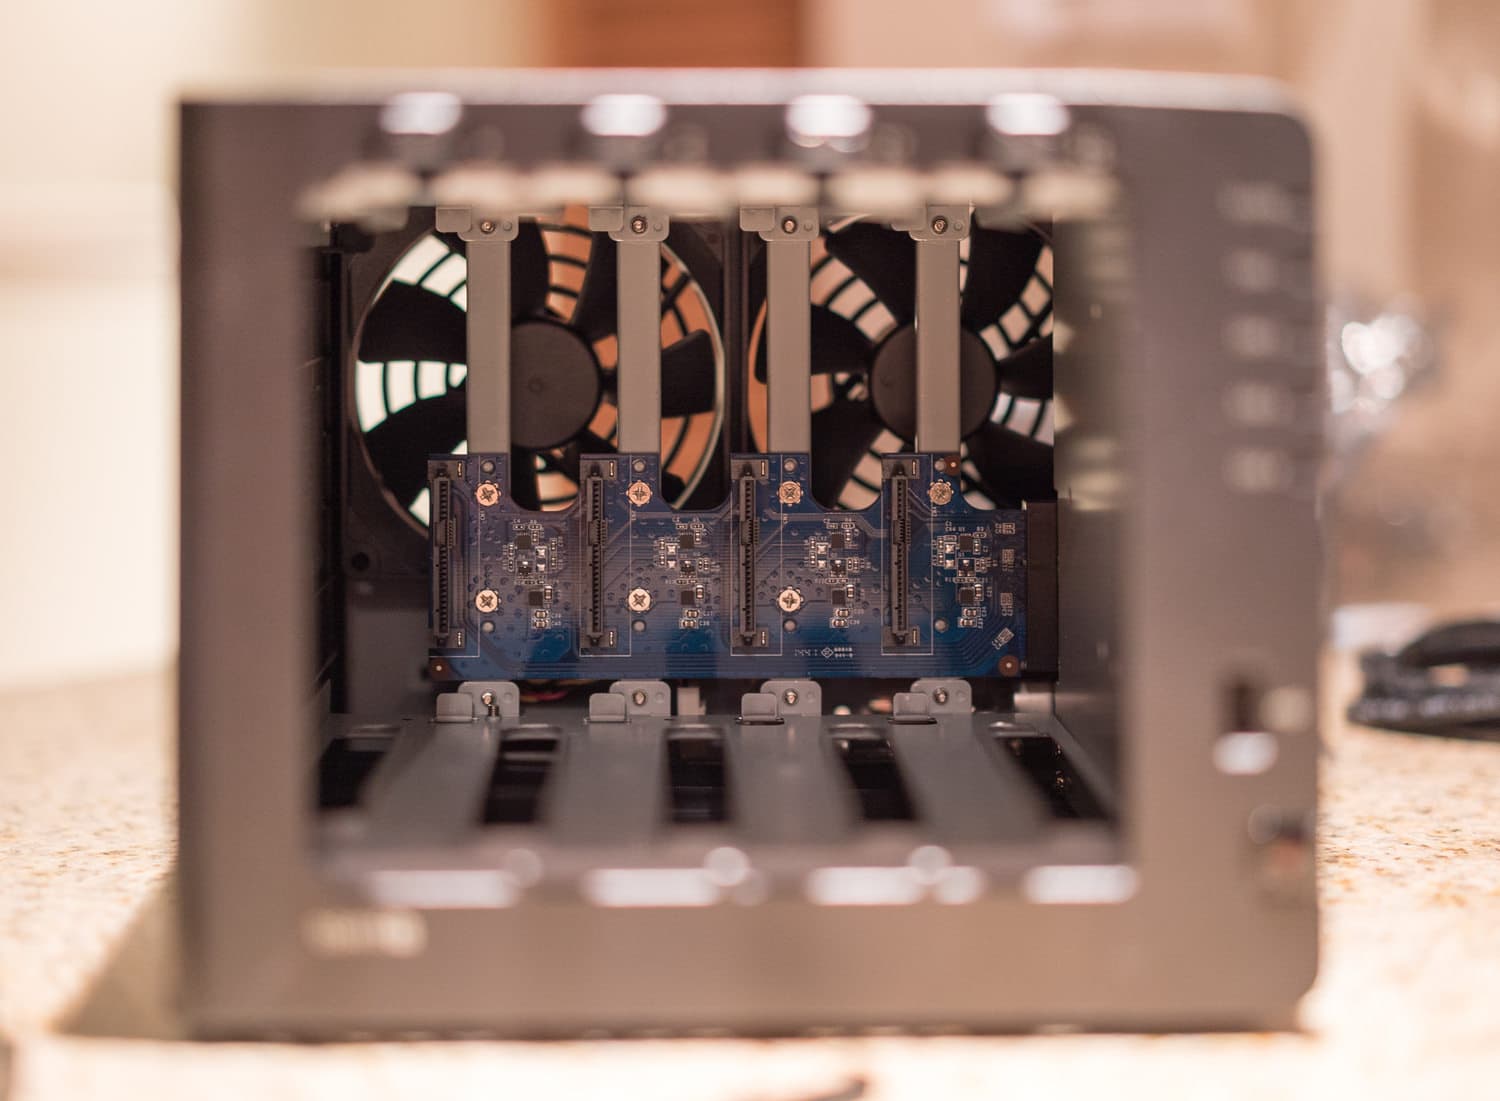
Installing the drives in the Synology DS415+ is a ridiculously simple process. There are no screws involved. You just lift a tab and pull out the drive mounts. Slide your freshly unboxed hard drives into each one and then pop on the side rails to keep them in place. You'll notice how the drive bays have some rubber grommets for additional vibration dampening.
This entire process took just a minute or two.
First boot
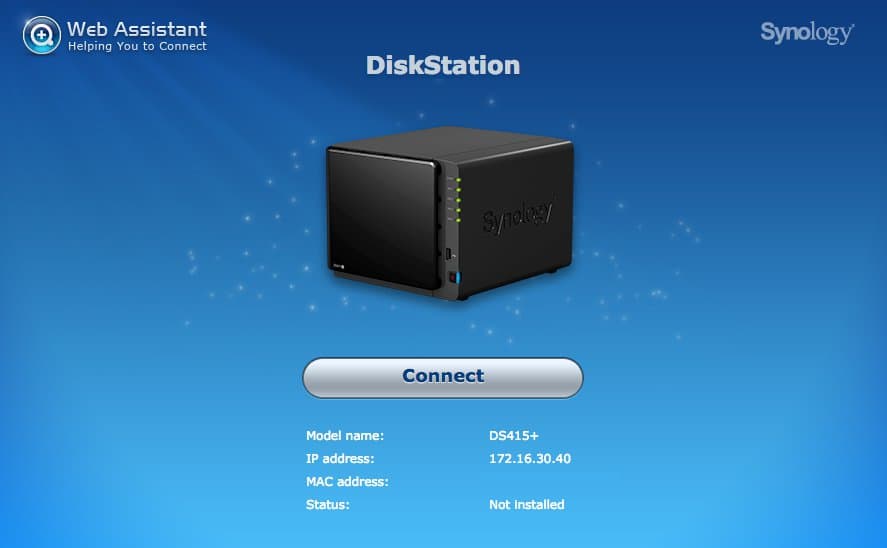
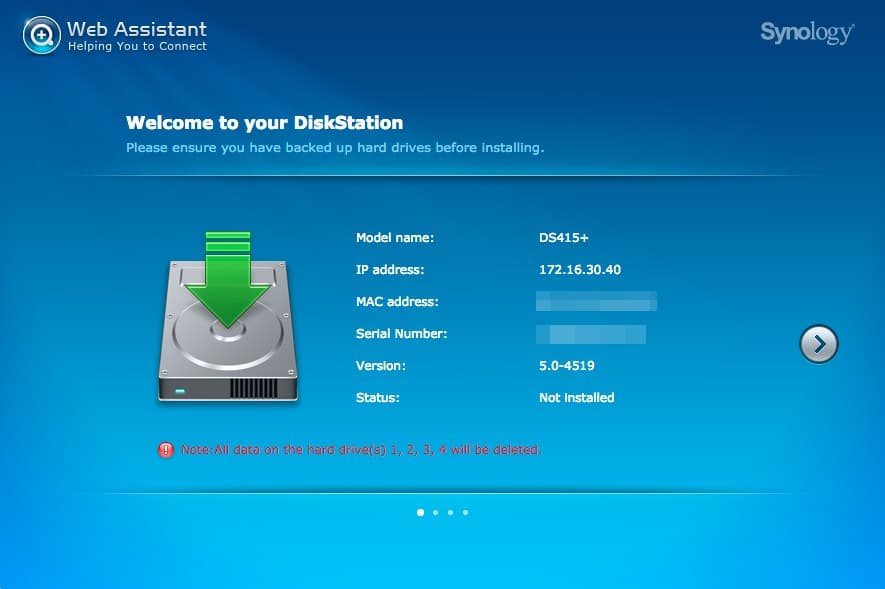
With my 12TB worth of hard drives nestled in their new home, I was eager to plug in and fire up the DS415+ for the first time. Since a NAS is headless, you can't just plug a monitor and keyboard into it. Instead of hunting for the NAS on SSH, Synology made a painless setup tool that lets you manage everything in a browser.
You can start by either installing their Synology Assistant Mac app or just by visiting find.synology.com or diskstation:5000 which will locate your DiskStation NAS on the LAN so you can continue with the web onboarding flow. I did the latter to find my NAS on the network and began going through the setup flow.
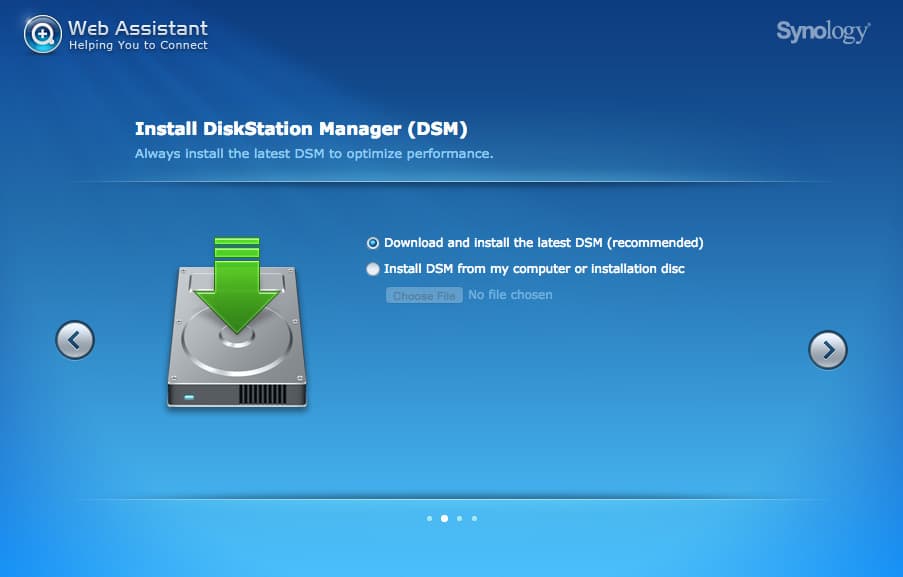
One of the first things I noticed while this Synology was up and running was how quiet it was. Sure when the disks are active and working you can hear their clicks, but when they are idle you can barely hear the large rear fans whirring. There are two fan speed settings for the Synology: "Cool Mode" and "Quiet Mode". Since I don't have the DS415+ in my bedroom, I am okay with it being a tad louder to keep everything cool so I set it to Cool Mode.
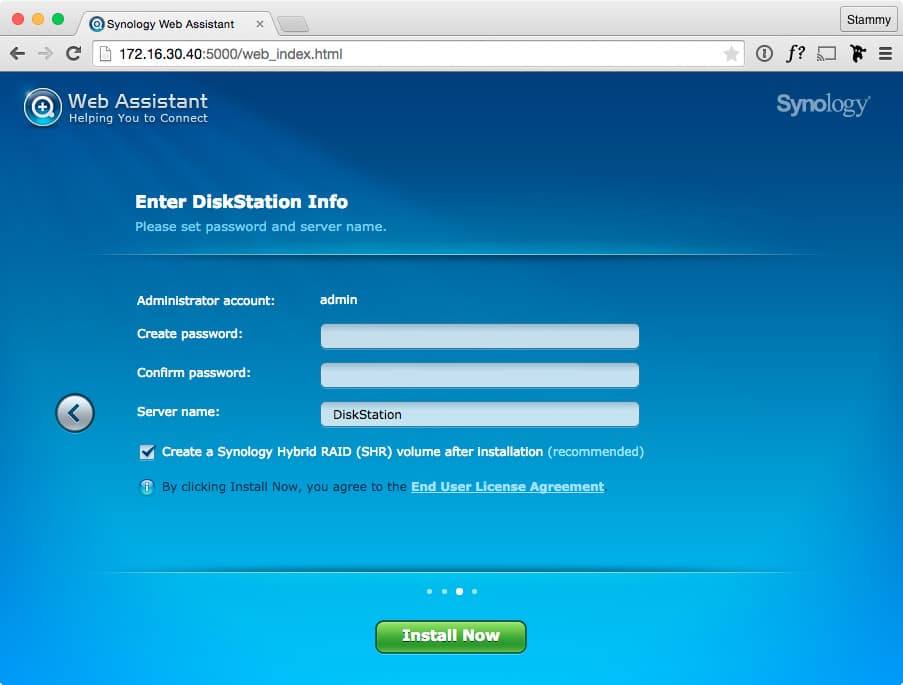
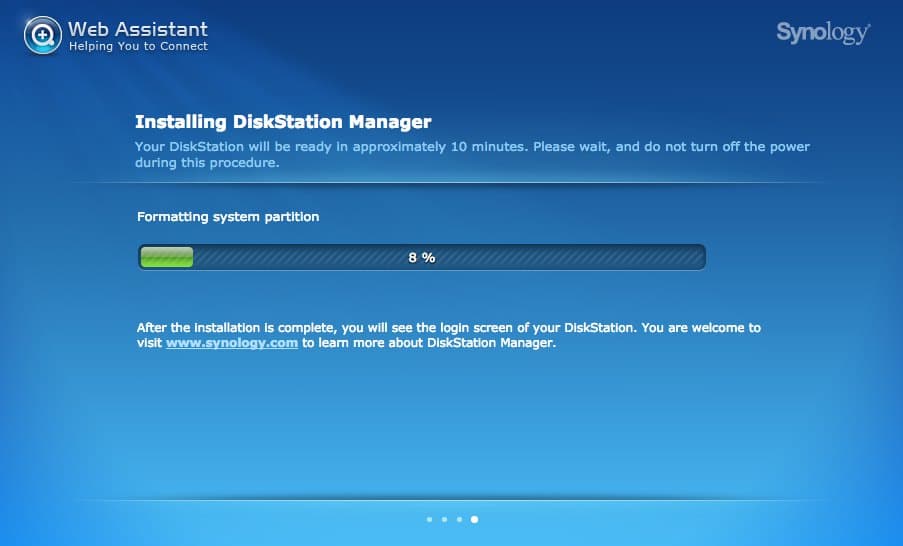
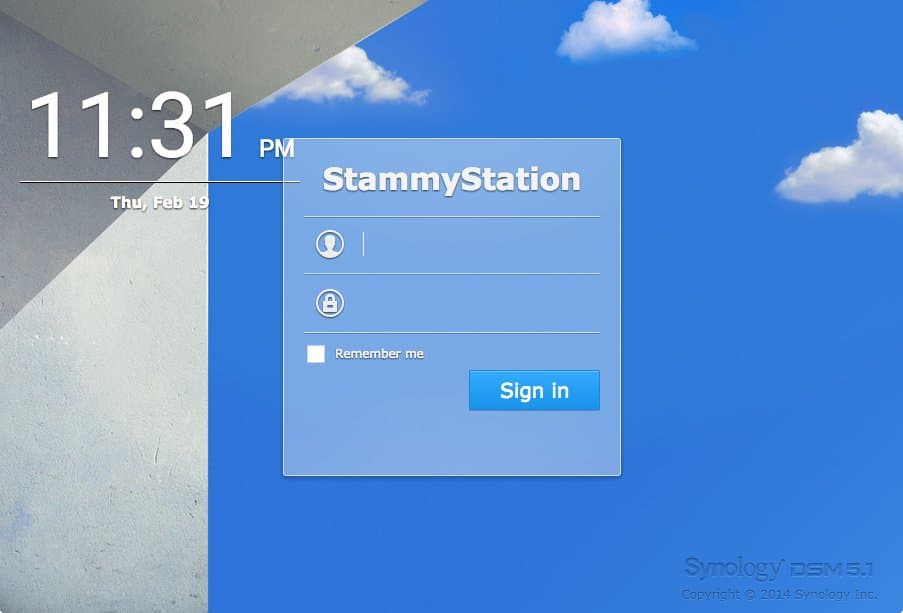
I decided to go with the default Synology Hybrid RAID (SHR) setting for the disk array. It's somewhat like RAID 5, so my 12TB would become closer to 9TB usable. The benefit of SHR is that in the future you can mix and match hard drives of different capacities, instead of requiring all disks to be exactly the same. This new functionality comes at the expense of a tiny performance hit due to new layer of Linux LVM usage between the filesystem and software RAID. SHR basically makes as many new LVM partitions as it needs to use the space on any unmatched disks.
In this 4-drive setup, SHR allows for the complete failure of one of the drives before there would be any data loss. That gives you enough time to pop in a new drive and have the array fix itself. Though there is an option that will allow SHR to have 2 disk fault tolerance if that matters to you. I'm okay with 1 disk fault tolerance as I plan to back up the NAS itself as well — more on that later.
8GB RAM upgrade
At this point I powered up the NAS for the first time to make sure everything was operational and then I turned it off to begin the RAM upgrade. To play it safe I did this after verifying the NAS worked so that if it did not boot up after the upgrade I knew it would be RAM-related. As I mentioned in the parts list above, a RAM upgrade is entirely optional and I actually do not advise it since I found it difficult to actually take the case off to even get to the RAM.
I will spare you the details and just show some pictures. Basically it involved sliding a knife in/around the joints in the case to undo some pesky clips.
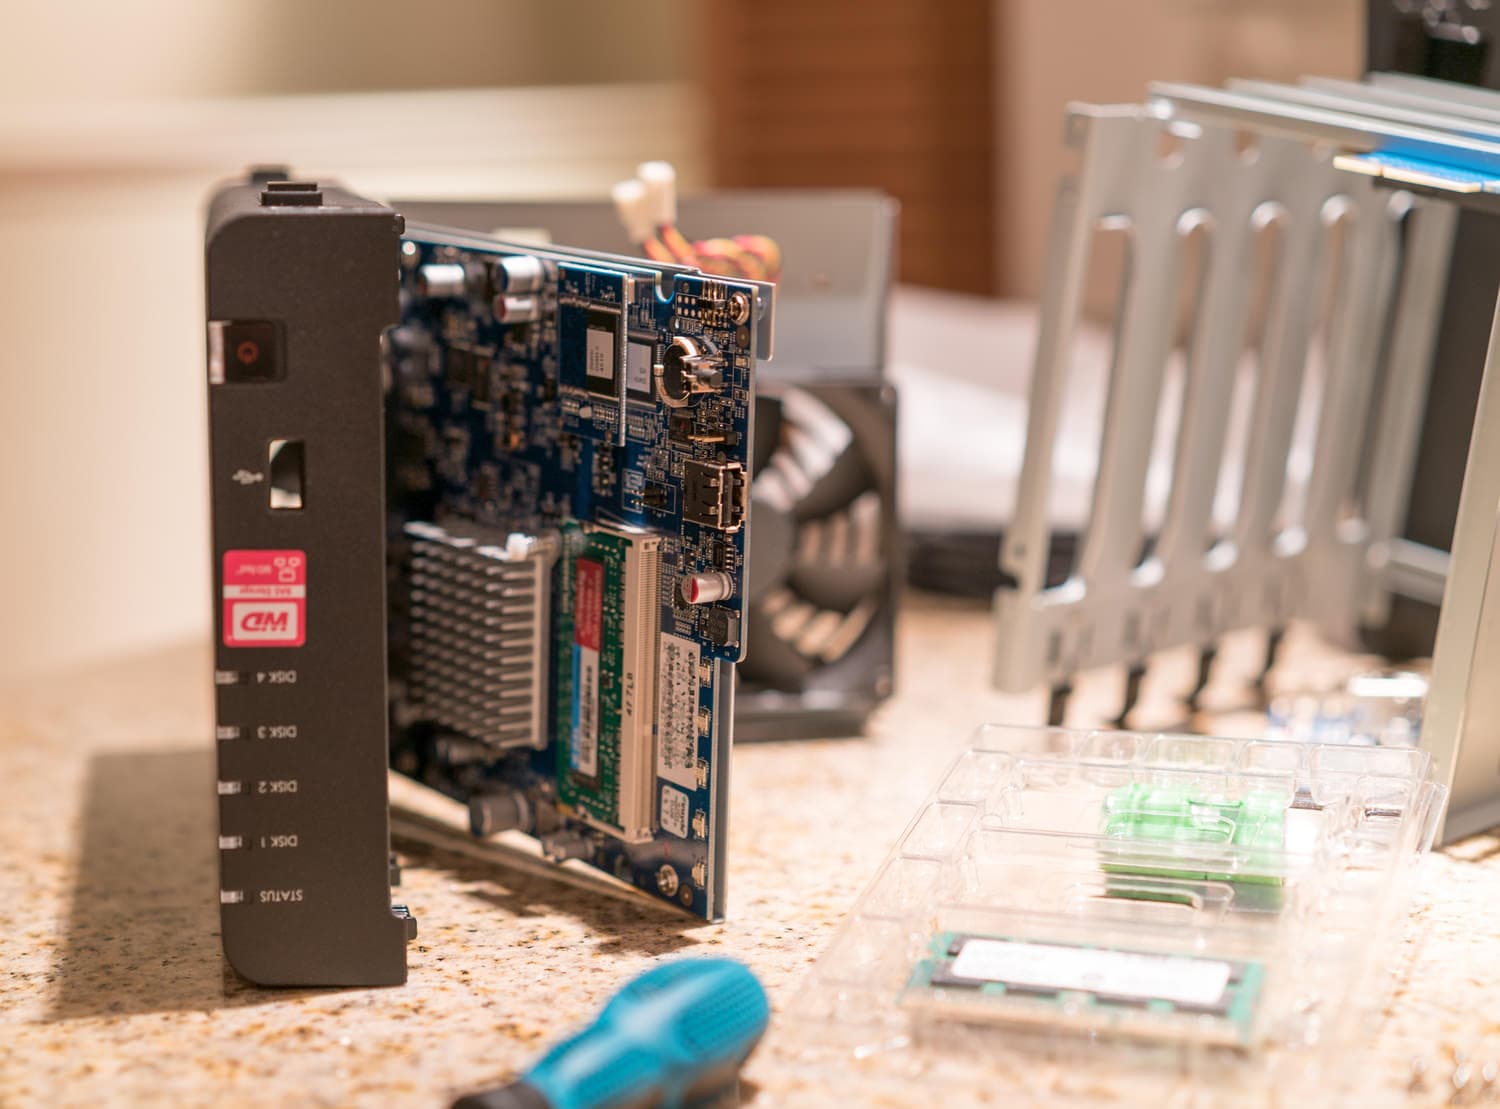
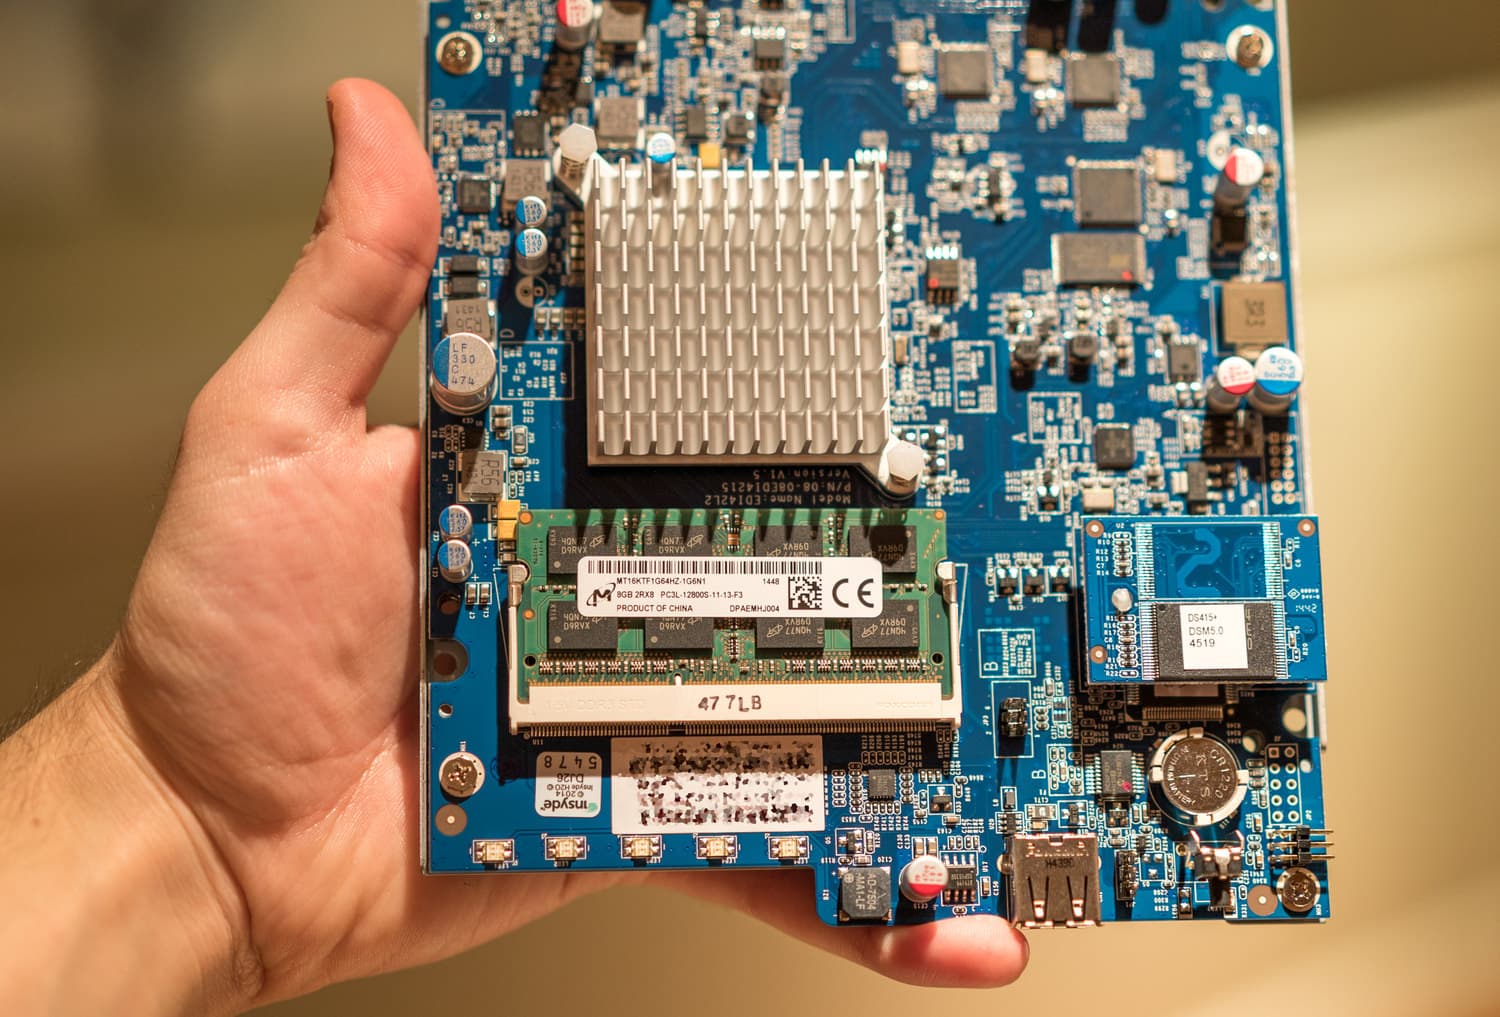
After reassembling the system with the new 8GB stick of RAM, I booted it up and went to the control panel to verify that everything was okay.
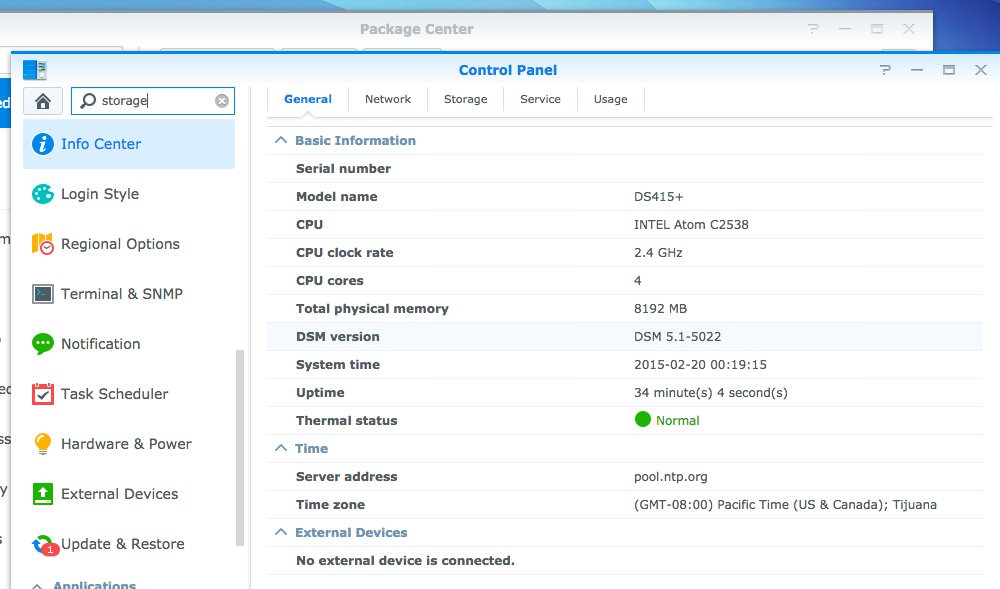
8GB of RAM successfully recognized by the system
Now that everything was functional, I tucked away the NAS, keeping it wired next to another recent purchase, an Apple AirPort Extreme Base Station that replaced a vintage Apple Time Capsule.
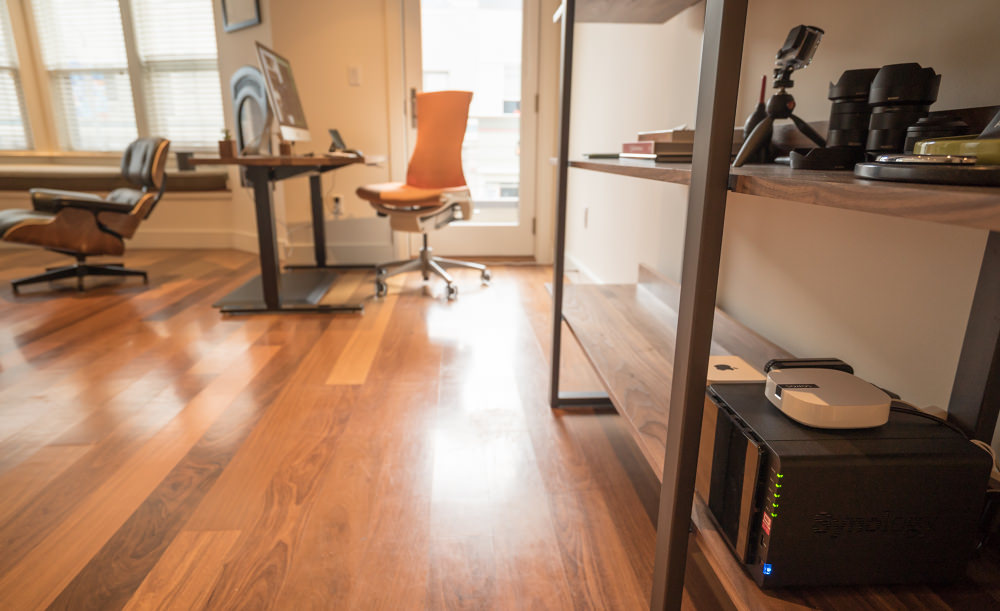
The DS415+ at home on my shelf next to my router, cable modem and Sonos Boost.
Setup
Configuration and usage
Before we get started with the main event of transferring all of my photos, videos and other data over to the Synology, I wanted to give a brief tour of the Synology DSM software. DSM stands for DiskStation Manager and it's one of the main reasons I purchased the Synology over another NAS brand.
Note: Synology has since released DSM 6.0! Some of the setup instructions below may not be 100% accurate anymore but should be close.
This is the "desktop" for the DSM web-based operating system. It's obvious Synology has tried very hard to make this web app feel like a real OS as if you were VNC'd into it.
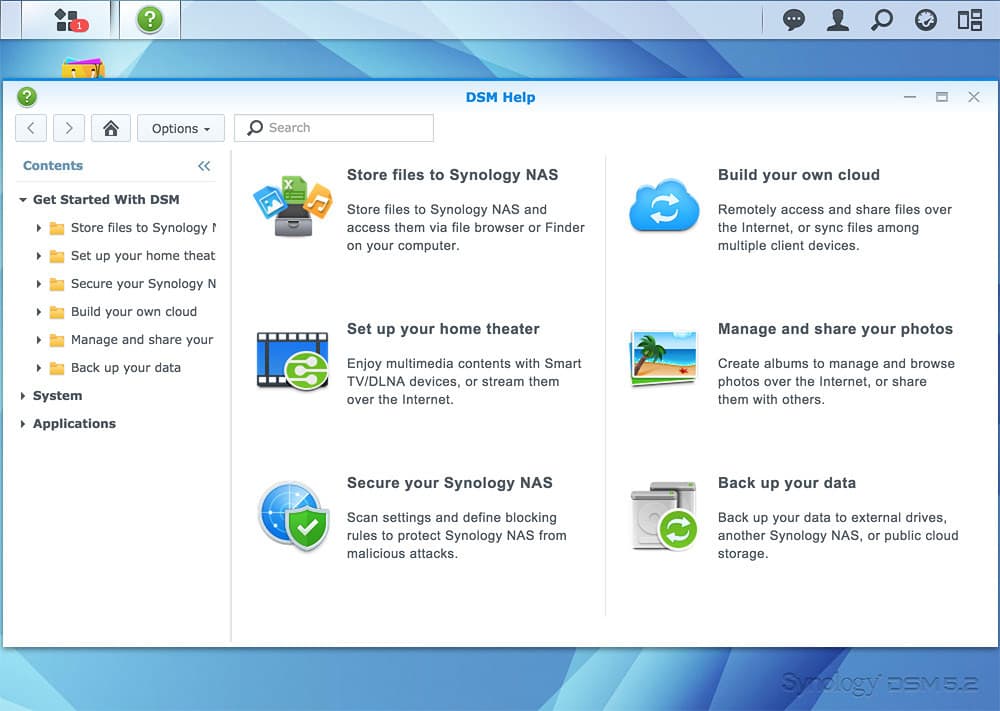
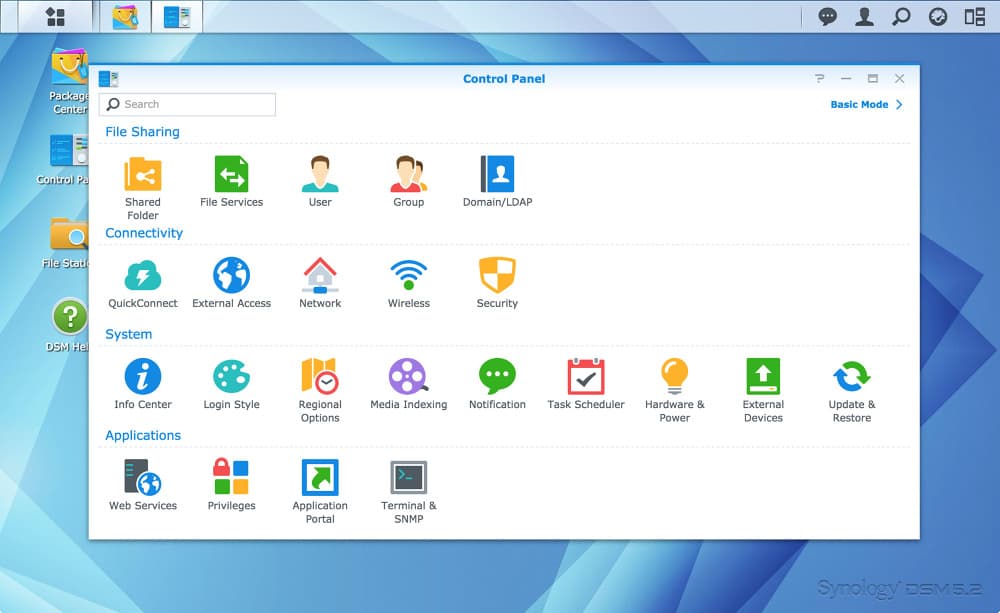
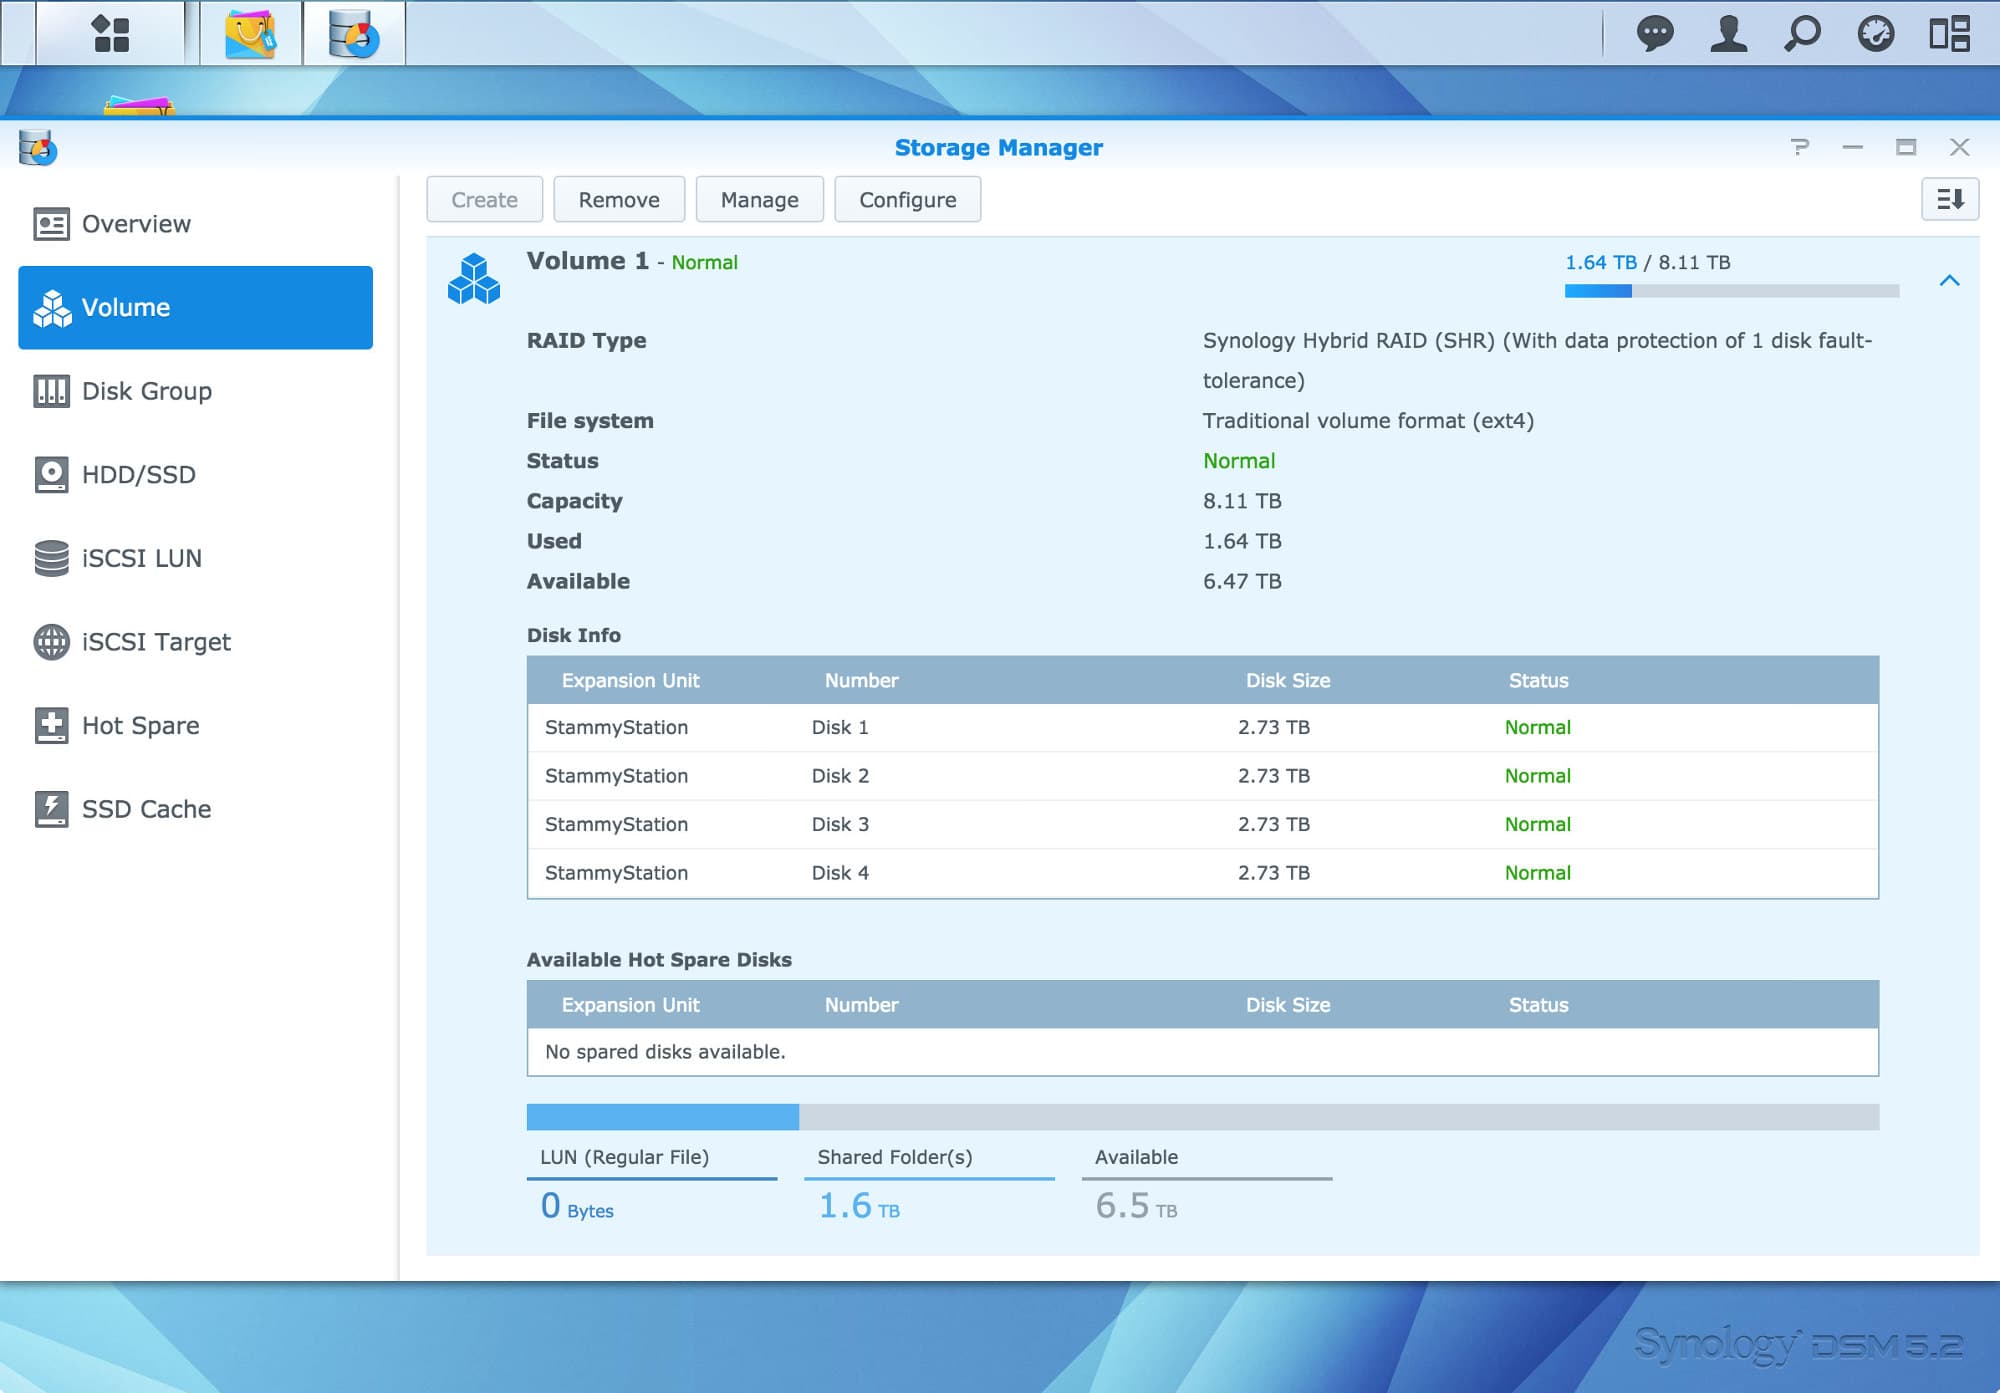
You can check up on the status of your RAID array in the dedicated Storage Manager app. There is even an option to have the DiskStation email you (you can OAuth into your GMail account) for everything from security issues and disk array health to reboot notices for upcoming automatic software updates. You can even enable two-factor authentication for access to your Synology.
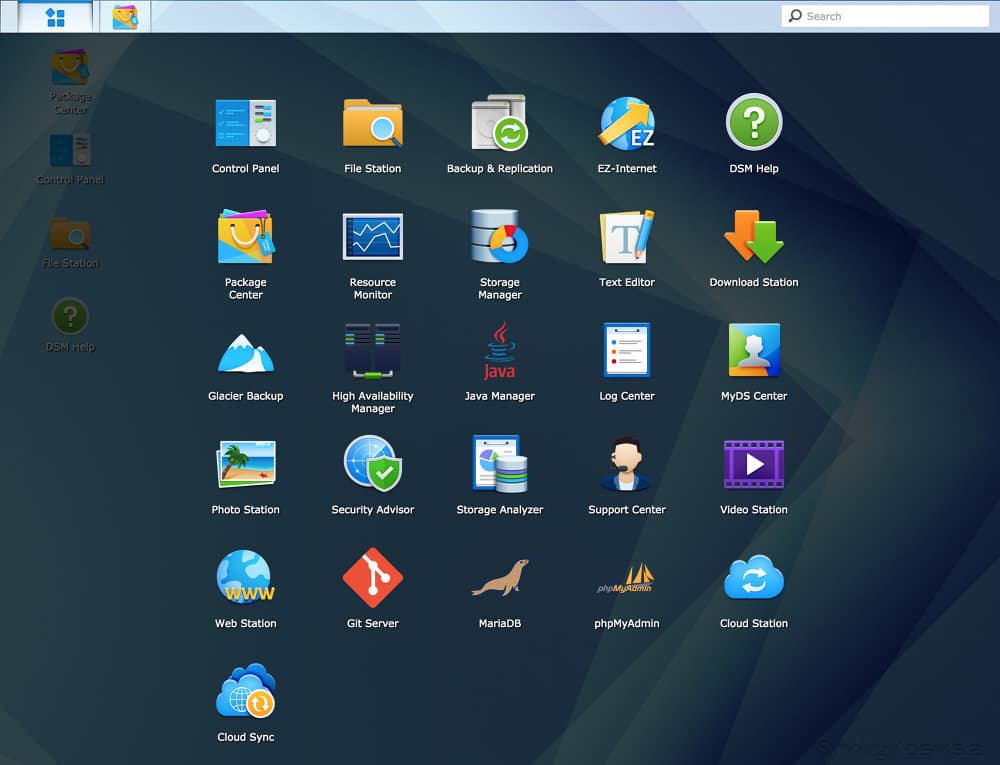
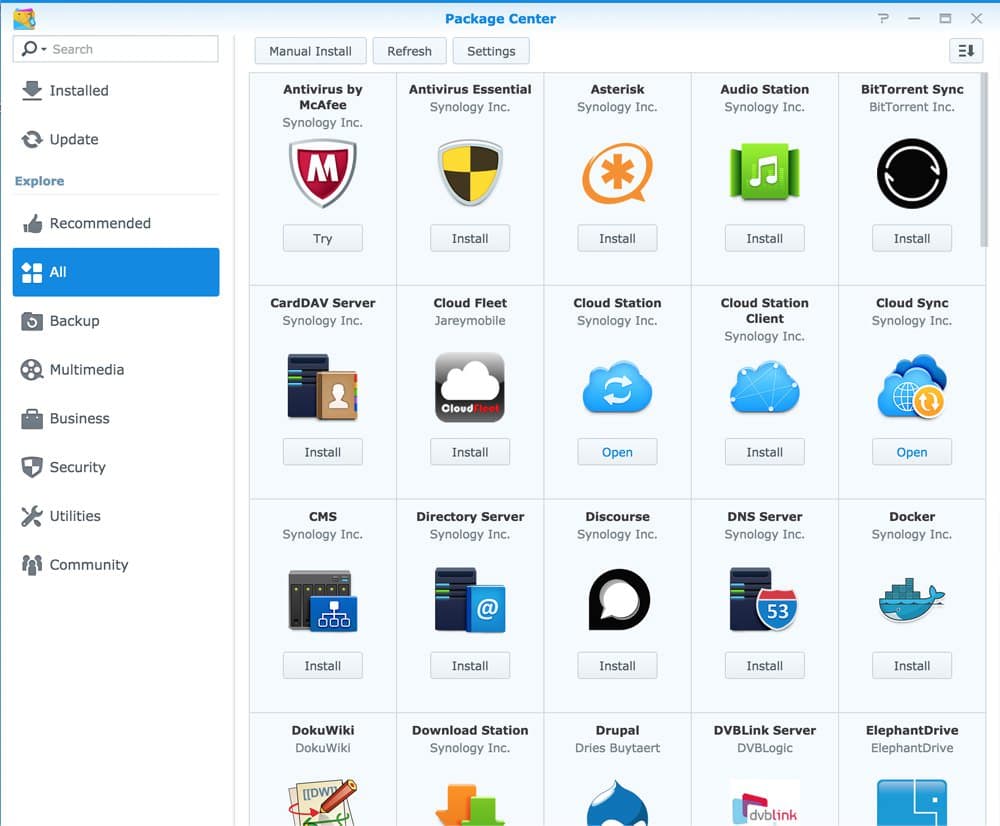
There are a quite a few official DiskStation applications: Download Station, Photo Station, Video Station, Audio Station, Cloud Station, iTunes Server, VPN Server, Note Station and a bunch of other Synology and supported third-party services. There's also a Media Server to serve your content to DLNA/UPnP-compliant devices.
Assuming you have a decent Internet connection, you can use the VPN server to encrypt your web traffic when at a coffee shop or other such untrusted wireless networks without having to pay for another server or VPN service.
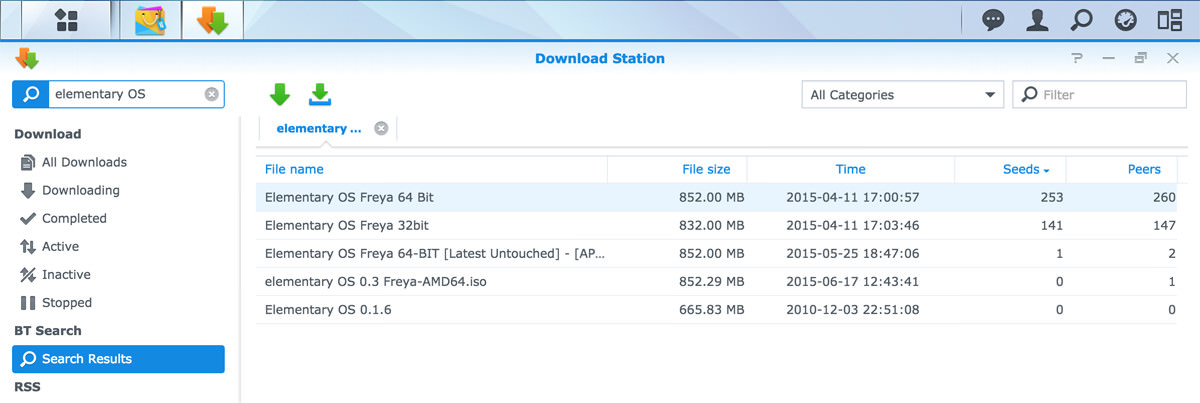
With Download Station you can use the DSM website or mobile app to manage regular HTTP/FTP downloads or search for a files to download on BitTorrent or Usenet. There's also a popular Chrome extension for Download Station that lets you initiate downloads on your NAS inside Chrome. Very handy for making your NAS your default download destination.
There's a handy app called Cloud Sync (discussed later) helps you sync to or from a public cloud service like Google Drive, Dropbox, Baidu, OneDrive, Box, hubiC, Amazon Cloud Drive, S3, Yandex or just WebDAV. Or if rolling your own is more your flavor, you can install the BitTorrent Sync client in the Package Center.
The Synology Backup & Replication application lets you setup recurring backup tasks to other services and network volumes with the ability to restore particular versions of files. Similarly, there's Cloud Station which is like a NAS-hosted Dropbox cloud alternative that lets you save up to 32 file revisions for every file in your shared folders — though a fair bit of warning for that; it appears to be unreliable in its current version and tends to dramatically overuse space.
In a nutshell, there is a myriad of backup and file-related software that's ready to use on the Synology. If you built your own Linux NAS, you'd have to spend hours in a terminal writing your own scripts or configuring each backup tool to get them up and running.
And then there are the mobile apps for browsing your files, photos, videos and more. Of course, these will only work on your local network unless you configure your DiskStation to be accessible on the Internet. I have opted not to do that for security reasons, but if you want to the Synology DSM software makes that process easy with QuickConnect.
Of course you don't need to use any of this software if all you want is simple network file access.. you know, like what a NAS is for. If you're on a Mac, the NAS should just appear in Finder like this after you check Enable Mac file service in the DSM Control Panel under File Services.
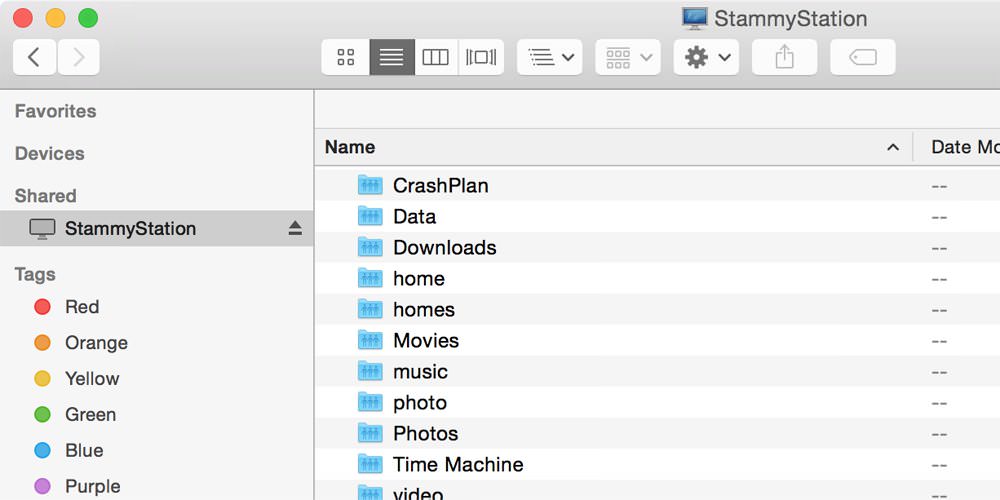
If this doesn't work, you can type in the IP inFinder → Go → Connect to Server.
Set a DHCP reservation
Now that your new DS415+ NAS is pretty much good to go, you will want to set a static local IP so your router doesn't constantly assign a new IP whenever your Synology reboots, as is the case automatic DSM software updates. It gets annoying when you try to access the Synology DSM website and the URL has changed.
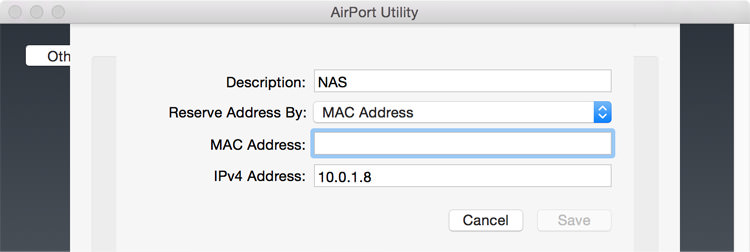
Instructions will vary depending on your router, but you should be able to reserve an IP for your NAS based on its MAC address. The easiest way to find the MAC address of your NAS is by firing up the Synology Assistant desktop app. It will quickly find DS415+ on your network and list out the MAC address of the NIC you are using (of the two it has).
If you have an Apple Airport Express or Extreme, you can set this up by finding your router in the Airport Utility app, clicking Edit, then going to the Network tab and clicking + under the DHCP Reservations section. Then just type in the MAC address and preferred IP.
PhotoStation
While I'm on the subject of all this included software, I thought I would go a bit deeper into the Synology photo offering, PhotoStation. It's a very capable offering but I only use it for my mobile phone photos.
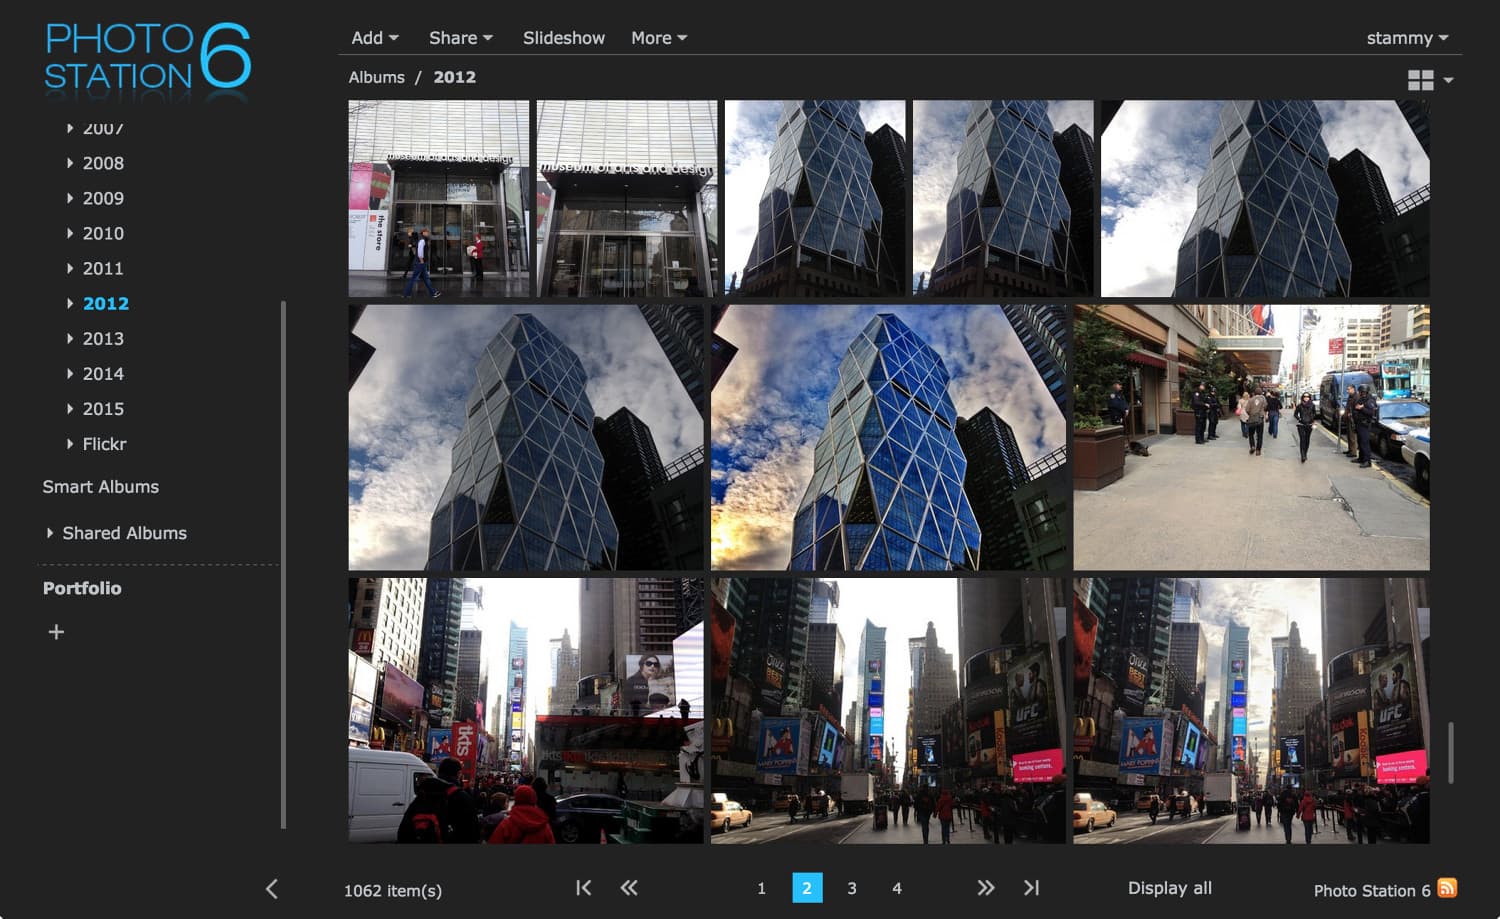
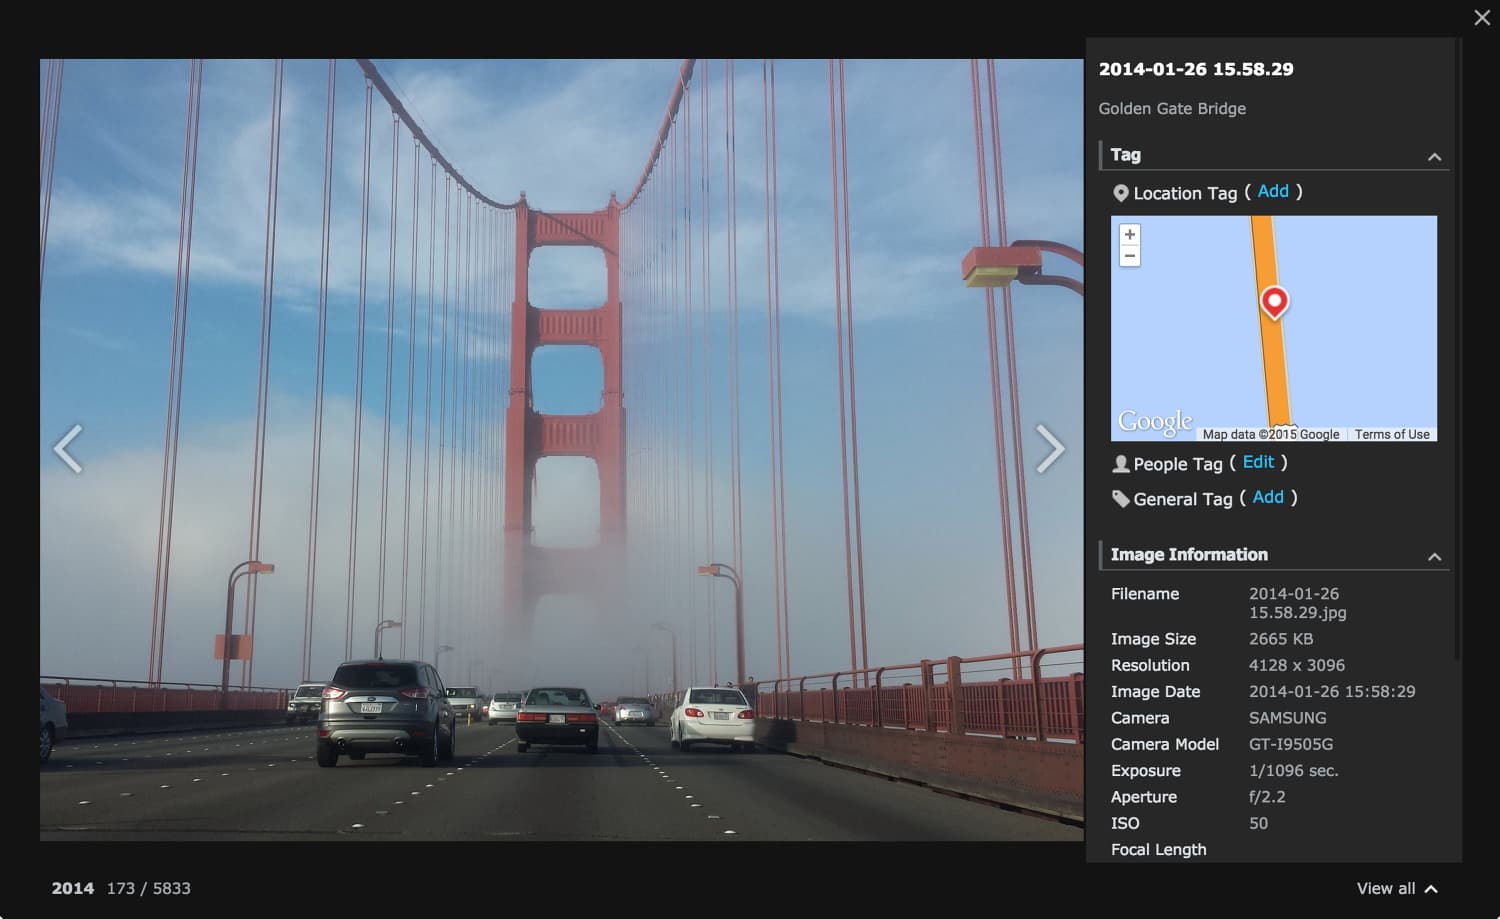
Ever since my first iPhone in 2007, I've been keeping every mobile phone photo and video I've taken. Previously these were just stored on Amazon S3 as I didn't have a need to view them often. I also don't find these older mobile photos important enough — even going back just a few years photo quality is pretty bad and blurry — to mix them in with my Lightroom or Google Photos usage. So PhotoStation seems like a good silo for these older mobile phone photos.
PhotoStation is so tightly integrated with the DSM software that all you have to do is transfer folders of photos to the aptly-named "photo" folder. The DS415+ will then automatically begin processing the photos and videos, creating thumbnails and transcoding as necessary so you can easily view them on its local website or the Synology DS photo app.
I dragged about 60GB of mobile media to the photo folder. The NAS slowly processed the photos, transcoded the videos and gave me a handy way to see the progress. The processed thumbnails are stored in another directory so they don't clutter up the photo folder.
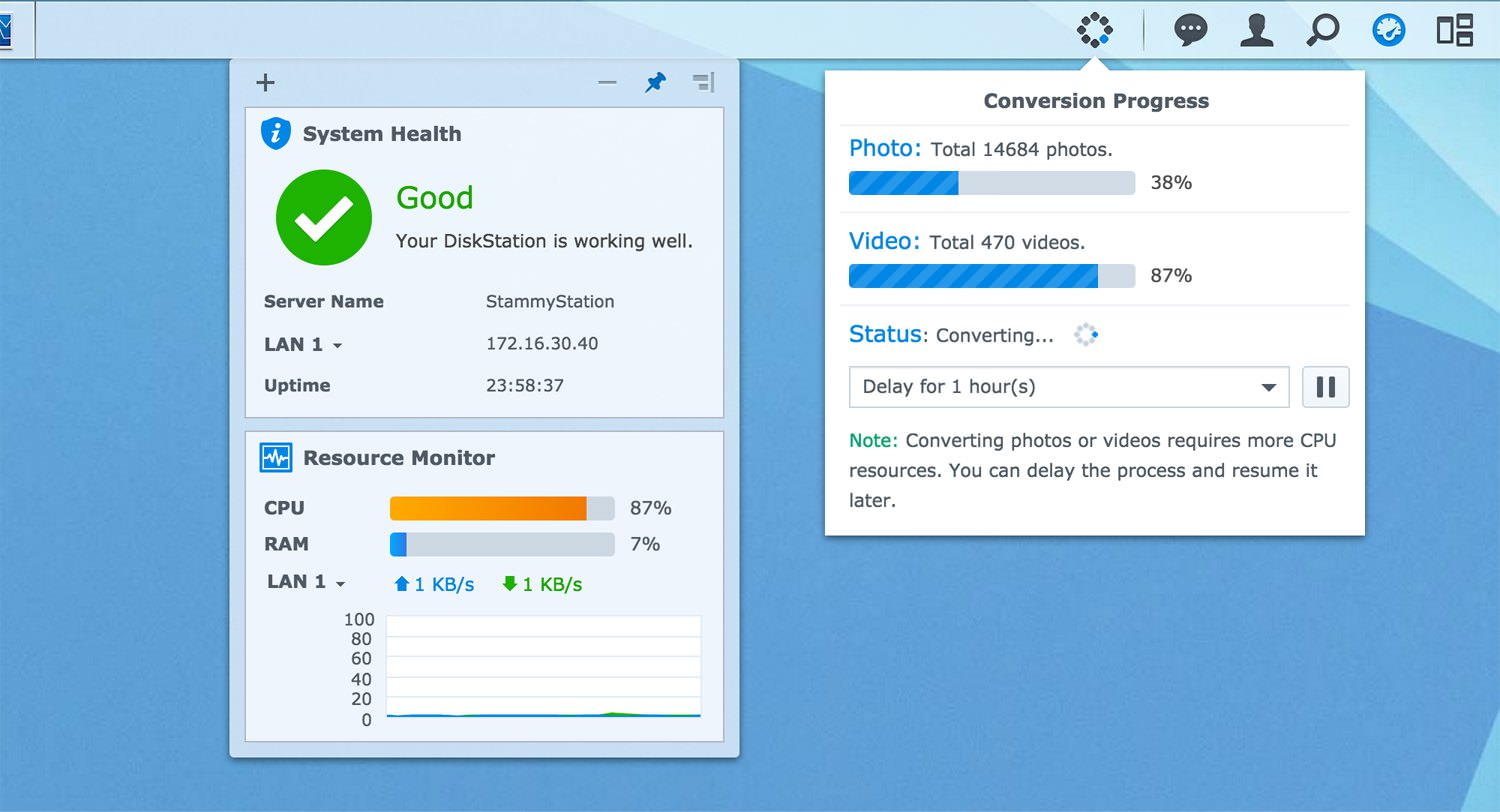
It takes a while to convert all this media to be easily consumable
PhotoStation can also work with RAW files, but I opted not to store my DSLR/mirrorless camera photos here. I didn't want to have the NAS spending forever processing all of my RAWs when I would never browse them inside the PhotoStation site and would only browse in Lightroom.
After the photos were processed I took a look at the DS photo app:
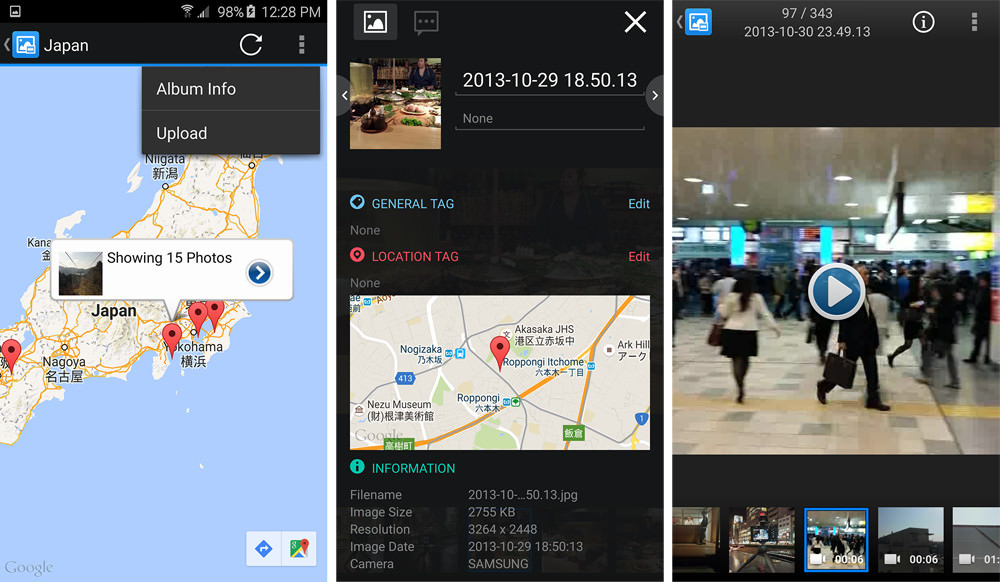
PhotoStation is not pretty but gets the job done for photos I rarely need to browse. If you use the mobile app, it can automatically upload your mobile phone media to the Synology as you take them — like Google Photos, but without all the cool features. I will discuss how my I manage my RAW photos with the NAS and Lightroom later in this article.
Transferring your files
Okay, now that we've done a little tour of the software, it's time to get to the meat of the setup: moving all my photos and videos over to the Synology. It would take quite a bit longer to complete your transfers over Wi-Fi, even if you're on the latest and greatest 802.11ac hardware, so this massive initial transfer should be done over Ethernet.
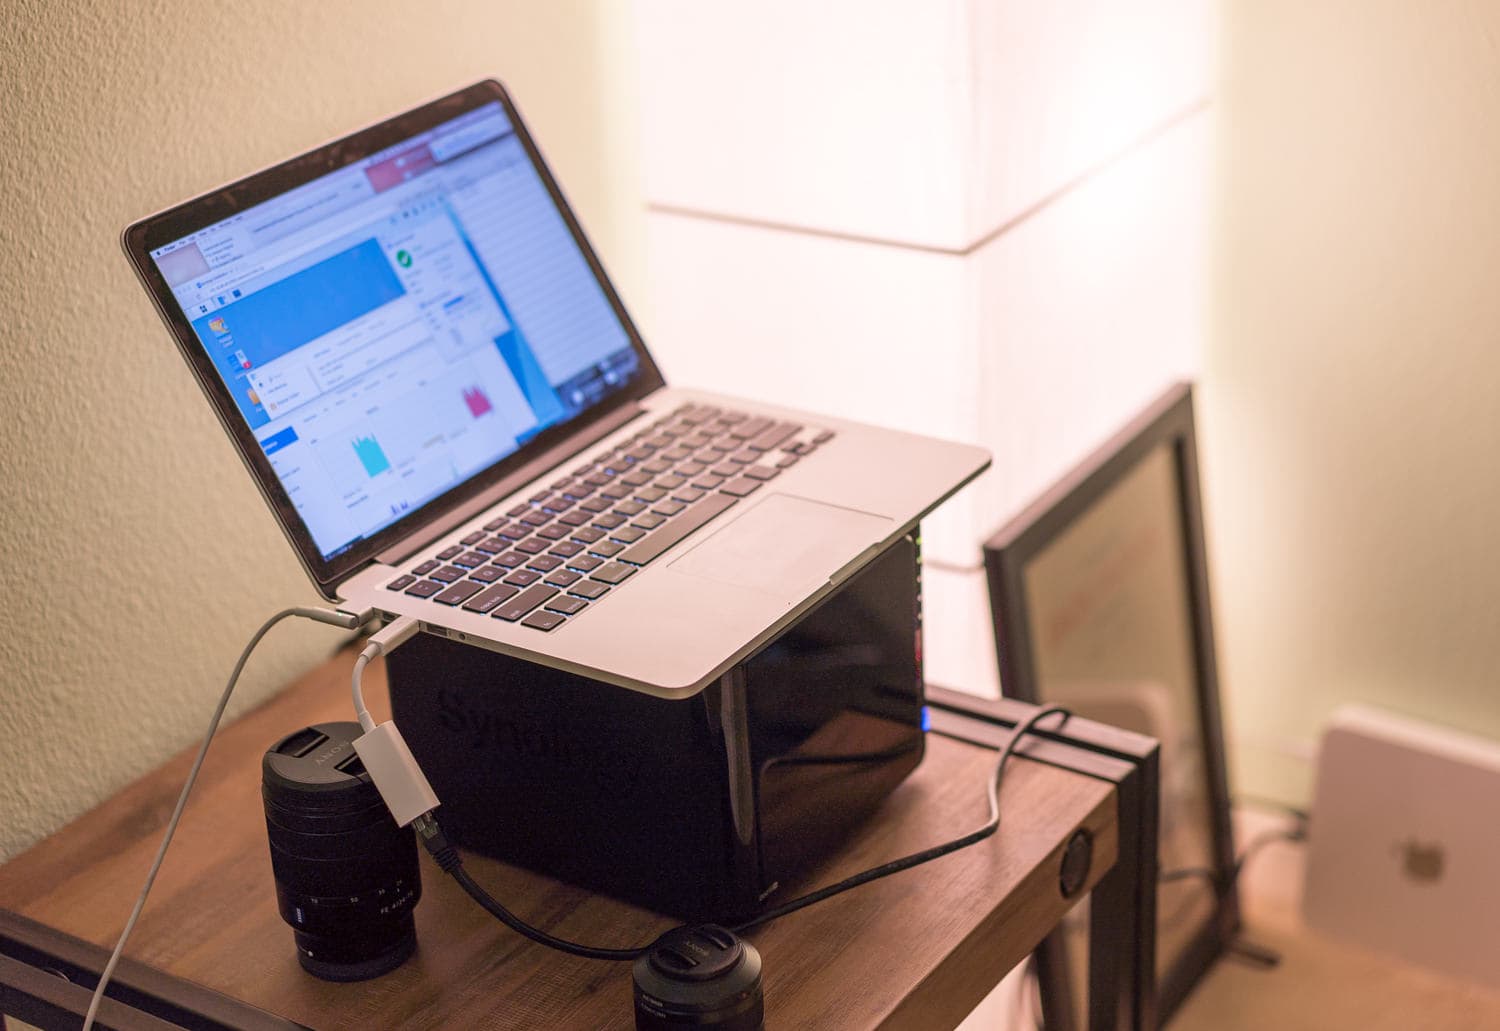
You should have Cat 6 gigabit Ethernet cables, a Gigabit-capable router and a computer with a Gigabit NIC. When I got the DS415+, my 13" Retina MacBook Pro was my main computer so I purchased the Thunderbolt to Gigabit Ethernet adapter.
Downloading the files from Glacier
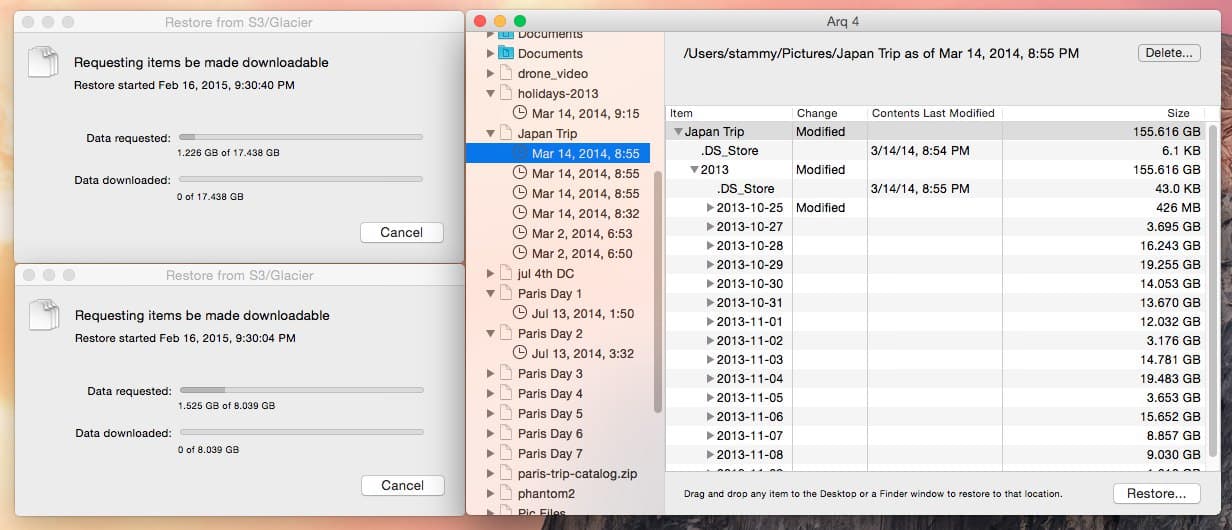
The majority of my videos and RAW photos were stored on Amazon Glacier via the Arq Mac app, so I had to start there and begin the slow and expensive process of downloading my files. Since Glacier gets more expensive the faster you need the files and with the number of simultaneous transfers you have, it took about a week to get all of my files. And that was still with me rushing the processing and setting aggressive speeds.
I had also encrypted my data on Glacier so I could only download them through Arq instead of setting up a script on the NAS to download them. My Amazon AWS bill that month was close to $400. Keep that in mind if you have a ton of data on Glacier and you want to put on your NAS quickly.
The actual transfers
Now that I had all of my files — well some of them, they consumed all the remaining space on my 1TB SSD so I had to download, transfer, delete and repeat to make room for new downloads — it was time to drag them over. It's really just that simple. When the DS415+ is on your network, it appears in the OS X Finder and shared folders can be mounted.
As I mentioned earlier, I decided to store all photos and videos from my mobile phones separately from all media taken from my GoPro and mirrorless cameras. So all mobile pics go to the default photo folder for use by PhotoStation and I created a new shared folder called Photos to organize my videos and RAW photos for use by Lightroom.
To create that new shared folder first you can visit Control Panel → File Sharing → Shared Folder and click Create. You just need to give it a name, but there are additional options like if you want to encrypt the folder. I opted not to encrypt this particular folder since it's just a bunch of photos I put online anyways and I also did not want to impact performance while accessing and editing these photos.
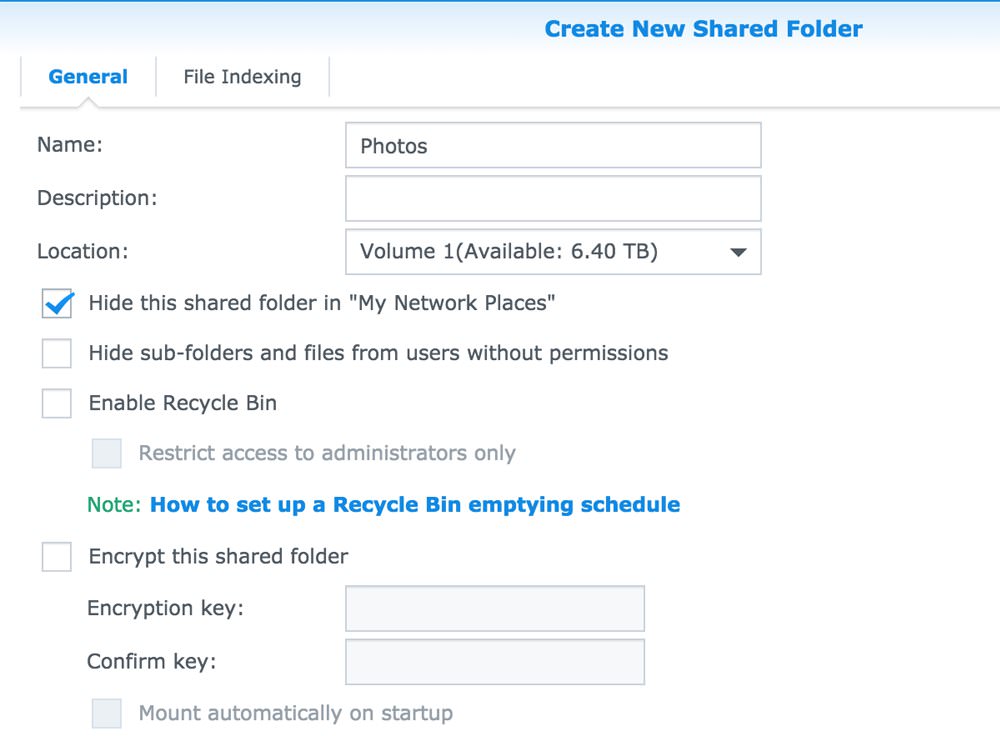
On the next screen I set the permissions for the folder so that only my user account had Read/Write privileges and every other account including guest had No access selected.
The new shared folder will appear in the Finder and you can just drag files and folders over. I recreated the simple year-based folder structure I've been using for all my Lightroom media:
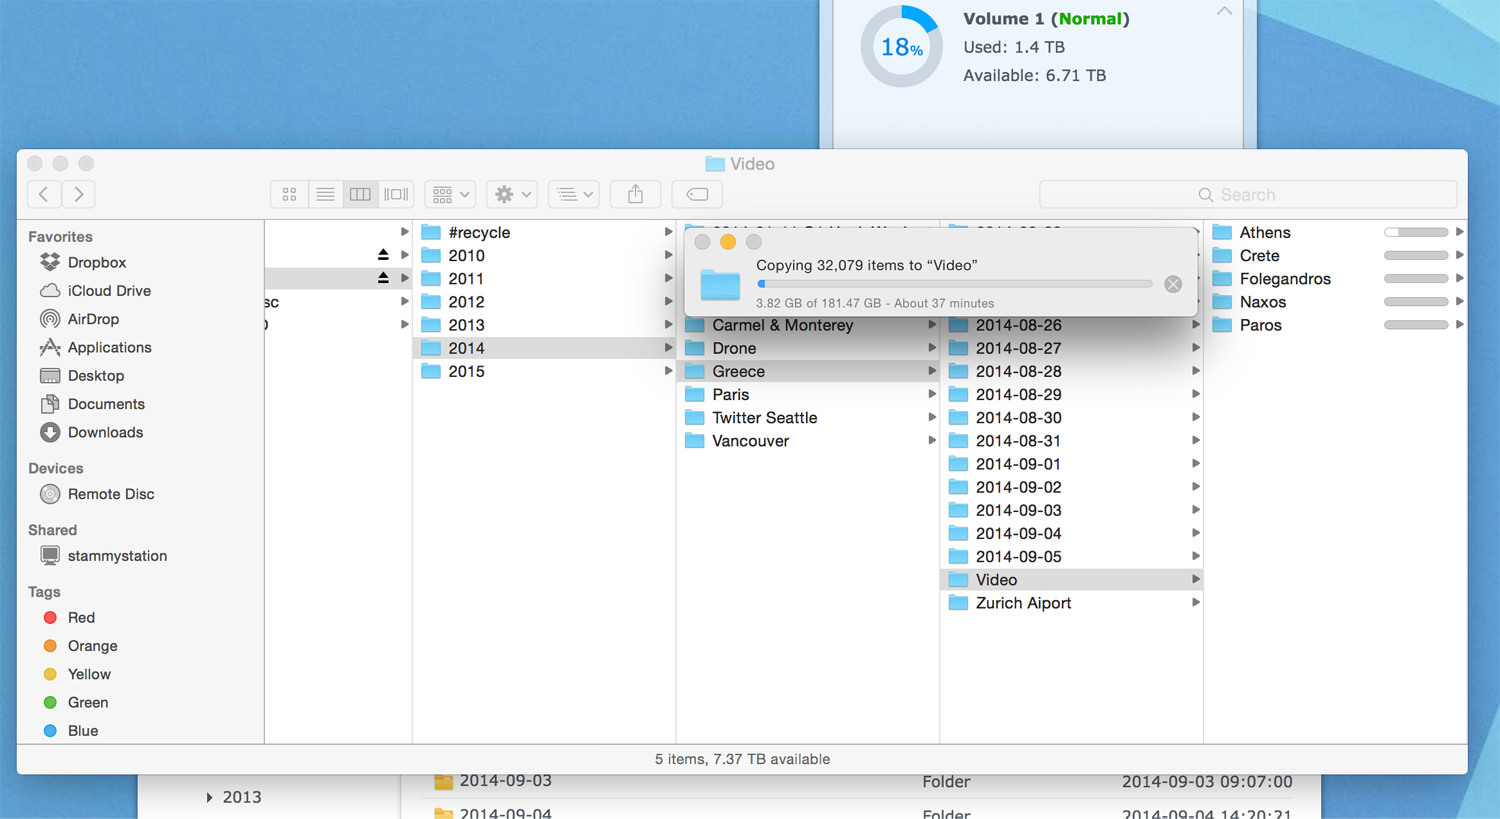
Under an hour to transfer 181GB spread out over 32,000+ files (lots of timelapse stills).. not bad!
Over a gigabit Ethernet connection and with my WD Red edition hard drives, I was seeing consistent 110MB read and write speeds which is fairly close to the 123MB/s theoretical throughput of gigabit Ethernet, factoring in TCP/etc overhead. However, you only attain those sustained speeds when transferring large files. If you're transferring a bunch of small files, like say a GoPro timelapse with 10,000 photos, it will take a bit longer.
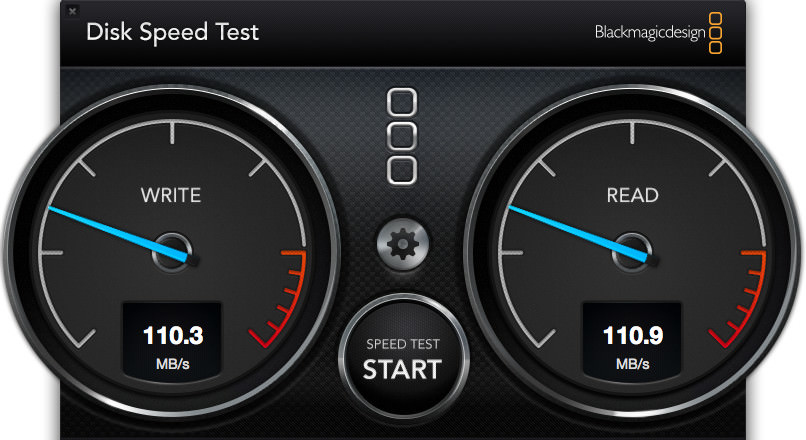
Over Wi-Fi, that number seemed to hover around the 18-24MB/s range for both reads and writes. Wait a second — that seems slow for my 802.11ac iMac and Apple AirPort Extreme, which supports up a theoretical max of 1.3Gbps.
After Option-Clicking on the Wi-Fi icon in the OS X menu bar I noticed I was connected to my router with a Tx Rate of just 176Mbps via 802.11n. I assumed this was because I have tons of other 802.11n devices on the network — TV, tablets, phones, et cetera. I opened up the AirPort Utility to move all of these devices to a separate guest network and leave the primary network just for my iMac.
Surprisingly, this just worked™ and I was now cruising on 802.11ac with a Tx Rate of 1300Mbps. For me that meant sustained transfer rates to and from the DS415+ over Wi-Fi of 60-80MB/s. That's so much faster than what I was getting! However, even though I'm just 10 feet away from my router, sometimes the Tx Rate will dip to 878Mbps. Definitely fast enough to work with photos stored on the NAS in Lightroom and not be in a world of hurt.
Of course, you'll still want to do the initial transfer over Ethernet. It took me about 3 hours combined to transfer 1TB of photos, videos and miscellaneous data.
Working with Lightroom
How the NAS fits into my workflow.
Now for the real reason I went down this network attached storage path in the first place: establishing a workflow for storing and using my archived RAW photos.
I mentioned in Traveling and Photography (Part 1) that whenever I'm traveling I always keep two copies of my photos. I carry about lots of SD memory cards and don't delete them, even after I import photos onto my laptop every day of the trip. Then when I get home I process the photos for a photoset — which often takes many weekends of spare time to cull and adjust.
It's only when that is complete that I finally I archive all the RAWs by moving them off of my computer. That used to be cloud storage but now the NAS is the first destination. Sound simple? It is. But how does this work with the Lightroom catalog and what happens to all the edit metadata? This is what happens if you try to open a LR catalog on the network.
Don't put the catalog on the NAS
My original thought was that I would export every set of photos as I was done with them by exporting a Lightroom catalog with it to the NAS (via the "Export this Folder as a Catalog..." option). That way I could have a lightweight Lightroom catalog only filled with items I was currently working on. I quickly learned this will not work: for your safety, Lightroom will not let you open a catalog hosted on a network volume. Not to mention it would be annoying to constantly switch catalogs whenever I wanted to access different sets.
The Lightroom catalog is based on a SQLite database which lacks the ability to lock the database while in use. As such, this could easily lead to corruption if stored on a network drive where it could be accessed at the same time by multiple instances of Lightroom. Adobe decided to protect the user from possible catalog corruption like this.
However, if you're up for a challenge you could trick Lightroom into thinking the Synology DS415+ is not a network volume by mounting it as an iSCSI LUN target. But that requires an expensive (and from what I hear buggy) iSCSI initiator application and more configuration.. a task left up to the reader.
Okay, that's just a long way of saying that I'm going to do the easy thing and just have one large Lightroom catalog locally on my Mac and store the RAWs and videos on the NAS.
Adobe Lightroom knows how to work with network storage volumes. You can import from them, keep photos on them and it shows up as a normal drive. And it doesn't freak out if you're not connected to the NAS; it just shows it as offline.
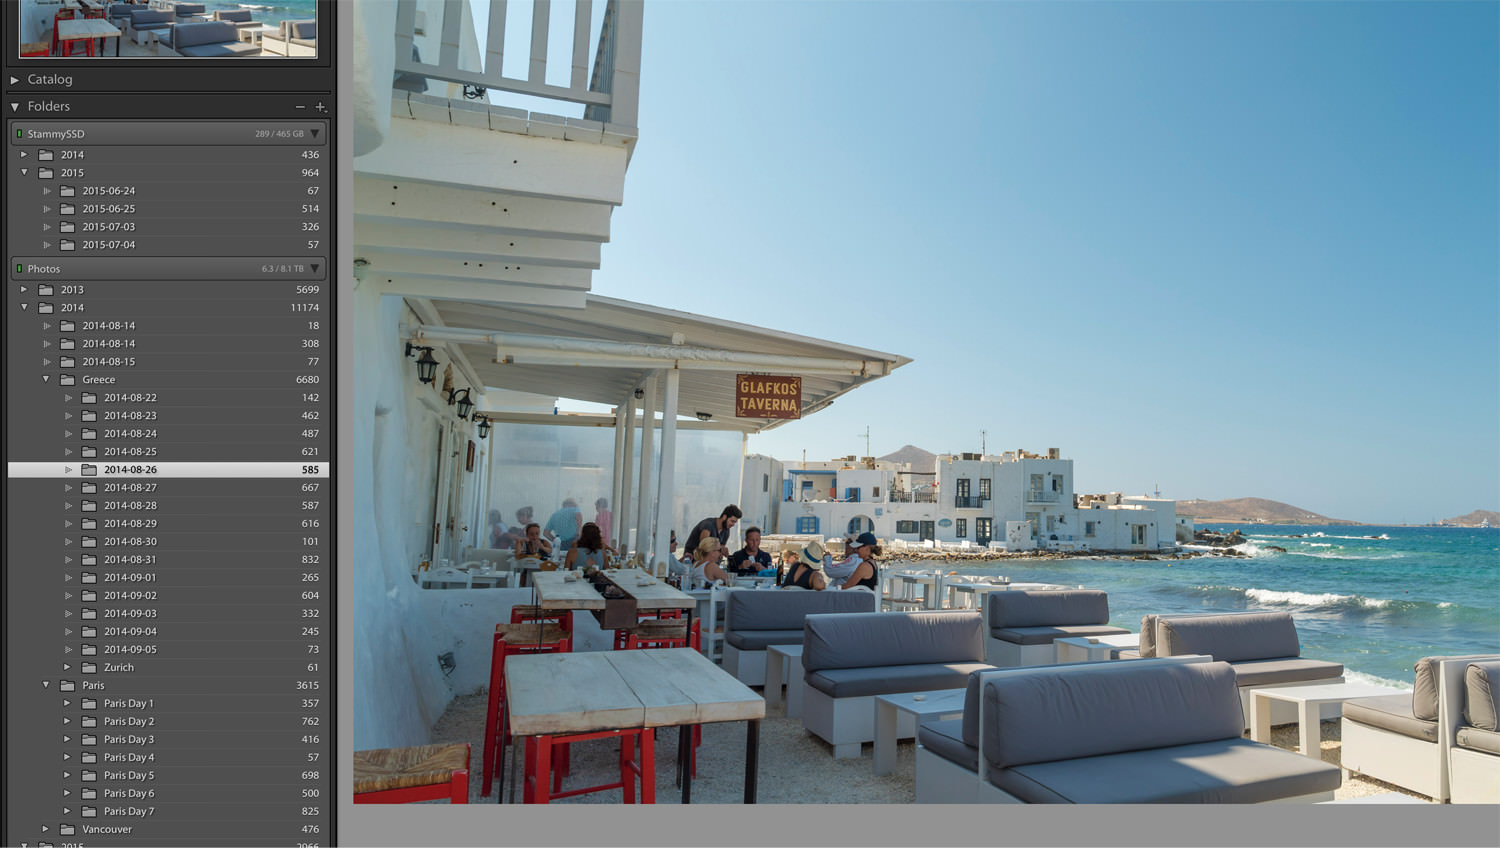
Notice the two volumes (local and NAS) listed on the left pane.
Moving your RAWs
There are a few ways to move your files over to the NAS. If the photos have not been imported into Lightroom already, you can just go ahead and import them: select the NAS as the volume and make sure to select Add instead of Move in the top options. That way they will remain on the NAS. If the NAS is not showing up, make sure it's connected in Finder and you have already connected to the shared folder where you are storing these photos.
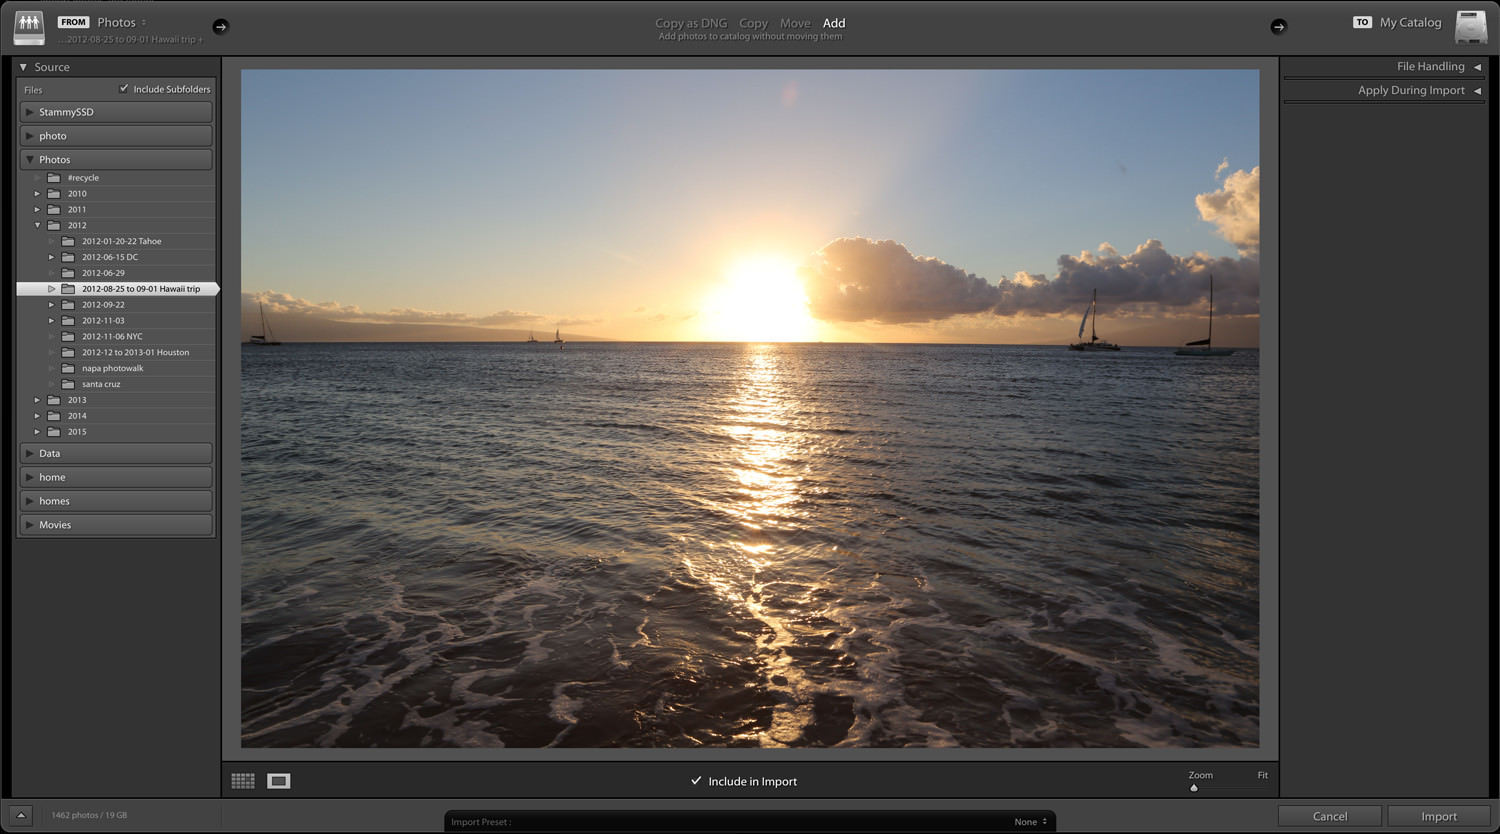
If this is your first set of photos imported from the NAS, you will now see the volume listed permanently when in the Library mode. At first it may only display the name of the subfolder, but you can right-click to specify it show the parent as well: the year folder in this case.
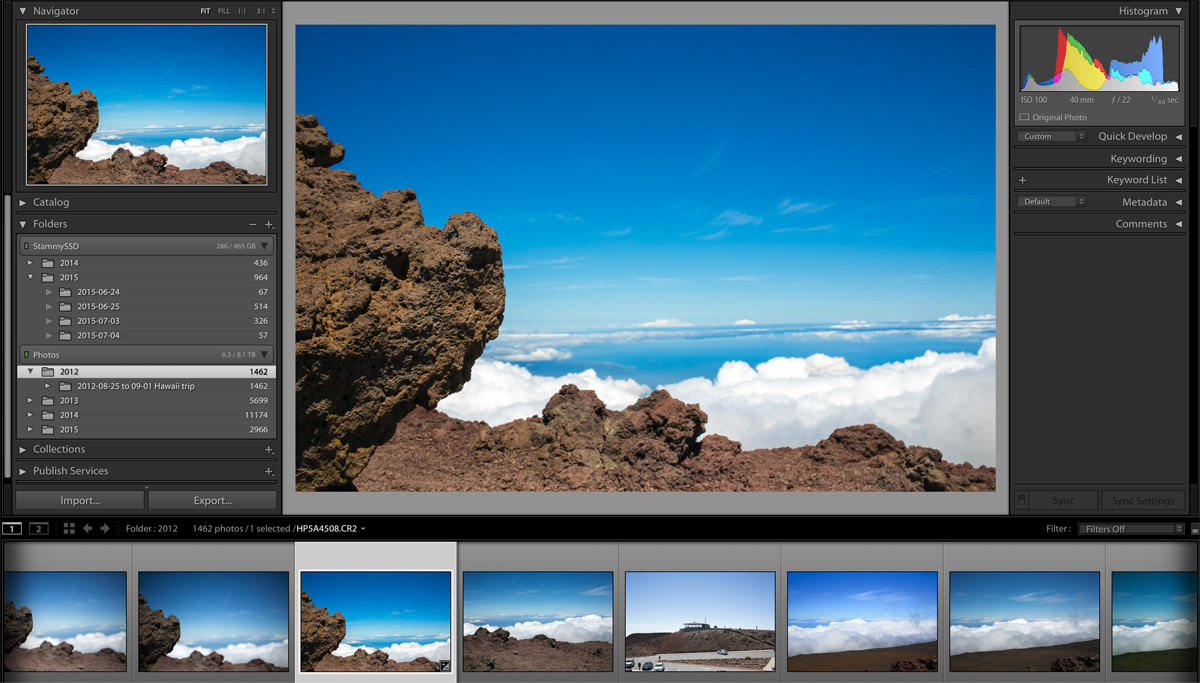
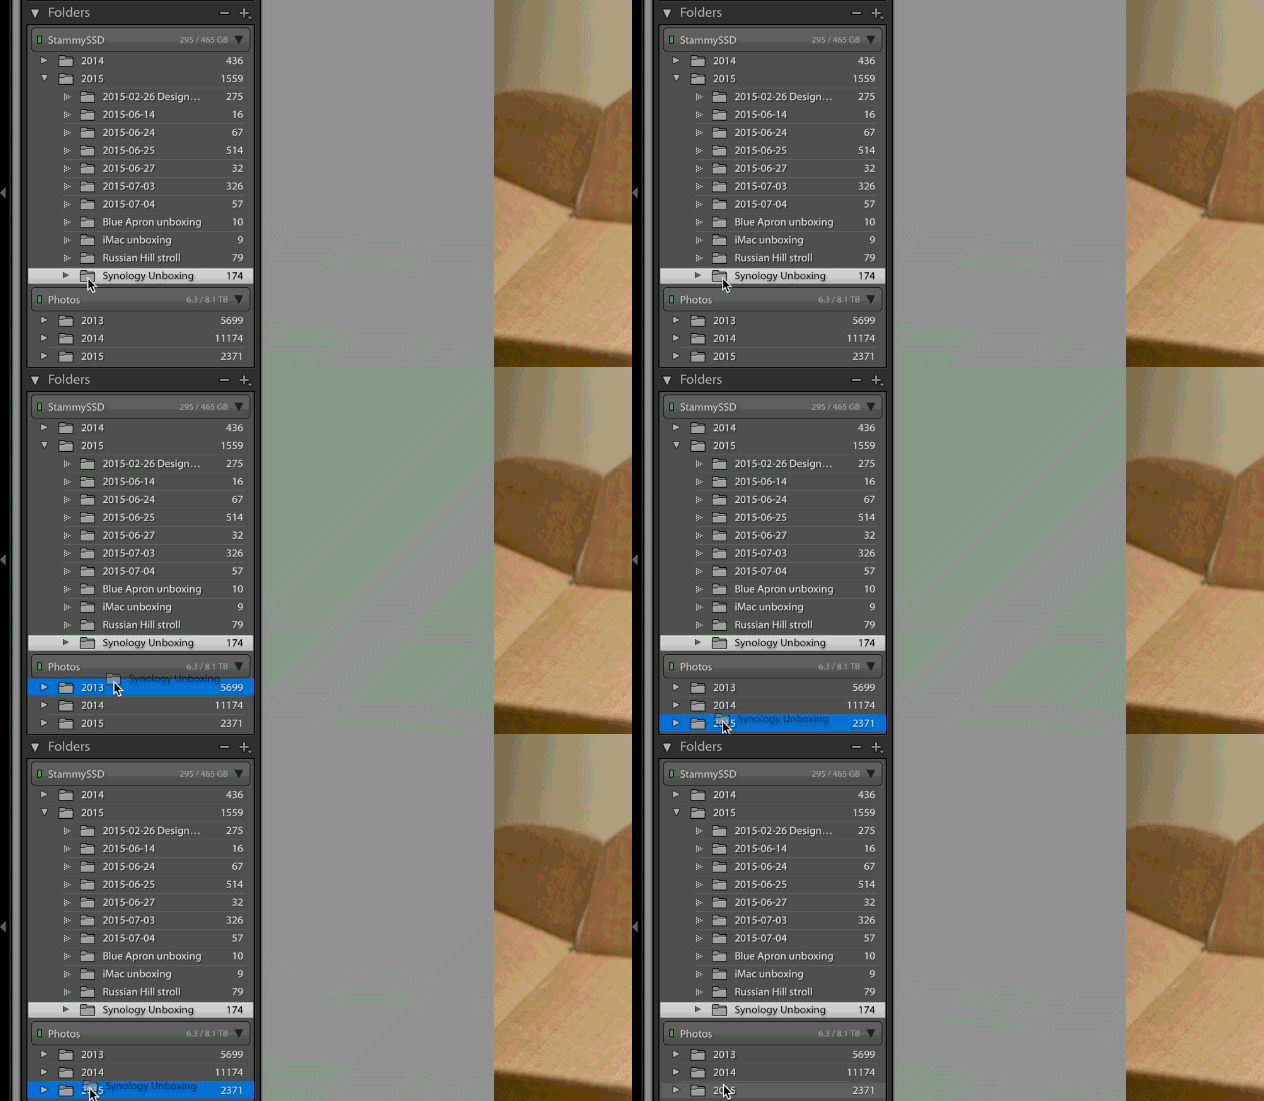
Now that the NAS appears in Lightroom, you can easily move folders from the local drive to your Synology by just dragging! Super simple. This is now my core workflow: finish working on some photos and drag them to the NAS to free up some space.
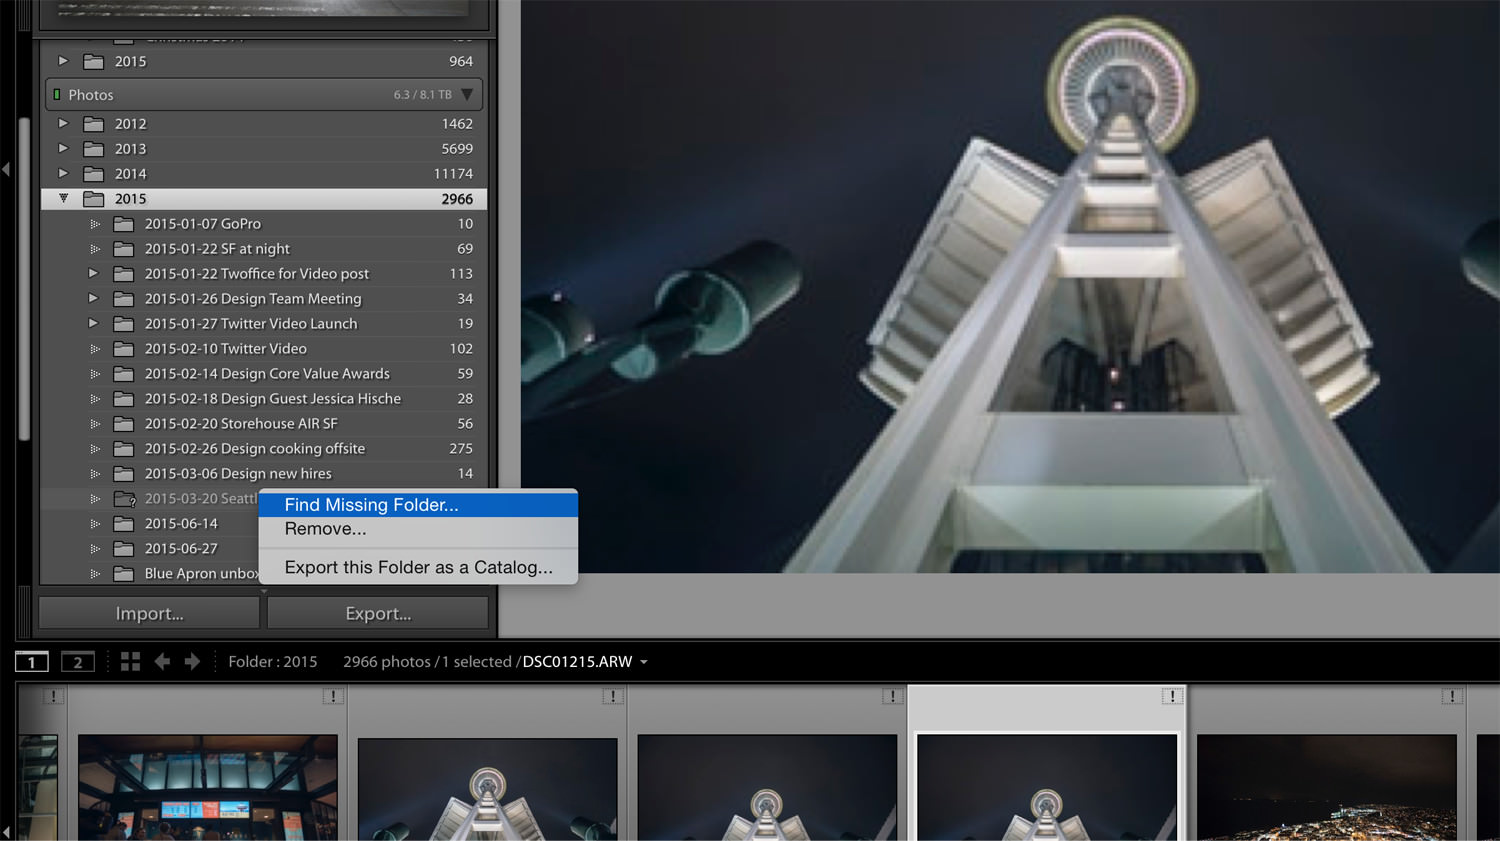
Of course, if just moving files over in the Finder is more your style, you can do that as well. If the photos already existed in Lightroom, the next time you open Lightroom it will not know where the files are, as indicated by a missing folder icon in addition to an exclamation icon on each photo.
You can easily fix this by right-clicking on the folder in the left pane while in Library mode and selecting Find Missing Folder.... A Finder dialog will pop up for you to specify the new folder on the NAS where the photos can be found.
With most of your photos now on the NAS, go to File → Optimize Catalog... for a bit of catalog housekeeping.
Performance, previews & working offline
Earlier I had talked about real-world network performance when transferring files to and from the NAS over Wi-Fi as well as Ethernet. I said I get about 60-80MB/s reads and writes when connected with 802.11ac. While I used Ethernet for the initial transfers, I would be more than annoyed if I had to use it more often than that and have another cable hanging around in my workspace.
So is this setup fast enough to use Lightroom comfortably? Yes.
First off — the vast majority of my photo editing is done with files on my local drive. I browse archived photos on the NAS occasionally from time to time, for example if I wanted to try out some new process tweaks on a particular photo or more frequently look up photos I took of family or friends that they ask for months later.
However, I only ever see network throughput spike to ~15MB/s when I click on a photo for Lightroom to load.
That goes to show that Lightroom is not I/O bound; if it was there would be a huge perceived difference compared to working with RAWs on my 700MB/s+ SSD.
Another important thing to note is that Lightroom relies much more heavily on CPU, GPU (in Lightroom CC) and RAM than disk I/O. As long as the catalog, cache and previews are stored on the local drive with originals remotely, it should only feel a tad slower.
We can use a few Lightroom features to our advantage to make it faster: increased cache, 1:1 and Smart Previews.
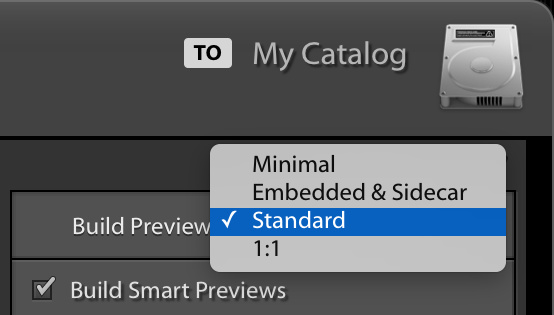
You may be familiar with these preview settings on import.
Library vs Develop mode
Lightroom works in different ways depending on whether you're in Library mode or Develop mode. When you import photos, Lightroom will make some minimal or standard sized previews that are used in the Library mode; low-resolution versions of your RAWs for quick access for things like displaying in grids and viewing scaled. However, when you zoom in on a photo, or if you have a high-resolution screen, that will exceed the default Standard Preview Size of 1440px-wide and Lightroom will have to work on-the-fly to access the original file and generate a larger preview.
My typical Lightroom culling process in Library mode involves lots of zooming to 100% to look at certain parts of the photograph to see if they're in focus and sharp. As such, I prefer building 1:1 previews when I import photos. This generates full-resolution previews from the original RAW photo via the Adobe Camera Raw engine. This makes browsing and zooming feel near instant at the expense of an initial long generation time and larger preview cache in your catalog folder. Since your catalog folder is still stored locally, this will also make browsing your NAS-hosted photos in Library mode quick as well.
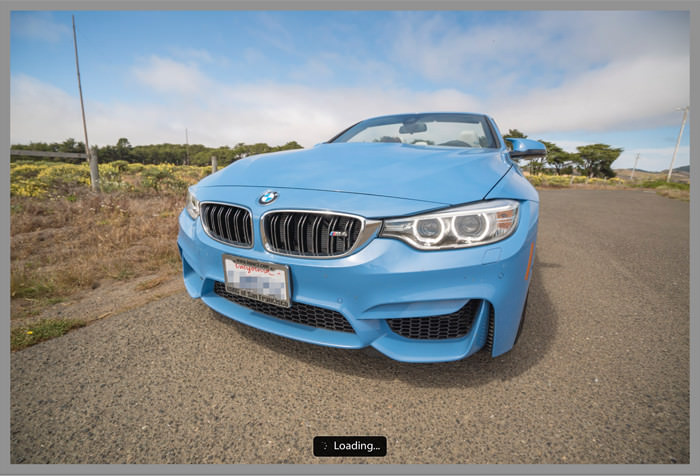
1:1 Previews eliminate that pesky loader while in Library mode. Also, the M4 is a blast.
These previews can also be generated at any time, or with only a small selection of your photos, by going to Library → Previews → Build 1:1 Previews. These previews take up a good amount of space on my local drive so when I move them to the NAS and know I won't be actively using them anytime soon, I discard the previews. Lightroom also has a catalog setting that can automatically discard them after a specified amount of time; I think the default is 30 days.
However, all of that only applies to Library mode.
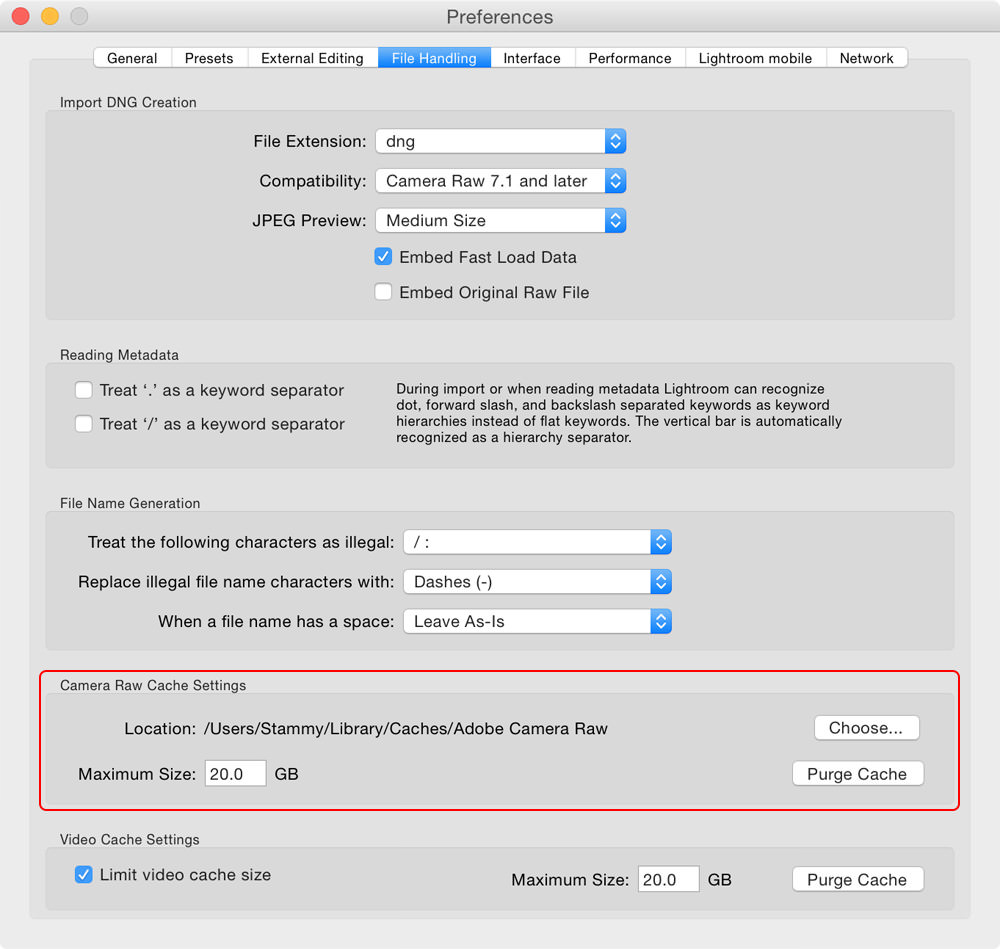
Develop mode on the other hand runs every single adjustment you make through the Adobe Camera Raw engine; there's no way around this, it takes time. Any performance gained by generating 1:1 Previews stays in Library mode and has no effect in Develop mode. However, we can help the performance here by increasing the Camera Raw cache size. For some reason the default is only 1GB! Let's jack that thing up to 20GB in Lightroom → Preferences under the File Handling tab. I also did the same for video since I have always found video playback in Lightroom to be ridiculously slow.
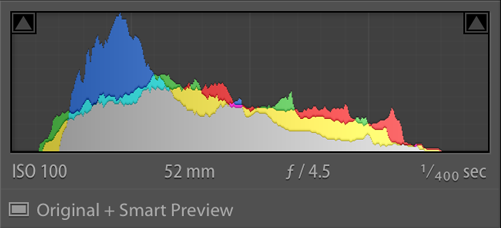
The bottom of the histogram will say if the current photo has a Smart Preview built.
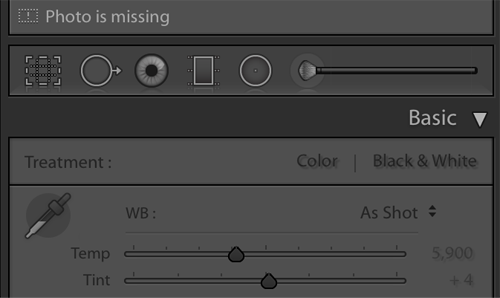
If you don't have Smart Previews, Lightroom disables the Develop controls and says your photo is missing when your NAS is disconnected.
There's one last thing I like working with in Lightroom: Smart Previews. They have the huge benefit of letting you work offline. When your machine is reconnected to your NAS it will sync the changes you made back to original RAW files. Super handy if you want to do some basic editing while away from your NAS without having to take everything with you: you can either check the box to generate Smart Previews on import or go to Library → Previews → Build Smart Previews when in Library mode.
However, Smart Previews are not some kind of performance savior for Develop — the previews themselves are somewhat small at a max width or height of only 2540px, but they are editable, lossy DNGs. You won't be able to do any 100% zooming when offline using only Smart Previews but it's better than not being able to edit at all.
When your NAS is disconnected from Lightroom but you have Smart Previews enabled, the controls will no longer be disabled in Develop mode. Also, the exclamation "your photos are missing" icon is no longer shown and is replaced with a Smart Previews icon. A much better experience overall. I hated when Lightroom always thought my photos where missing when I went offline.
If Smart Previews are not enough and you want the ability to access any of your photos on your NAS from anywhere in the world, you can always make your NAS accessible on the Internet. I don't use this for security reasons but performance here would also be super slow with my Internet connection's upload speed at home. And you would constantly have to tell Lightroom the new location of the photos whenever you connected via LAN or Internet.
Can multiple Macs use the same catalog?
While we can't store the Lightroom catalog on the NAS for each computer to use, we can store a copy of the catalog on each computer and sync them. We'll still have the database locking issue here, so only one computer can use the catalog at a time. When the catalog is local to each computer Lightroom is smart and creates a lock file that will not allow you to access the catalog if it's already in use.
The way this works is that you move your entire Lightroom folder (typically found in Users → [You] → Pictures) to a Dropbox folder — or any file-syncing service, even your own git-annex assistant.
I moved my Lightroom folder to my Dropbox folder. This Lightroom folder contains the Lightroom Settings folder along with Lightroom Catalog.lrcat, Lightroom Catalog Previews.lrdata and Lightroom Catalog Smart Previews.lrdata.
The next time you open Lightroom it will ask you to a select a catalog as it can't find the original one. Select the new location of your catalog by clicking Choose a Different Catalog and browsing for it. Also be sure to check the box for Always load this catalog at startup.
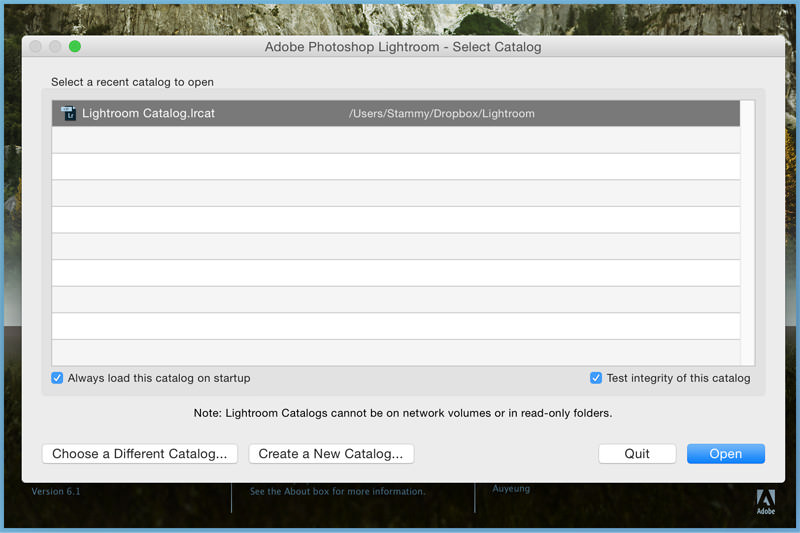
When you want to use Lightroom on another computer, you must entirely exit out of Lightroom and wait for syncing to complete on both computers. You can only ever have one instance of Lightroom open. Since previews are stored in this folder as well, syncing can take a very long time.
What else can you do?
All this storage... the possibilities are endless.
OS X Time Machine backups
While my primary reason for the NAS was for media storage, I have so much extra space I might as well use it as a backup target for Time Machine for my 5k iMac and 13" Retina MacBook Pro. Once setup, this allows you to select the NAS as your primary backup destination.
The process takes a few minutes and involves creating a new shared folder for Time Machine as well as creating a new user with a quota and permissions so that it can only access that one folder and not control anything else. If you don't set a quota Time Machine backups will slowly start taking up all available space instead of only keeping recent backups. I set an arbitrarily large quota of 1.2TB for my Time Machine backups.
I would go through the details of setting this up but Synology has excellent documentation about that. They also the equivalent information for using Windows Backup and Restore with your Synology NAS.
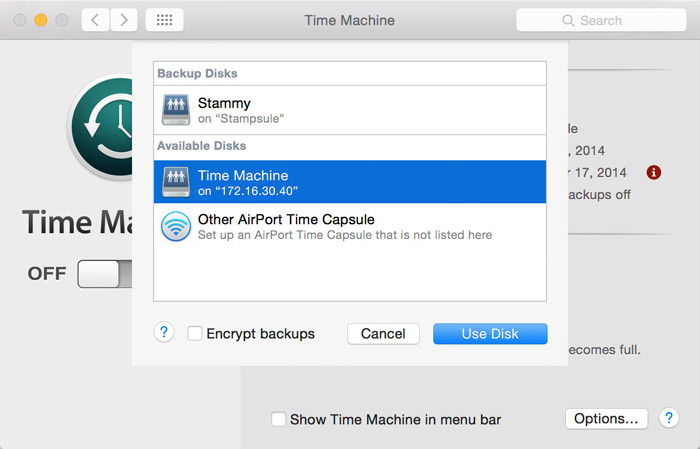
Click on "Other Airport Time Capsule" and then your NAS should appear.
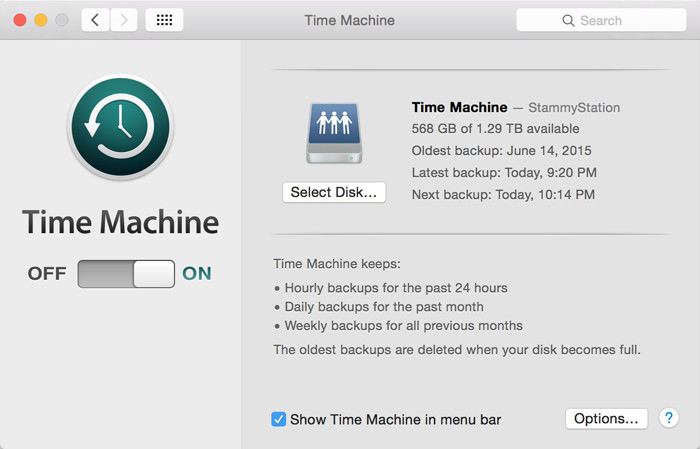
Good to go! Notice it says the correct "TB available" based on the quota I set
Just remember to use the new username and password you created when adding the NAS as your Time Machine destination. If you see that Time Machine says the available storage is much larger than the quota you set, it is logged in with your main NAS user credentials. You may need to open up the Keychain Access utility, search for Time Machine and delete the current credentials it has and login again.
UPDATE: August 22nd, 2017
Crashplan announced they will be exiting the consumer market and shutting down Crashplan for Home as they focus on business offerings instead.
As such, I now suggest using Backblaze B2 with your Synology device. Synology has native support for this via the Cloud Sync app. There is no support via the more ideal Hyper Backup app yet (since sync is not backup).
I setup Backblaze B2 with the Cloud Sync app set to only do a one-way sync ("Upload local changes only") to sort of mimic a real backup.
The best part is that you don't need to keep updating the community-maintained Crashplan app that had a tendency to break with Synology DSM updates.
Installing CrashPlan—Skip this section, see above
Synology includes an arsenal of approved third-party applications in addition to its own in the Package Center. However, there is no official package for my preferred backup service, CrashPlan. CrashPlan offers unlimited online storage for about $5 per month per computer. This makes it closer to Amazon Glacier and Google Nearline in pricing than the much more expensive Amazon S3. But the real treat here is that CrashPlan is actually user friendly and not aimed at developers, so you get some niceties like a solid Mac app and mobile apps to manage your data.
It's also convenient that CrashPlan has Linux support unlike its competitors like BackBlaze. Since the Synology DS415+ runs on an x86 Atom processor (older DiskStations had ARM processors), it's possible to run CrashPlan without much modification. I started down this path and installed CrashPlan manually via SSH.
Then I found a much cleaner and easier solution.
There's a guy that maintains Synology CrashPlan packages so you can simply install it in the Package Center. And it's popular — over 130,000 people are actively using it. Occasionally a DSM update comes out that causes the CrashPlan install to stop working, but this package is usually updated quickly and fixes itself.
Step 1: Open up the Package Center and navigate to Settings → Package Sources and the aforementioned community source: http://packages.pcloadletter.co.uk
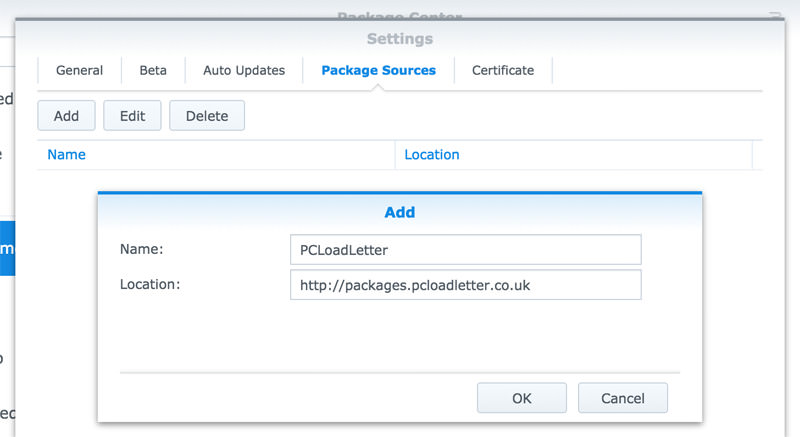
Step 2: While you're in the settings panel, go to the General tab and set the Trust Level to allow installation of packages published by Synology Inc. and trusted publishers. The PCLoadLetter source will automatically publish its own certificate to the NAS and be considered a trusted publisher.
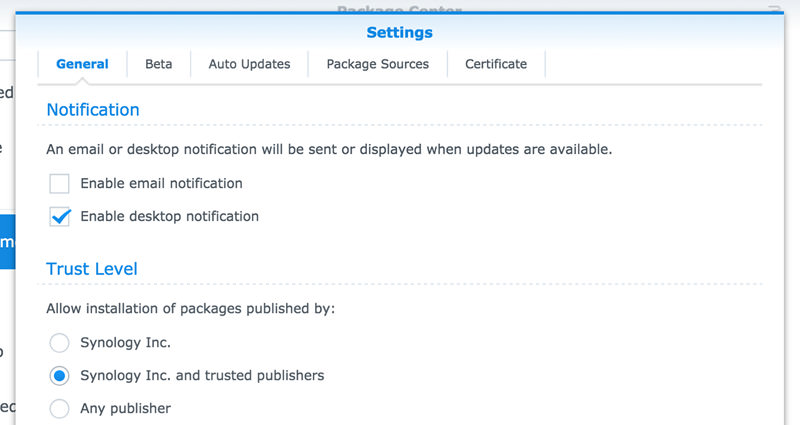
Step 3: Now we have to install Java as it's a dependency for CrashPlan. You can use the official Java package from Synology or you can use an optimized Java package from the same PCLoadLetter source that we just installed. The latter is probably a good idea if you don't have upgraded RAM in your machine, or you have an older Synology device and not the DS415+. I opted to keep it simple and go with the official Java package.
In the Package Center, search for java and install the Java Manager. Open it up once that completes. It doesn't actually install Java automatically — due to strict Oracle licensing, you need to download the installer yourself from Oracle's website and upload it to the NAS. A dialog will appear that tells you exactly what you need: a Java SE 7 version for Linux Intel x86 as a tar.gz (not rpm) file. While Java SE 8 is out, some people have reported issues when installing via this Java Manager.
Click Browse to select your downloaded file and complete the Java installation.
Step 4: Still in the Package Center, search for CrashPlan and install it. A few versions may appear like CrashPlan PRO and PROe. You probably just want regular consumer CrashPlan; it's the green icon.
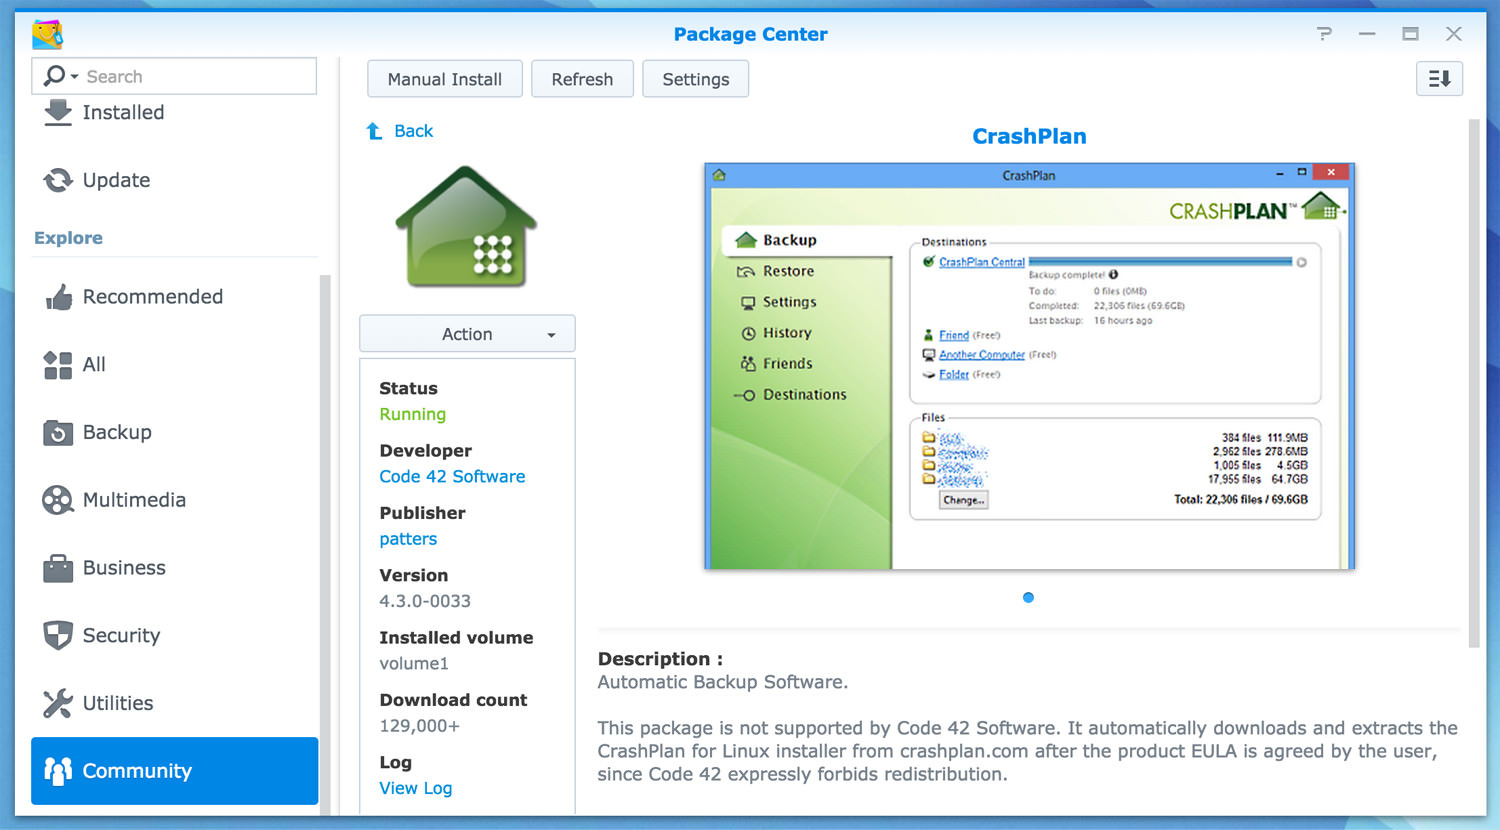
Before you can proceed, you need to wait a few minutes and then click the Action dropdown menu to stop and then run CrashPlan. Sounds odd but required only for the first run as described by the package maintainer:
This is because a config file that is only created on first run needs to be edited by one of my scripts. The engine is then configured to listen on all interfaces on the default port 4243.
Step 5: The CrashPlan client is now running on the DS415+ NAS. However, it's a headless client so there's no lovely GUI for you to log into CrashPlan and manage settings. Unfortunately, the easy part is over and it's going to get a bit hairy. You're going to need to use another CrashPlan client on your computer to remotely connect to it. You will need to modify some config files first.
Install the CrashPlan Mac client if you don't have it already. If you already have it, close it and make sure it's no longer running. Then, open up the terminal and open this ui.properties file in your text editor of choice:
sudo vim /Applications/CrashPlan.app/Contents/Resources/Java/conf/ui.properties
Inside you'll find two commented out lines with serviceHost and servicePort. Remove the #'s from the beginning and replace 127.0.0.1 from the serviceHost line with the IP of your DS415+.
# Before
# serviceHost=127.0.0.1
# servicePort=4243
The IP of your Synology is the same as the URL for the DiskStation website but you can always find the IP by opening up the Synology Assistant Mac app and it will search the network for you. This is another reason why it's a good idea to set a DHCP reservation as mentioned earlier so your LAN IP doesn't change.
# After
serviceHost=10.0.1.8 # Replace with your Synology's local IP
servicePort=4243
Save this file but keep it open in your text editor. You will need to comment those two lines out again after it's all setup.
Step 6: Now we need to find a unique identifier for the CrashPlan client on the Synology and pass it along to the Mac CrashPlan client. It will not connect without it. Before we proceed, we'll need to enable the SSH service on the Synology. Head to Control Panel → Terminal & SNMP, check Enable SSH service and click Apply.
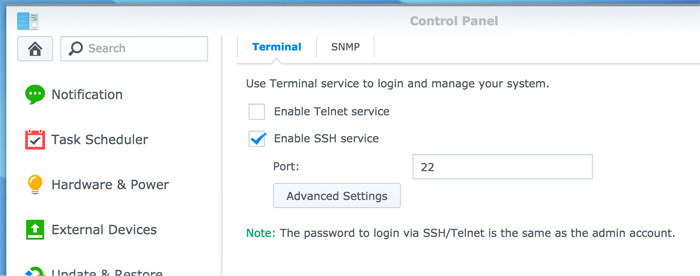
Now open up a terminal on your Mac and connect to your Synology. The password is the same as the one used for your admin account. Once you're SSH'd in, you'll run that single cat line that will tell you the port and unique identifier we need.
[Your Mac ~]$ ssh root@10.0.1.8
root@10.0.1.8's password:

BusyBox v1.16.1 (2015-06-29 18:18:40 CST) built-in shell (ash)
Enter 'help' for a list of built-in commands.

StammyStation> echo `cat /var/lib/crashplan/.ui_info`
4243,d1263e67-c51e-2f02-bfb0-423e8de3099b
Copy the last line (not literally the one above, but the one in your terminal).
Step 6: You can exit out of the SSH session as it's no longer needed. Still inside a terminal window on the Mac, you're going to paste that line into this .ui_info file:
sudo vim /Library/Application\ Support/CrashPlan/.ui_info
There should only be one line in that file: replace it with the line you just copied and save the file.
Step 7: Open up CrashPlan! Log into your account and you're good to go. You will probably need to purchase a new subscription to backup the Synology DS415+.
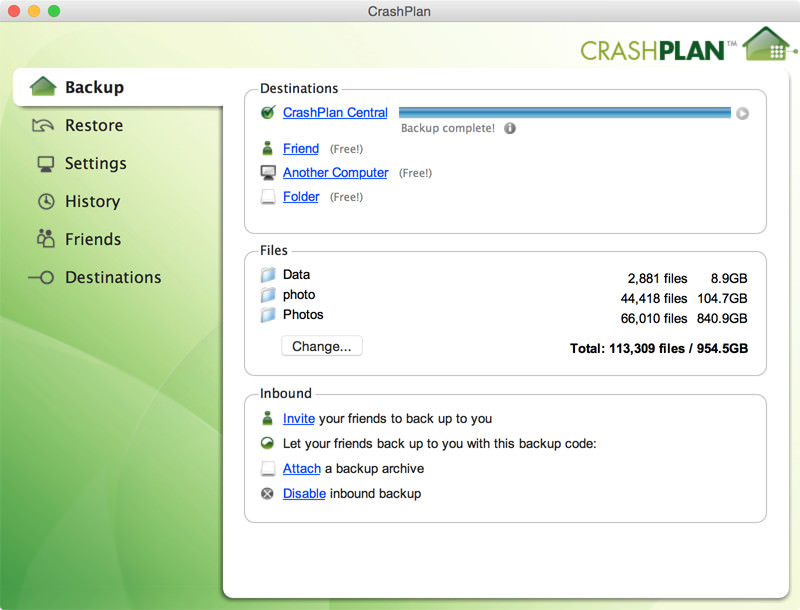
From here you just need to select what you want backed up and set a password or key to use for encryption. I actually recommend against selecting the entire volume. There's lots of unnecessary stuff in there, from the Linux OS itself to temporary files and so on. Just select the folders inside volume1 where you store the big stuff.
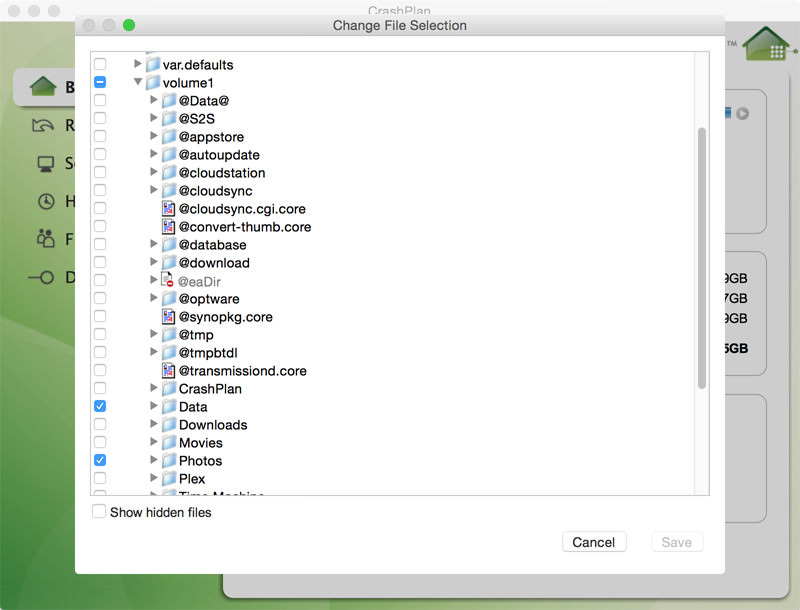
Step 8: Assuming you also use CrashPlan to backup your Mac, you will need to comment out the host and IP address we modified to get the Mac CrashPlan client to connect to the headless Synology CrashPlan client. Quit the Mac CrashPlan app then open up that same ui.properties file from earlier and comment out the first two lines. Open up the CrashPlan app again and it will be back to managing your Mac.
Step 9: Wait for the initial upload to complete. This will take forever. I think it took me about two weeks with a 10-40mbps upload connection (it varied quite a bit) for the first terabyte.
It's also a good idea to keep an eye on the CrashPlan client on the Synology from time to time and make sure it's still running. You can do this by finding it in the Package Center and looking for it to say "Running" in green text. Occasional DiskStation Manager software updates can temporarily break CrashPlan. You should receive an email from CrashPlan if one of your computers hasn't been backed up within a few days.
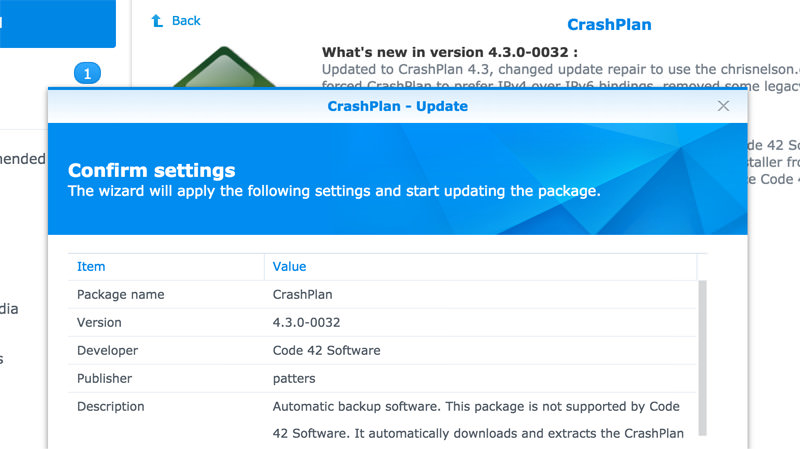
Running a CrashPlan update: you can enable email and desktop notifications (Package Center → Settings) when updates are available (and can't be automatically installed like this).
If your main CrashPlan client is on a Windows or Linux machine, you can find the equivalent directories of those files we touched here.
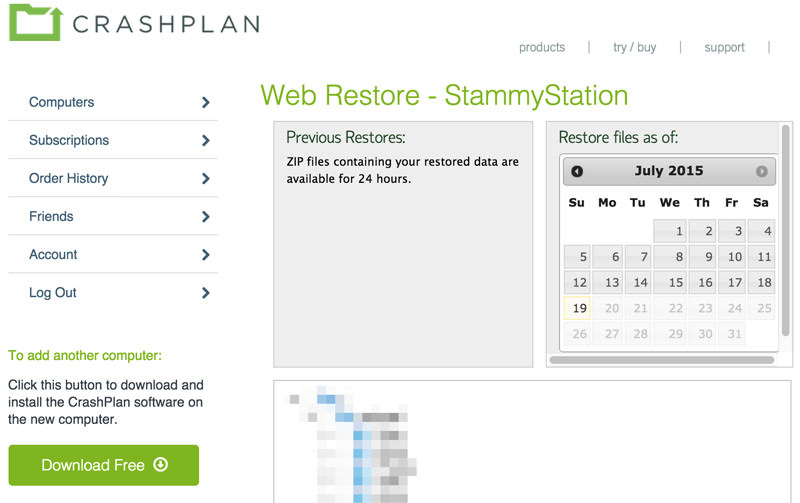
Bonus step: After your initial upload completes, log into the CrashPlan website, find your DiskStation and click Restore. Don't worry it doesn't actually restore anything but takes you to a page to enter your encryption key and browse your files. Just make sure you are able to see your files to ensure everything is good!
Even more redundancy
If you don't mind higher costs in the name of data redundancy, there are some additional steps you can take. You can purchase and setup a second, identical DS415+ and pair them together to create a High Availability cluster (HA). Synology makes this process amazingly simple. However, this requires directly linking them to both the same network and to each other bypassing any routers or switches using both NICs. This means they must be in the same physical location, which I see as a downside as I'd like to have one at home and one at another trusted location to keep the data safe in the event of theft, disaster, et cetera.
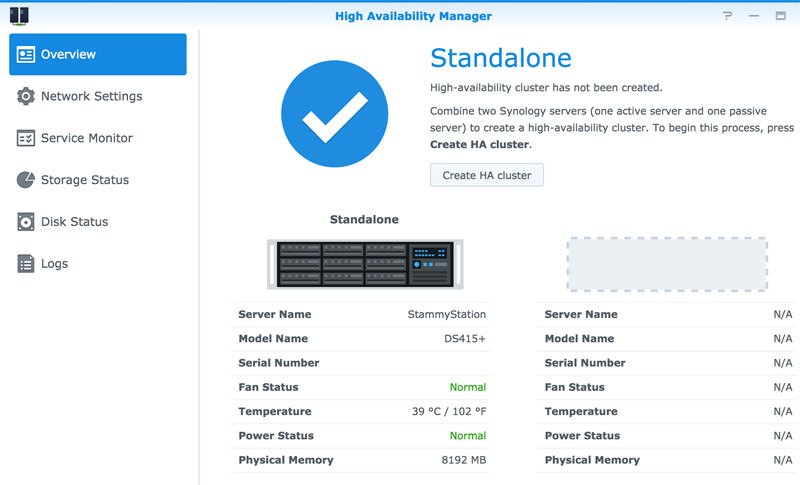
Synology High Availability Manager
If you prefer to keep the second NAS in another location, you could instead install CrashPlan on both and have the second DS415+ marked as a backup destination for your first DS415+. CrashPlan makes it easy to add other computers as backup destinations:
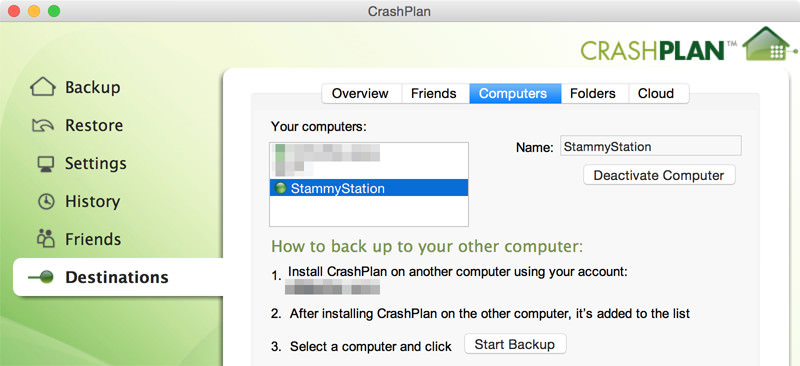
Glacier Backup
Archival-only, not backup
Glacier Backup does not have the ability to restore individual files, only folders. As such, I only use it as an archival option in addition to Crashplan.
Yes, all of these dual-NAS options mentioned above are pricey, bordering on overkill, especially if you're fine with cloud backups. What I did was simply use Synology's included Glacier Backup application. You login with your AWS credentials, tell it what shared folders you would like to backup and it will automatically do a one-way backup to Amazon Glacier on a schedule you set.
The Synology Glacier Backup is incredibly robust and setup is easy however there are a few hoops you should go through with Amazon AWS before proceeding. As I have mentioned in the past with other AWS-related articles, you will want to create a new authenticated user that only has certain permissions ("IAM" in Amazon lingo) and not give the application root S3 keys. This is considered good practice for a few security reasons but mainly to limit potential damage by limiting what AWS services and data it can access if these credentials are compromised, used incorrectly by a software bug or more likely user error. The last thing you want is a bug in a backup application to also nuke your S3 buckets, static websites, DNS records, databases and more.
But I digress, let's get this all setup! First off, sign into your AWS account and go to Services → IAM. Click on the Users tab then click Create New Users. Type in a user name of your choice on that page and hit Create. I chose a descriptive user name for the task at hand: nas-glacier-backup. After you hit create, you'll see a page that displays your new user security credentials.
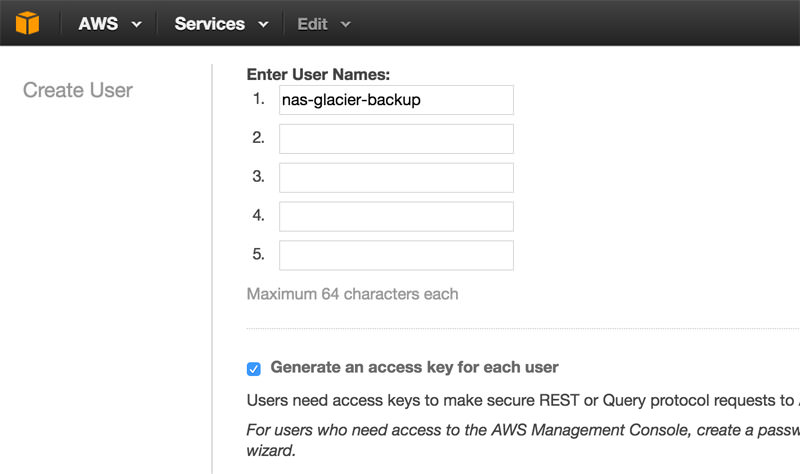
Now we need to give this user the permissions to read and write to Glacier. You can do this by creating a group and attaching a policy and the new user to it. However, since our use case is fairly simple, it's easier to just attach a single policy directly to the user.
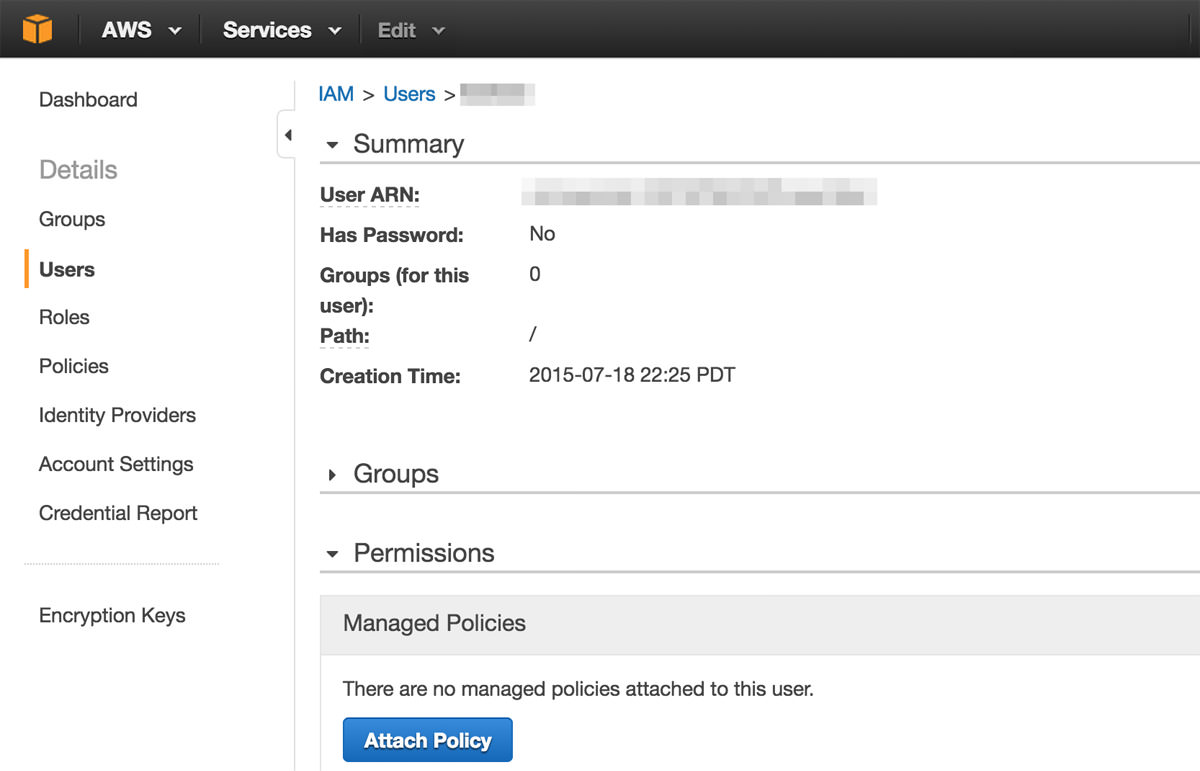
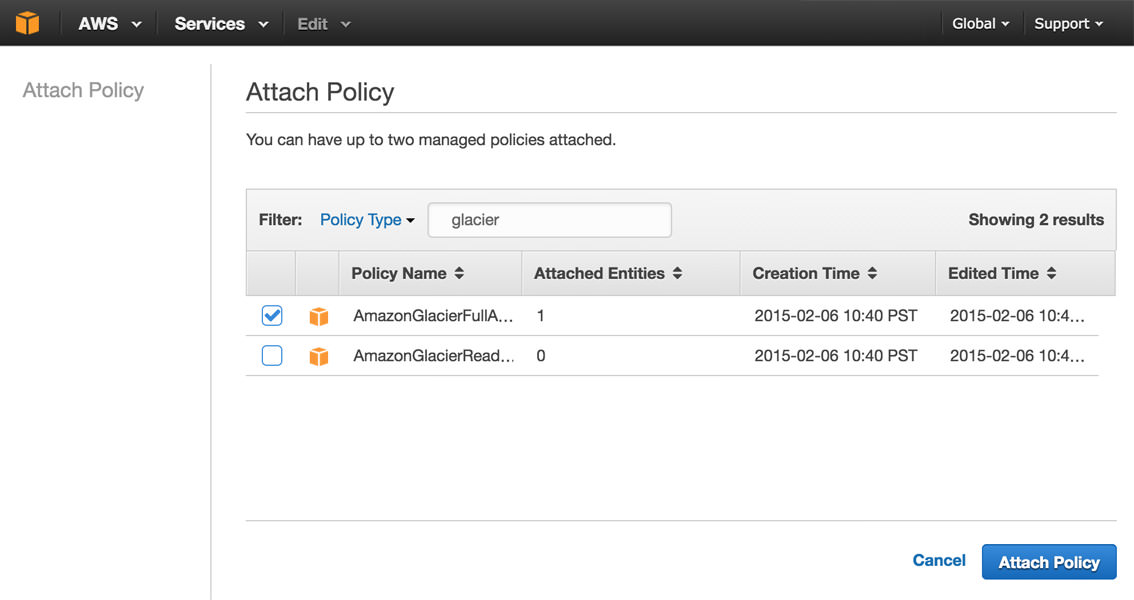
Navigate back to the Users tab, click on your new user and then Attach Policy. You'll land on an Attach Policy page where you can search for and select the policies (JSON documents that state the permissions) to attach to the group. Search for glacier and select AmazonGlacierFullAccess. That's the only one we'll need. Click Attach Policy to wrap this up.
If you already use Glacier for another app or service
And you want to be extra careful, it's possible to customize your user policy to only work within a certain bucket. This involves creating either a custom or inline policy and manually selecting everything. It's a bit complicated and probably overkill as well, so I won't elaborate here.
We're done with AWS for now and have the new user and security credentials in hand. Visit your DS415+'s DSM local site and install Glacier Backup from the Package Center if you haven't already. Follow the wizard and start by providing your new credentials.
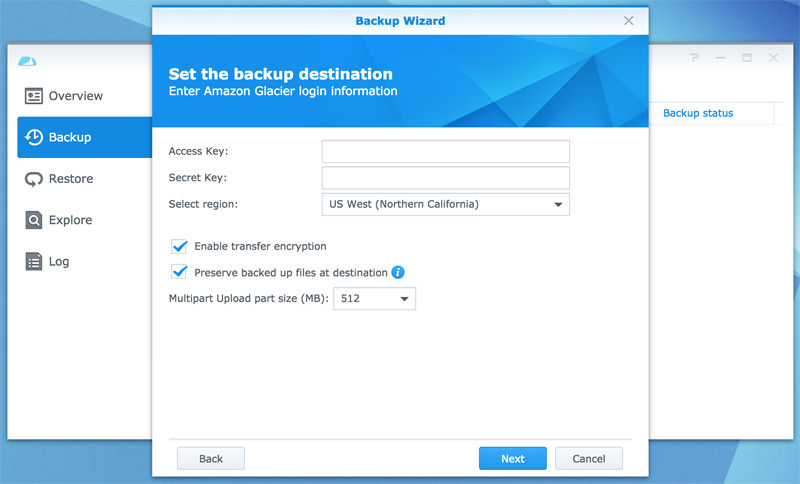
Now you can select the shared folders you would like to archive on Glacier. Any folder names wrapped with @'s are ones you have created with encryption. Encrypted folders can be backed up by Glacier Backup, however in a disaster scenario like you no longer have your NAS physically, you will only be able to restore this encrypted folder on another Synology device. So you can't just get any other Glacier app to access your files. Keep that in mind if you start encrypting everything.
If that's a dealbreaker and you're up for a challenge, you can manually install s3cmd via SSH and use lifecycle rules to transition S3 objects to glacier.
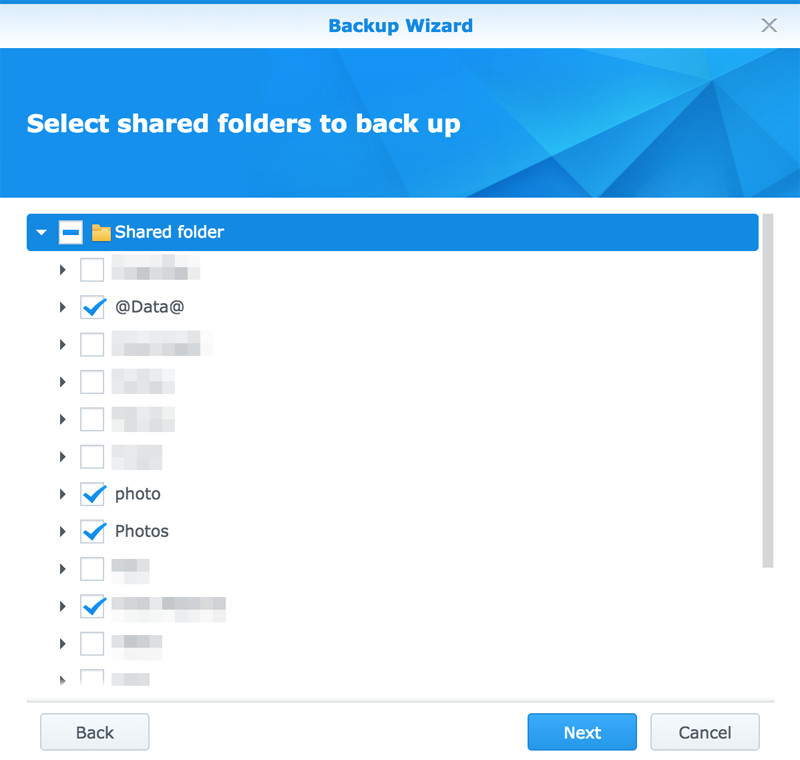
The @ identifies an encrypted folder.
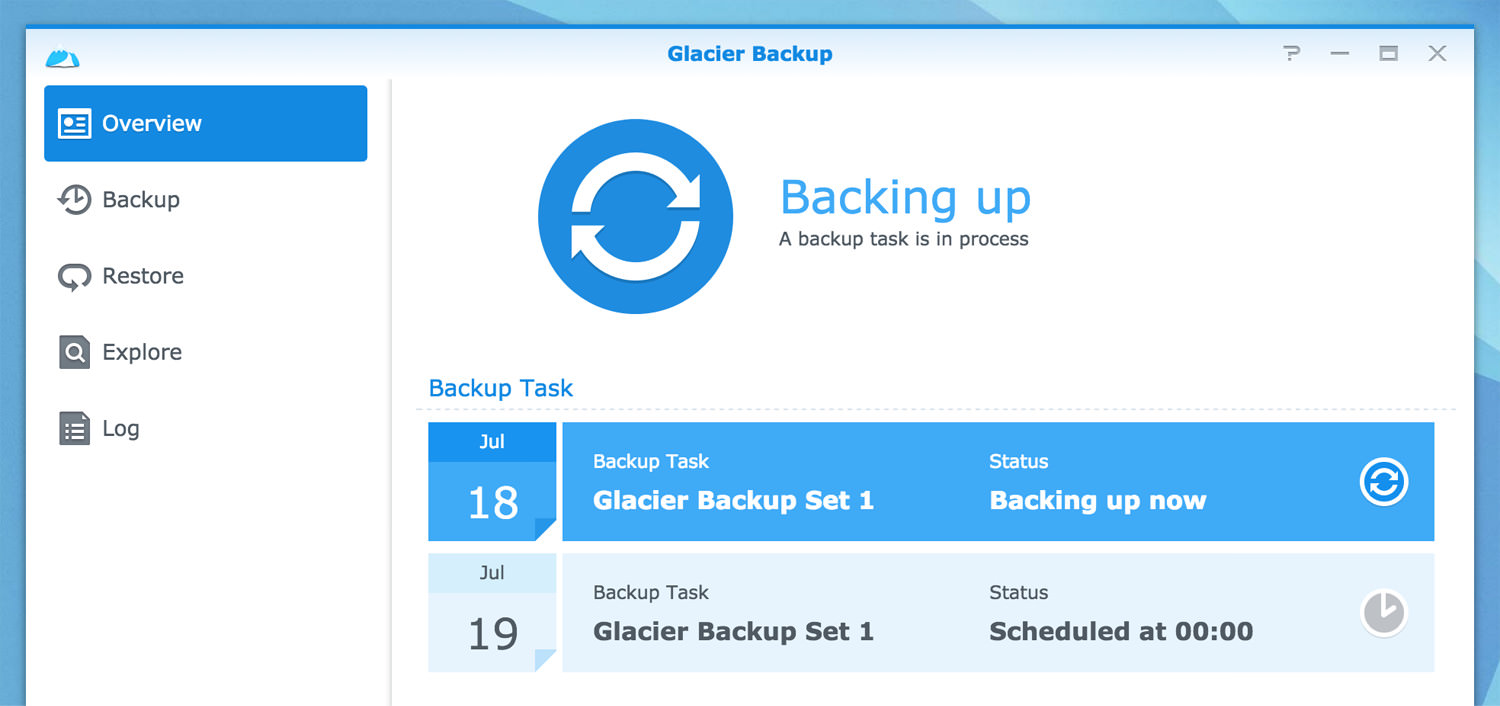
On the next page you'll be asked to set a schedule for this backup task. I set it to run daily at midnight.
That's it! The initial upload will take a while and you can keep an eye on it by visiting the Backup tab. If you need to pause the initial upload at any time you can click Cancel — it doesn't actually cancel it, it just pauses. You can resume by clicking Back up now.
Likewise, you could use Synology's own Backup & Replication application to backup or sync certain folders to just about anything: other Synology NAS devices, other network and LUN volumes, rsync servers, attached external USB hard drive as well as Amazon S3 and Microsoft Azure destinations.
Backing up S3 buckets, Dropbox & more
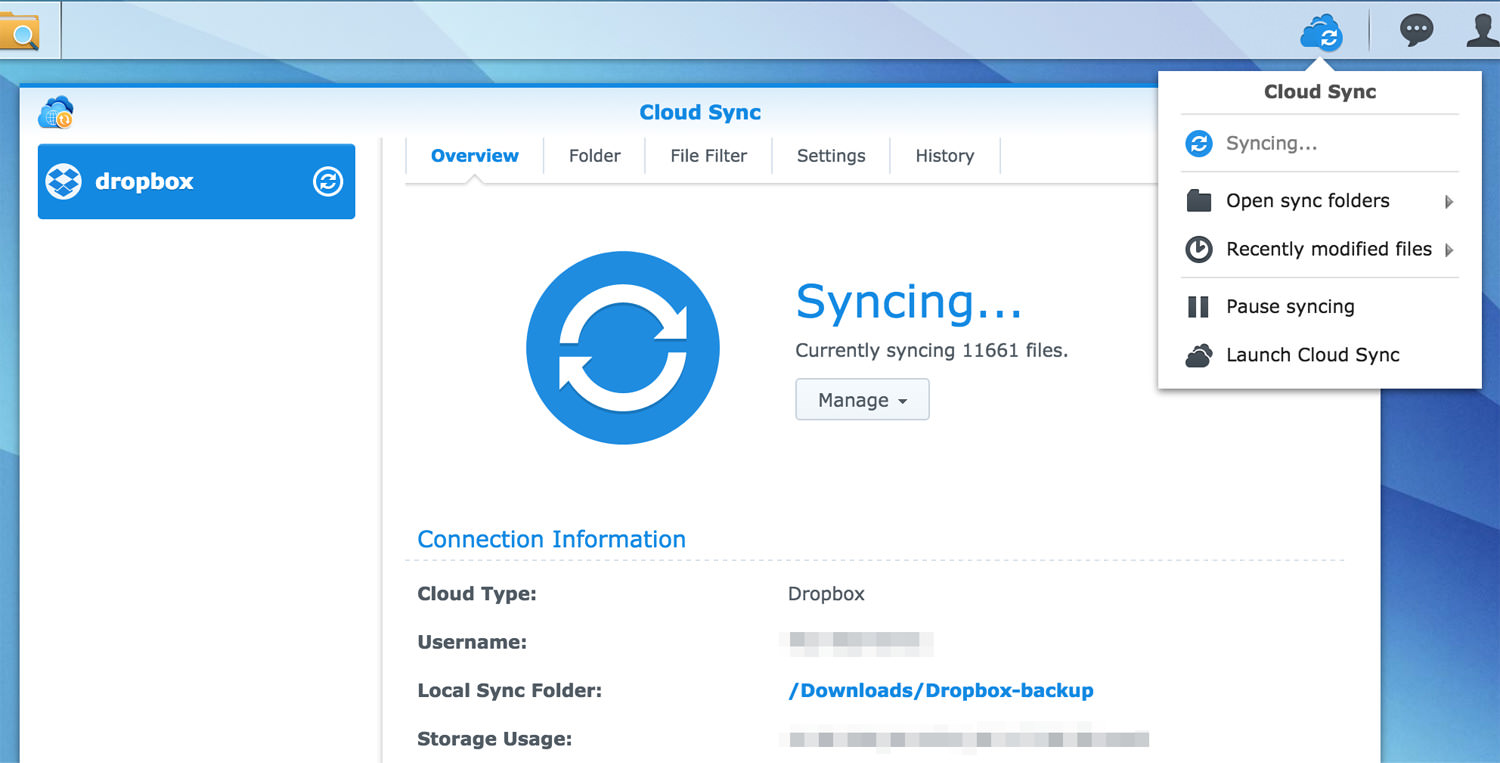
There's one more Synology application that I put to work: Cloud Sync. For example, I was able to connect my Dropbox account and have it download a copy of all my Dropbox data to the NAS for safekeeping. This is handy if you use selective sync to hide certain folders on your computer to conserve space. Now you can have all of your data on the NAS (and still synced on Dropbox) and not worry about getting locked out of Dropbox.
I only have it apply changes made to Dropbox locally and it does not sync any local changes back up; in case I accidentally delete the local folder somehow I don't want it to be removed from Dropbox too.
As we did with Glacier Backup above, you will want to create a new Amazon IAM user for any S3 backups you do with Cloud Sync.
However, there's one issue with Cloud Sync in that it cannot sync encrypted shared folders. Though I discovered that if the encrypted folder is mounted on the NAS (identified with the open lock icon next to it), you can create any backup task with it in the Backup & Replication app. You can create a separate task there to backup any encrypted folders to other cloud services, though I am pretty sure it saves your files unencrypted which defeats the purpose.
One cool Dropbox trick
As I was setting up the DS415+ NAS and writing this post, I began thinking that it was a shame that I had all this extra storage and couldn't easily use it to backup the precious photos the rest of my family captures. I'm always getting emails with videos of my niece and nephew but they're not in one place and they're not created by the same person. Everytime I visit family I help debug their computers and phones that are constantly running out of disk space. I've tried to get everyone on Dropbox in the past but convincing people to pay $10/month for digital storage is not easy.
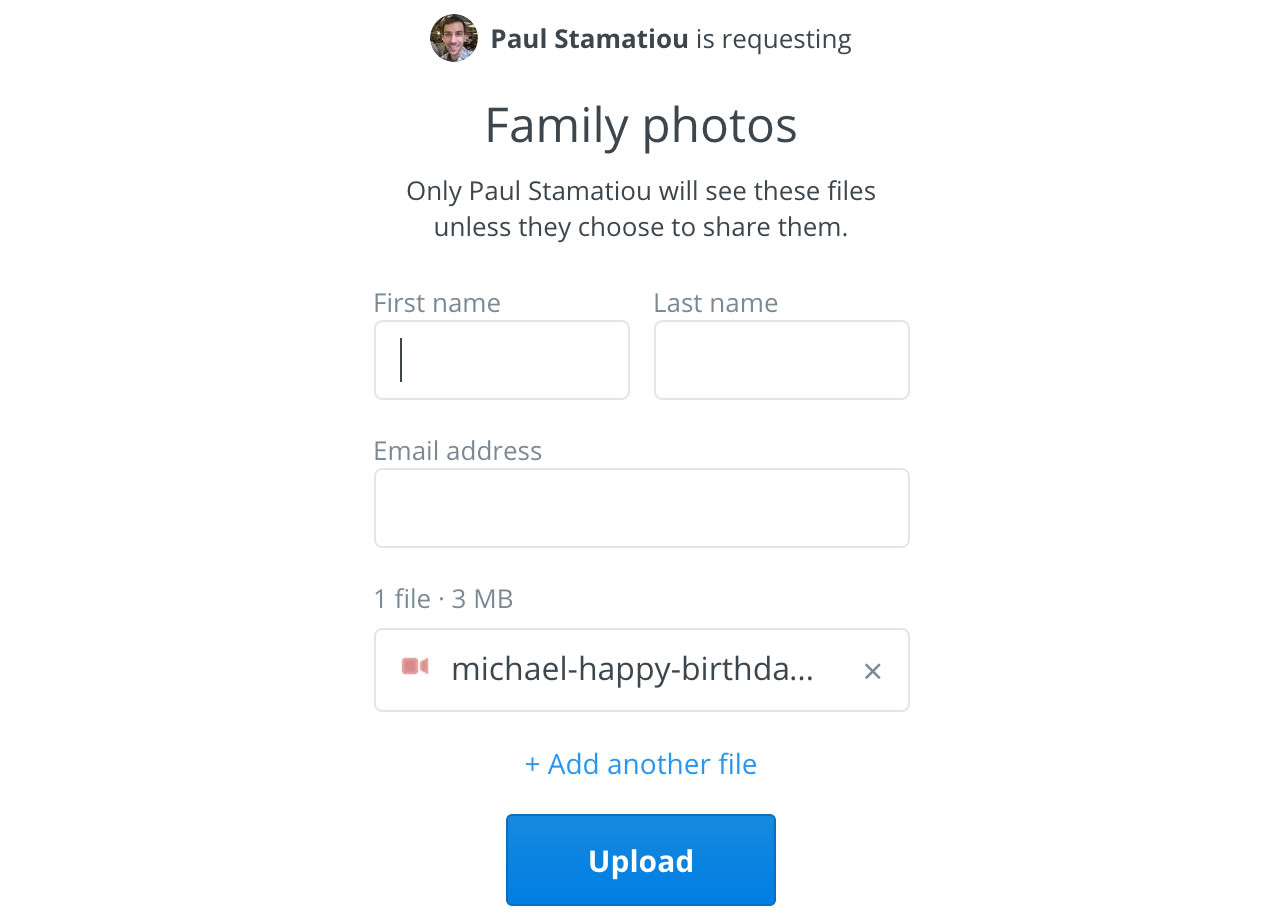
I recalled that Dropbox released a feature called file requests not too long ago. The way it works is that you can create a special URL and give that out to people and they can upload any files directly to you, even without a Dropbox account. All the uploaded files end up in your account.
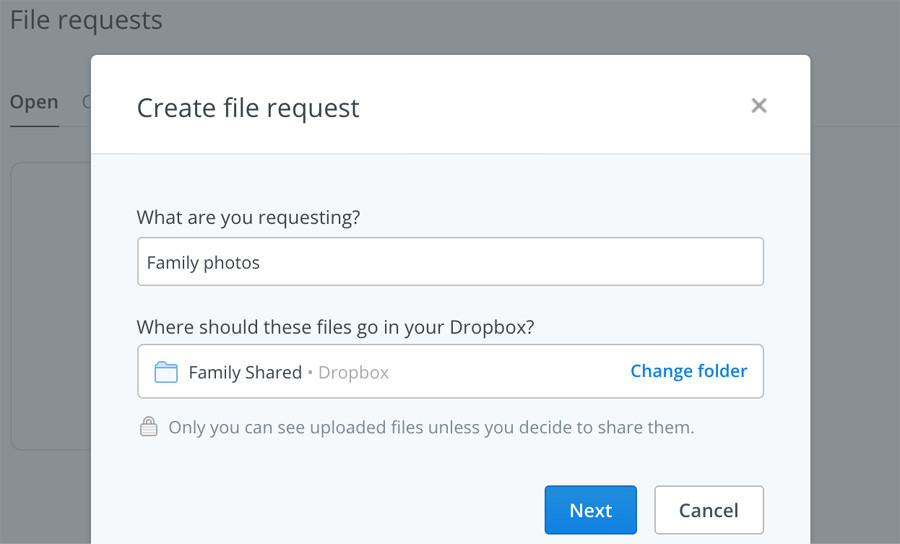
So that's what I did. I also combined that with a shared folder, so that if my family wants to get on Dropbox everyone can join the folder, hide it via selective sync to free up space on their machine and be able to see everyone's photos in one place. I get the benefit of having Synology Cloud Sync automatically download these photos for me, which I can have automatically backed up to Backblaze B2, Glacier, Nearline and more.
Backing up to Google Nearline
While I was setting up the Cloud Sync app I started thinking about Google Nearline. Nearline is the Amazon Glacier-equivalent archival service from Google, minus the nasty retrieval delays (they just throttle reads at 4MB/sec if you're not storing many TBs — fast enough for me)! It's always nice to diversify your backups to different cloud service providers. It was just a passing thought and I didn't see it in the dropdown of supported services in Cloud Sync. But I kept reading about Nearline...
It turns out the Nearline API has an interoperability mode made just for helping people migrate from Amazon S3 to Google Cloud Storage! Basically this means that it will let you use an API that acts similarly to the Amazon APIs. This means we can fool Cloud Sync into thinking we are using S3!
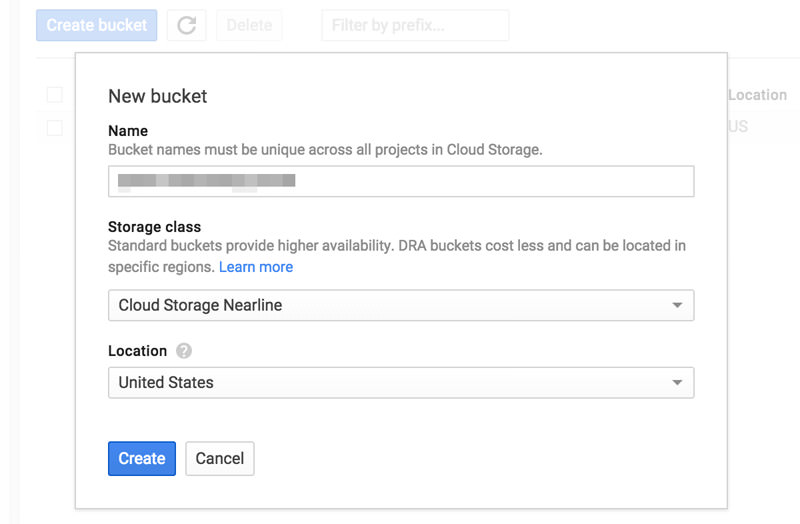
To get started with Nearline you need to go to the Google Developers Console to create a new project and billing account. Once you've done that, go to Storage → Cloud Storage → Browser and click the Create bucket button. Enter a name for your bucket and set the storage class to Cloud Storage Nearline.
Next, on the left pane click on Settings under the Cloud Storage heading. Navigate to the Interoperability tab on this page and click Enable Interoperability Access. Then click Create a new key.
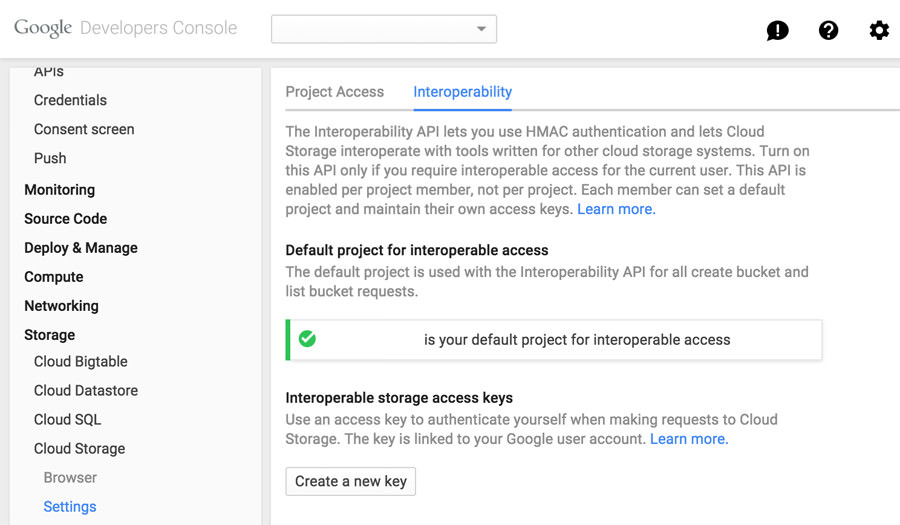
Update 01/07/2017: The latest Synology DSM software officially supports Google Cloud Storage. Ignore this part. All you need to do is provide the Project ID of your Google Cloud Storage account, select your Nearline bucket from the pre-populated dropdown and that's it! You'll get an Access Key and Secret, just like Amazon AWS services. Open up Cloud Sync on the Synology and add a new backup, selecting S3 from the list of cloud services. On the next page, on the line where it says S3 Server you will actually type in the Google Cloud Storage endpoint: storage.googleapis.com. Then paste in your access key and secret key and select the bucket you created in the dropdown.


You can optionally enable encryption with your own passphrase — which means you will not be able to access your files on the Google Developers Console storage browser and only through this tool. I'm only backing up photos so I don't really care if these are encrypted.
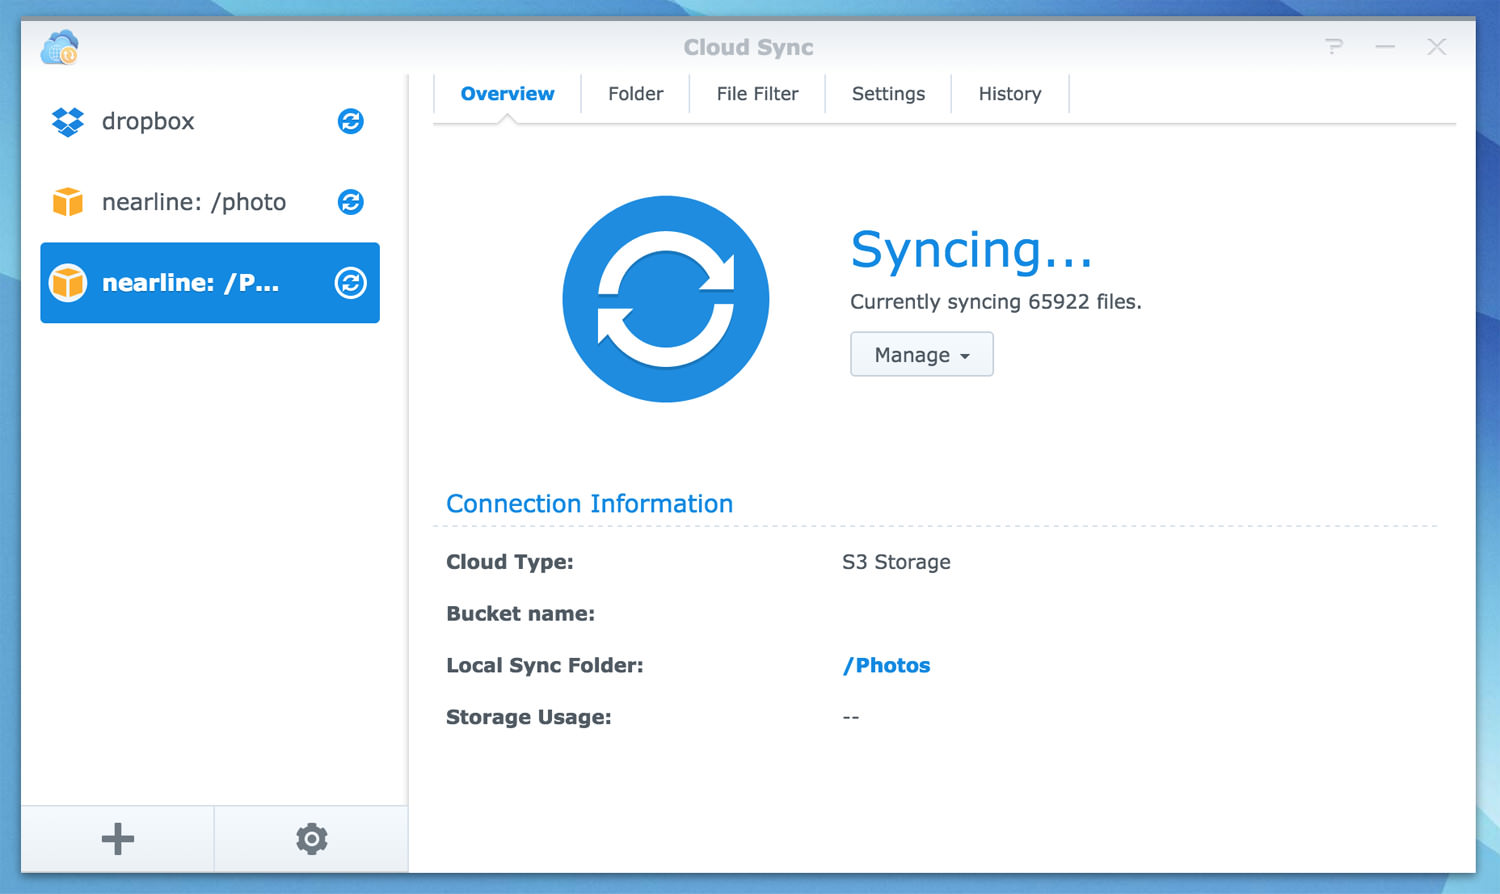
Backing up my photos to Google Nearline... this will take a while.
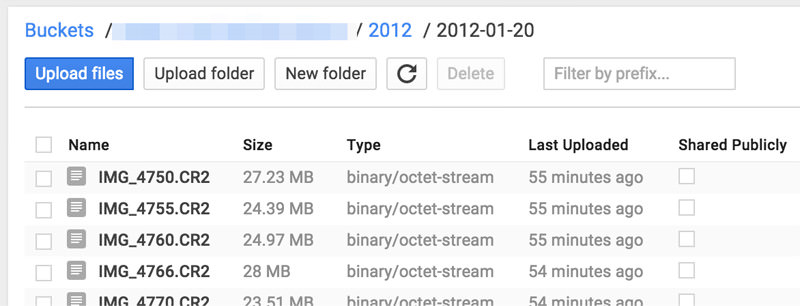
Boom! You will now see your files begin to appear on the storage browser. I would suggest only setting up one Nearline backup/sync and letting the initial upload finish before creating another. I have gotten authentication errors twice and have had to remove the task and recreate it (no data loss, just ceased uploading). That being said, I imagine it's only a matter of time before Synology updates Cloud Sync to officially support Google Cloud Storage and Nearline.
Encrypted shared folders
Just like I created a shared folder for my RAW photos above, you can create as many shared folders as you like for other types of data. You may wish to enable encryption for data that's more sensitive. The DS415+ has hardware encryption built-in so there's not much of a performance hit when using it.
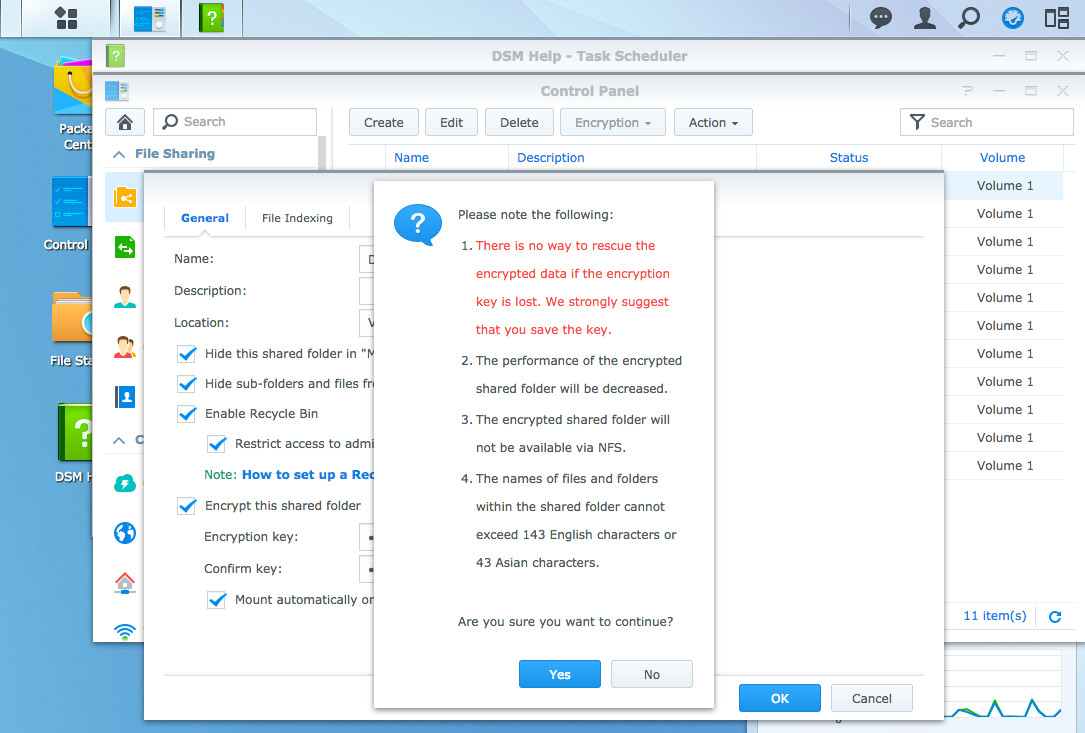
Read the warnings before you make any encrypted folders!
However, there are two things to keep in mind when enabling encryption. The most obvious one first: if you lose the encryption key, you're entirely out of luck and you will never be able to restore your data on the Synology. (CrashPlan is the exception — it can backup the unencrypted data when it's mounted and allow you to access it using your CrashPlan encryption key).
Second, they're a bit harder to backup to the cloud. For example, the included Cloud Sync application does not work with encrypted folders at all. It does work with any cloud destination inside the Backup & Replication app, Glacier Backup and CrashPlan, though they all have more complicated setup processes and with the first two you will only be able to restore data on a Synology device.
Plex Media Server
While there are some good media-focused applications ready to install in the Synology marketplace, Plex requires a manual installation. Plex is a robust media server with a fleet of apps for every phone, computer, tablet and smart TV. It organizes all of your movies, videos and more; intelligently pulling accurate metadata, movie covers and so on. And with the new quad-core processor in this DS415+, you have enough horsepower to really use it. (Though, just barely. If you have any 4K content, you can have the Plex media server on your desktop and have it access the files on the NAS.)
First, download Plex for the NAS and be sure to click Intel under the download options. Then, follow this guide to add Plex as a trusted publisher in the Package Center. After that you can click Manual Install, select your Plex download and complete the installation wizard.
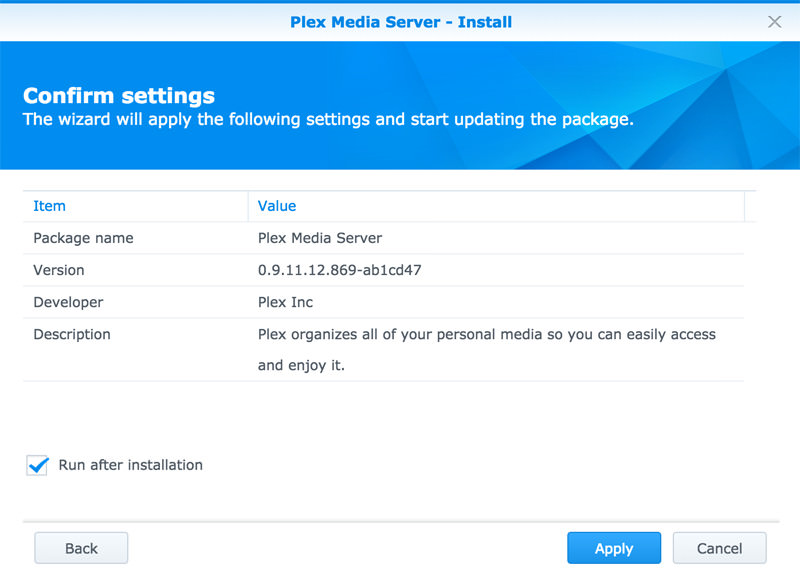
On the Plex application page, you'll see a URL listed where you can go to visit the Plex management interface; it looks something like yourIP:32400/web. From there you can create a new media library and tell Plex where your media lives. You'll probably want to create new shared folders like Movies, TV to organize your content for Plex to ingest.
Using SSH and ipkg
Earlier we enabled the SSH service to help with our CrashPlan installation, but there are so many uses that come with the ability to SSH into your NAS. Like any other Linux machines, you can do just about anything you want to it. Want to write a script on a cron to securely encrypt backup certain files to Tarsnap, s3cmd or gsutil? You can do that. Want to setup a local Jekyll website to stage your blog? You can do that. Et cetera, et cetera...
However, out of the gate there is no friendly command-line package manager like apt-get or yum. Also the shell used is BusyBox with ash, which is minimal and lacks the creature comforts you may have come to expect with bash or zsh.
While you can't entirely replace the shell — it will just get wiped out when the next Synology DSM update comes along — you can modify /root/.profile to give you access to bash inside of BusyBox. Though I have not done this myself so I will refrain from sharing how this work until I can vouch for the method.
But the main point I wanted to get across was that you can install a simple package manager called ipkg. To install ipkg, you will need to run a bootstrap script. The Synology forums have a great guide on how to do this. Be sure to install the one for Intel Atom CPUs if you have the DS415+.
If ipkg ever stops working after a DSM software update, you probably just need to restore the symlink and restart:
ln -s /volume1/@optware/ /opt
The End
I've only scratched the surface of what you can do with network attached storage like the Synology DS415+. When I started this, I was really only looking for a local RAID array to offload some pictures. But I really became enamored with the included software and modifications, the possibilities of then backing this up to the cloud, having it run jobs and more. I should have done this long ago. I think it's pretty obvious that I'm very happy with this setup.
To answer the question I posed at the beginning of this article: I store my data on the NAS... and then in the cloud. The cloud-only dream will happen one day, but boy do I feel so much better having all my content locally as well as in the cloud. I have a real Lightroom workflow now that is actually easy to work with. One day this might catch up with me and monthly storage costs will be absurd but with the nature of these storage services, I think it will just keep getting cheaper and cheaper.
If you enjoyed this post, please share it and follow me on Twitter. This one took more than a few weekends and evenings to write and edit. :-)