I have never been into tablets. I’ve had numerous ones over the years from iPads and iPad Minis to Android tablets. I always found their utility to be too constrained to find a permanent space between my daily phone and laptop usage.
Against my better judgement, I decided to give tablets one more chance. On the last day of a vacation that started in Rwanda and ended in the UK, I walked into the Regent Street Apple Store in London and purchased a 12.9" iPad Pro and Smart Keyboard.
That was a few months ago. A few months in which my 13" MacBook Pro has not even been powered up once. Any new gadget novelty has long since worn off and I’m still loving and using this iPad Pro daily.
What changed this time around?
Update (June 2019)
This post is almost exactly a year old now and some things have definitely changed in the iPad world—for the better!
When I wrote this post in mid 2018, the iPad Pro had made great inroads at enabling more advanced tasks and uses cases. There were definitely a few things that would keep most from relying on it for all of their tasks; multitasking functionality could have been better, Files access was rather rudimentary and daily annoyances like text manipulation left something to be desired.
Then there was the significant iPad redesign in late 2018. It received a better Liquid Retina Display, Face ID, support for an updated magnetic Pencil, oh and it tossed out the Lightning port in favor of a USB-C port.
If you can tell, the inclusion of the USB-C port was the most interesting to me.. but it was locked down. Unfortunately, iOS 12 didn't really unleash the power of that port: USB-C connected external hard drives could not be accessed in the Files app. And to add insult to injury, imported photos from SD cards and cameras still had to be imported to the camera roll first, then to any photo editing app you wished to use. A hassle.
Fast forward to WWDC 2019 where Apple made waves by announcing that iOS for the iPad will be known as iPadOS going forward. No longer is the operating system used on the iPad going to be the exact same iOS you see on iPhones, merely retrofitted almost as an afterthought to work on larger screens.
While built on the same foundation as iOS, iPad has become a truly distinct experience. With powerful apps designed for a large Multi‑Touch display. Multitasking made simple with intuitive gestures. And the ability to drag and drop a file with a fingertip. It’s always been magical. And now it’s called iPadOS. Apple
This is Apple saying they'll dedicate more to custom iPad workflows, use cases, functionality and differentiators. iOS 12 ushered in a few things in this direction: namely the introduction of the Shortcuts app to simplify the automation of a few workflows.
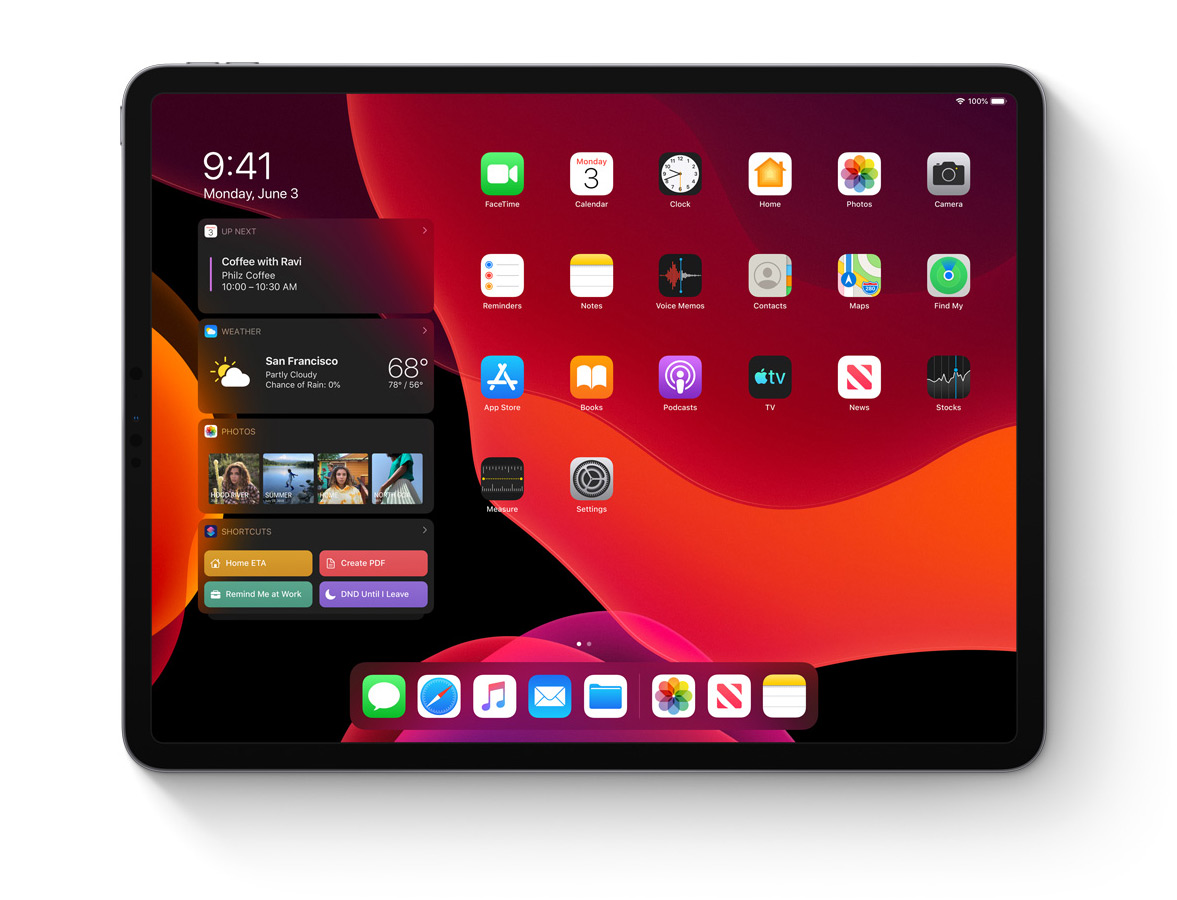
The iPadOS Home screen makes better use of all the real estate, letting you pin widgets from the Today View.
And sure enough, they definitely showed they care about the iPad at this WWDC keynote. There were so many iPadOS features I can't cover them all, but you can take a look at the complete list. Here are some of the big ones I'm excited about:
-
Full support for USB-C external storage devices: This is the big one for me. There is now complete USB external storage device access in the Files app. This means you'll be able to plug in a USB drive and access and manipulate the files on it, move them around... just as you would expect. And my second complaint related to media has been resolved too: you can import photos directly to an editing app instead of making at pit stop on the camera roll first.
The Files app in iPadOS gets a ton more functionality as well, such as a new column view to browse files on a larger display and the ability to zip and unzip files natively.
-
Speed: Face ID unlocks more quickly. Apps launch up to 2x faster.
-
Better use of Home screen real estate: The Home screen can now put some of that gargantuan real estate to use with the ability to always display widgets from the the Today View (the view that lives to the left of your first home screen). I just hope this means app developers will put more effort into incorporating such widgets in their apps, and adding additional utility there.
-
Enhanced multitasking: You can now quickly switch between multiple apps for Slide Over, use the same app in multiple spaces (including two instances of the same app side by side, as well as easily get to App Exposé to see open spaces.
-
Enhanced text editing and manipulation: Great to see some of my annoyances related to tedious cursor placement and text selection mentioned later in this article have been addressed here. Copy, paste and undo all get their own gestures. And there's various improvements to text selection including easier cursor control (just drag it).
-
Desktop-class browsing with Safari: Now you can load the full desktop version of a website (no more having to request the desktop version to get particular functionality or a larger view that site developers reserved for more capable clients) including a download manager.
While this is a generally great-to-see enhancement, it also opens up one more thing: running a fully functional development IDE in your browser (albeit one that is remotely hosted on your own server). I've been running my own code server instance on an AWS Lightsail server for a few weeks now (though there's currently a webkit bug in the iPadOS beta with HTTP auth and web sockets preventing it being used securely.. but should be fixed soon).
-
Sidecar: With this new feature you can use your iPad as a Pencil-enabled second screen workspace to control macOS apps (ie use your iPad as a drawing tablet for Photoshop running on your Mac running macOS Catalina)
-
Mouse support: Okay so this is actually an accessibility feature to enable the use of external pointing devices. Once you connect a trackpad or mouse, it will appear in the AssistiveTouch settings for you to enable. The cursor, however, is finger-sized so it's not the most aesthetically pleasing experience if you intend to use it for casual use. Video showing a mouse working on an iPad
Final thoughts
This WWDC brought a flurry of impressive announcements from Apple (see my note about the Mac Pro in my updated Lightroom PC article), but the iPad updates were my favorite.
My only takeaway now is that I will definitely be buying the next generation iPad if it gets announced in October or potentially picking up a current generation to take advantage of the new USB-C functionality in Files app (my current iPad Pro has the Lightning port).
Why did I get one?
Honestly, I purchased the iPad Pro on a whim. I had a long flight ahead of me, hundreds of gigabytes of photos on SD cards with me and was curious about trying my hand at a basic mobile photo workflow for culling and organizing. The iPad Pro boasts a pretty speedy A10X Fusion chip and I had heard good things about using it for photo editing and management.
As the person who built a $6,000 5.2GHz PC for Adobe Lightroom work, I will be the first to tell you I did not expect to actually do any real editing on the iPad Pro. But that curiosity was enough to get me out the door of the Apple Store with a new gadget. More on my experience with photo editing on the iPad Pro a bit later in this article.


I haven't owned the iPad Pro long but I have definitely put it to use in a variety of settings with ease.
What is the iPad Pro?
The iPad Pro is the most high-end iPad and differs quite a bit from other iPads like the new 9.7-inch iPad and the 7.9-inch iPad mini 4. Size is the obvious place to start: the iPad Pro comes in 10.5-inch and 12.9-inch sizes, making them the largest iPads in the line.
The recently refreshed $329 9.7-inch iPad—which now supports the Apple Pencil, unlike past non-Pro iPads—has been drawing a lot of comparison to its much more expensive big brother. In addition to the larger display size, the iPad Pro also boasts quite a few enhancements:
-
Better display: Higher resolution, brighter, True Tone display and 120Hz refresh rate with ProMotion and support for a wider color gamut (P3). The Retina display in the iPad Pro is not to be overlooked — True Tone dynamically adjusts the display's color temperature based on current ambient conditions. It's much more subtle than something like Night Shift but definitely makes using the display feel more natural (not more accurate) in a variety of scenarios.
But the really interesting piece is ProMotion. Depending on the activity and content at hand, ProMotion will adjust the refresh rate of the display, up to 120Hz (that's double the refresh rate of a good computer display). If you're just browsing a website, viewing photos or watching a movie it can slow down the refresh rate to save power. If you're drawing with an Apple Pencil, scrolling something quickly or otherwise just using iOS, it ratchets it up to 120Hz. The result? Scrolls like butter.
And finally, the iPad Pro display is fully laminated. It feels like it's the top-most element that you're actually interacting with, instead of being a good bit behind the glass with a visible gap. As part of this, the iPad Pro also has an anti-reflective coating.
-
2nd generation TouchID for faster and more reliable access.
-
Latest A10X Fusion chip (6-core CPU and 12-core GPU). It's fast and lends some credence to the rumors that Apple is thinking about ditching Intel for ARM chips for a future line of Macs.
-
Quad speakers. More on this later, but they are seriously impressive and they've got a trick up their sleeve too.

The four speakers in the iPad Pro pump out some stellar audio for a tablet.
- More capacity. The iPad Pro is offered in larger 256GB and 512GB sizes compared to other iPads.
- Higher megapixel front and rear cameras (along with 4K video and OIS on the rear camera).1
- Support for a new breed of accessories that attach to the bottom of the iPad Pro with a new connector called the Smart Connector.
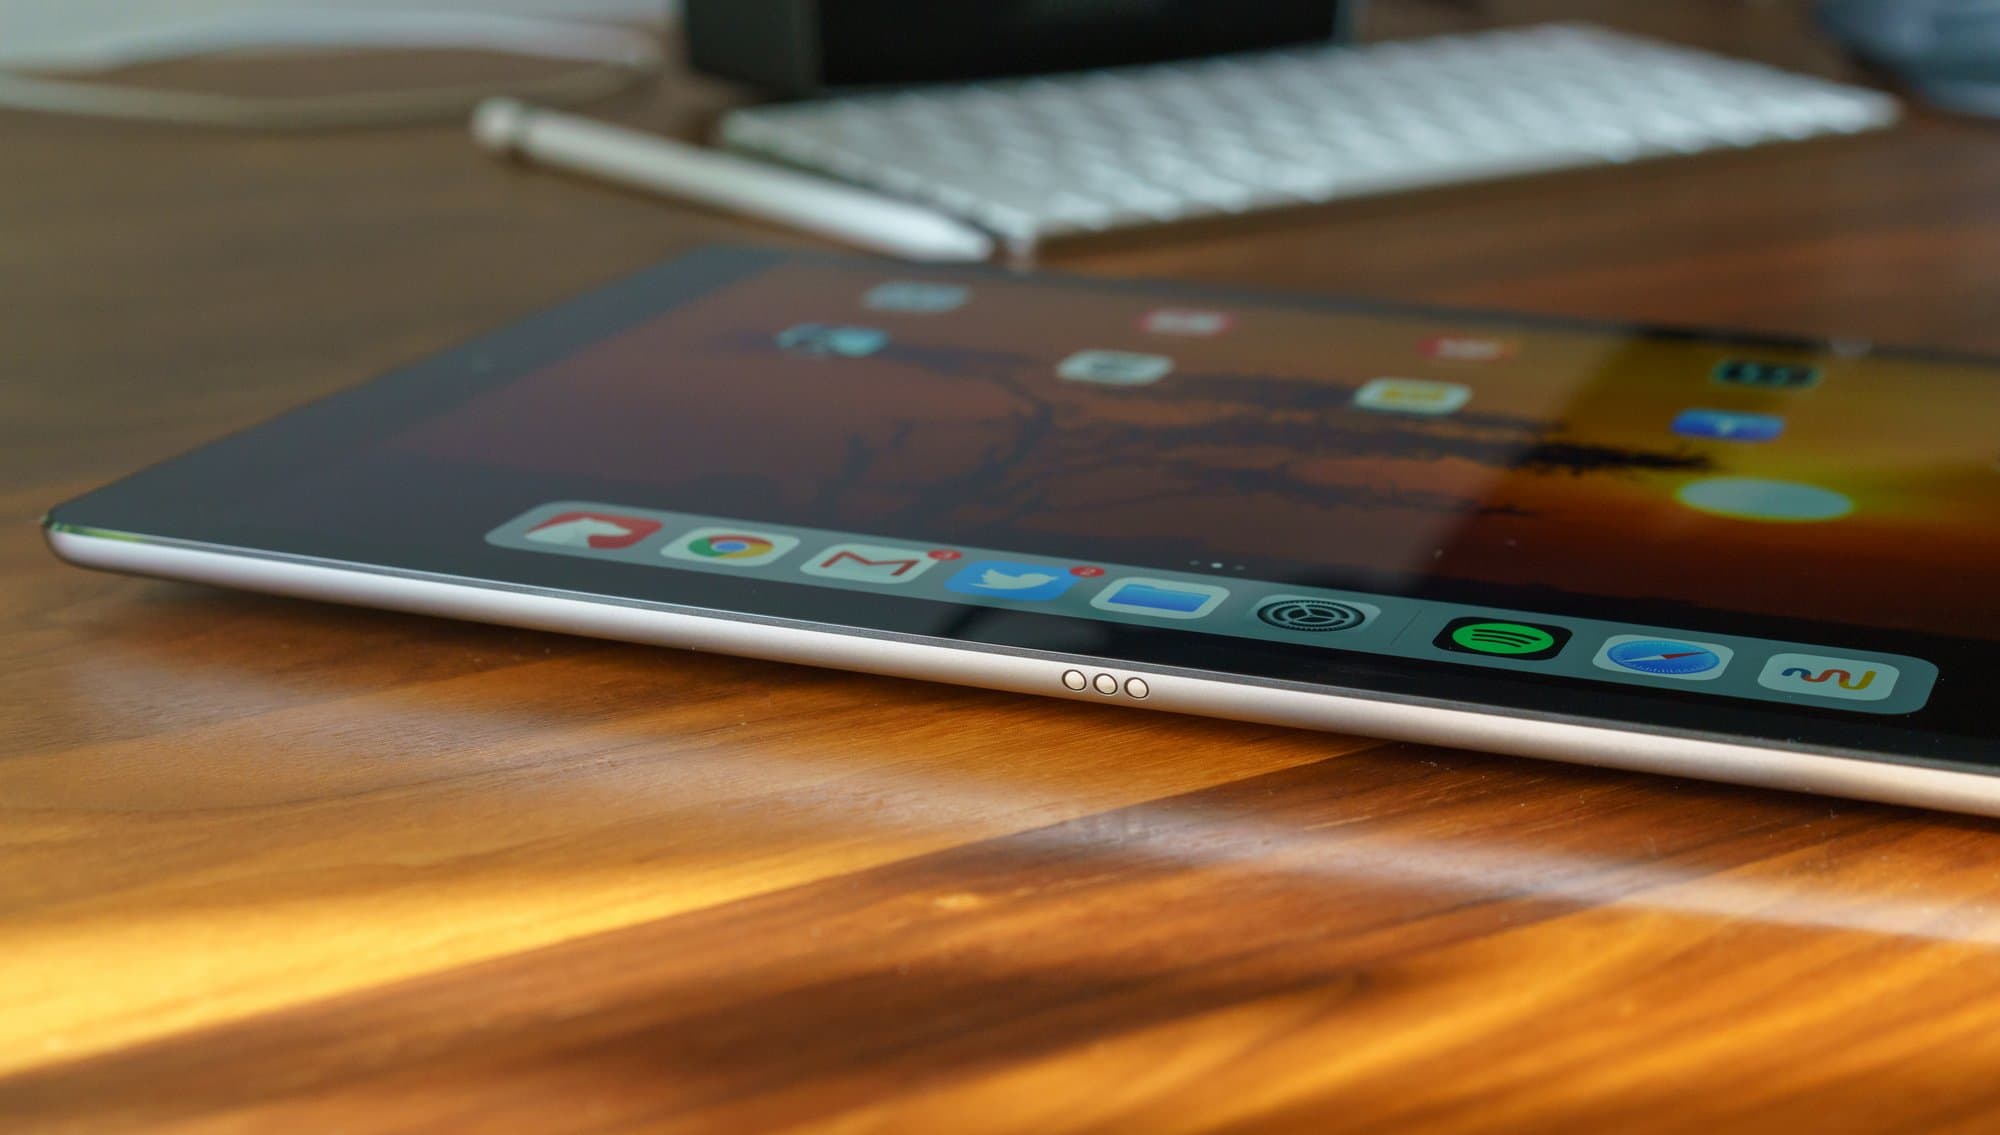
The three dots are the Smart Connector.
Of course, all this extra performance and functionality comes at a price. While the iPad Pro starts at $649 for the base model, you'll be hard-pressed to leave the store without spending at least $1,000 all said and done.
However, price doesn't matter if the iPad Pro is unable to take over a majority of what I use my laptop for.
Why I love the iPad Pro
The three things that drive my daily usage
Huge screen
Deciding between the 10.5-inch and the 12.9-inch models was the hardest decision to make when looking at the iPad Pro in person. After much deliberation I opted for the gargantuan 12.9-inch iPad Pro. It’s massive.
Viewing websites, photos and videos at this size is an utter delight that never gets old. It does not feel like I’m making any compromises. Comparing it to smaller tablets, there was always the thought in the back of my head that I’d have a better experience on a laptop. Not so here.
The Web just feels like something you should navigate with your fingers and this screen does it justice.
The feeling is hard to describe but I think Mike Rundle does a good job at conveying the emotion involved with this thing:
Using my 12.9” iPad still feels like the future. Something about the dimensions of the screen coupled with the thinness of it feels impossible, like a movie prop. Walking around with a movie playing doesn’t feel like it should be physically possible.
— Mike Rundle (@flyosity) May 17, 2018
I really wanted to pick the 10.5-inch version for my typical reason: the perfect mix of power and portability, making it great for traveling. But then I really paid attention to how I use my devices: I don’t travel that much. Aside from a few flights and trips, my daily use is almost exclusively at home and the occasional coffee shop (I'm partial to The Mill). That’s about it. I’m not going to be running to meetings with this or using it at work.
I went with the 12.9-inch iPad Pro and haven't looked back. I still can't get over the wow factor of the size of this thing. It reminds me of my 17-inch MacBook Pro I had before Apple discontinued them: uncompromising.
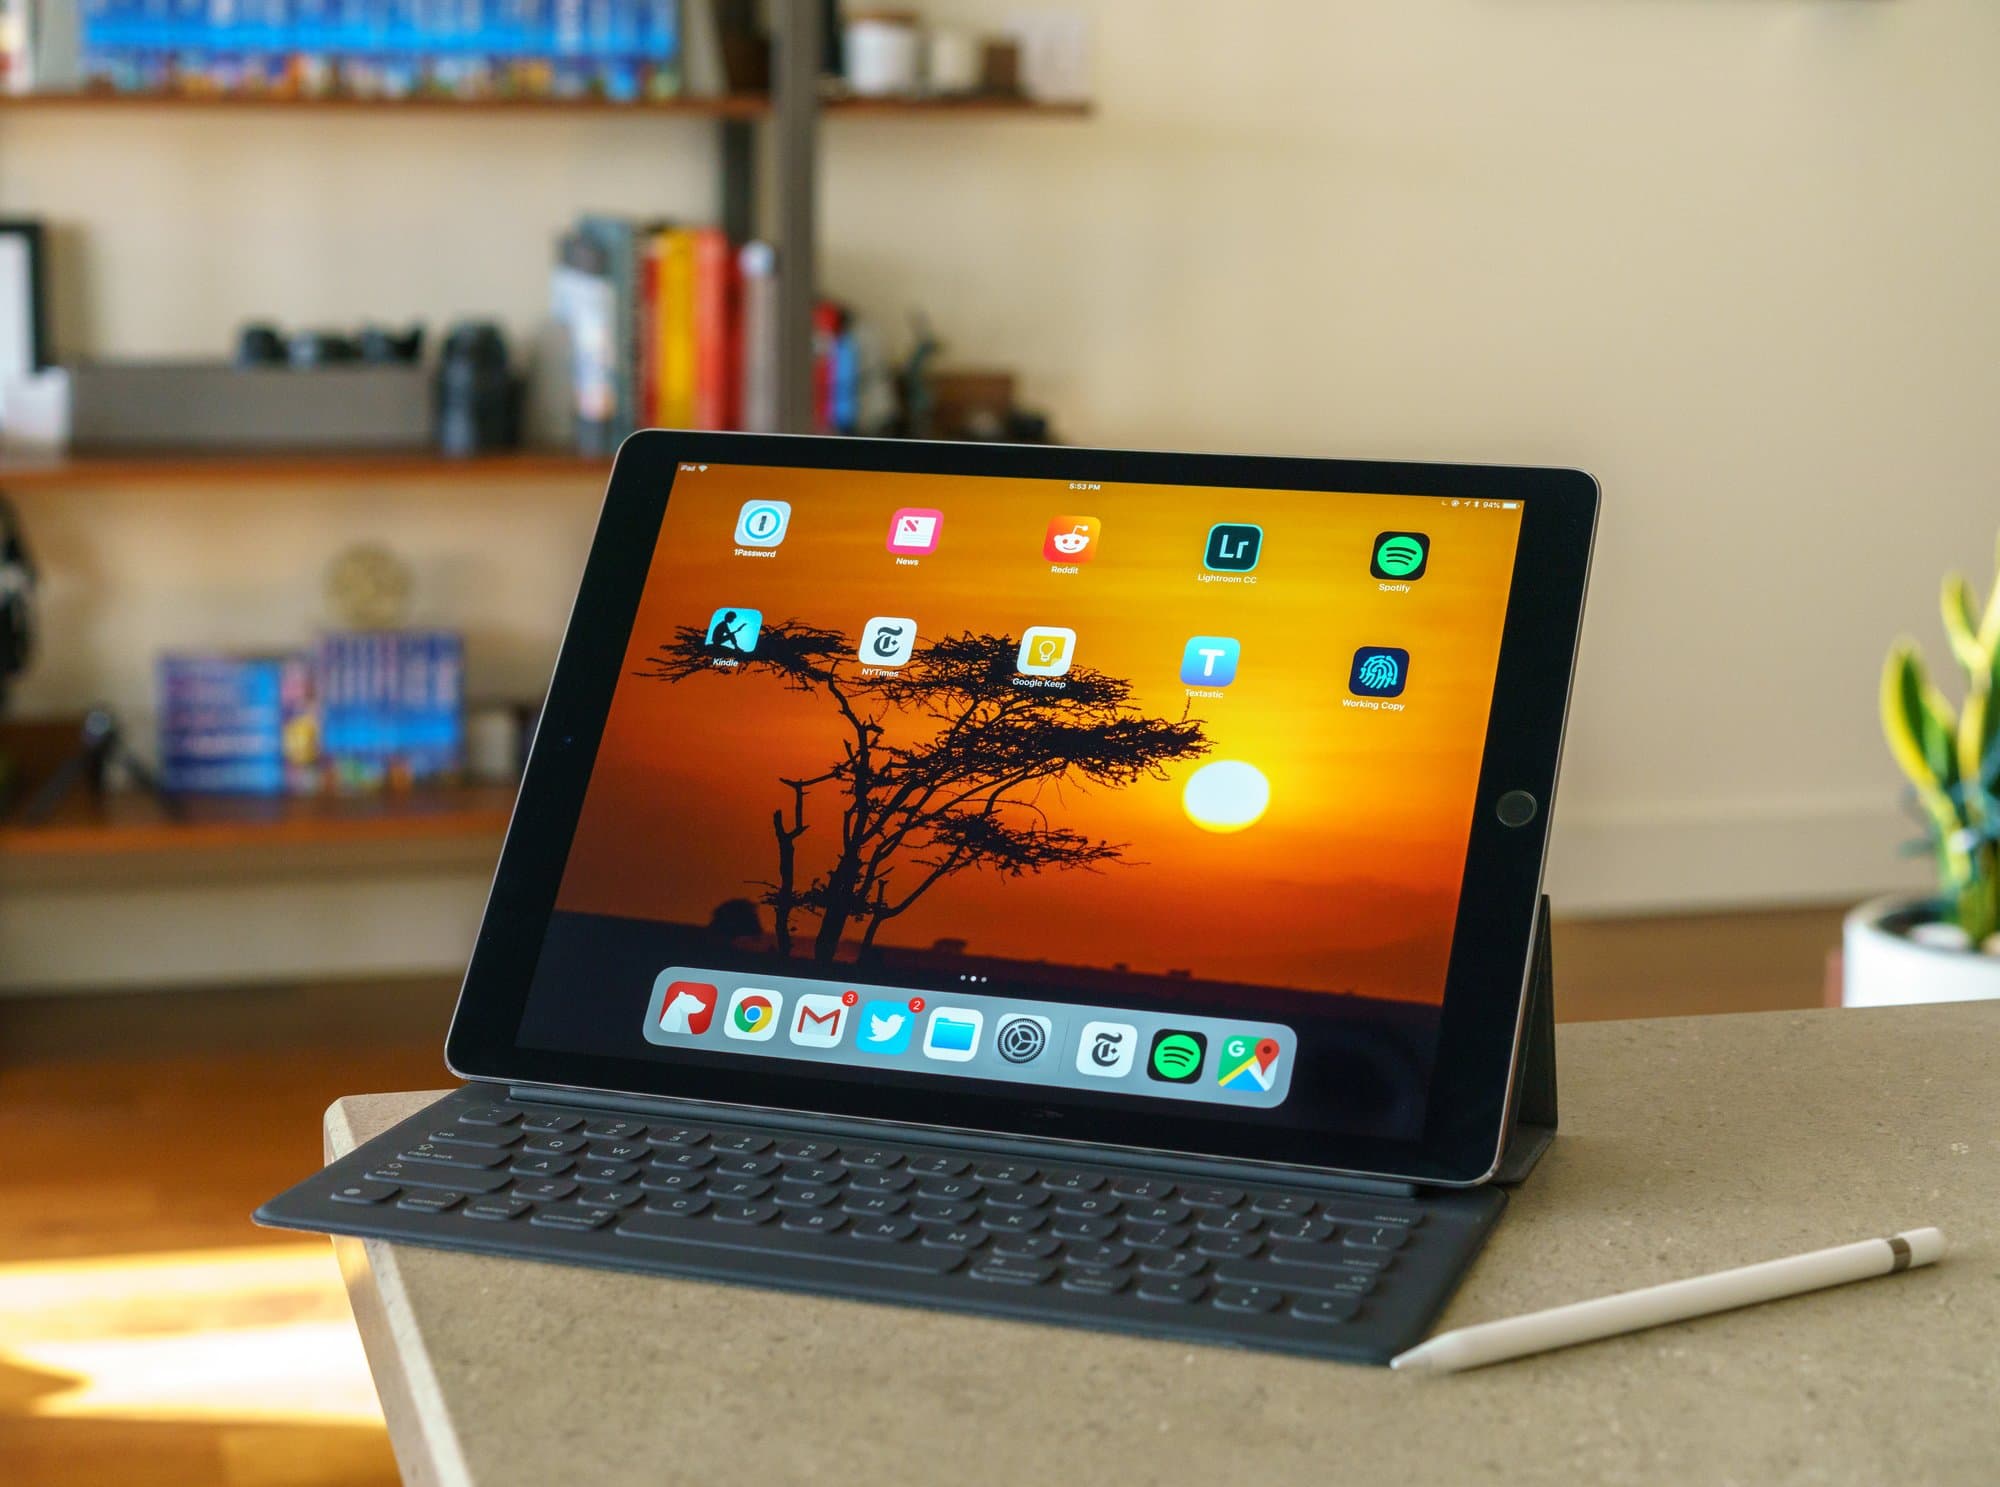
Smart Keyboard
The iPad Pro's new Smart Connector opens the door for a new breed of iPad accessories. Unfortunately, even two years after the original iPad Pro launch there are hardly any Smart Connector accessories aside from keyboards. Fine by me though; the full-size Apple Smart Keyboard is just brilliant.
I never got the hang of the virtual keyboard on iPads. Even if you can type quickly and reliably with them, it is still an annoying process to launch a keyboard that takes up so much of the screen's real estate, let alone be required to have the iPad laying down at an angle conducive to typing on the screen.
The best part about using a keyboard with the iPad Pro is being able to use numerous keyboard shortcuts supported throughout iOS and various apps.

Battery life
10 hours.
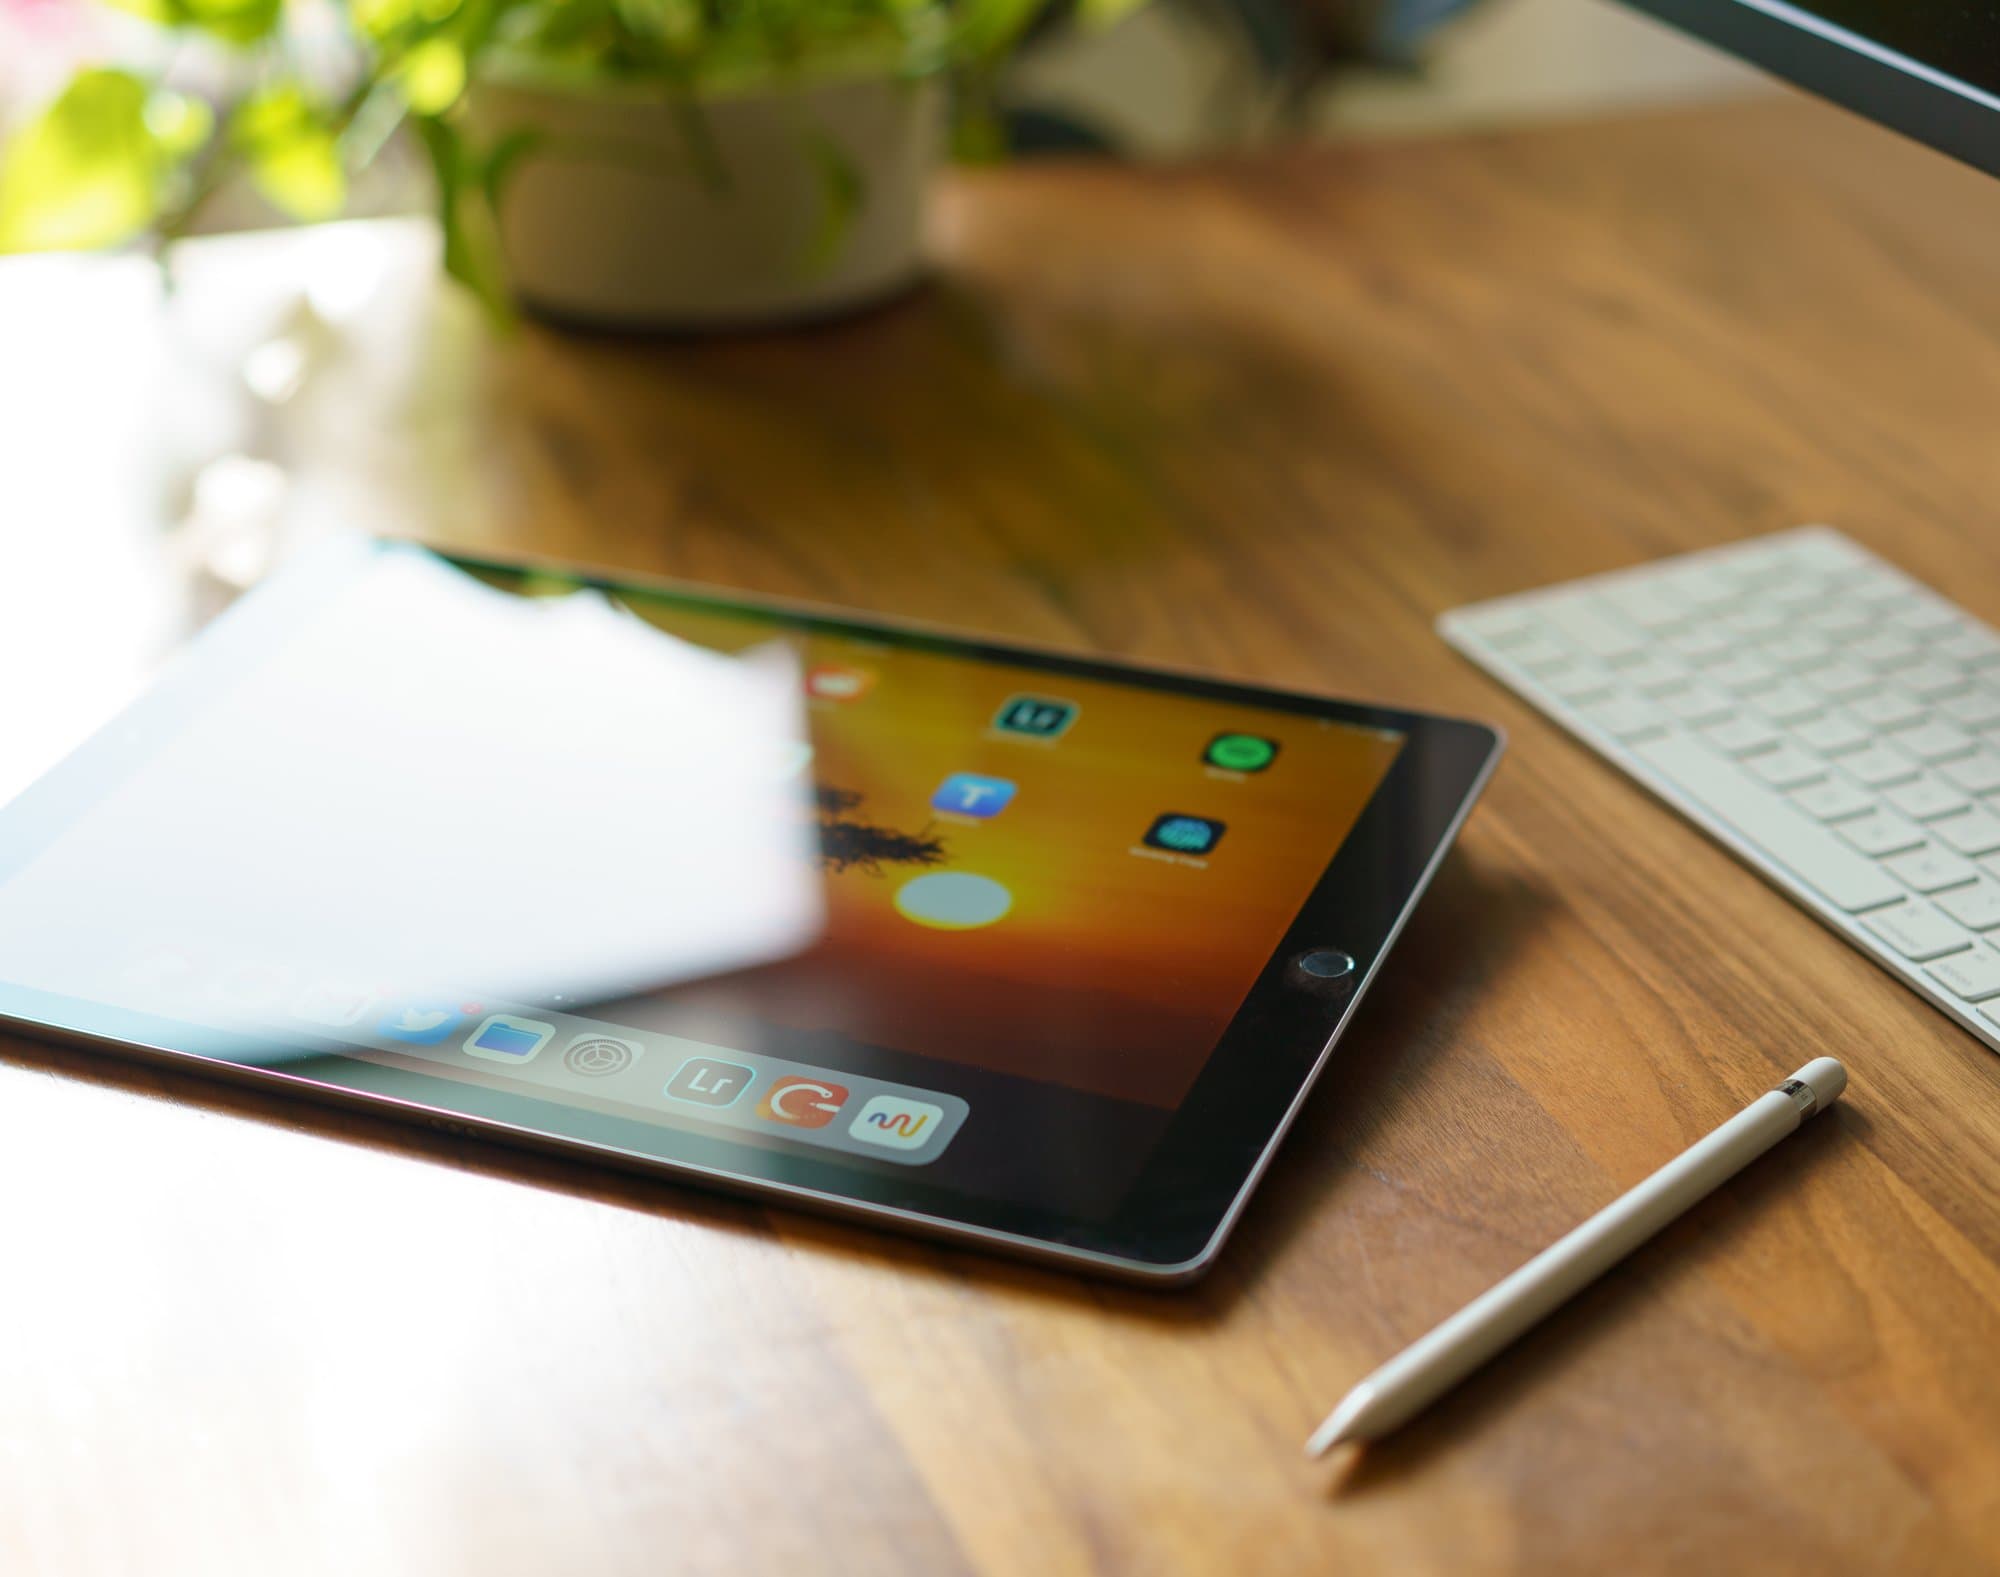
While great battery life is not exclusive to the iPad Pro, the 10 hour battery life is fantastic. I can go for days with light use without needing to reach for the power cable. This alone lends itself to more casual daily use, rather than intentional use, as compared with a laptop.
With a laptop you have to decide you want to use it, open up, wait a second for it to wake up and then log in. When you're done using a laptop, you need to close the lid and move it across the room where you keep the charger and plug it back in.
The iPad Pro is always ready to go. I usually have it with the keyboard folded open and resting on my kitchen countertop or near my coffee table. I use it dozens of times throughout the day; either at a glance with notifications or just a quick TouchID away from Googling a recipe, checking email and news in the morning while I make my coffee and so on.
First impressions
The iPad Pro deviates little from what you'd expect from iPad hardware. It's still a sleek slab of glass and metal that you just want to pick up and hold.2
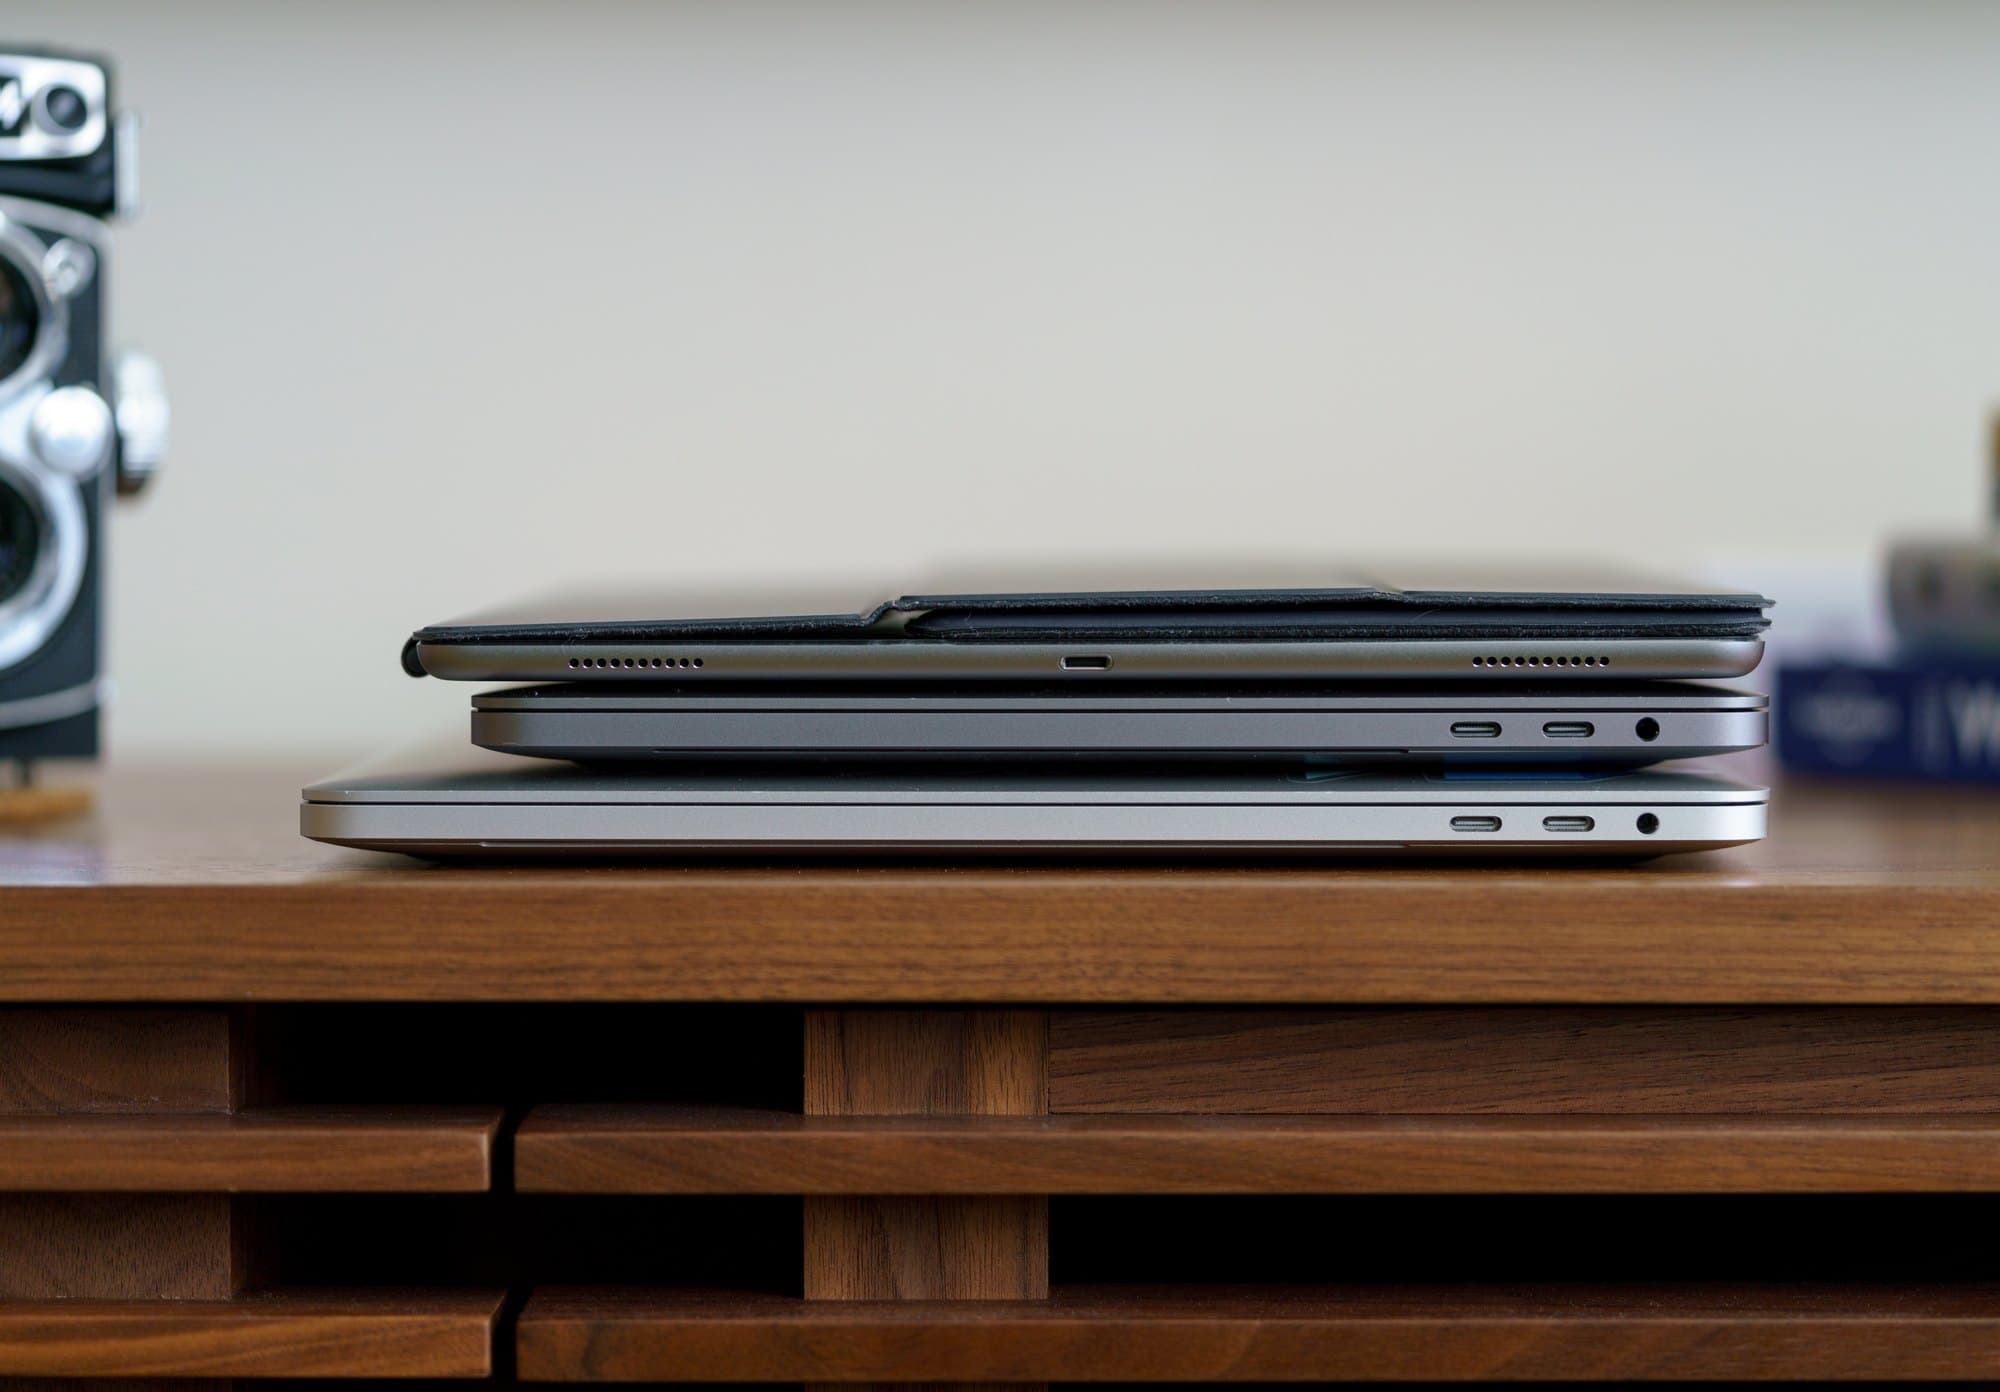
12.9" iPad Pro, 13" TB MBP, 15" TB MBP. The iPad Pro and 13" MBP are the same length but the iPad Pro is a bit wider.
I was taken aback the first time I held my 256GB Space Gray 12.9" iPad Pro with its glistening chamfered edges. And while the iPad Pro definitely has a bit of heft to it (1.57lbs), it still feels remarkably manageable given the size and slim profile. I do wish the screen bezel was slimmer but that's really the only complaint I can summon right now.
Speakers
Taking a look around the tablet I see the expected Lightning connector, the new Smart Connector, cameras, tiny rear microphone hole, TouchID, volume and power buttons... and then four perforated areas where the speakers hide.
I expected the iPad Pro to be nice and big. I expected the great battery life and Smart Keyboard to make it more usable and the Pencil to be a nifty add-on. But I did not expect the speakers to be anything other than a mundane table stakes item on the spec list. The iPad Pro speakers are fantastic.
Sometimes when I travel I bring a small bluetooth speaker to have some music with me in the hotel room. I won't have to do that any more. There's a bit more to it as well: audio adjusts depending on the iPad Pro's orientation. When the iPad Pro's orientation changes, it changes the range of frequencies that each speaker doles out. All speakers produce low frequencies but only the top two speakers produce mids and highs.3 It's a small but welcomed attention to detail. And yes, the iPad Pro can produce some noticeable bass that you can definitely feel while holding.
Keyboard
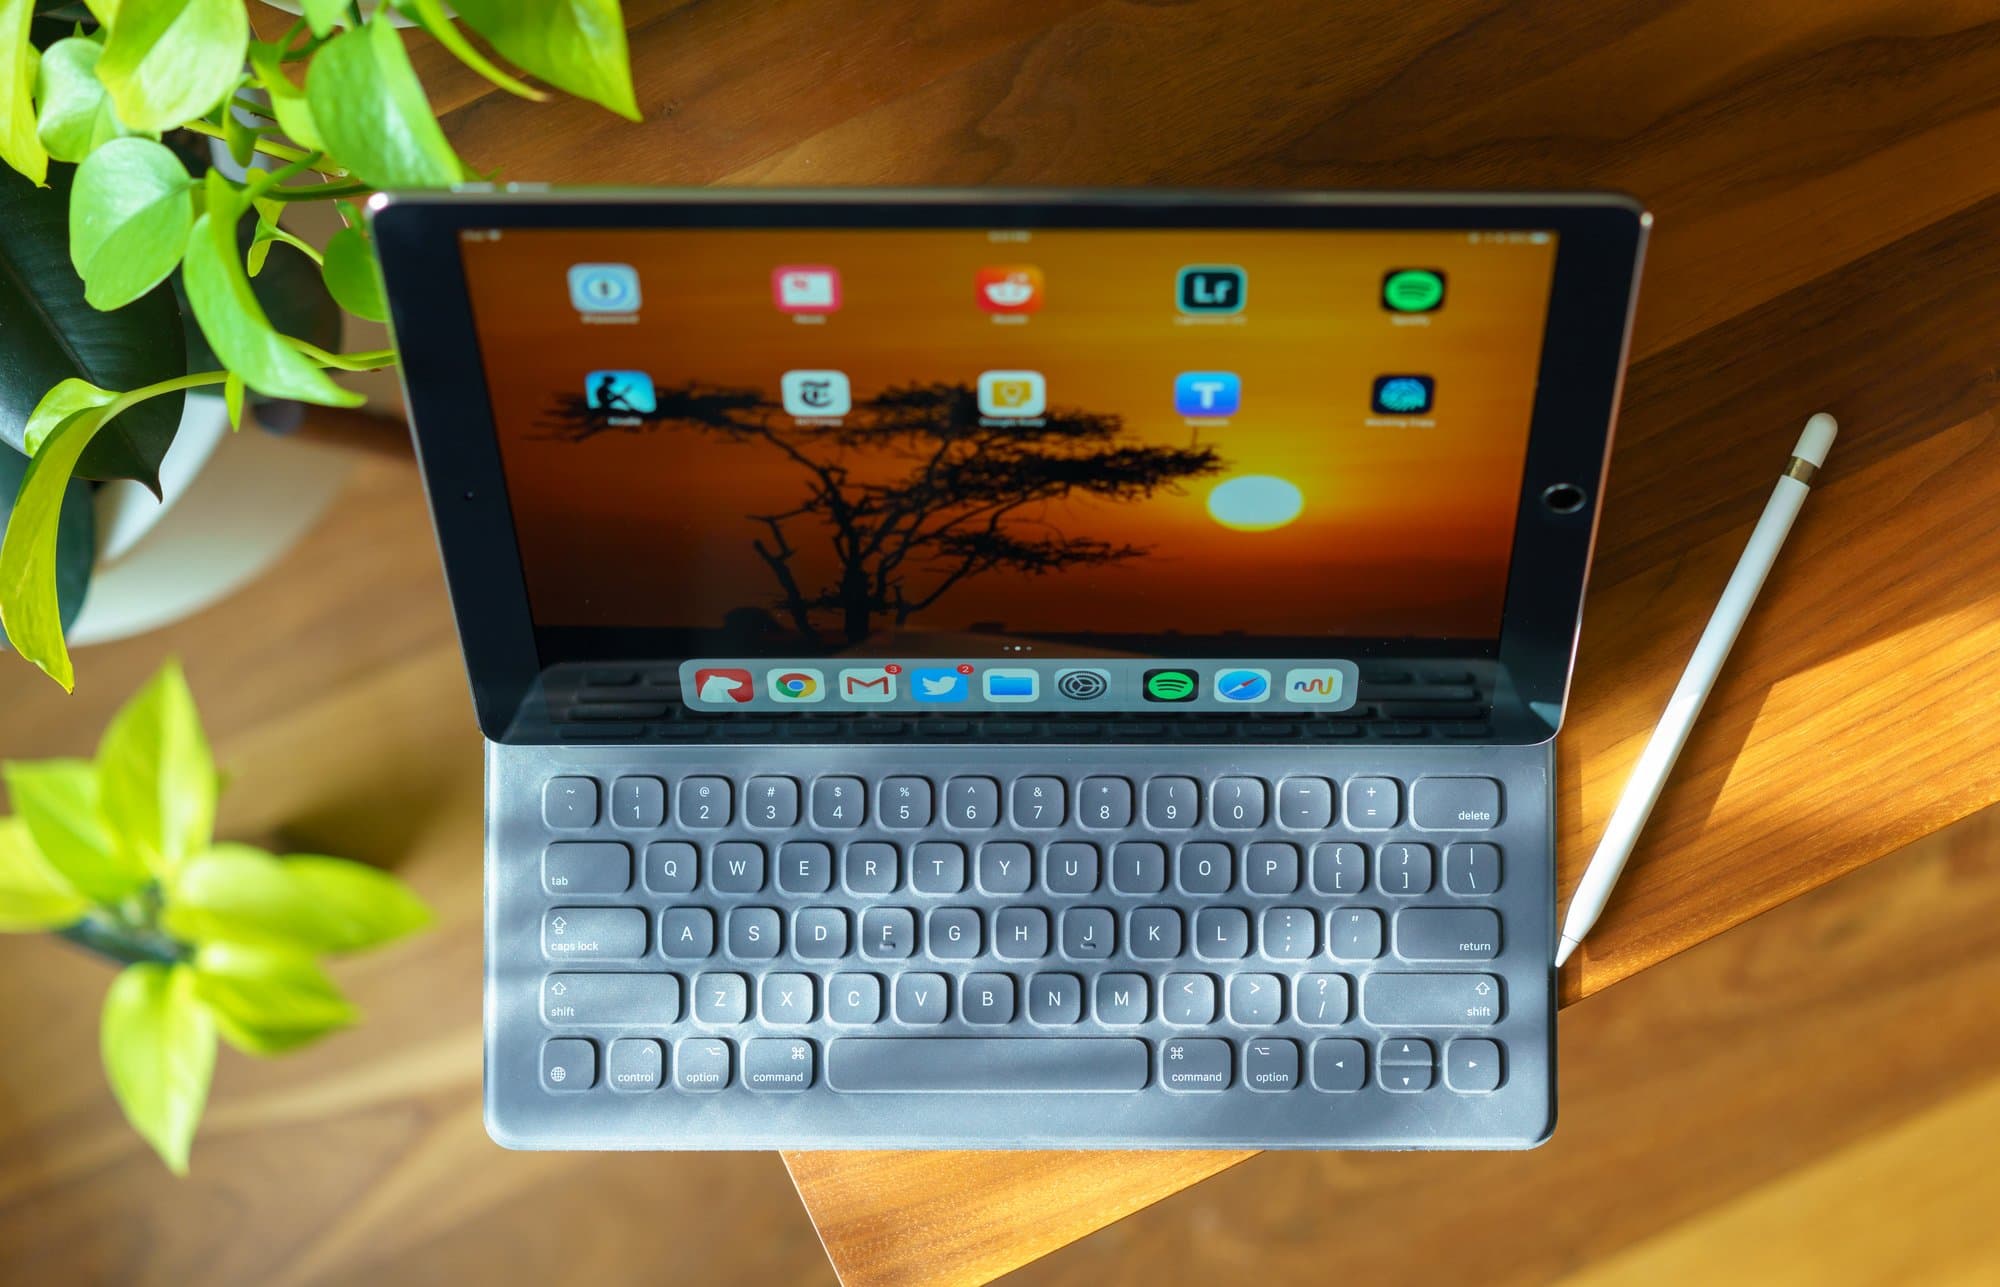
Using any iPad with a dedicated keyboard really supercharges the tablet experience if you hope to do anything other than passive media consumption. I spend a lot of time web browsing and writing so having a better text input method was vital. The Apple Smart Keyboard follows the same formula as the Smart Cover: lightweight and magnetically-attached cover that doubles as a foldable stand.
The Smart Keyboard adds a bit of extra thickness to the cover, but it's still fairly thin and light. There are a few ways to fold the keyboard depending on if you want the keyboard open with a more laidback screen or no keyboard and a more vertical angle. Folding the Smart Keyboard into either mode can feel a bit like origami. It still takes me a second to remember how to fold it into the no-keyboard mode.

Thanks to the Smart Connector, no batteries are required with the Smart Keyboard. However it does lack backlighting and lacks a top row of function and media keys.
The keyboard's material is rather interesting.. like some kind of textured fabric formed over the keys. Activating keys does not take much effort but a bit more than what you might expect from a wireless Apple Magic Keyboard, modern MacBook or MacBook Pro. It's easy to type on and I've written most of this article on with the Smart Keyboard keyboard. I wouldn't say it's better to type on than the Magic Keyboard, but it's great for what it does. Keyboards are an intensely subjective matter so your mileage may vary.

However, I have found some issues with it:
- The keyboard constantly disconnects and becomes unresponsive to iOS. I have to unfold then fold the keyboard back or jiggle the Smart Connector area to get it to work again. It happens multiple times per day. It's a known issue that Apple has tried to address once with a firmware update, but now seems to just advise replacement.
- The viewing angle of the iPad Pro is not adjustable. You just get the two modes and that's it. It's okay most of the time but on a few occasions (usually when I'm slouching in a chair...) I have found myself stuffing something behind the iPad Pro to prop it up a bit more.
- When the keyboard is folded open, the soft side of the cover touches the surface you're working on. That's the same side of the cover touches the iPad's screen when it's closed. So you can't just casually unfold the keyboard on to just any coffee shop table without wiping the table down first, lest you get crumbs or a drizzle of honey on your iPad Pro.
- Rather trivial but it's hard to use the keyboard in a more relaxed, casual couch setting without placing a hard surface underneath.
Those are fairly minor concerns though. Having a keyboard on my iPad Pro has changed how I think about and interact with it. And I haven't even talked about the keyboard shortcuts yet. It feels so much more powerful; huge productivity boost. First off, there are the basic iOS shortcuts:
⌘ (Command) + H: Navigate to the home screen from anywhere. ⌘ + Tab: The quick app switching behavior you've come to know and love on macOS. ⌘ + Space: Open up Spotlight search. I frequently use this as an app launcher if I don't want to move my hands from the keyboard. ⌘ + Up/Down: Jump to the top or bottom of a website or other such supported scroll view, respectively. ⇧ + ⌘ + 3: Take a screenshot. ⇧ + ⌘ + 4: Take a screenshot and enter the editing UI. ⌘ + Option + D: Show and hide the dock. ⌘ + period: In certain supported applications, this kind of functions as an escape/cancel key.
When you are in any application you can hold down ⌘ (Command) to get a cheat sheet about what shortcut keys that app supports. You'll quickly find that most shortcuts are similar or identical to their macOS equivalent. Things like ⌘ + C for copy, ⌘ + V for paste and so on. Not all apps do a great job at supporting every expected shortcut key combination though.4
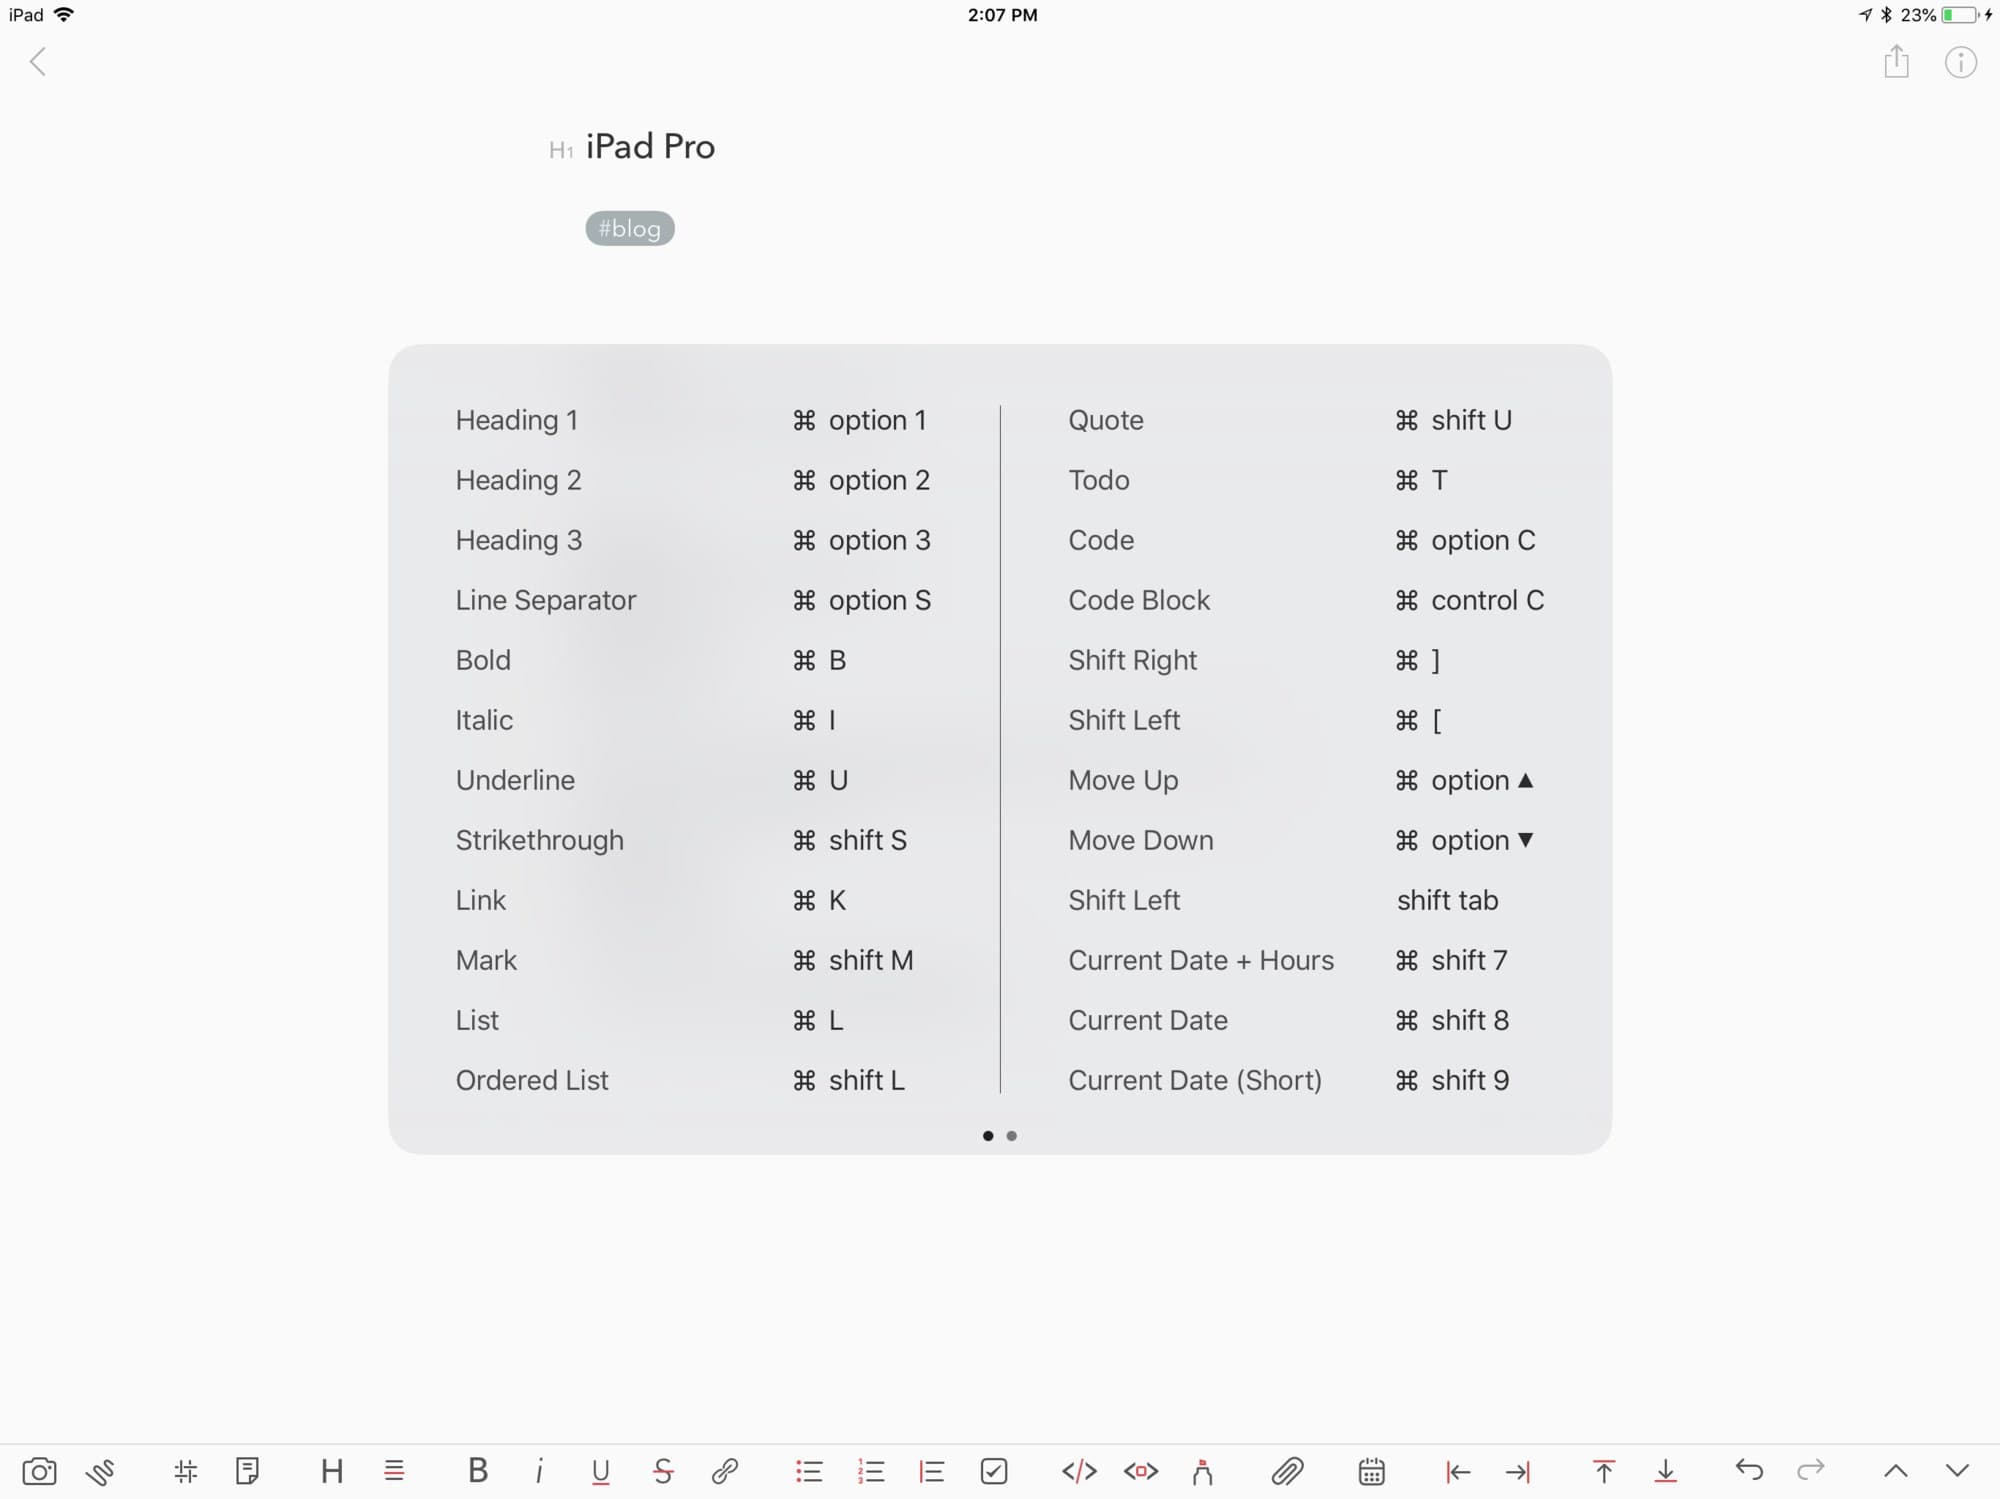
Holding down ⌘ in Bear app to view keyboard shortcuts.
When typing a lot...
Unfortunately, the Smart Keyboard is not a panacea that fixes all iPad Pro issues and makes it a trailblazing creation machine. When typing for extended periods, like writing this post over many sessions, I run into two issues with text input using the Smart Keyboard:
- Repetitively placing a cursor or selecting text is a chore. It's tedious to constantly move your hand from the keyboard up to the middle of the screen as opposed to a closer adjacent mouse as you have become accustomed to with a computer.
- Staring down at a screen begins to hurt my neck after a long time. I get the same thing when using a laptop for too long and always prefer connecting my computer to a raised display so I only have to look straight ahead, not down.
While I can't exactly fix the first issue (though I have tinkered with using the Pencil to more accurately tame the cursor/text selection), I can come up with a quick solution to the second issue: use an adjustable iPad stand and a wireless keyboard.

Hold on a second, I know what you're thinking. This is ridiculous for a portable machine. I agree, and I use this setup sparingly. Really only when I know I will be using the keyboard for a long writing session.
I got the Viozon iPad Pro stand that raises the iPad Pro quite a bit higher. Then I easily paired an Apple Magic Keyboard with the iPad Pro. The unexpected benefit of using this keyboard is the extra top row of shortcut keys. I didn't know how much I missed the brightness, volume and media keys.
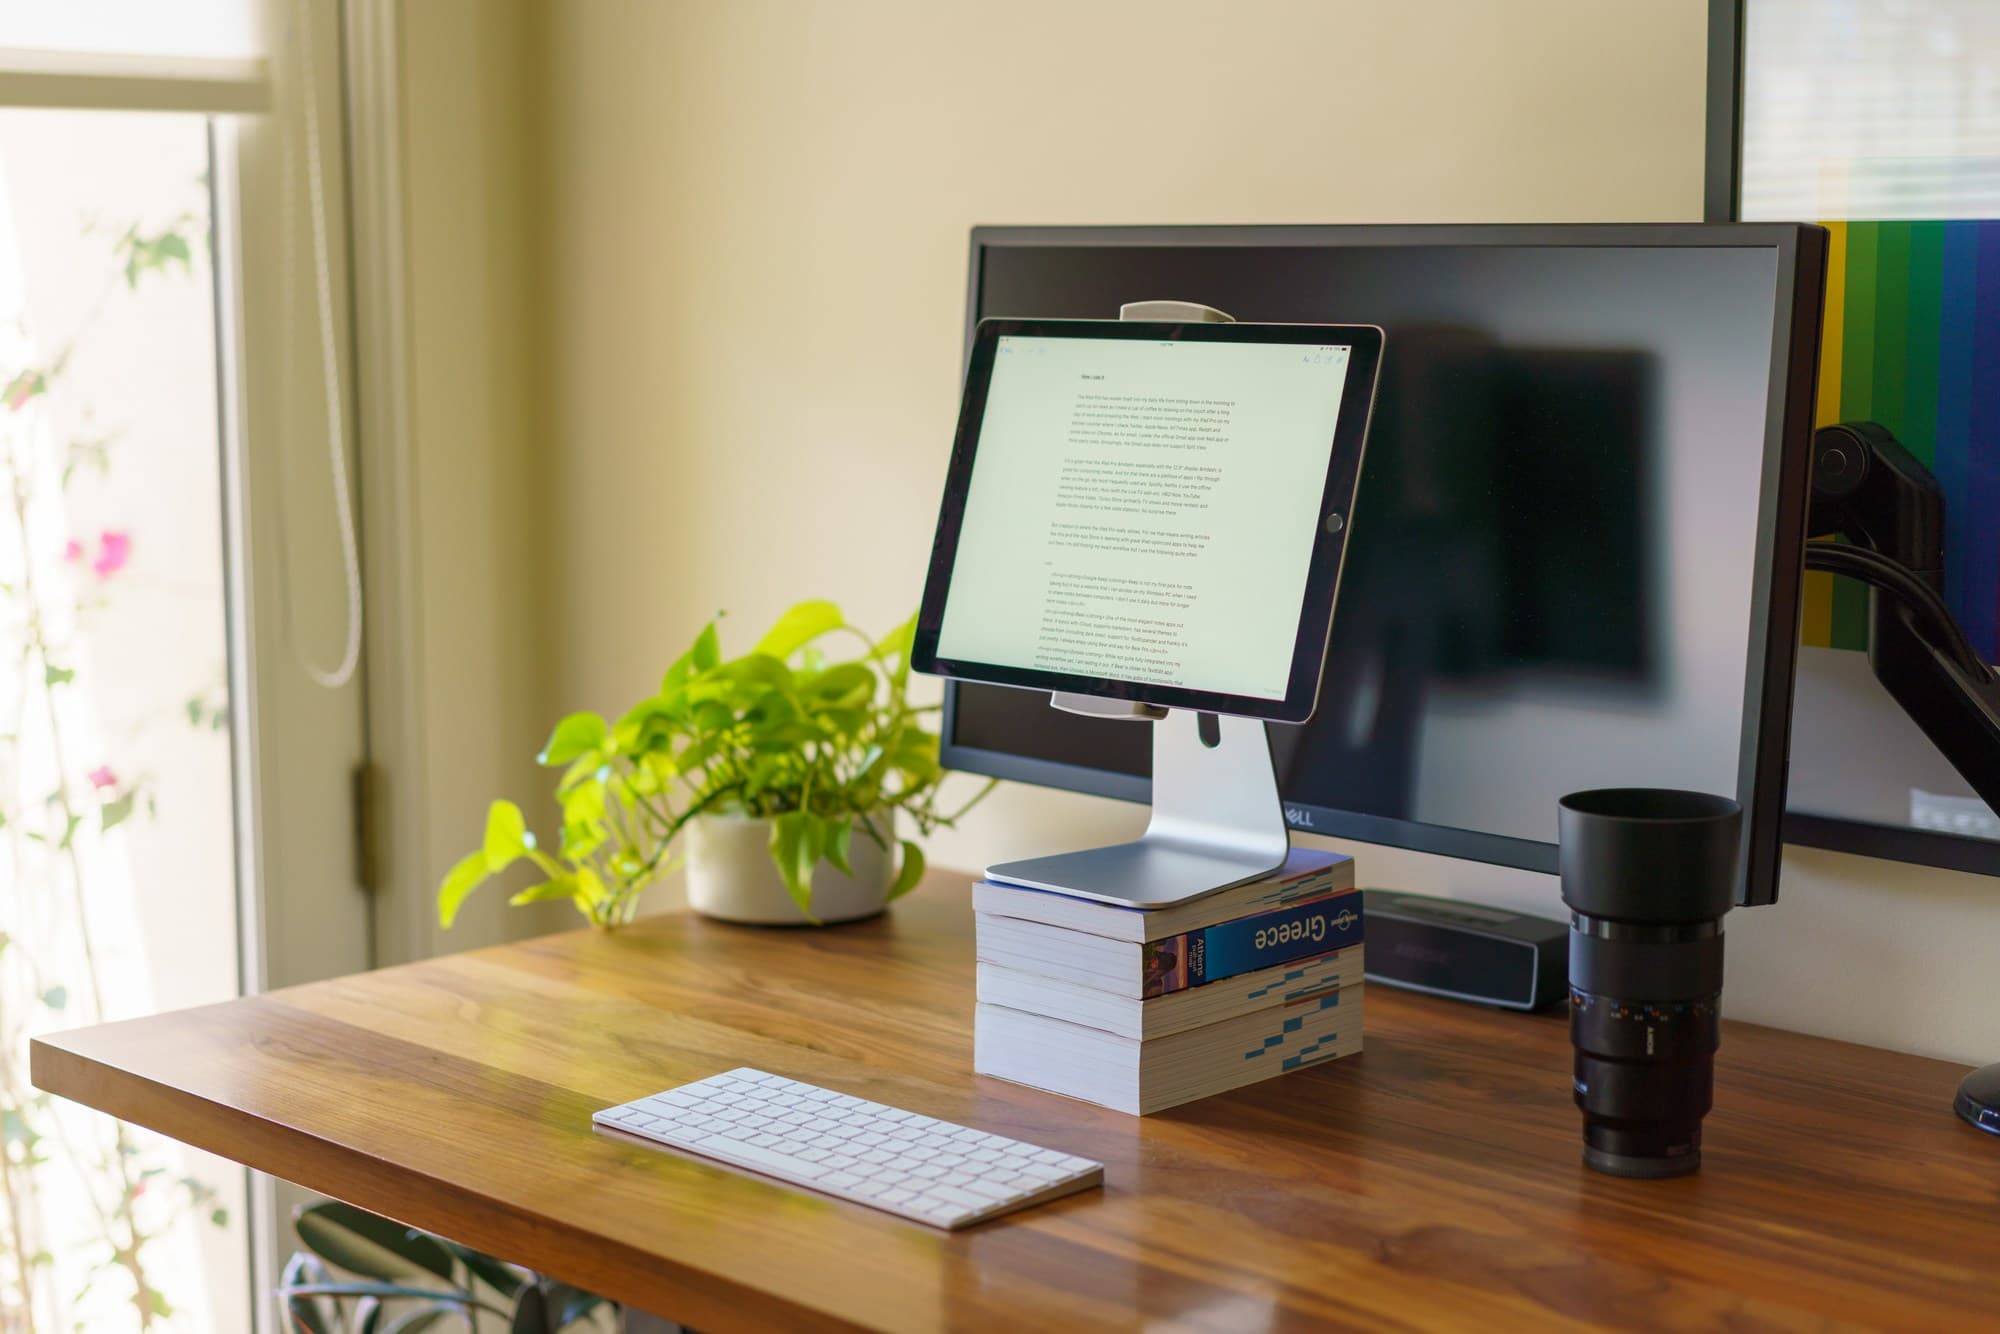
iPad Pro + Ulysses app on my standing desk for when I really want to write a lot.
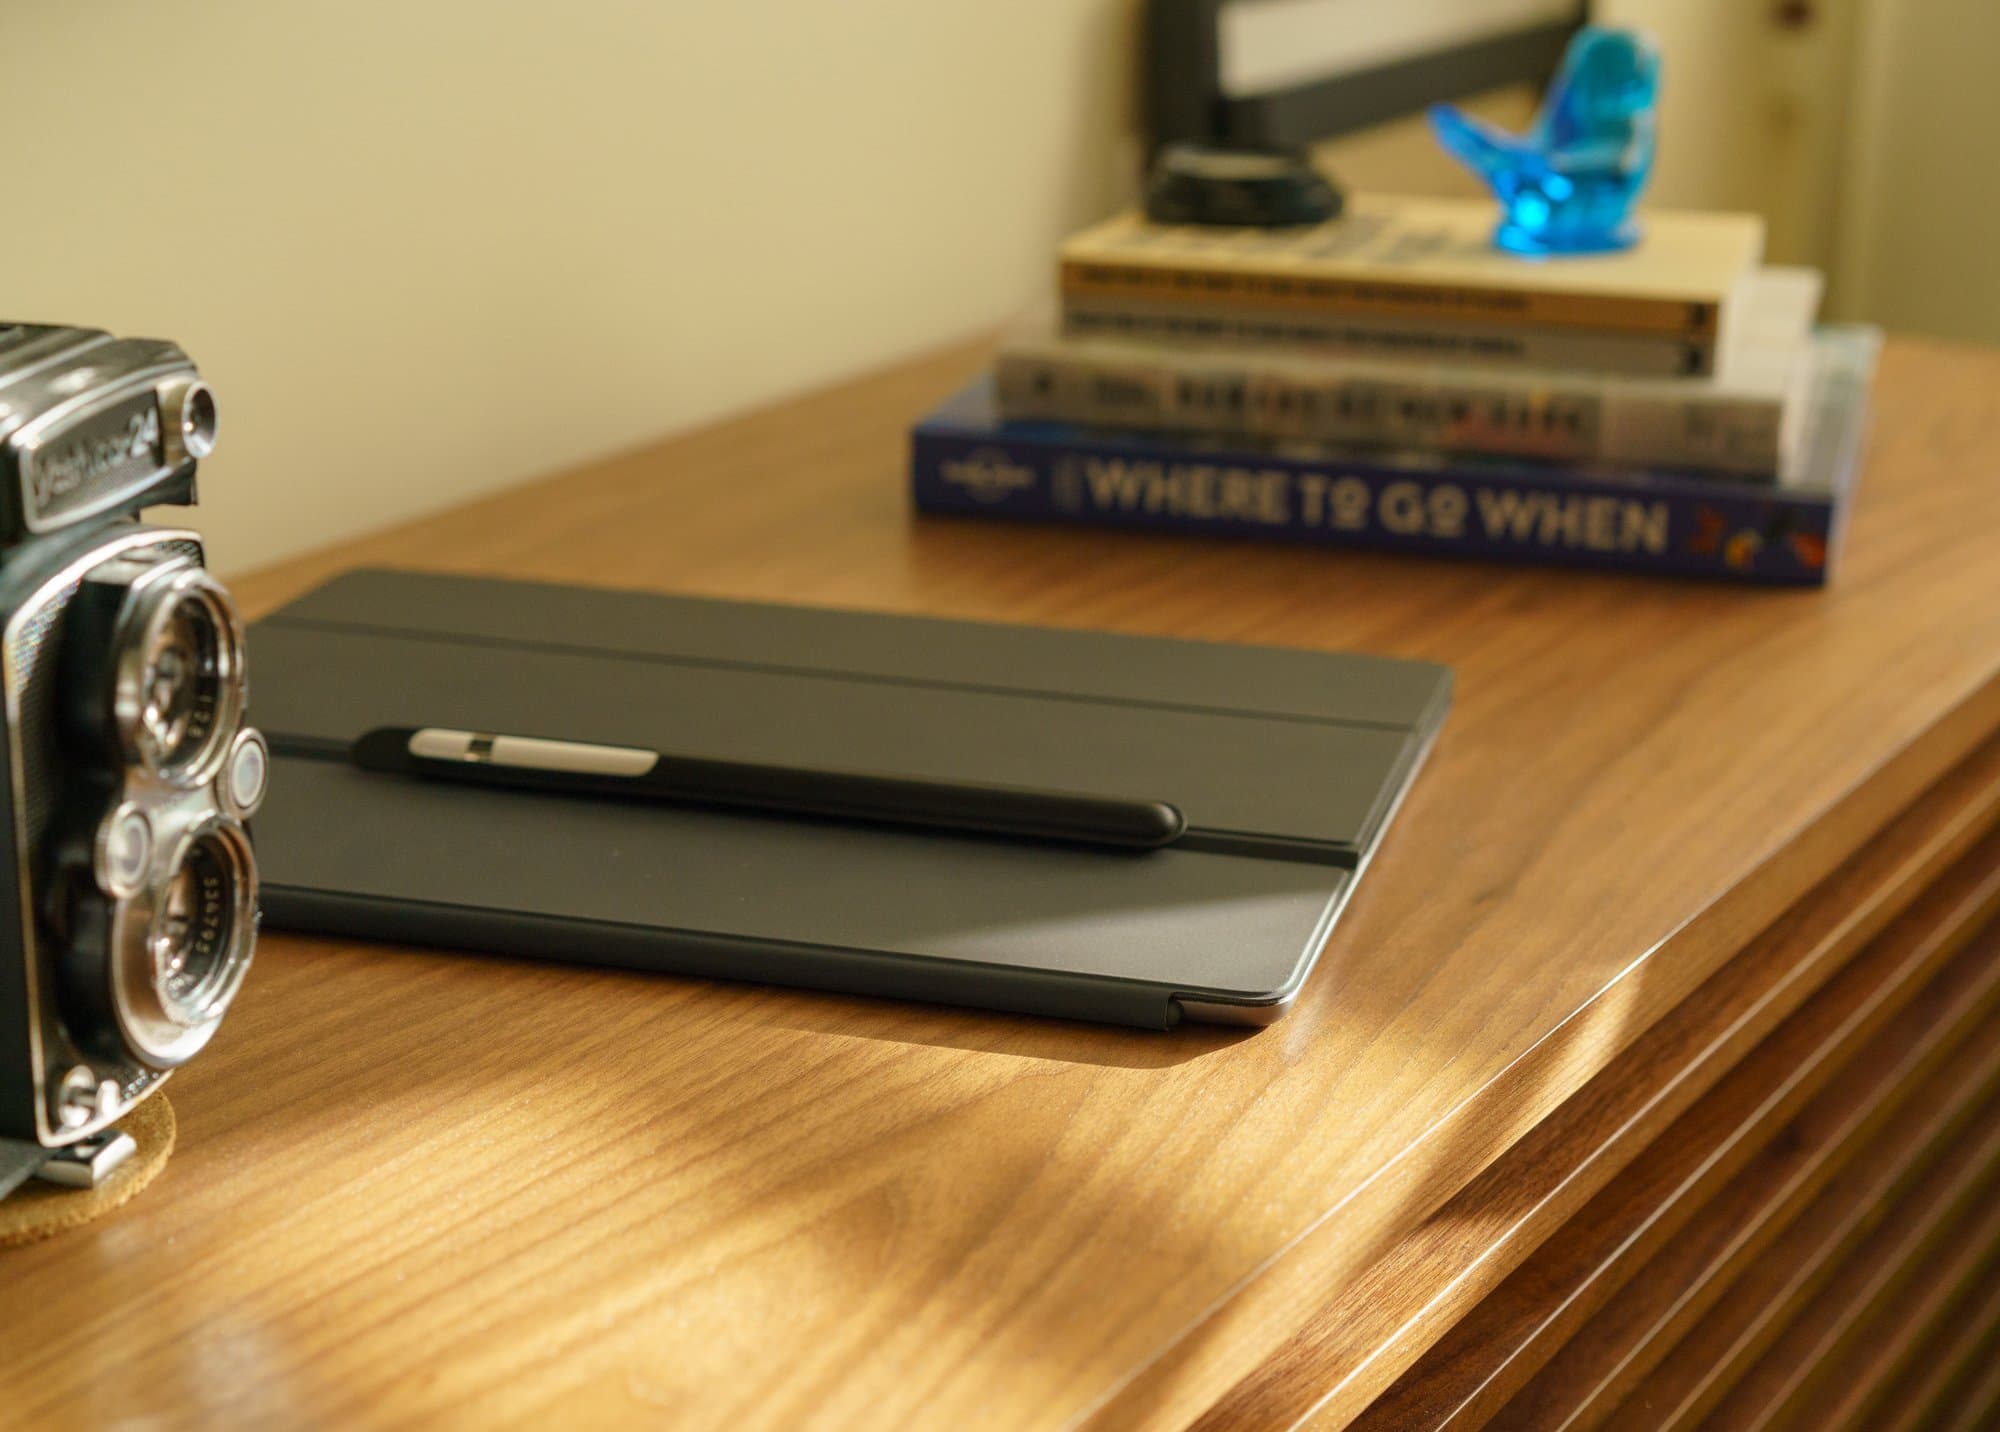
That's the route I went, but this is the iPad Pro and there's a thriving line of quality third-party accessories. Other popular keyboards include the Brydge keyboard that basically turns the iPad Pro into a laptop with a high-end foldable alumnium keyboard. Logitech has something similar with the Create keyboard case and then Razer has a high-end keyboard case, complete with backlit keys. But the one I'm most curious about is the Studio Neat Canopy, which is simply a way to take your Apple Magic Keyboard with you.


The iPad Pro with a stand makes for a good kitchen companion and I don't have to worry about getting the Smart Keyboard dirty.
Pencil
It’s hard to hear anything about the iPad Pro without hearing about the Apple Pencil in the same breath. I didn’t need the Pencil—my needs had been more than satisfied with the iPad Pro and Smart Keyboard thus far. But I felt the need to pick one up anyways to explore the capabilities... designing is my job, how could I not? Who knows maybe it could help with some quick design sketches here and there.
The Pencil is not your ordinary stylus. A regular stylus is rather low-tech and aims to get the capacitive touchscreen display to think it’s a finger. The Apple Pencil does no such nonsense, instead relying on internal sensors, Bluetooth and sensors inside the iPad to communicate with the Pencil. This allows for pressure sensitivity, position tracking and tilt tracking. In addition, there’s a feature at play called "palm rejection" that helps ignore when your hand is touching the screen as you’re using the Pencil.
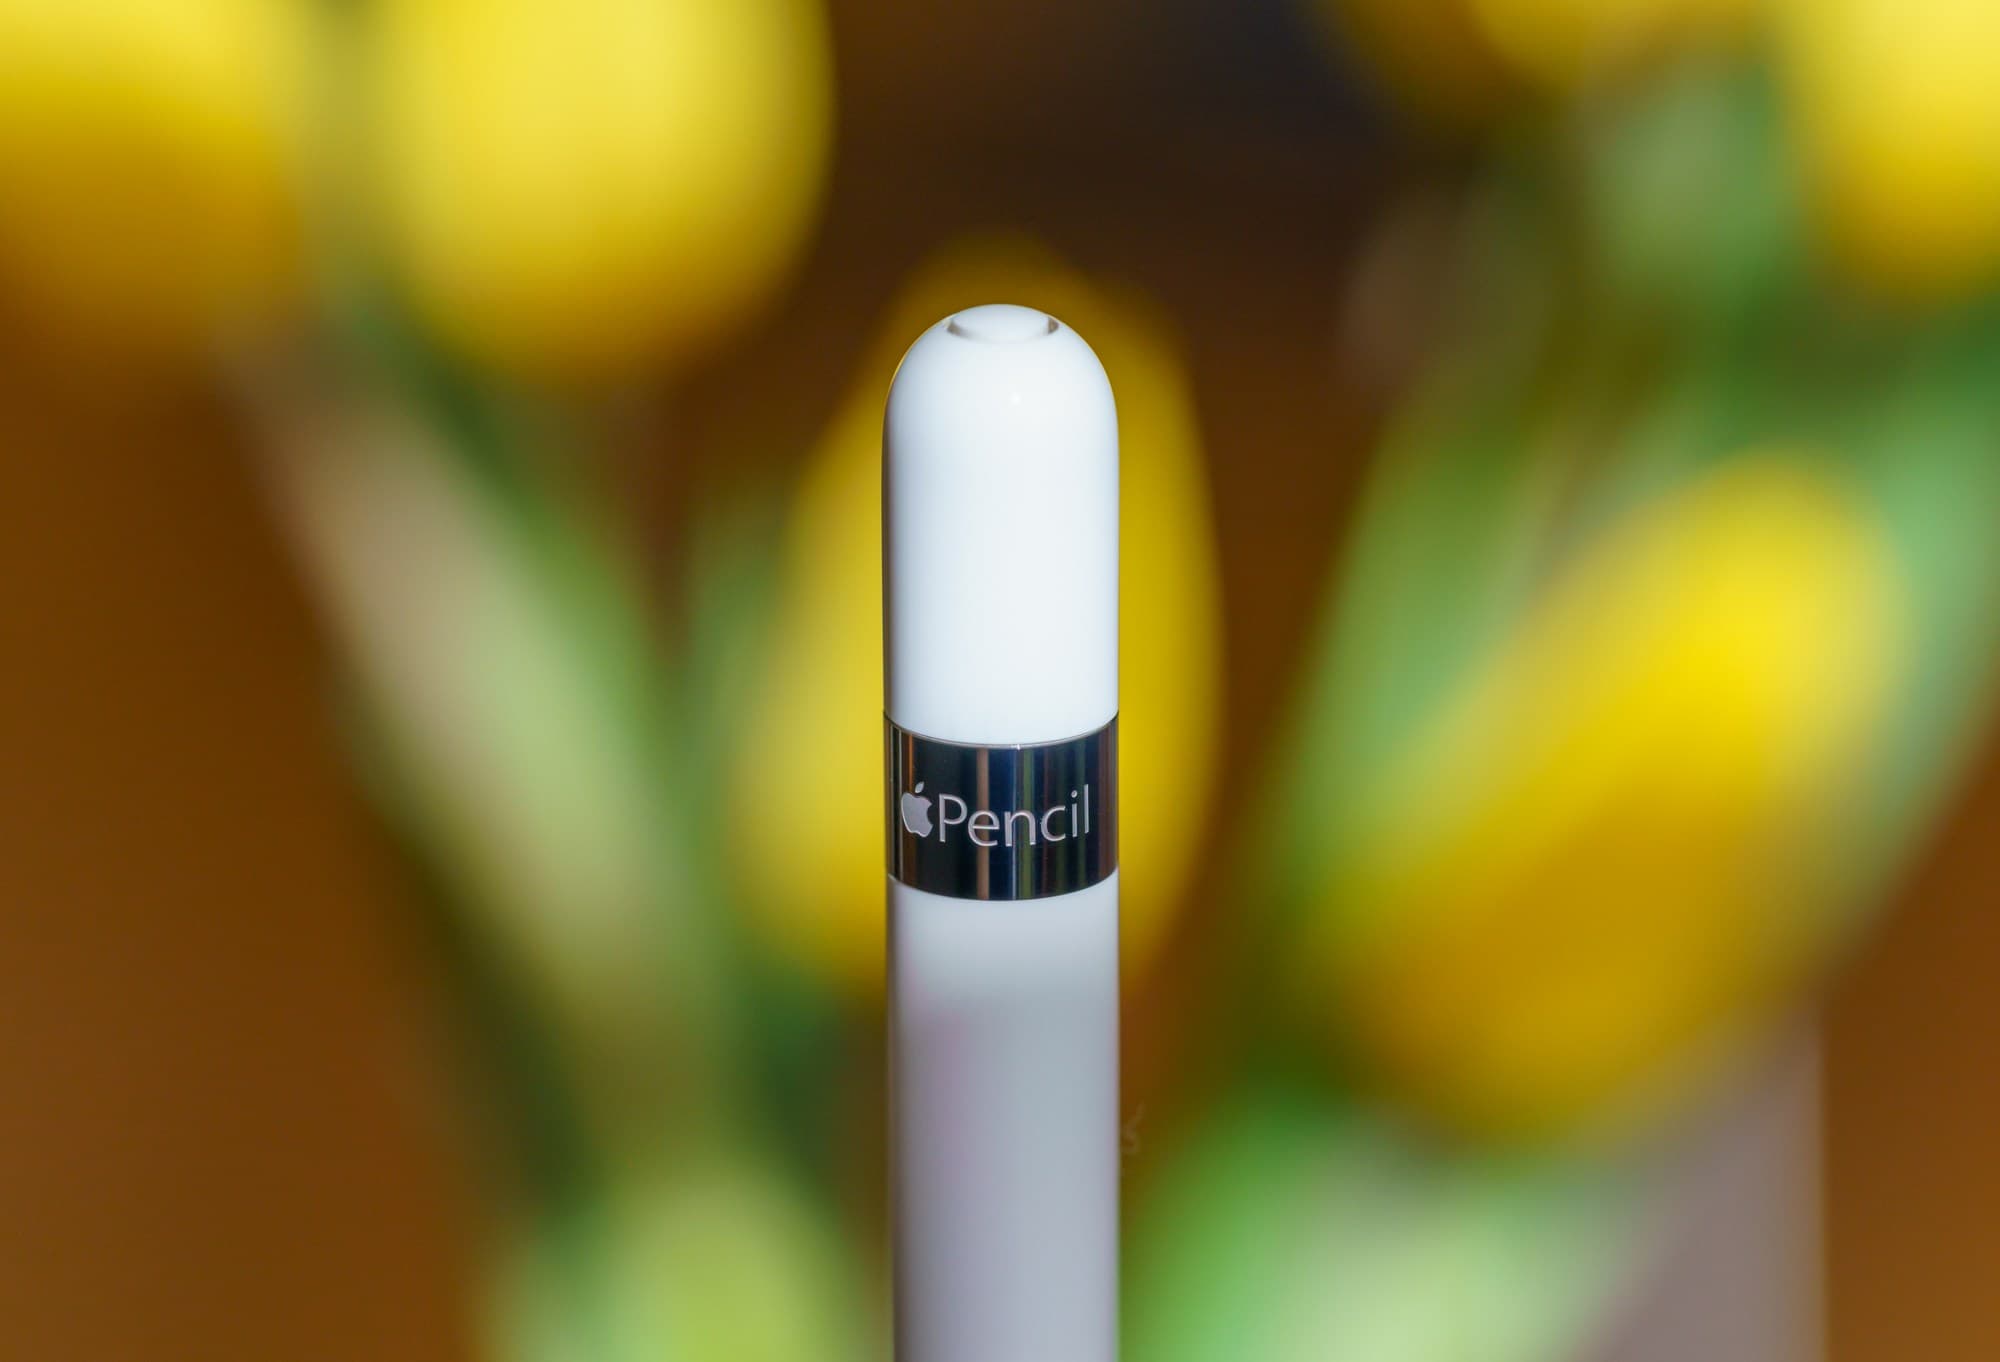


I bought a 90mm macro lens for this post. :)
And finally, the iPad Pro can detects changes coming from the Pencil at 240 times per second. That’s twice as fast as the ProMotion display can refresh. All this adds up to one thing: an extremely responsive writing and drawing experience. Lag is not eliminated entirely—you can draw a line very quickly and see the line just a tad behind the tip of the Pencil (more so in some apps than others), but that’s not real world usage.5
The Pencil is long, slender and a tad slippery with its smooth plastic exterior. It has a bit of weight to it as well, but I find that to be a plus. Pairing and charging the Pencil is as easy as popping the cap off the end and plugging it into the iPad Pro to charge. I’m sure you’ve seen this already, it’s quite goofy. There's also a supplied adapter so you can charge the Pencil with a normal Lightning cable.. but it's tiny and bound to get lost.
I began by using the Pencil in the native Notes app. Then with Paper by FiftyThree. Then ProCreate. Then Concepts. Then GoodNotes. Then Notability... the list goes on.6 The experience remains the same: fun, delightful, scintillating (even as I'm quickly reminded how poor my handwriting has gotten).
The Pencil glides. It's is so fast and so smooth on the iPad Pro's glass. Even the slightest touch gets registered. The pressure sensitivity is immediately noticed; lines get heavier and darker the harder I press.
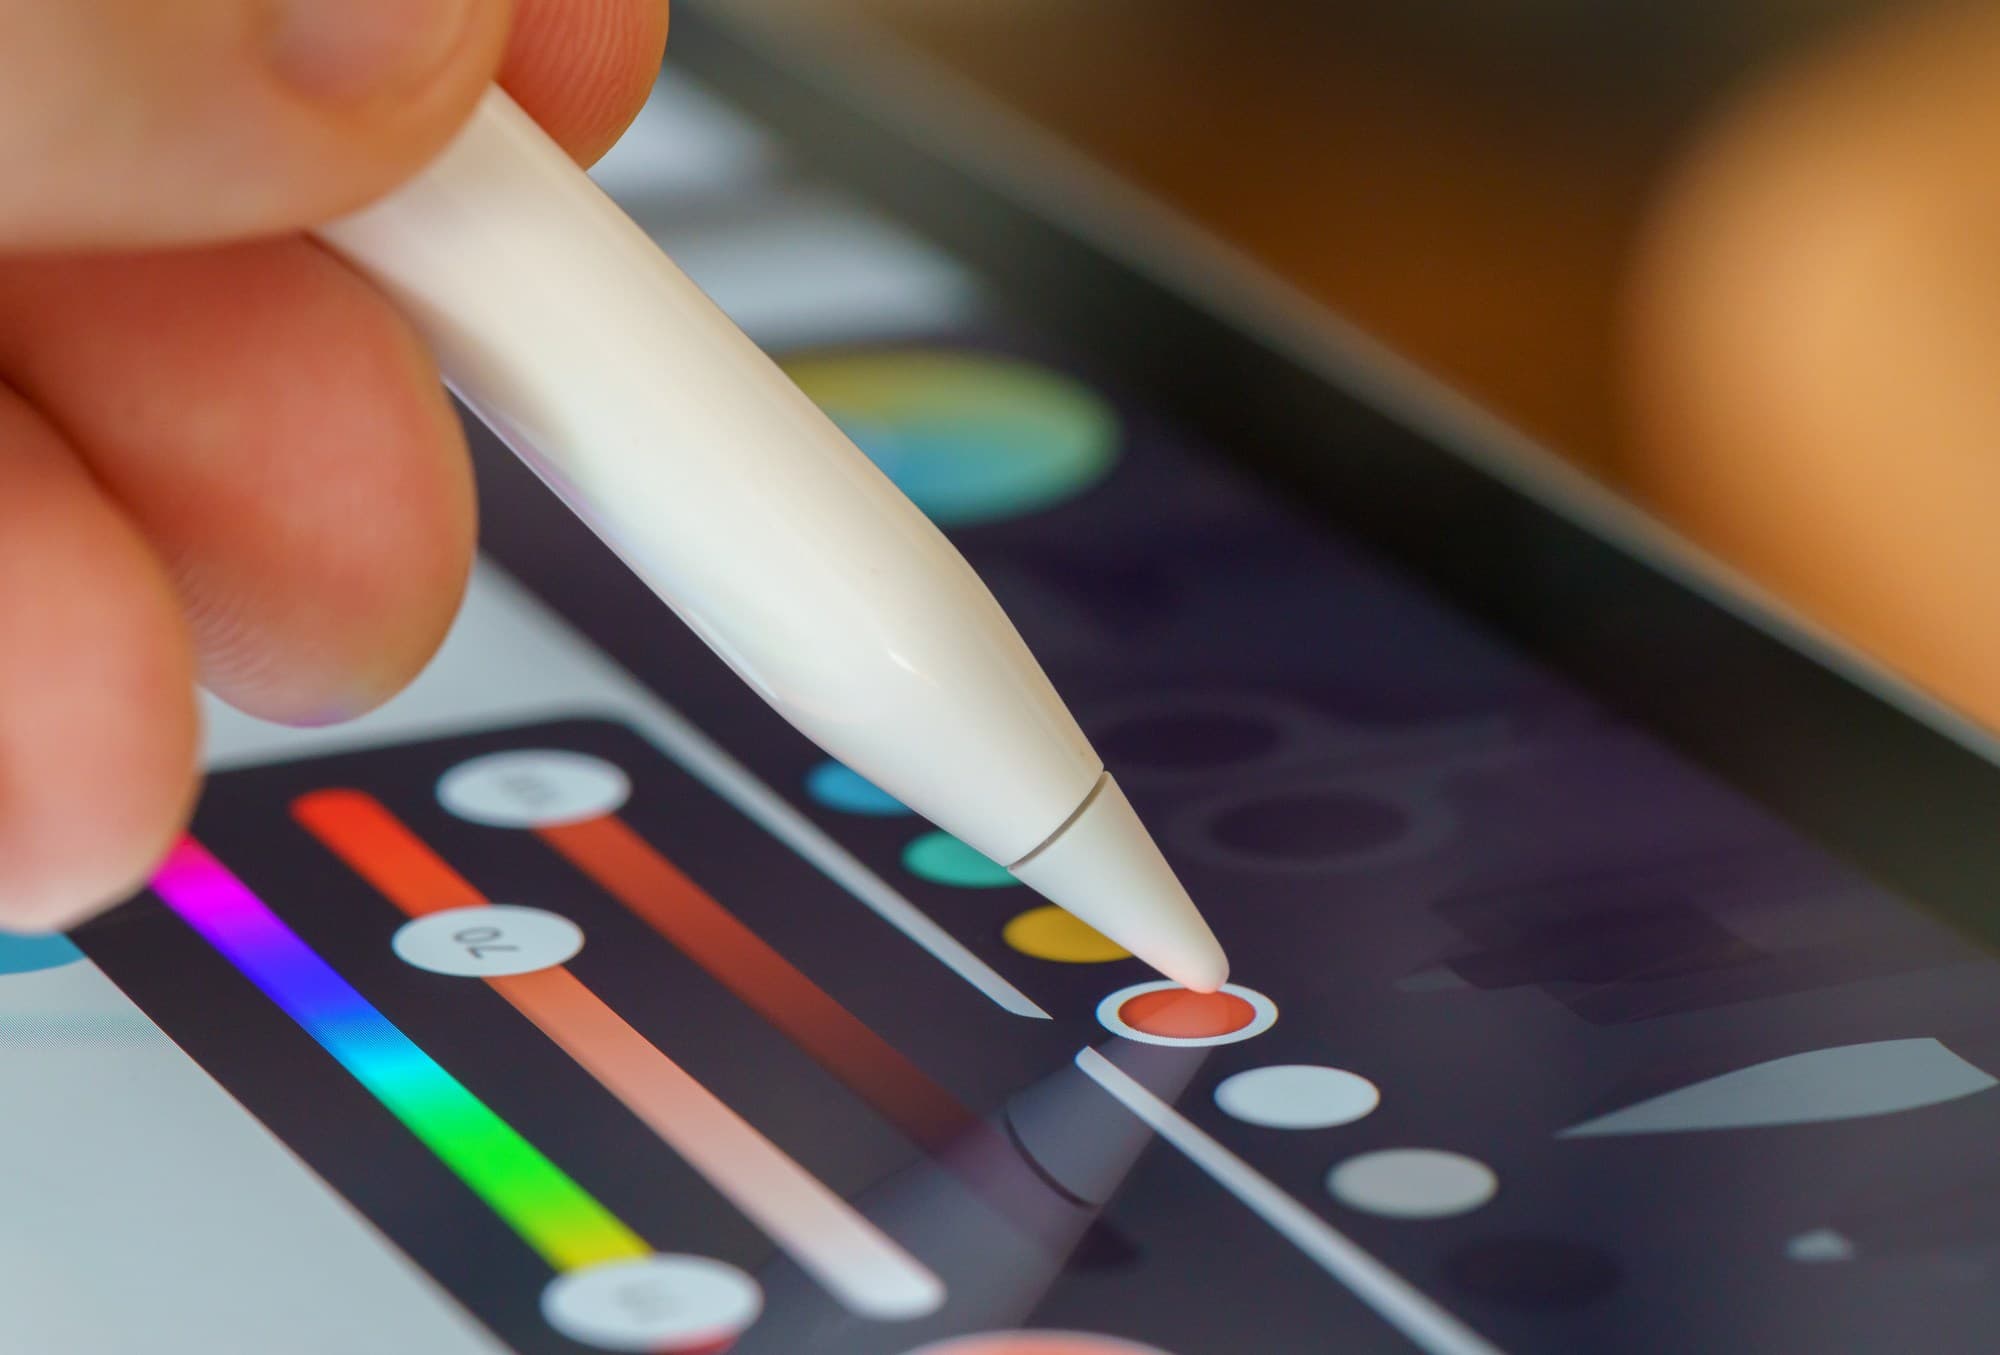
Tinkering with the popular Paper app.
The same goes for tilt tracking. As I tilt the Pencil while drawing, the line goes from hairline thin, to thicker and then it begins shading when it's tilted the most. Just like a real pencil. In fact the only thing I don’t like is that drawing with a plastic tip on smooth glass is, well, a bit too smooth. You don’t get to feel the texture and resistance of drawing on real paper that would have made it feel more realistic. 7
I know I’m not doing the Pencil any justice with this tame description, but trust me this thing is phenomenal. I just wish I had more reason to use it. I don’t do too much freehand drawing and I definitely prefer typing to handwriting when taking notes.
But then something interesting happened. I found myself casually using the Pencil throughout my regular app usage: from helping me lazily scroll around websites all the way to precisely placing cursors and selecting blocks of text in my various note-taking apps. It brings back some of that precision I had come to expect when computing with a mouse.
Charging
The iPad Pro battery life is great; there's no doubt about that! Unfortunately, it takes around 4.5 hours to charge the iPad Pro with the included 12W charger. The good news is that you can purchase just about any reputable USB-C charger with PD (I opted for the Apple 29W one, but Anker has a one too) and use it in conjunction with the Apple USB-C to Lightning cable to charge your iPad Pro in about half the time.
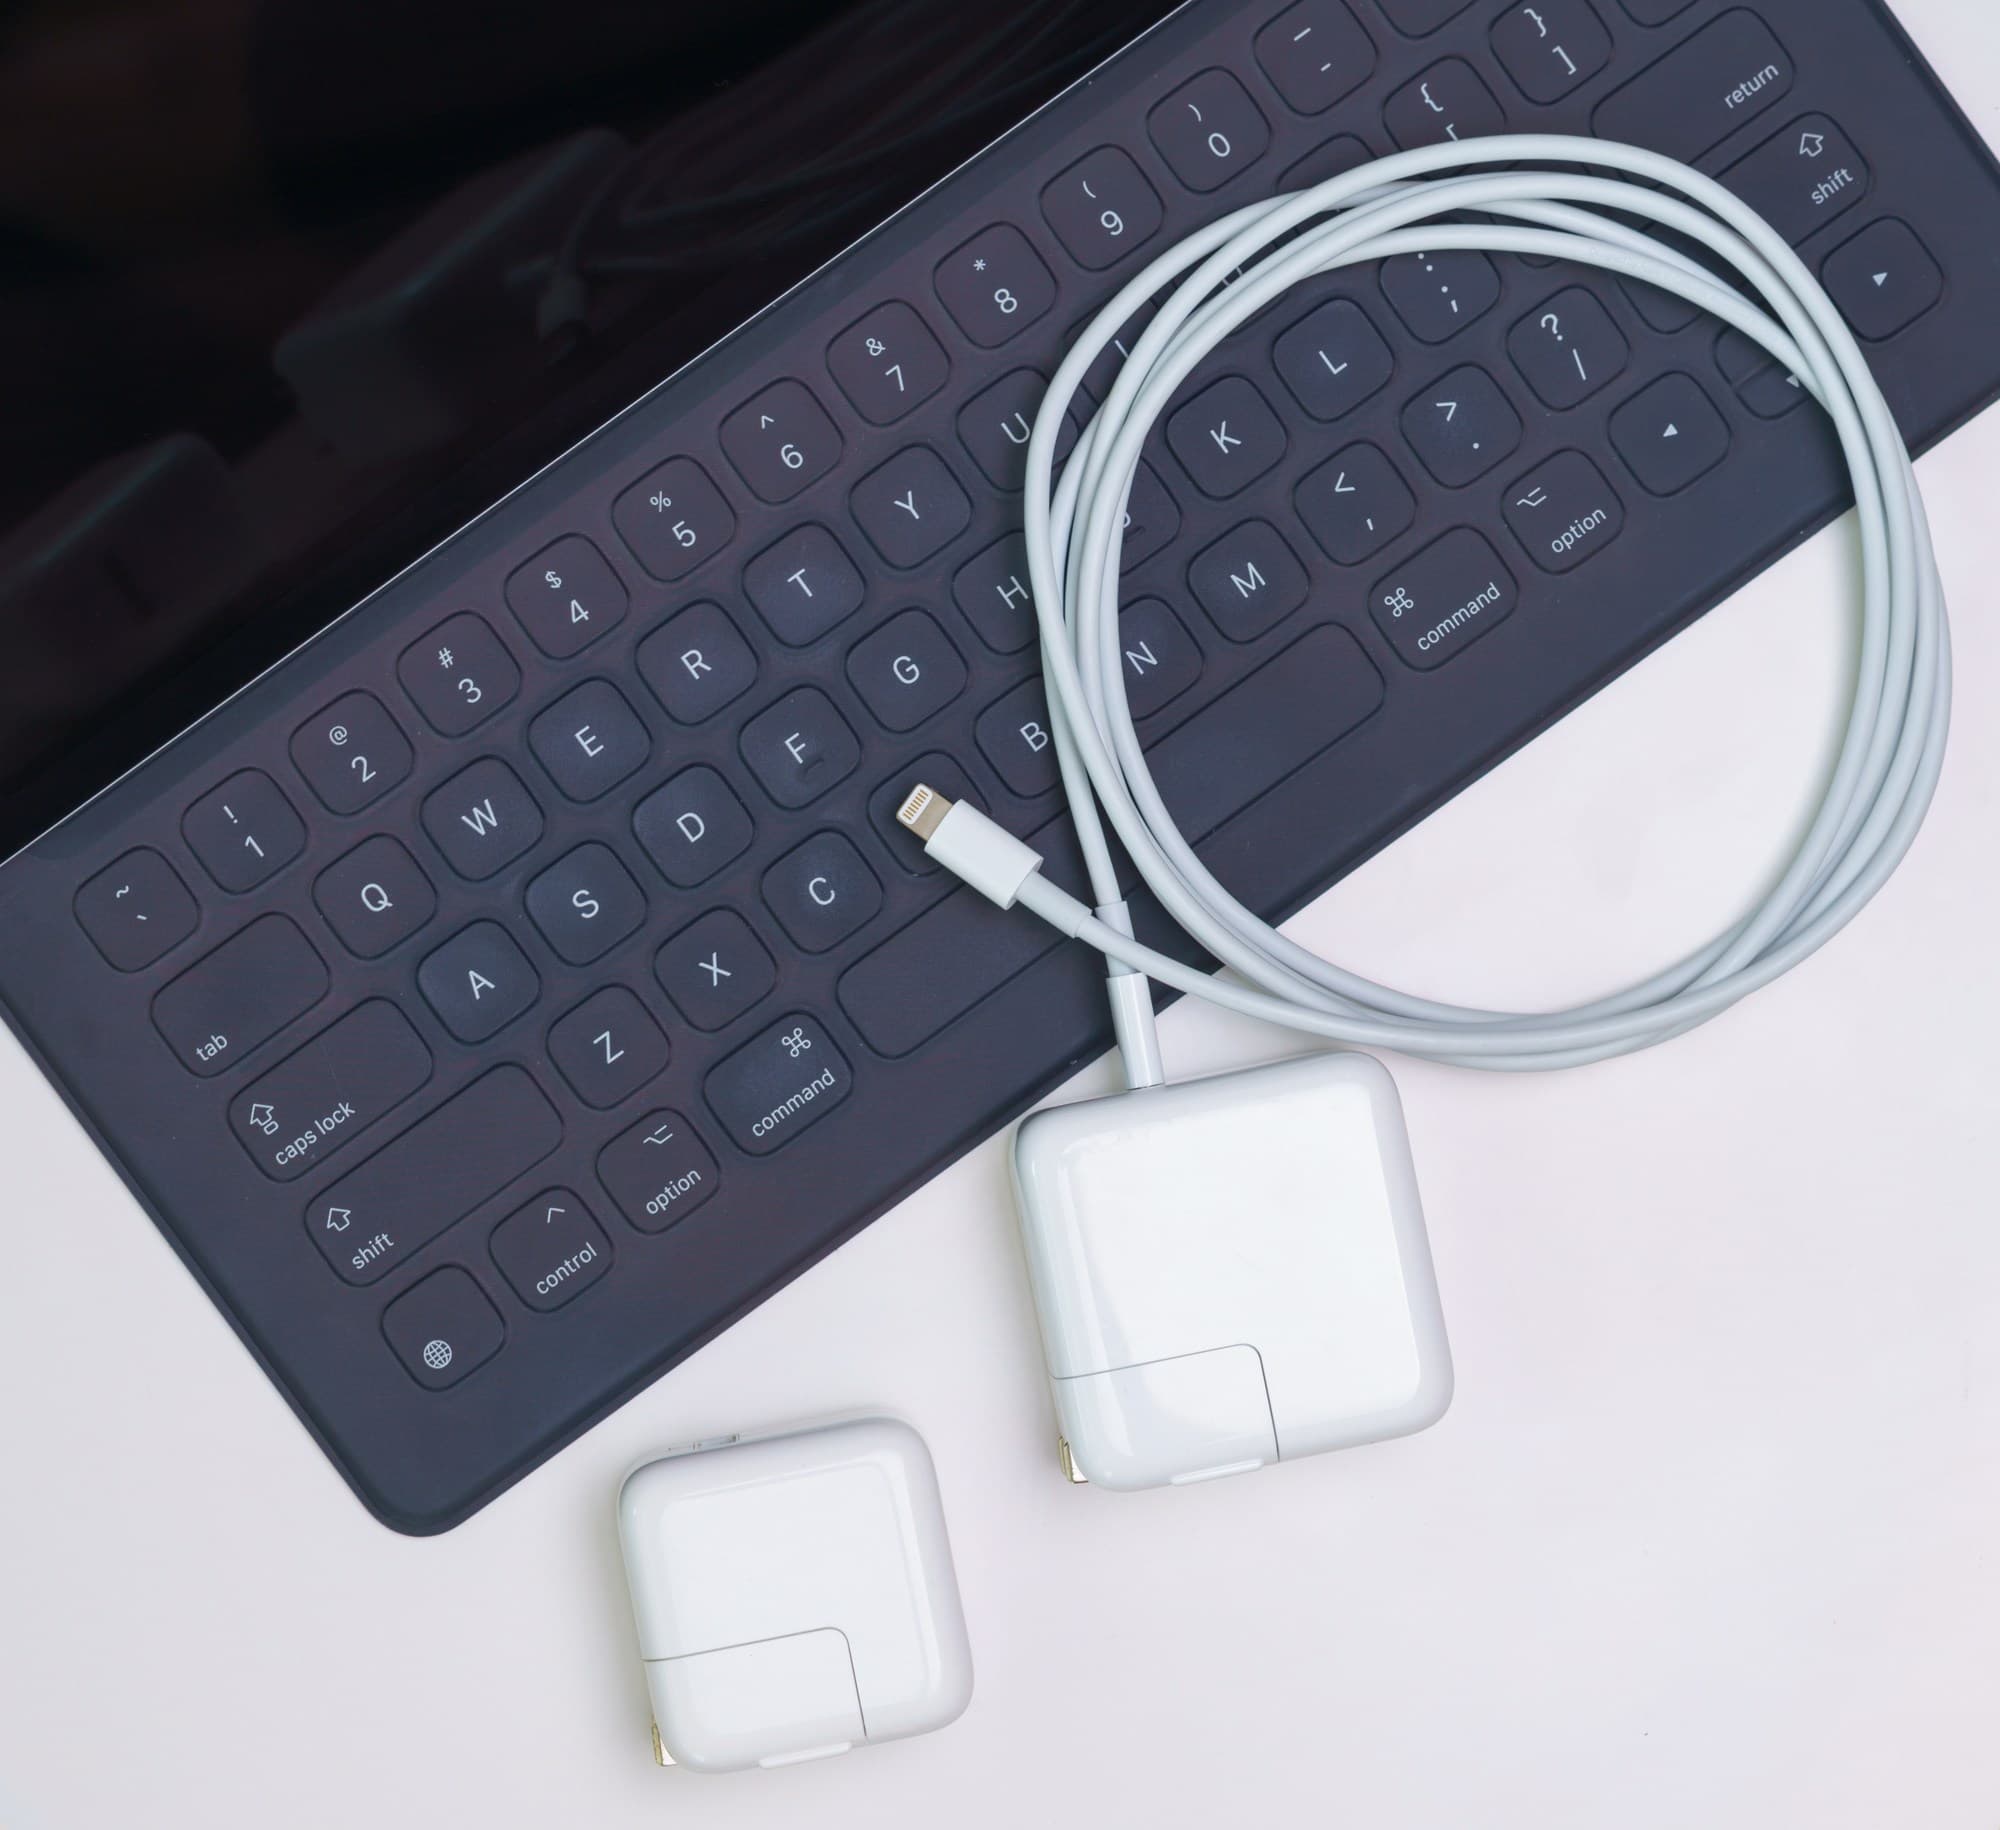
Apple 29W USB-C charger (next to included 12W charger) and USB-C to Lightning cable.
Multitasking with iOS 11
What really puts the Pro in iPad Pro
When the iPad Pro originally launched with iOS 9, there was not much to write home about in the way of functionality geared towards the precise needs of iPad users. Then iOS 10 came long with a first stab at supporting more advanced workflows that would shine when given a larger screen and faster hardware like the iPad Pro. But it left a lot on the table.
iOS 11 addresses these head-on. I can’t claim to know what it was like to use an iPad Pro on iOS 10 but I can talk about my first impressions of iOS 11 on the 12.9-inch iPad Pro. Hint: I'm happy with it overall. Apple added or significantly updated a gamut of functionality to really put the iPad Pro to use with iOS 11:
- Dock: A customizable dock that can feature up to 15 user-defined apps/folders and 3 recently used applications (that aren’t already in the dock) on the 12.9" iPad Pro.
- App Switcher now featuring App Spaces (apps or pairs of active apps using Split View), Control Center and the dock
- Split View and Slide Over: The two features that probably come to mind first when talking about multitasking on the iPad. Split View lets you have two apps side by side and Slide Over lets you summon any app to slide on top of your current app(s) as a smaller window. More on this below.
- App Spaces: Shown in the App Switcher, these spaces retain your Split View configuration. If you always have Chrome and Bear in Split View, switching to either of them or the single App Space for them will always open them together in your same Split View configuration.
- Video Picture in Picture: While PIP is not new to iOS 11, it really fits in well and plays to the multitasking story here. On the iPad Pro the video is resizable and can get quite large if you’d like it to, as well as be hidden off to the side with audio still playing if you need that space for a moment.
- Multi-Touch Drag and drop: Easily the most significant change to iOS, blurring the lines from the old iOS we have become accustomed to and what we've been doing on desktop computers for decades.
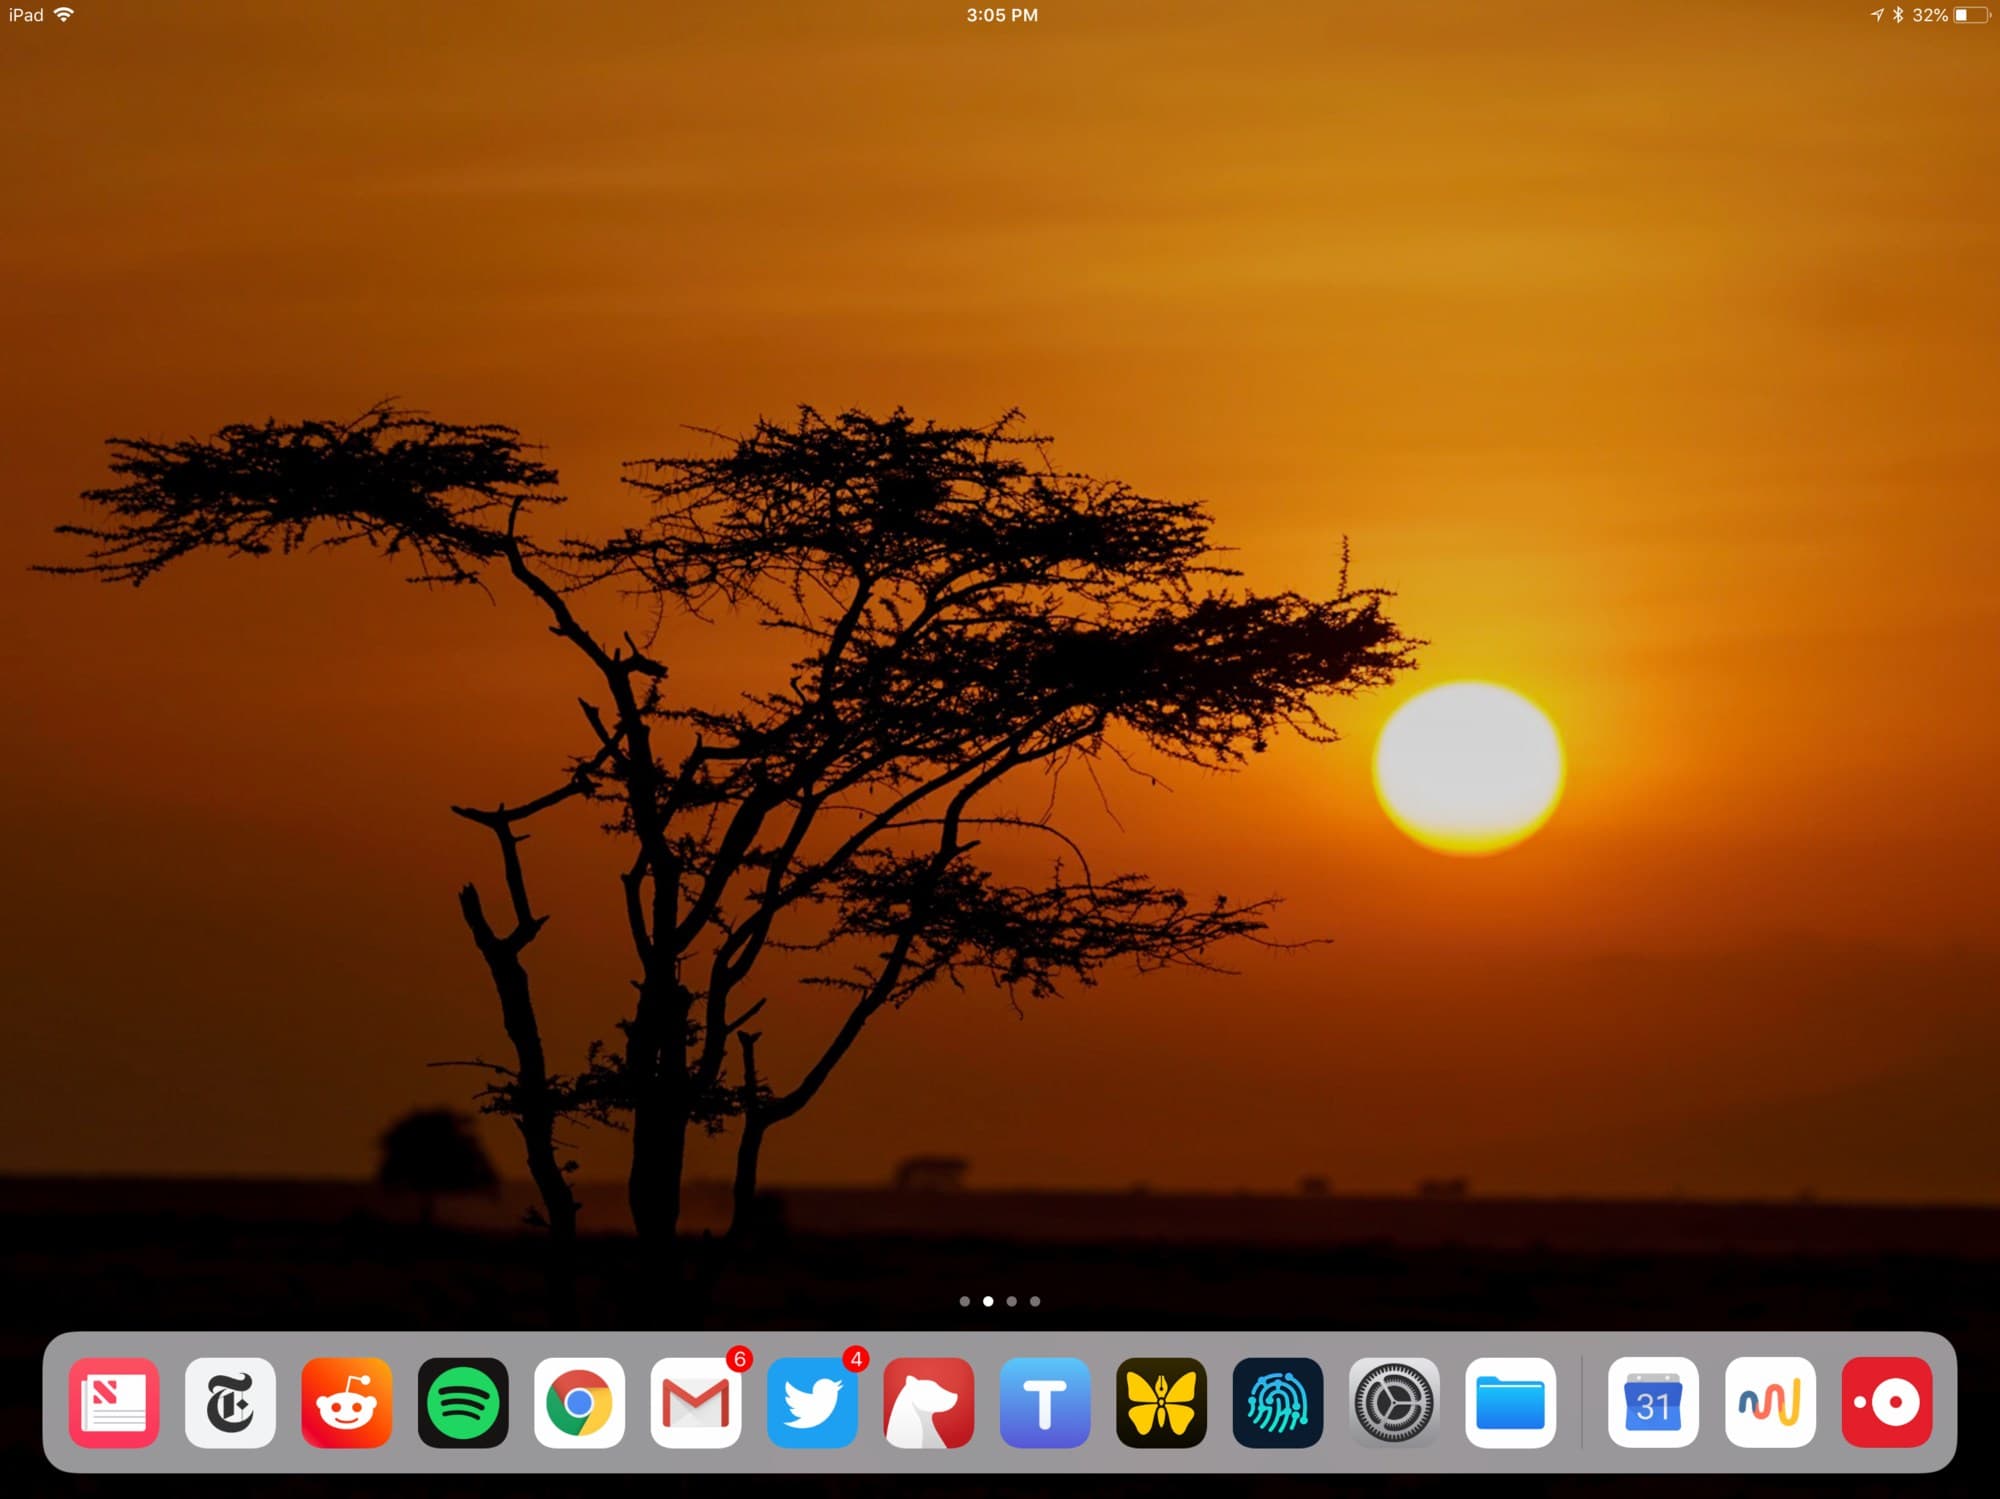
The new customizable dock greets you the first time you boot up the iPad Pro. You can swipe it up from any view, place any apps or app folders you use in it, as well as have it display recently used apps on the right side. No surprises here, just the same dock you know and love from macOS.8

The Dock and App Switcher
Then there's Split View and Slide Over. Honestly, it took me a few months to really start to appreciate these two and get a hang of their gestures. Split View gets the most use from me on a daily basis. The premise is simple: run multiple apps at the same time. You can do this either with apps laid out side-by-side with Split View or as a smaller, more temporary app floating on top with Slide Over.

Bear app in Slide Over mode on top of Chrome.
Invoking Split View involves dragging and dropping the second app you'd like to open while you have another full-screen app open (or to replace an app already in a Split View layout). I most frequently just swipe up the Dock and drag an app over. If the app you want isn't in the Dock and you have a keyboard connected, you can also type Command + Space to open up Spotlight, search for the app and then drag it down. You can also go to the Home screen, hold down and start dragging the first app then use another finger to tap and launch the second app while still holding the first app, then release it inside the second app (yea, these multi-touch methods are a bit involved).
The nuance comes with where you release the app. If you drag it directly to the center of the screen, it will become a Slide Over app. If you drag it to the sides, it will become a Split View app. Apple hints at what will happen by changing the shape of the app as you drag it around.9
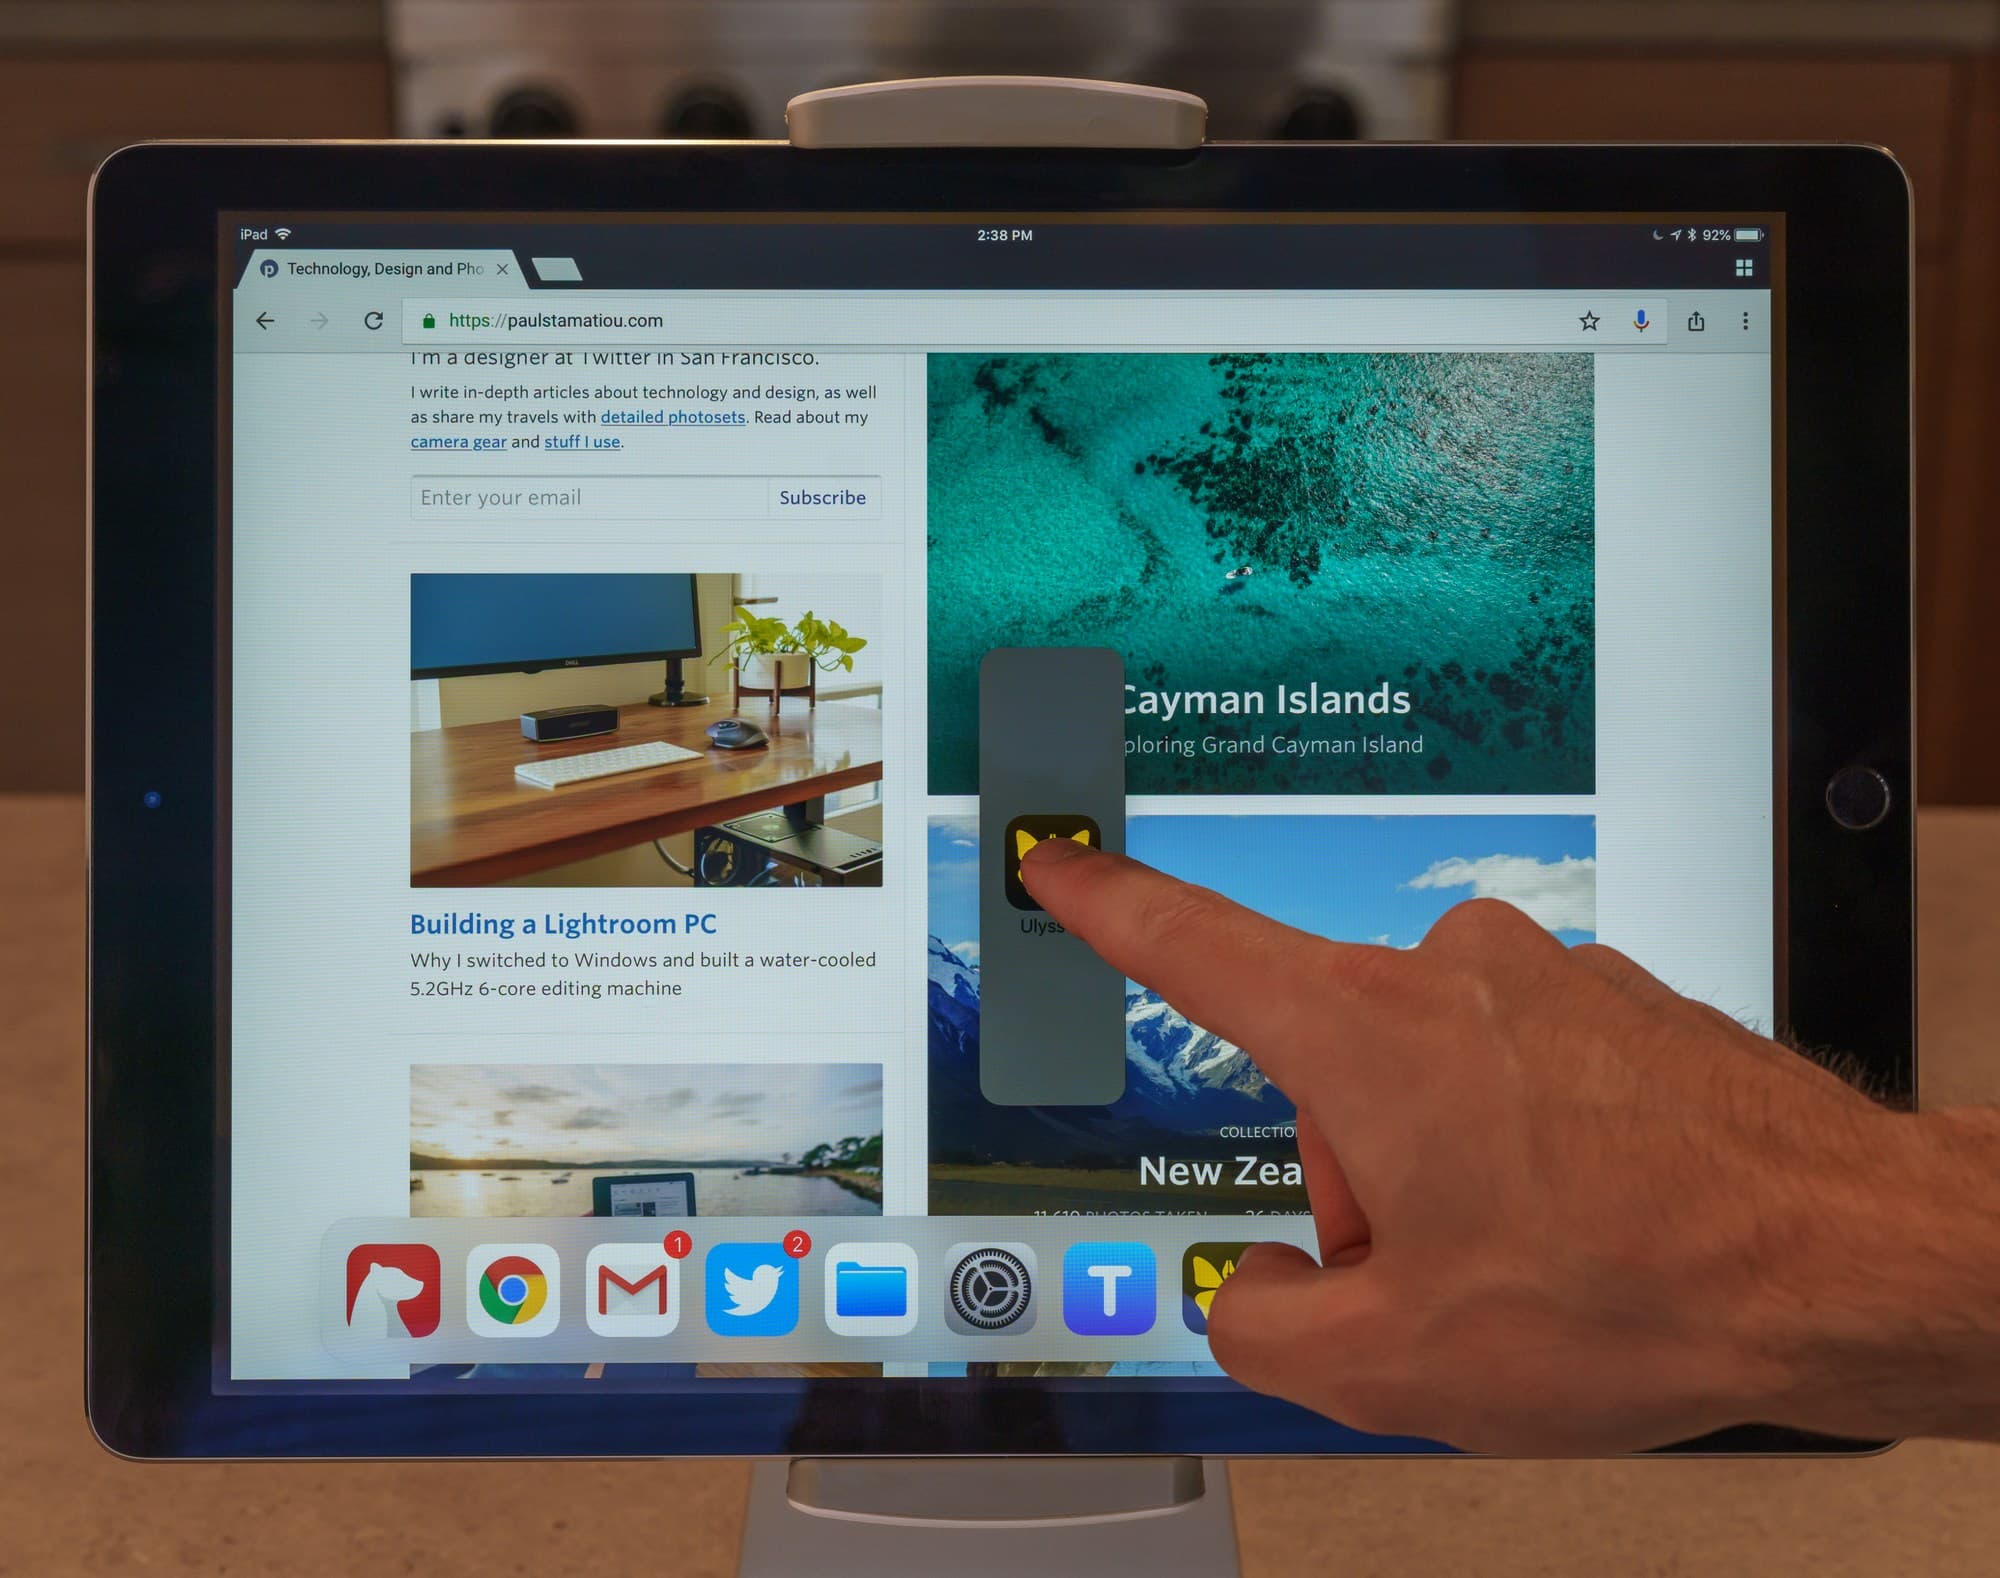

Dragging an app from the Dock to initiate Split View.
Apps in Split View can be laid out in a few ways: 50/50, 30/70 and 70/30. You can also select which side each app lives on. Adjusting the width of the app split is easy with a grabber handle that appears in a separator between the apps. Well, it should be easy at least. I have found it very tricky to actually get a hold of the grabber handle when dealing with certain kinds of apps (like ones with their own sliding sidebars and text editors) that always intercept your gesture here.
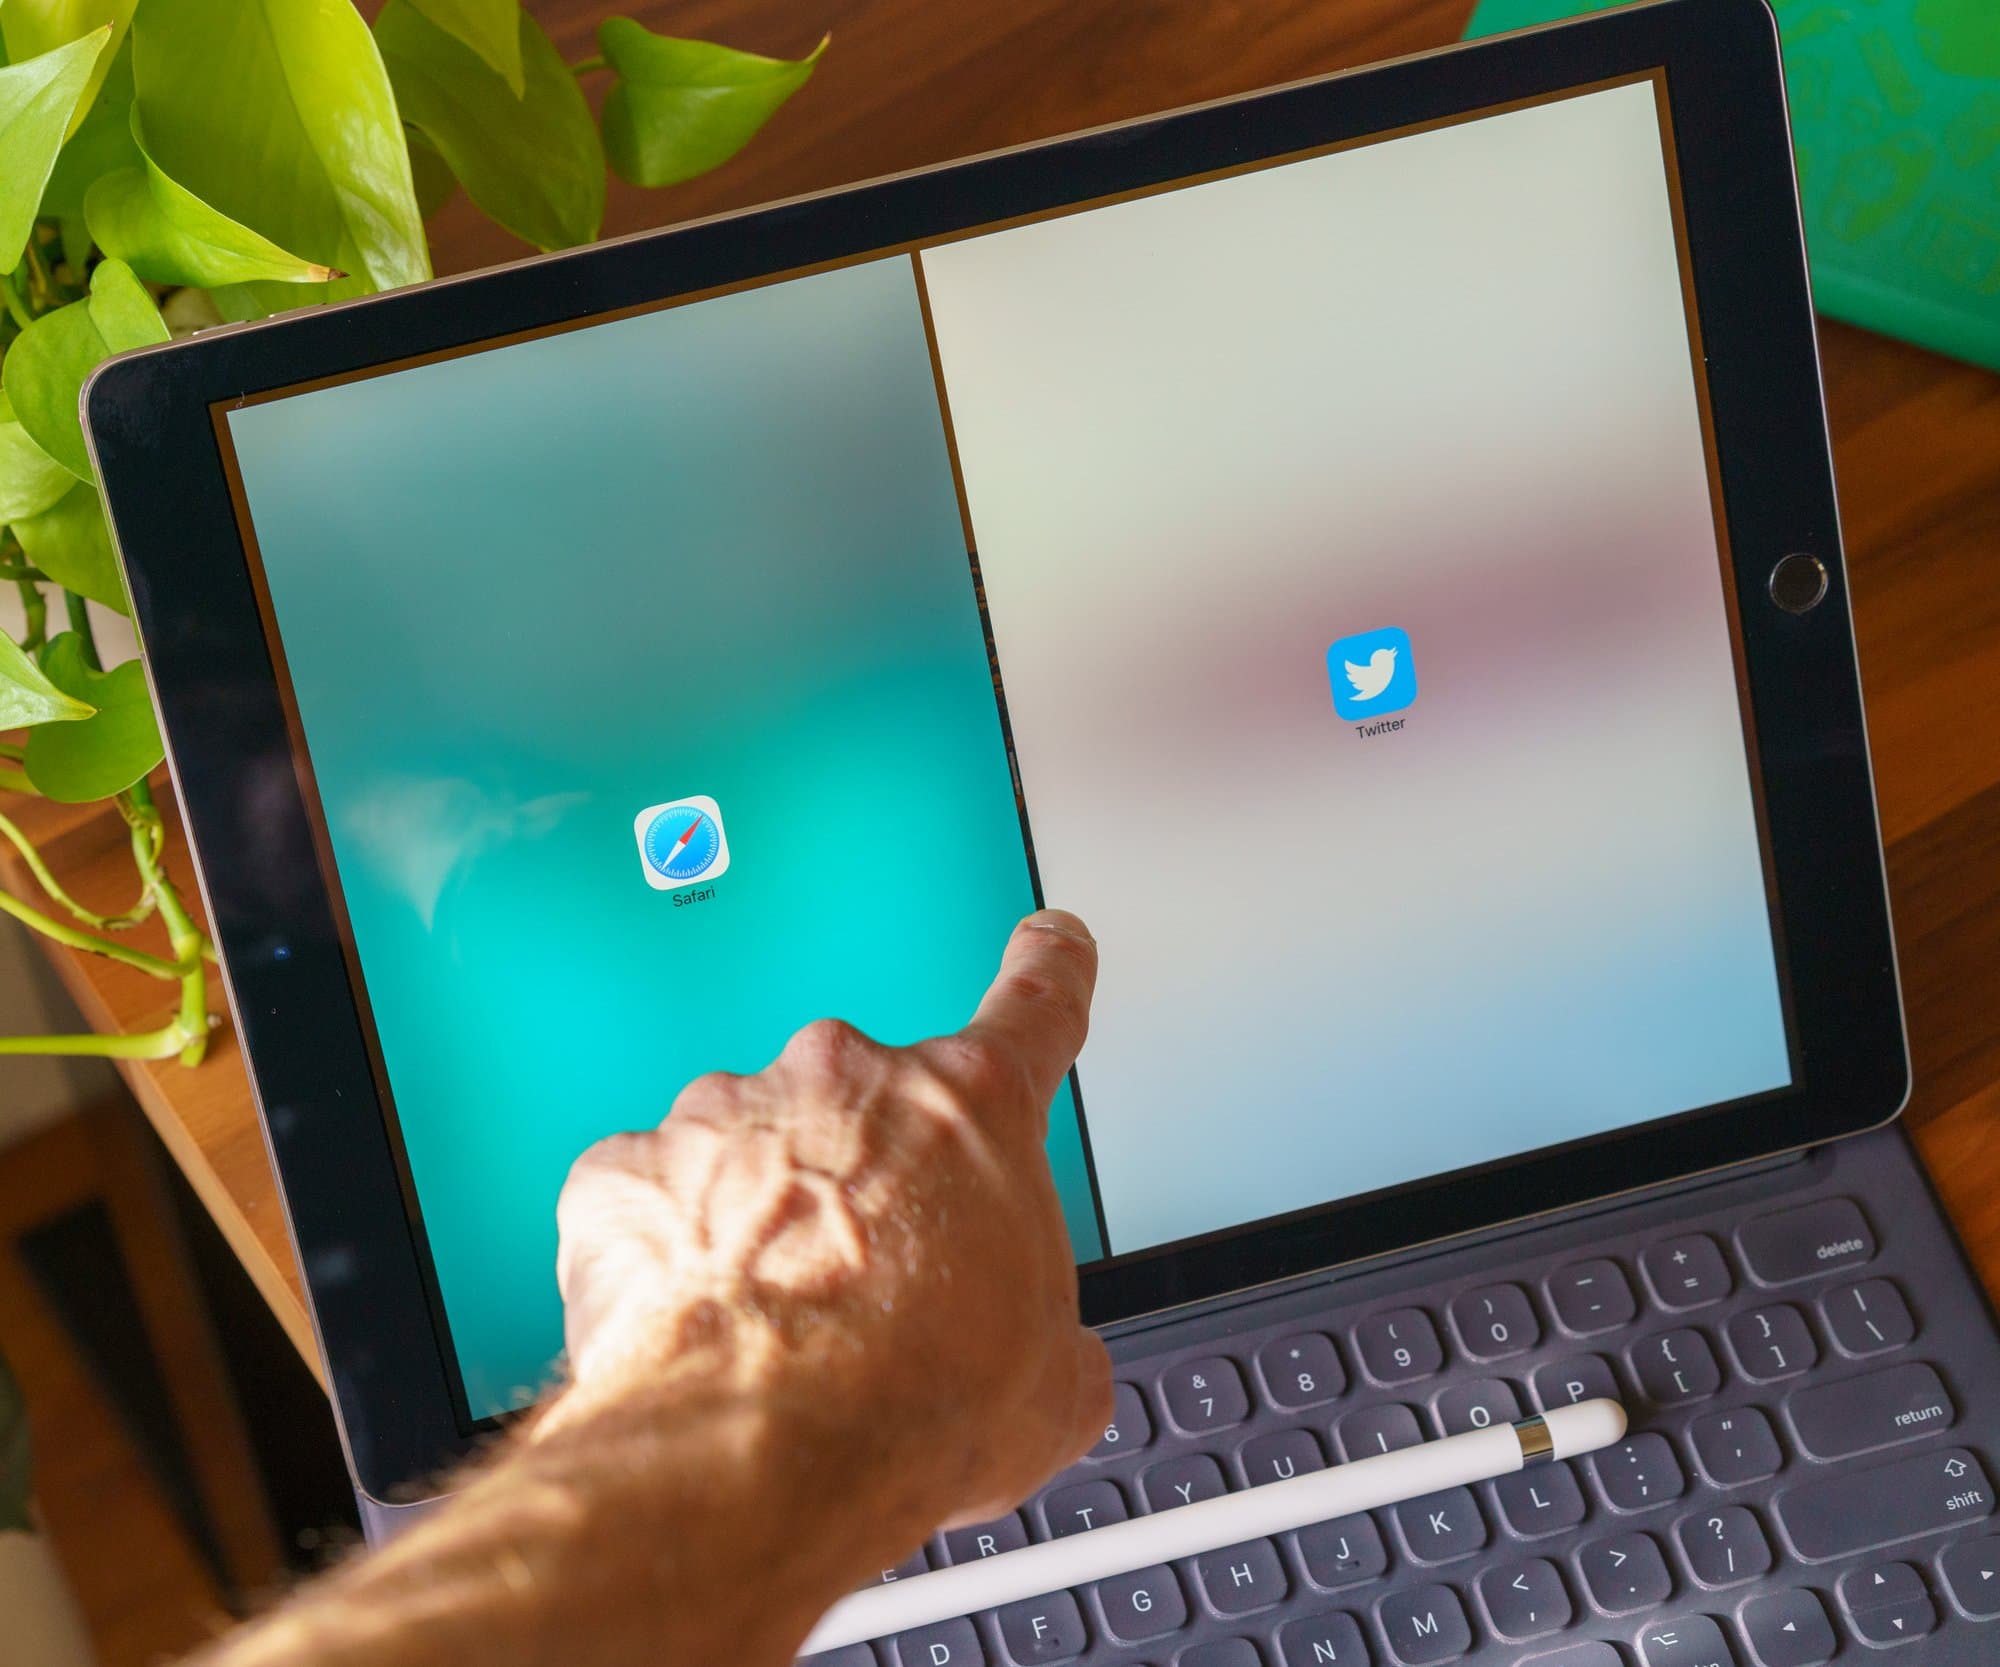
Adjusting the Split View layout.
So what's the difference between Split View and Slide Over?
If you put two apps in a Split View layout, they get saved as an "App Space" that gets surfaced in the App Switcher. But an app put into Slide Over is always accessible, from anywhere, by just swiping it on screen from the right. If you put the Notes app in Slide Over, you can open Notes from inside any other app (except for scenarios like when on the home screen).
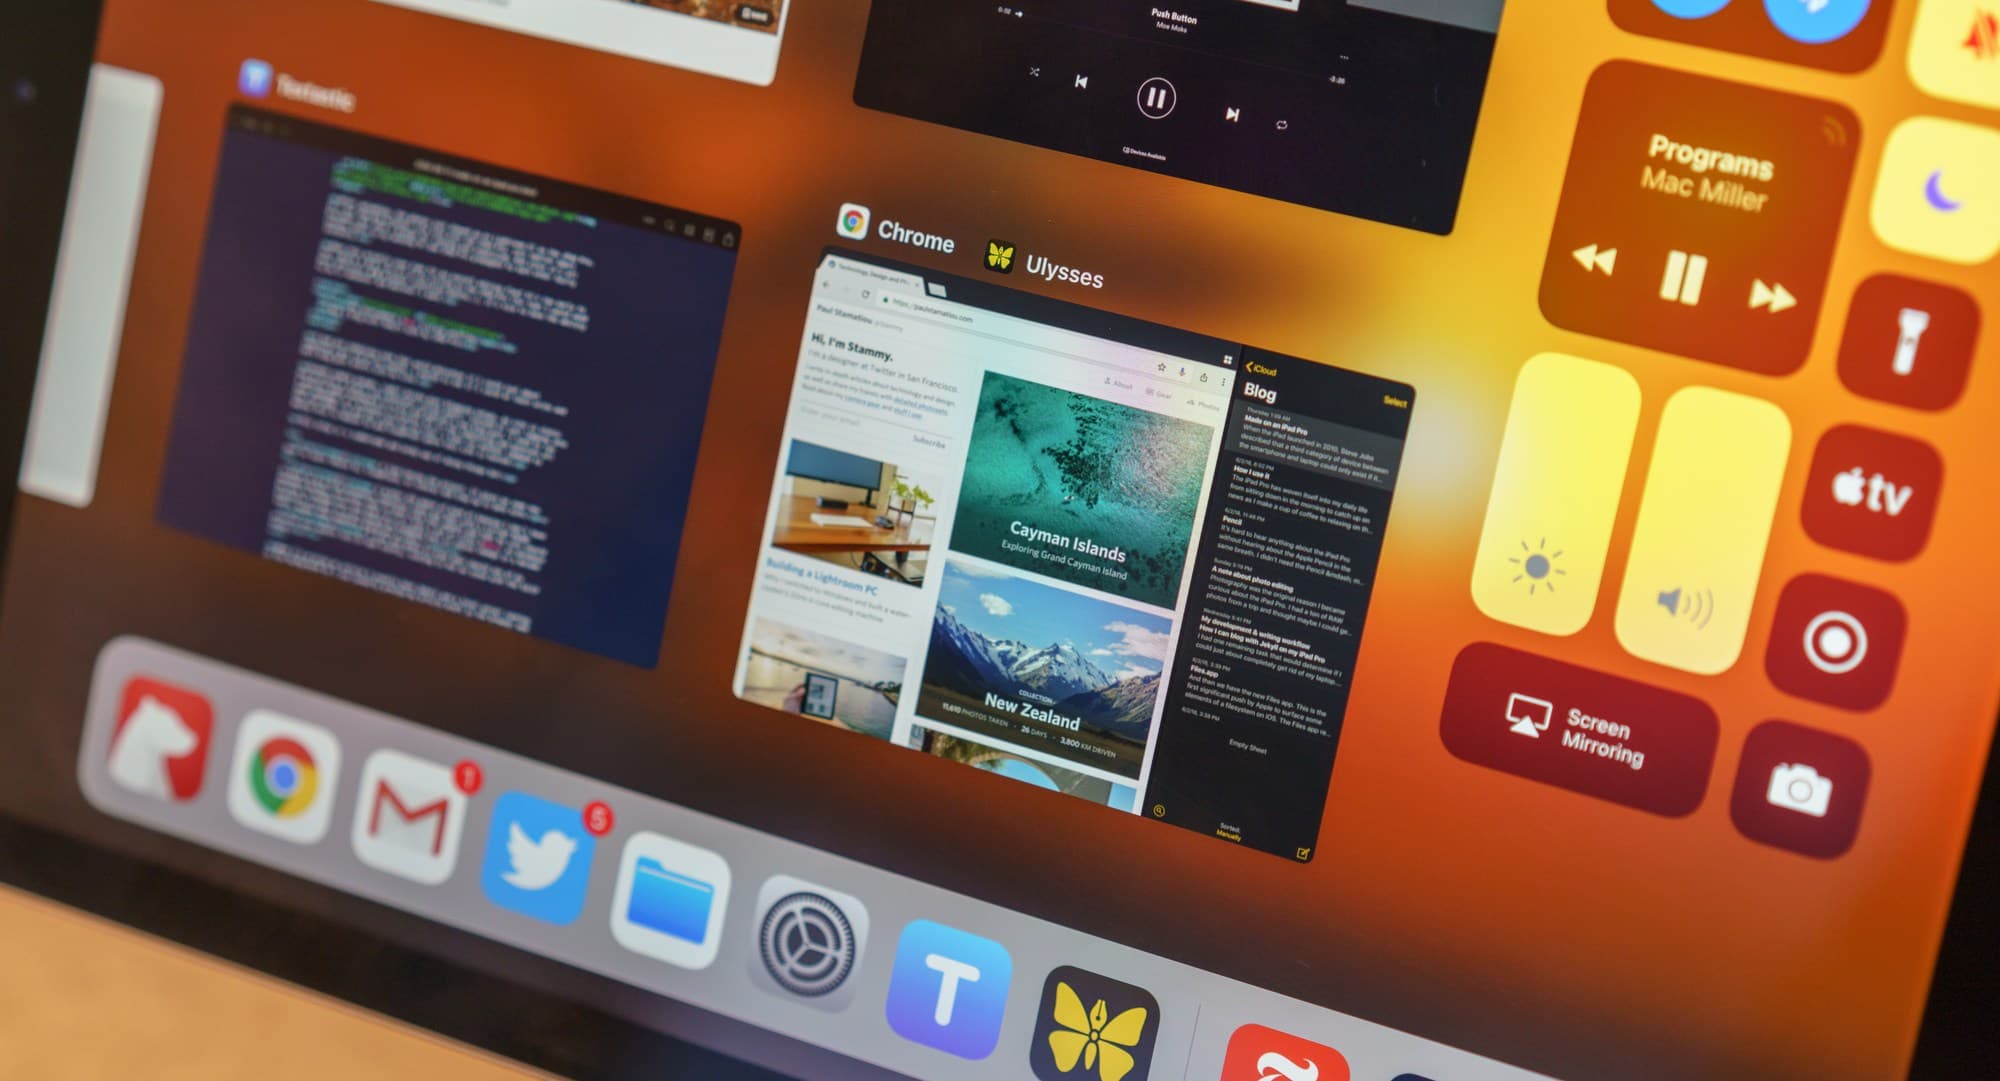
An app space shown in the App Switcher: Chrome & Ulysses.
Okay, I know like this sounds complex at first. Once you get the hang of these multitasking features, they will change how you think about the iPad Pro. There are some more details I'm leaving out, like how to change a Slide Over app into a Split View app, but the message remains the same: Split View and Slide Over are welcomed, powerful productivity companions in iOS 11 that shine with the extra real estate on the 12.9-inch iPad Pro.
Video: Showing off Split View, then Slide Over and finally opening up a docked PIP video.
When you have Split View, Slide Over and a PIP video, you can effectively have four apps running and in view at the same time. I still can't quite wrap my head around it given where we came from with iOS just a few years ago. It's so grown up now.
Even with all this new multitasking functionality, there's one thing that still feels different compared to using a desktop OS. Doing anything on the iPad Pro is a focused experience. There's no way to accidentally multitask. It's a conscious effort you have to make. And even if you have two apps open in Split View, they're taking over the entire screen and there's nothing else that can distract you. No other apps partially in view in the background, no badged or bouncing apps in the dock trying to get your attention.
It's so much easier to focus when working on the iPad Pro.
It's not all kittens and daisies though. First off, not all apps support Split View or Slide Over. Apps like Gmail and Spotify are the biggest offenders for me right now. I would have loved having Spotify as my permament Slide Over app.
But the most annoying issue with Split View is not knowing which app has focus. This breaks my expectations when using keyboard shortcuts or trying to type something. If I have Chrome and Bear open in Split View and expect to Command + T a new tab open in Chrome, I have to focus in Chrome first for it to recognize that shortcut.
And there's no easy way to send focus to the other app (aside from tapping any textarea inside that app). This means I have to tap on something like the location bar in Chrome, then cancel out of the menu because I didn't actually need to use the location bar, then I have access to my expected shortcut keys.
At the least it would be a welcomed addition for iOS to indicate which app has focus with some little ornamention in the separator between apps.
Drag & drop
Then there's drag and drop. For some people this is a workflow game changer. That's not quite the case for me; I barely put it to use. My mind will likely change when more third-party apps start rethinking how to use drag and drop in their apps in more interesting ways, like how Bear has the Drop Bar.
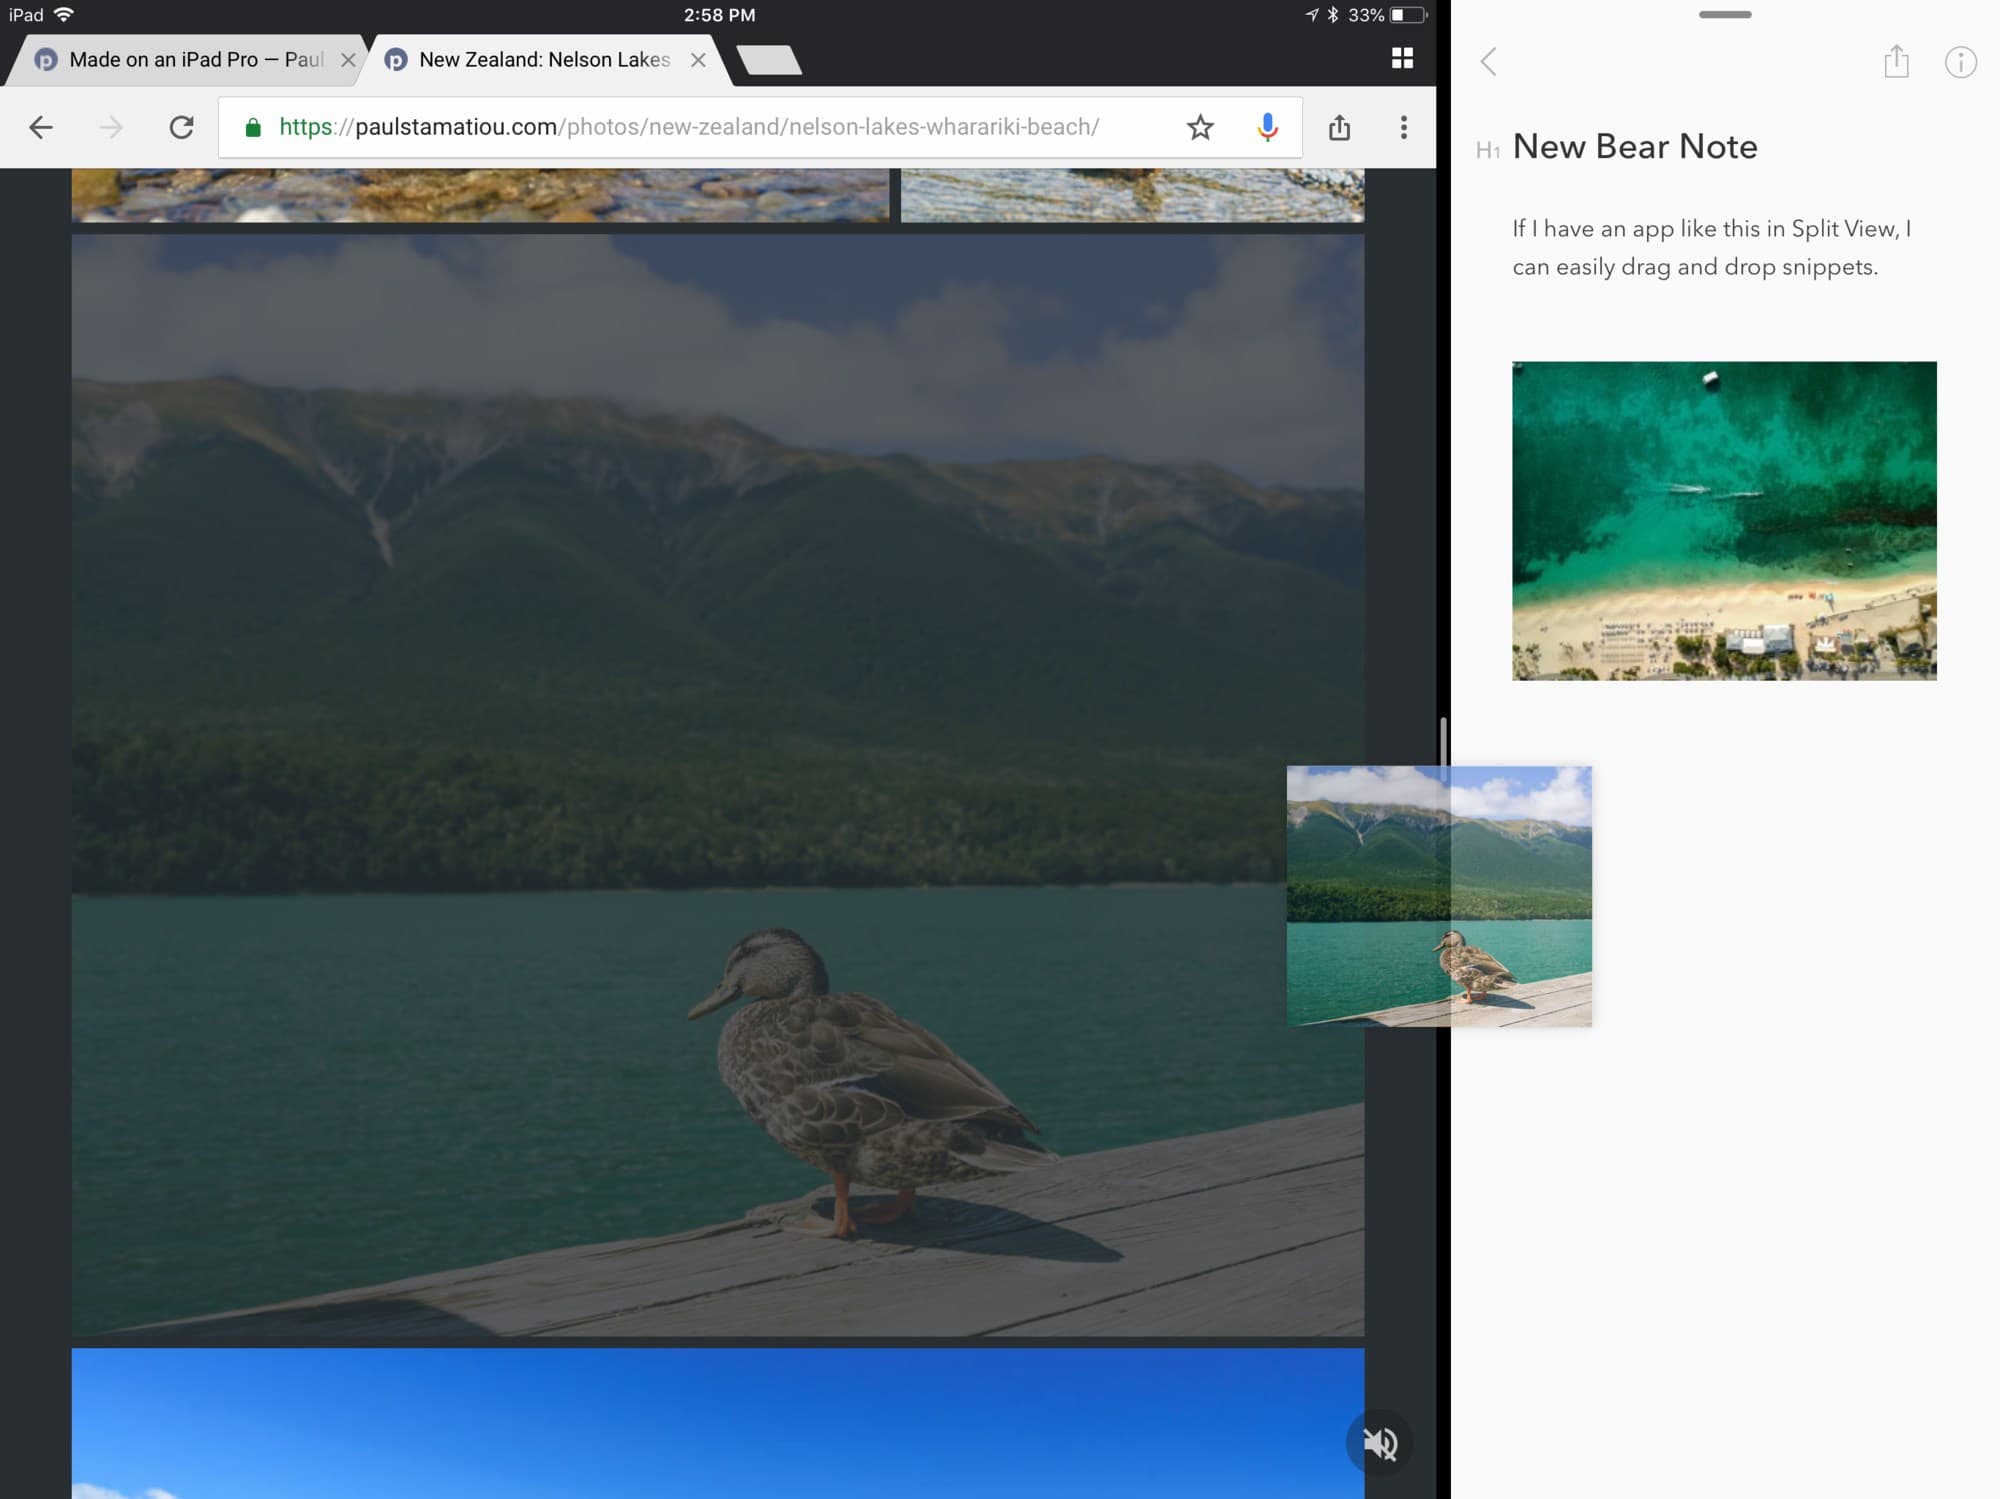
Drag and drop with snippets from Chrome to Bear in Split View is a breeze.
Until then, anything beyond basic dragging of text snippets and images from one app to another in Split View requires some multi-touch gymnastics. If you want to drag something from one full-screen app to another that is not open, you have to use one finger to drag and hold the object, then with another finger you need to summon the Dock to find the app you want and release. Oh and you better hope you had already opened that app earlier to the exact document/file/place where you want to release, otherwise the app won't know what to do and you'll have to release the object then try it again.
So yeah, my primary drag-and-drop use is for moving text snippets around in Split View apps. But even that feels unnecessary as I commonly have my keyboard open so using shortcut keys to copy and paste feels faster than having to select the text and then hold down even longer to get it to drag.
The Files app
And then we have the new Files app. This is the first significant push by Apple to surface some real elements of a filesystem on iOS. The Files app replaces the old iCloud Drive app, which did not surface any sort of local files. Files is what you might expect a modern file browser—free from any assumptions built up over the last few decades of desktop file management—to feel like.
For one, it does not have a strong emphasis on local files. You can’t even create local files or folders yourself and the "On my iPad" section is hidden by default, unless an app you use was specifically developed to be able to expose that folder to you. You can view this as a severe limitation or as a nod to where we’re going in the future with tighter reliance on cloud services.
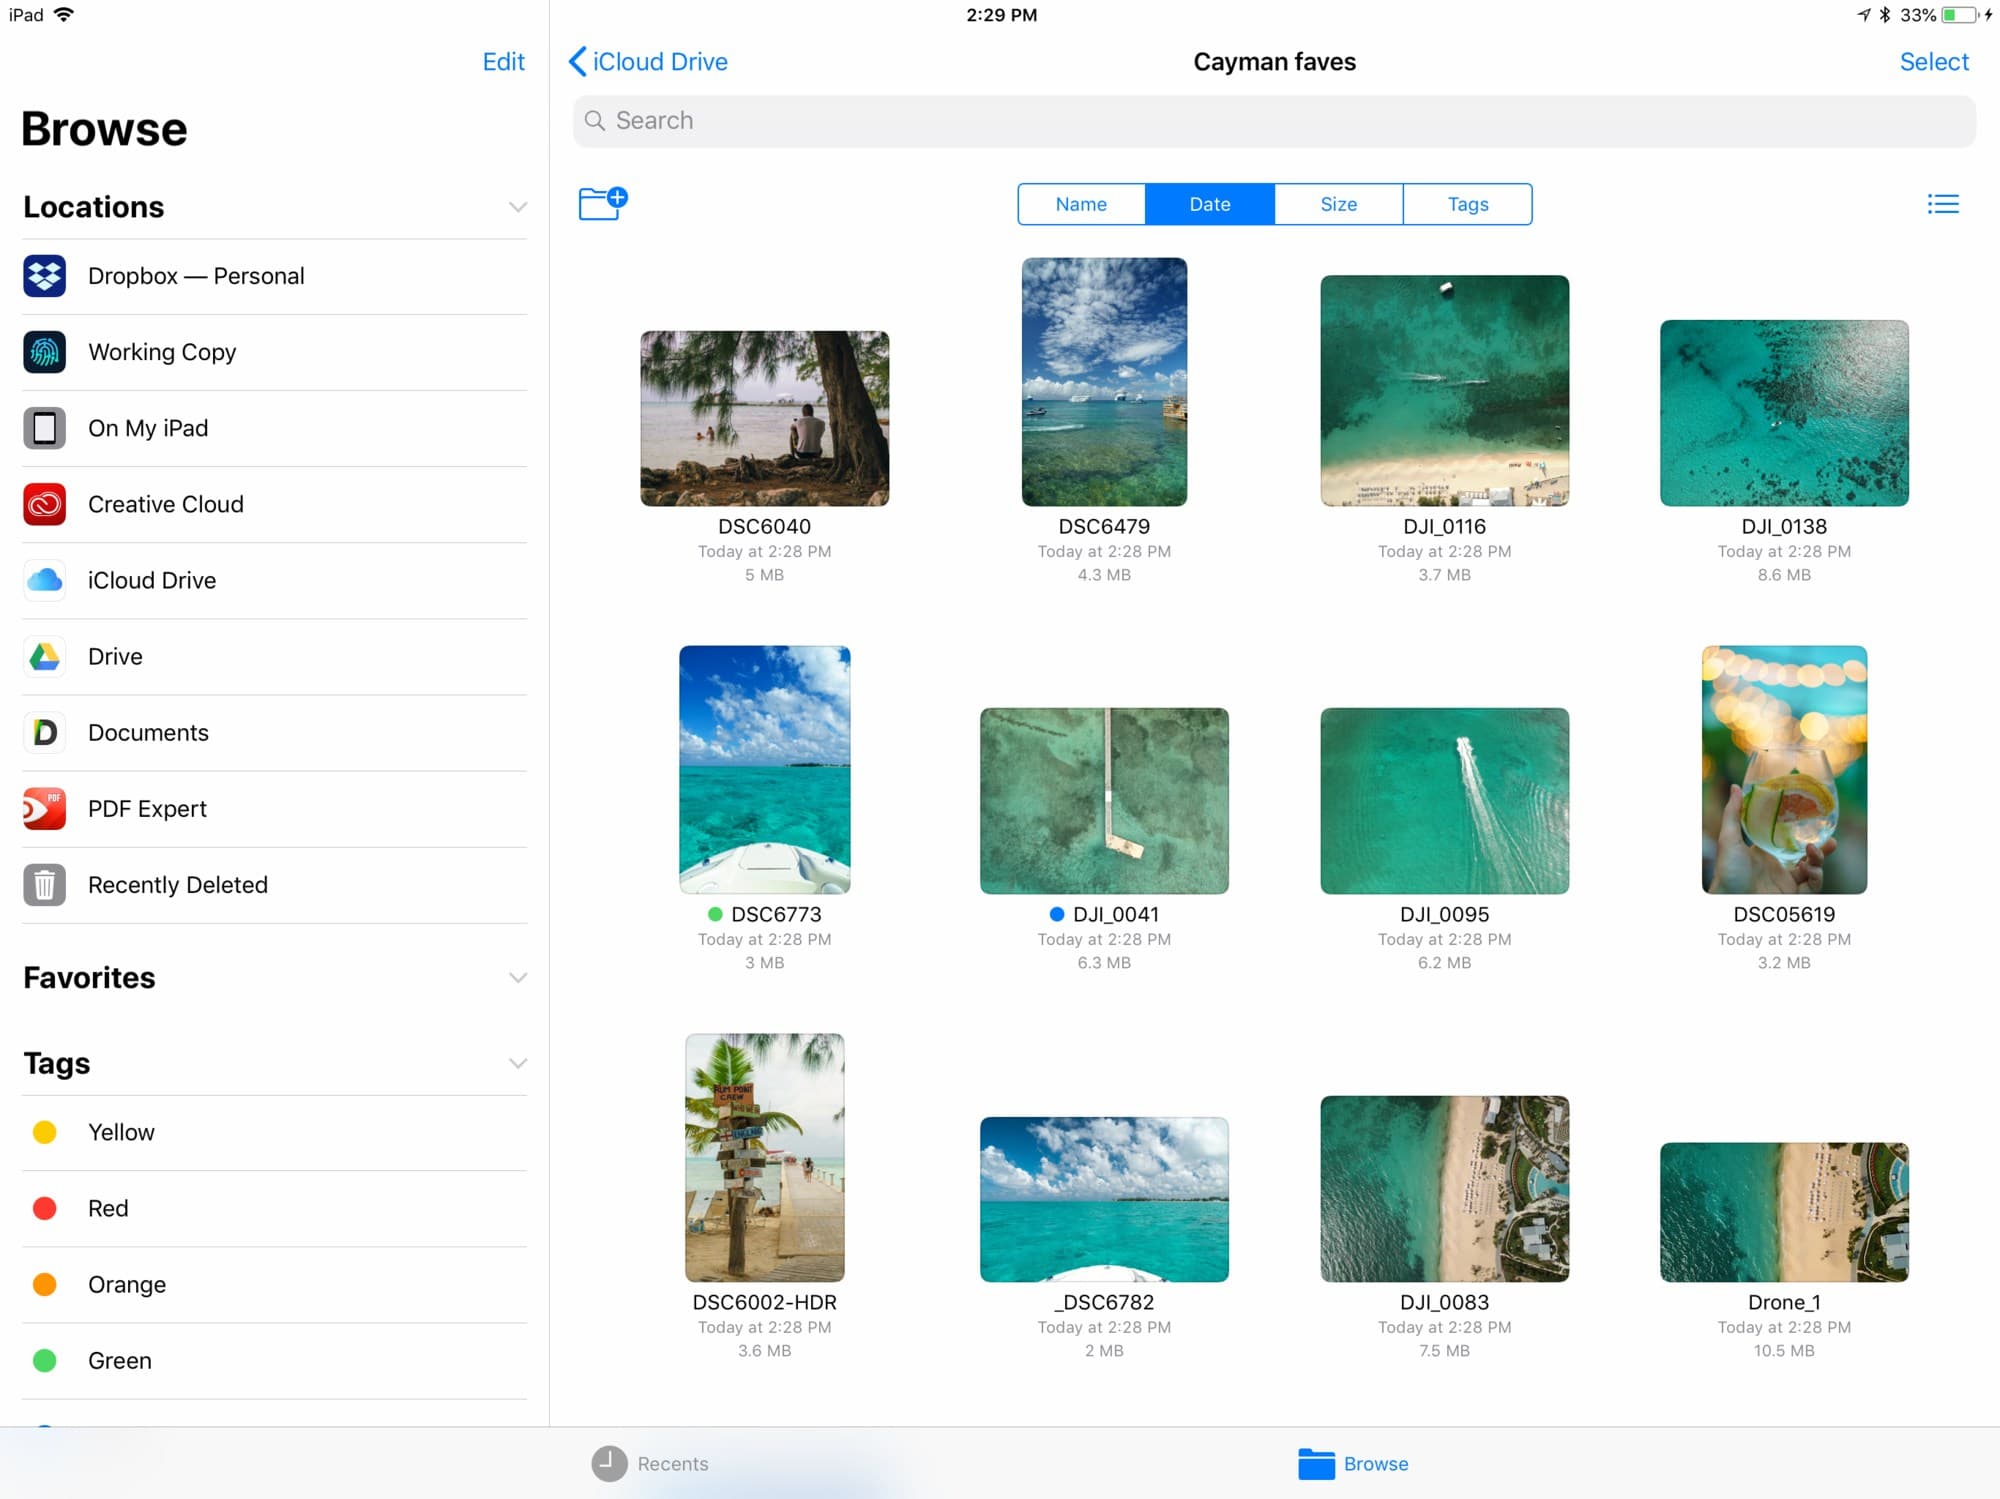
Files lets you browse, search and organize files on your iPad Pro, in iCloud Drive as well as in a myriad of other cloud storage services ranging from Box and Dropbox to Google Drive, Microsoft OneDrive and more.10 Everything is in one place with Files. Given that it can get pretty busy once you start adding more than a few storage providers, Files lets you tag and favorite items as well as do some basic folder management. It’s also a great example of the power of the new drag and drop functionality in iOS 11.11
Video: Showing off multitouch drag and drop functionality inside Files app.
All of this might start to feel like Finder on macOS. Unfortunately, this is where the similarities end. Since it’s a hybrid local/cloud system, you very often have to first download a file before you can preview or manipulate it. My first expectation after using this a few times was that I should have the ability to tell the iPad I no longer need a file I downloaded so that I can reclaim that space. That functionality doesn’t exist. I guess I just have to trust the iPad to free up space by offloading unused downloaded files as it sees fit.
At the very least you might expect that the Files app would let you browse local items like your Camera Roll or introduce a new Downloads section to simplify downloads in the browser. That’s not the case either. You have to rely on things like the Share extension to use the new "Save to Files" icon to copy those files into the Files app.

Want your Camera Roll photos in Files app? You have to do that yourself.
It almost feels like Apple’s priority with Files was to make it a great app to show off drag and drop functionality only. Any file manipulation beyond that really feels like an afterthought. For example, if you want to do anything to a file beyond just preview it, Apple has crammed way too much into the long press contextual menu.
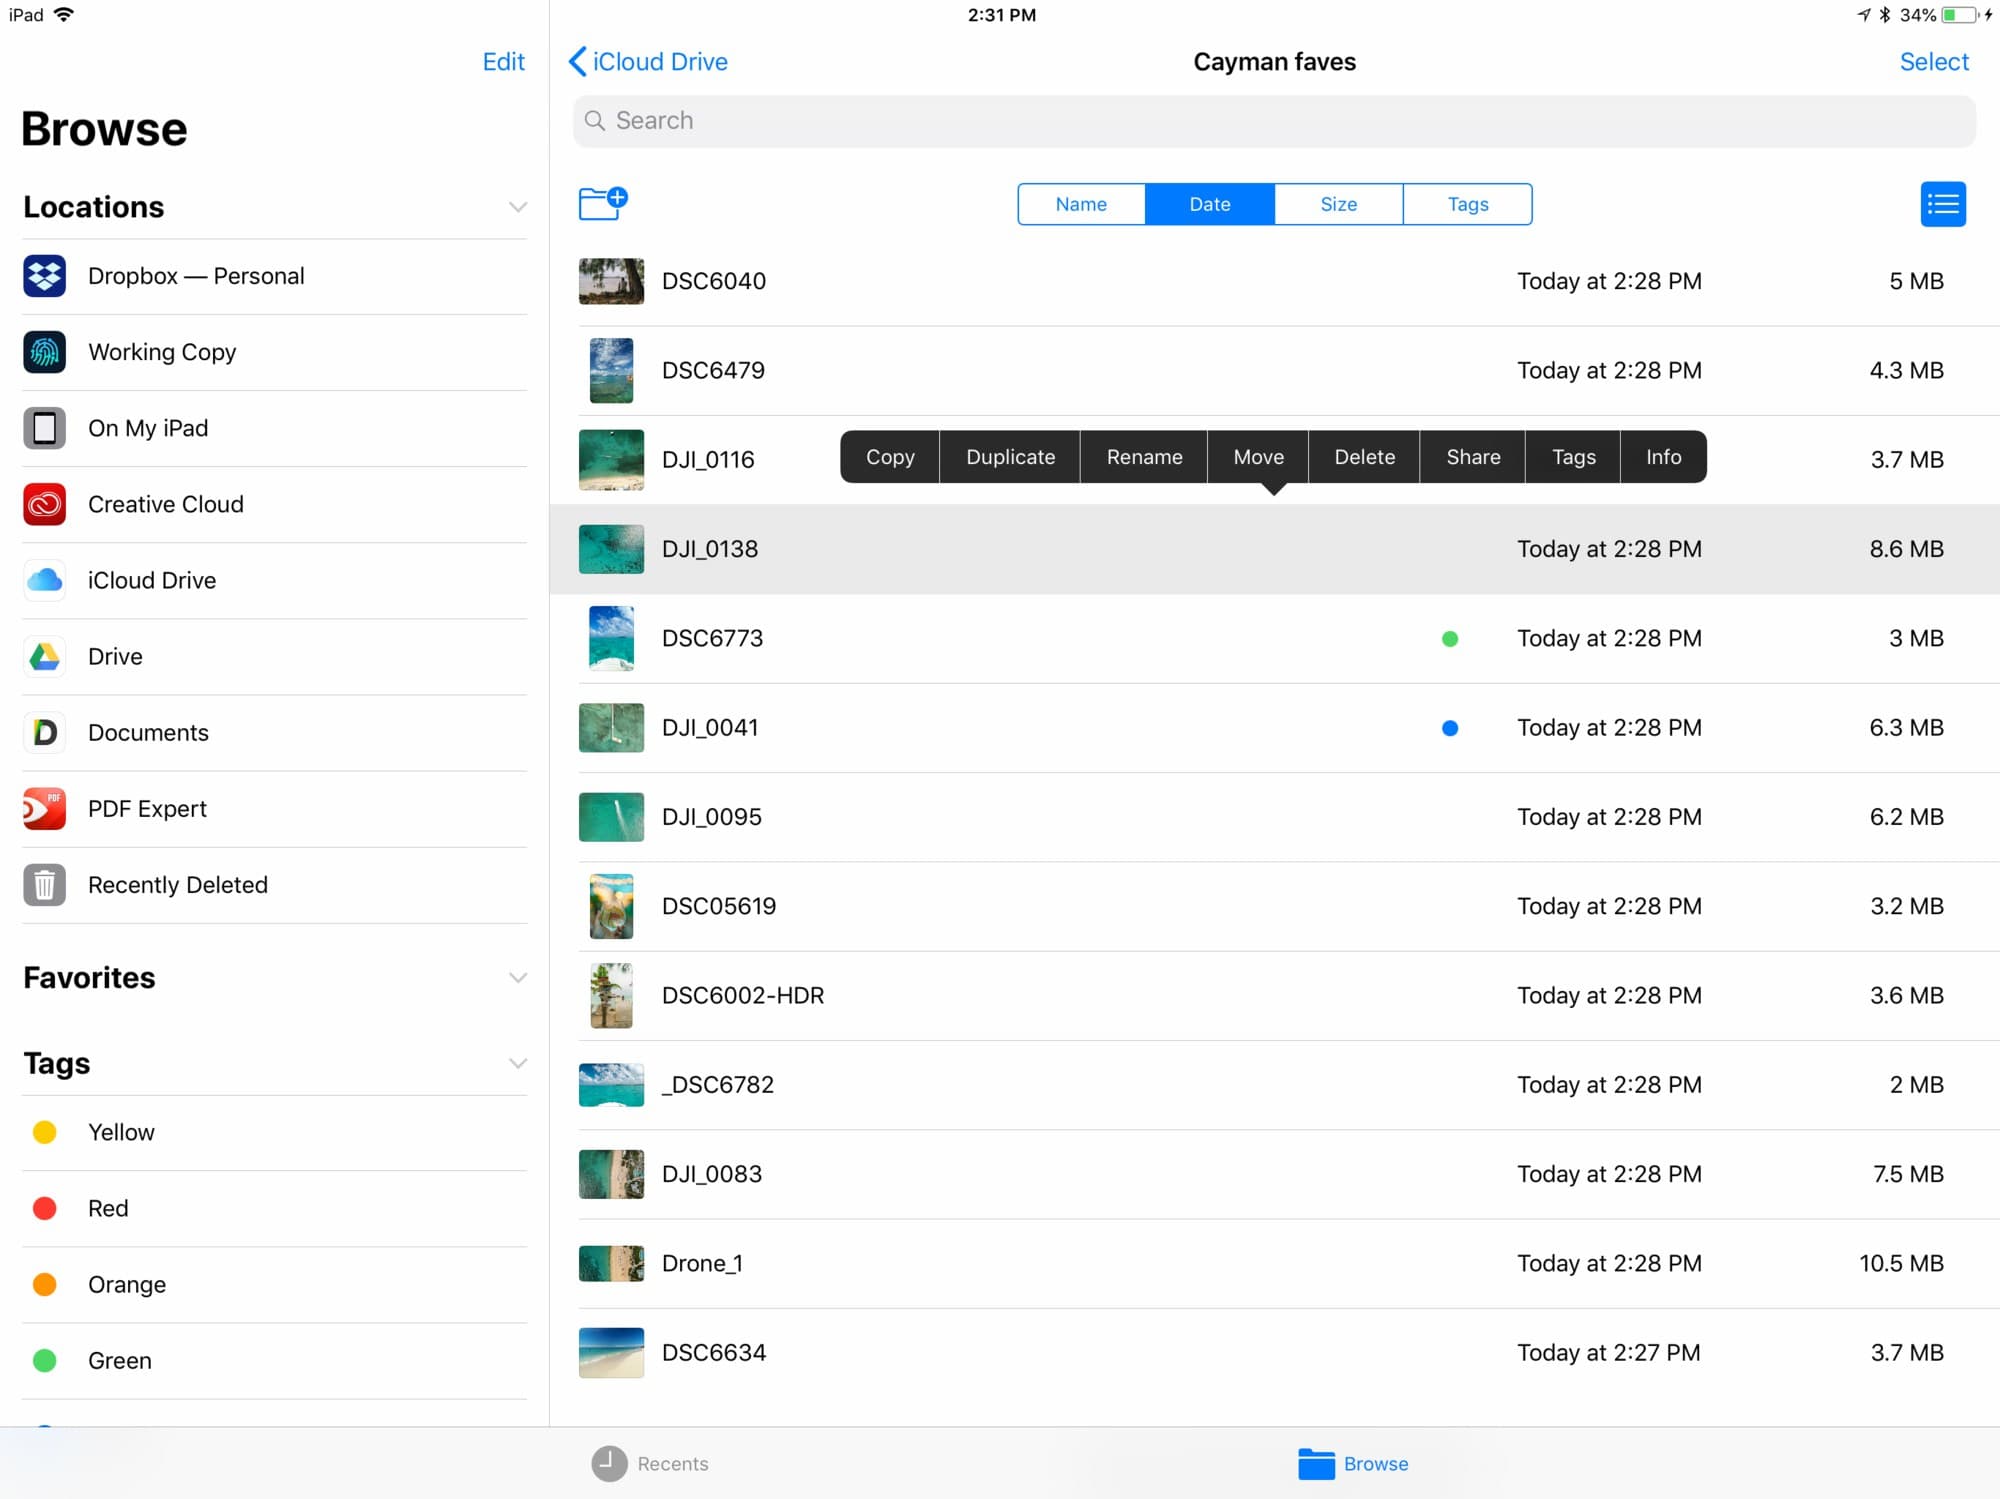
Just about everything you want to access lives in this annoying little menu.
Furthermore, I would have expected some way to select what app opens which kind of file by default. The only way to work around this is by using the Share extension, but once you go there you quickly realize most apps do not offer "Open in..." functionality but rather "Copy to...", so if you actually want to do any real manipulation you’ll be leaving a trail of duplicate files as you create and save new copies between apps. It’s pretty bad.

Want to edit a photo in an app? Nope, you're gonna have to make a copy.
The limitations don’t end there. Files can’t access any connected external storage devices, even if you find a way to hook one up via a USB adapter. I had hopes of being able to import RAW photos to the iPad Pro, then move them to a much larger external SSD as I travel. That’s unfortunately not possible at this time. (Update! This is now possible with iPadOS 13 and an iPad with a USB-C port.) You also can’t do simple things like put a few files into a zip archive (Update: You can now do this in iPadOS 13 too). Some of these limitations with local files can be worked around with a third-party app like Documents by Readdle.
While I don’t use the Files app itself much and it clearly has some room for improvement, I do put its capabilities to use in other ways. For example, I can use an app like Working Copy to download and manage a git repository. Then I can have another app access the files downloaded by that app and edit them. That’s a powerful new addition that enables so many workflows.
How I use it
The iPad Pro has inextricably woven itself into my daily life from sitting down in the morning to catch up on news as I make a cup of coffee to relaxing on the couch after a long day of work and browsing the Web.
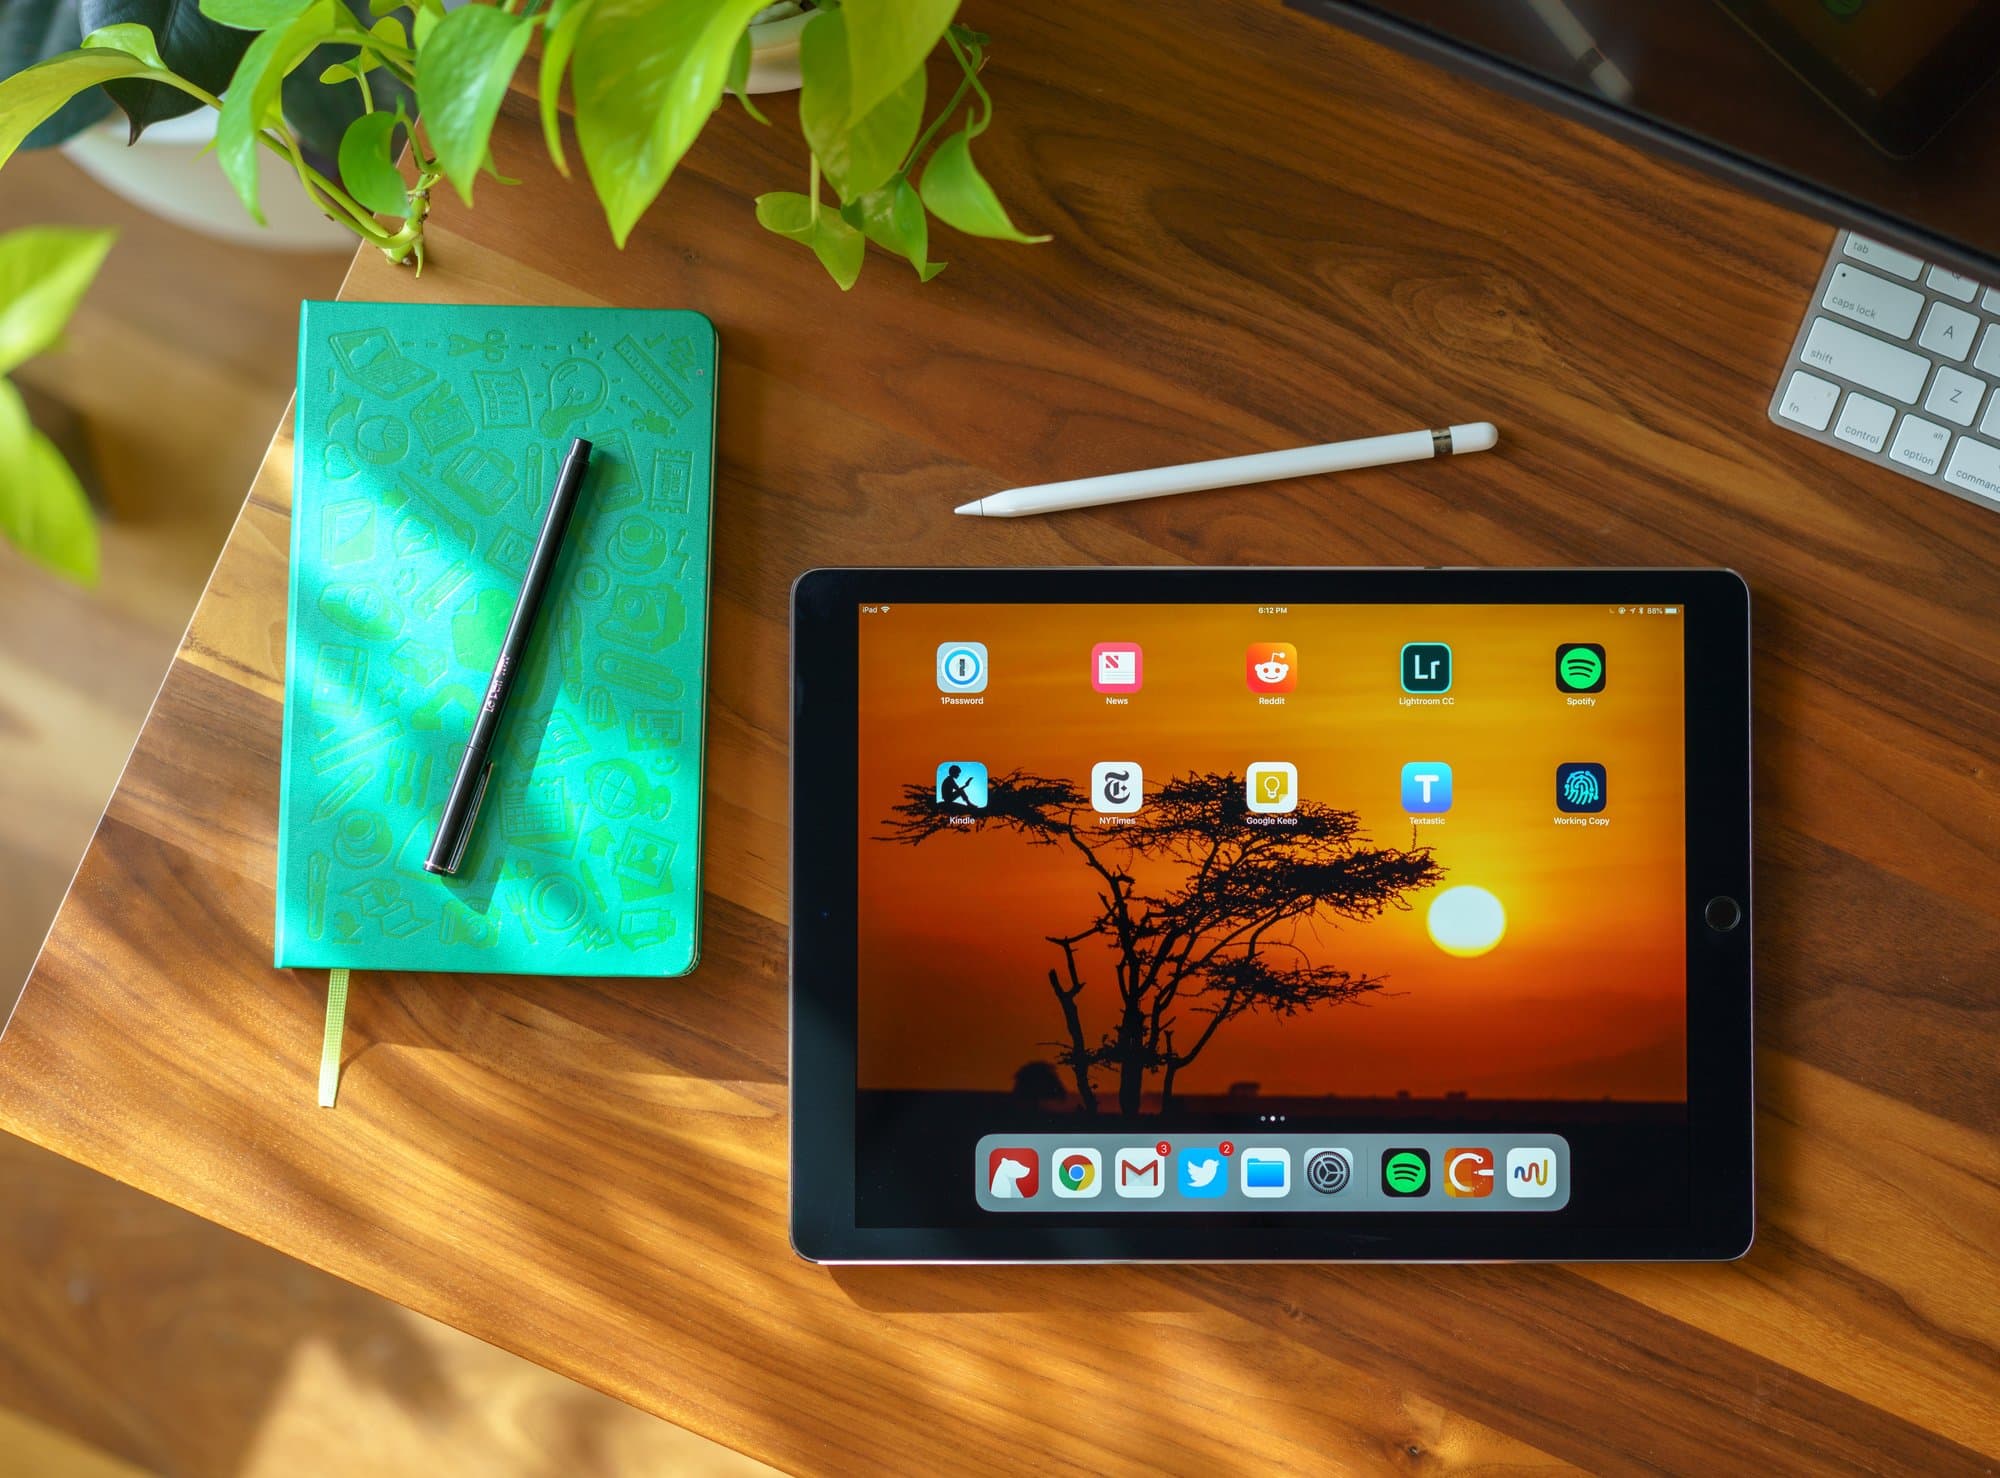
I start most mornings with my iPad Pro on my kitchen counter where I check Twitter, Apple News, NYTimes app, Reddit and some sites in Chrome. As for email, I prefer the official Gmail app over Mail.app or third-party ones. Annoyingly, the Gmail app does not support Split View.

Honestly, nothing I look forward to quite as much as making coffee in the morning and catching up on the world for 10 minutes.
It’s a given that the iPad Pro—especially with the 12.9" display—is great for consuming media. And for that there are a plethora of apps I flip through when on the go. My most frequently used are: Spotify, Netflix (I use the offline viewing feature a lot), Hulu, HBO Now, YouTube, Amazon Prime Video, iTunes Store (primarily TV shows and movie rentals) and Apple Music (mainly for a few radio stations). No surprise there.
But it's the more creation-oriented apps and tasks where the iPad Pro is really starting to shine. For me that means writing articles like this and the App Store is teeming with great iPad-optimized apps to help me out here. I’m still finding my exact workflow but I use the following quite often:
-
Google Keep: Keep is not my first pick for note-taking but it has a website that I can access on my Windows PC when I need to share notes between computers. I don’t use it daily but more for longer term documents.
-
Bear: One of the most elegant notes apps out there. It syncs with iCloud, supports markdown, has several themes to choose from (including dark ones), support for TextExpander and frankly it just has a simple, elegant UI. I always enjoy using Bear and I pay for Bear Pro.
-
Ulysses: While not quite fully integrated into my writing workflow yet, I am testing it out. If Bear is closer to TextEdit.app/Notepad.exe, then Ulysses is Microsoft Word. It has gobs of functionality that I can’t even do justice by describing. I use it while coming up with the structure of my blog posts. While I may put random notes and blog post outlines in Bear, I have started using Ulysses to turn each outline item into its own larger note ("Sheet").
But honestly there are so many amazing writing apps for the iPad that I’m not sure which one I’ll end up sticking with. Popular ones include iA Writer, Scrivener, Editorial and 1Writer.
-
Textastic: Another writing app?? Yes, but this one is a code-focused text editor. I use it in the more final stages of my articles when I need to write markup, start saving files and so on. I like Textastic as it pairs well with the Working Copy app to edit files from my git repository (all thanks to iOS 11 Files support).
-
TextExpander: I had used TextExpander years ago on my Mac to quickly expand customized text snippets as I’m writing. This doesn't sound like it's adding much value, but trust me after you get it all setup, you'll find yourself saving time by typing shorthand left and right. At some point over the years I stopped using it but am now giving it a shot on my iPad Pro. To my surprise a vast majority of these writing apps natively support TextExpander.

I began using Ulysses app to help tame this post as I wrote it.
There are also a ton of great apps for photo editing (Pixelmator, Affinity Photo, Procreate, Priime RAW and more) but I really don’t use my iPad for that. I use Lightroom CC on iOS for some limited culling and organization as I’ll talk about later, but the vast majority of my heavy photo/video editing occurs on my desktop PC.
I’m still discovering new apps to introduce to my workflow. I’ve heard good things about apps like Workflow (and the new "Shortcuts" app in iOS 12), Launch Center Pro and Gladys but haven’t yet had the time to tinker with them.
When I’m out of the house and on untrusted Wi-Fi networks, I use the TunnelBear VPN. There are a ton of alternatives (like Encrypt.me and NordVPN) but the reasoning is the same: it buys you some peace of mind that you won’t as easily be the victim of a network man-in-the-middle attack.
And finally, I do tend to use my iPad Pro a good bit in the kitchen and use apps like NYT Cooking and Kitchen Stories as cooking references.
On RAW photo editing
Promising but not a great fit for me.
Photography was the original reason I became curious about the iPad Pro. I had a ton of RAW photos from a trip and thought maybe I could get a headstart on some organization and culling on my long flight home. I figured the iPad Pro’s large display paired with the fast A10X Fusion chip was a good combo to at least get some kind of work done. I obviously did not expect it to compare to the PC I built for my heavy photo/video editing, but I’m always down to explore new potential workflows and gadgets. Might as well give it a shot, right?
I would also need a way to get the massive RAW photos onto the iPad. I purchased the Apple Lightning to USB 3 Camera Adapter so I could directly connect and import photos from my Sony A7R III.12
I connected the adapter and began the process of importing at least one of my many 128GB SD cards that was completely filled. I had shot a few hundred gigs on the trip and knew that I wouldn’t be able to import everything as I only had a 256GB iPad Pro. It would be a start and good test to run the iPad Pro through its paces.
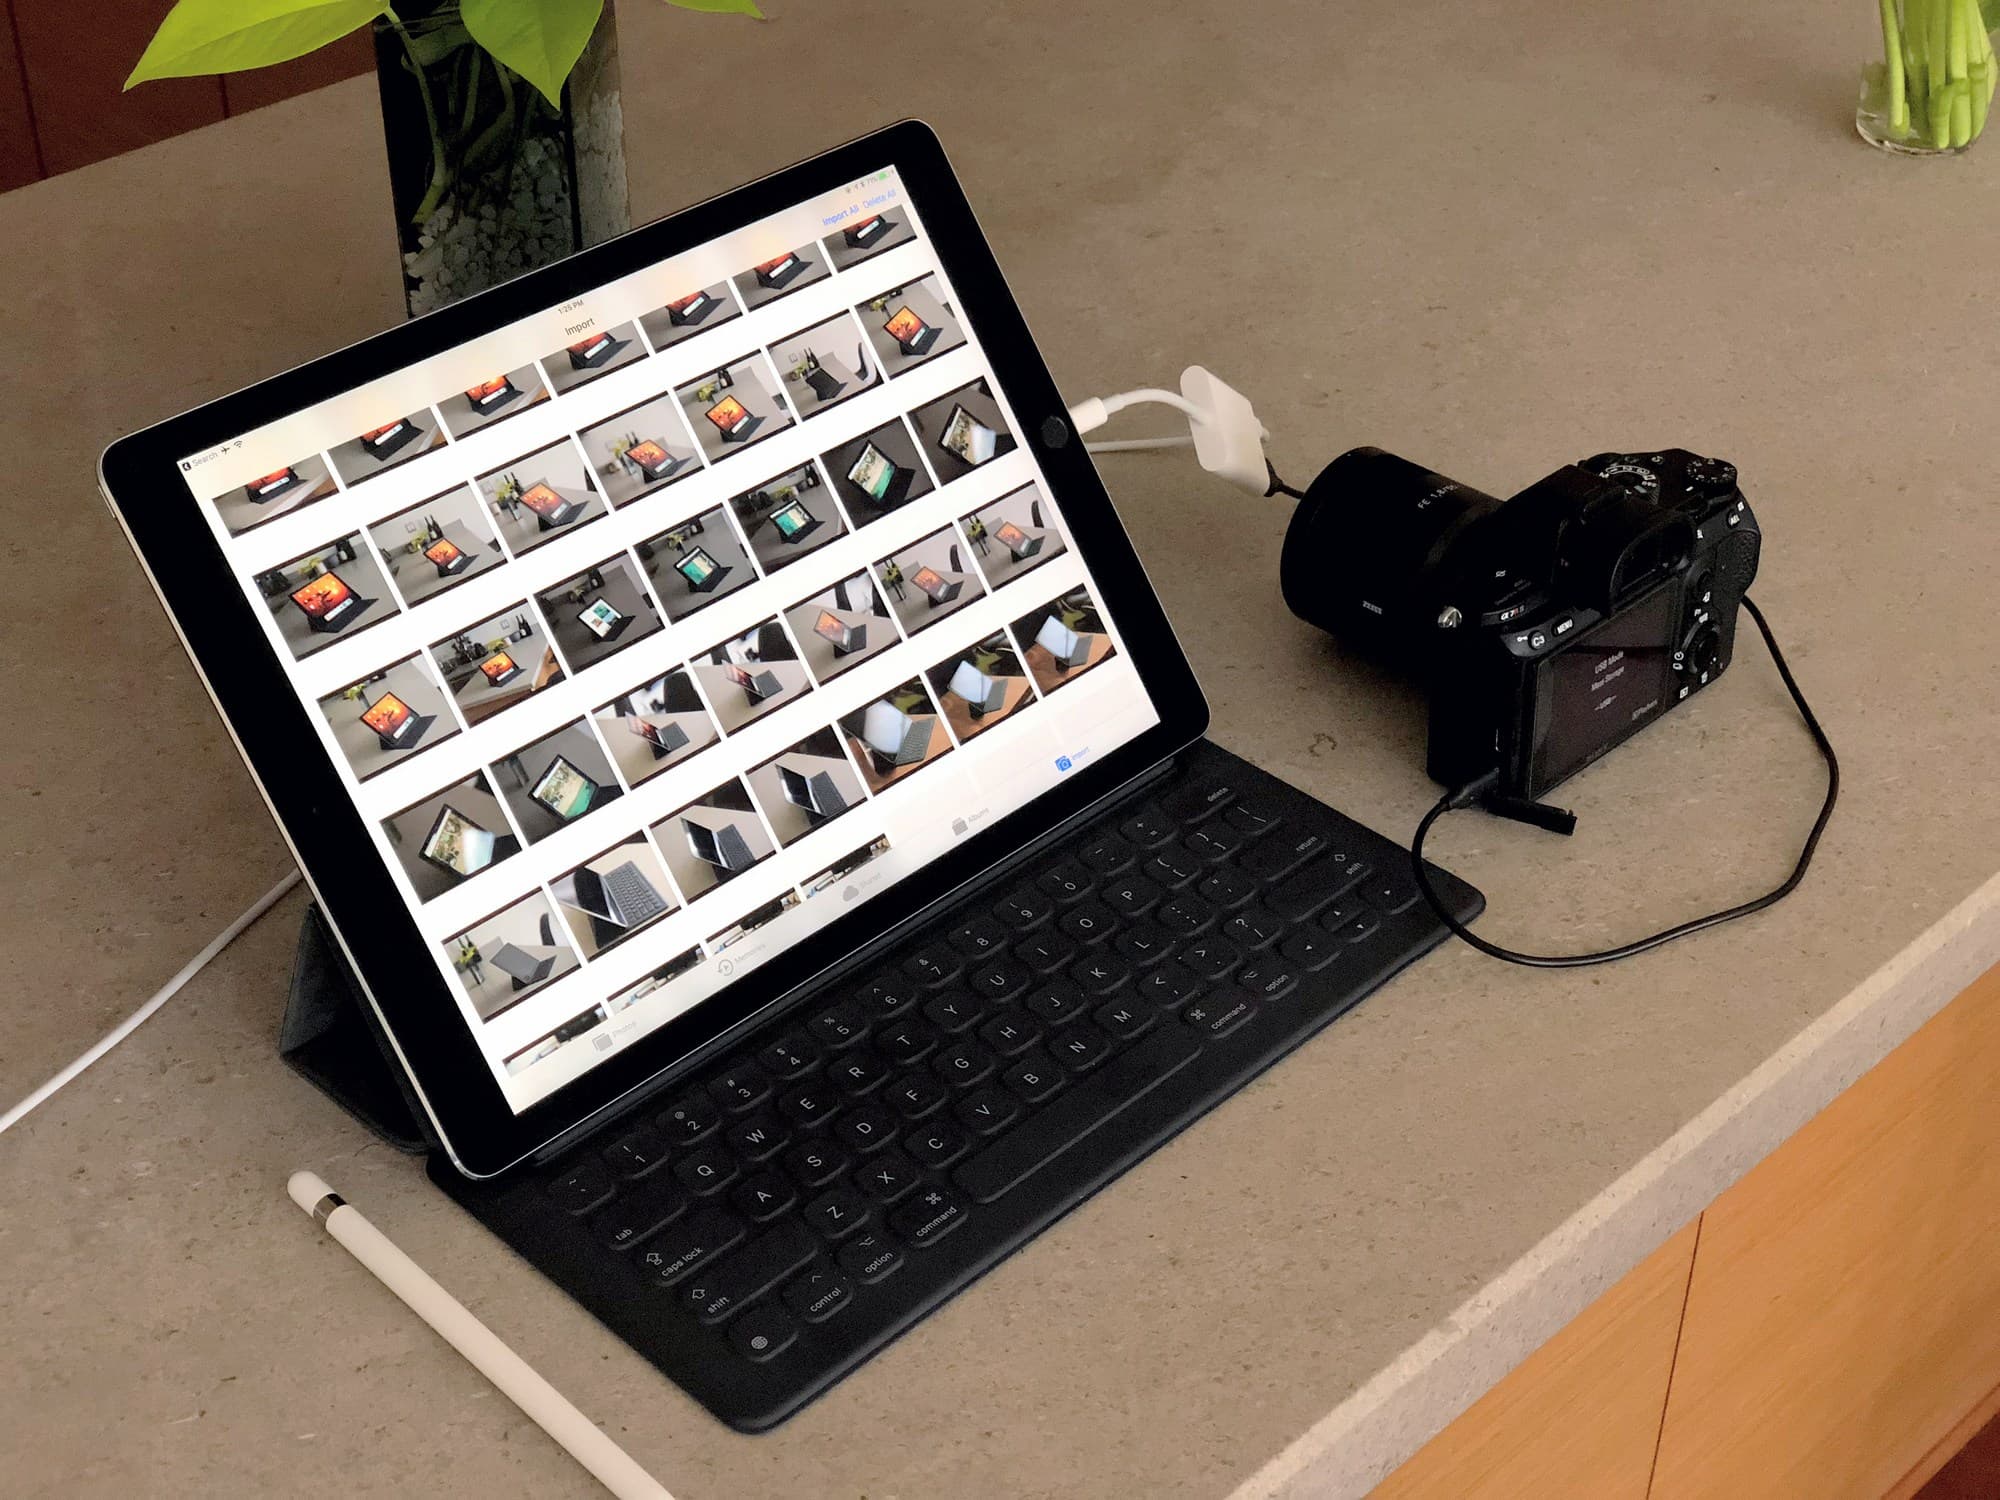
About to import shots using the USB 3 camera adapter.
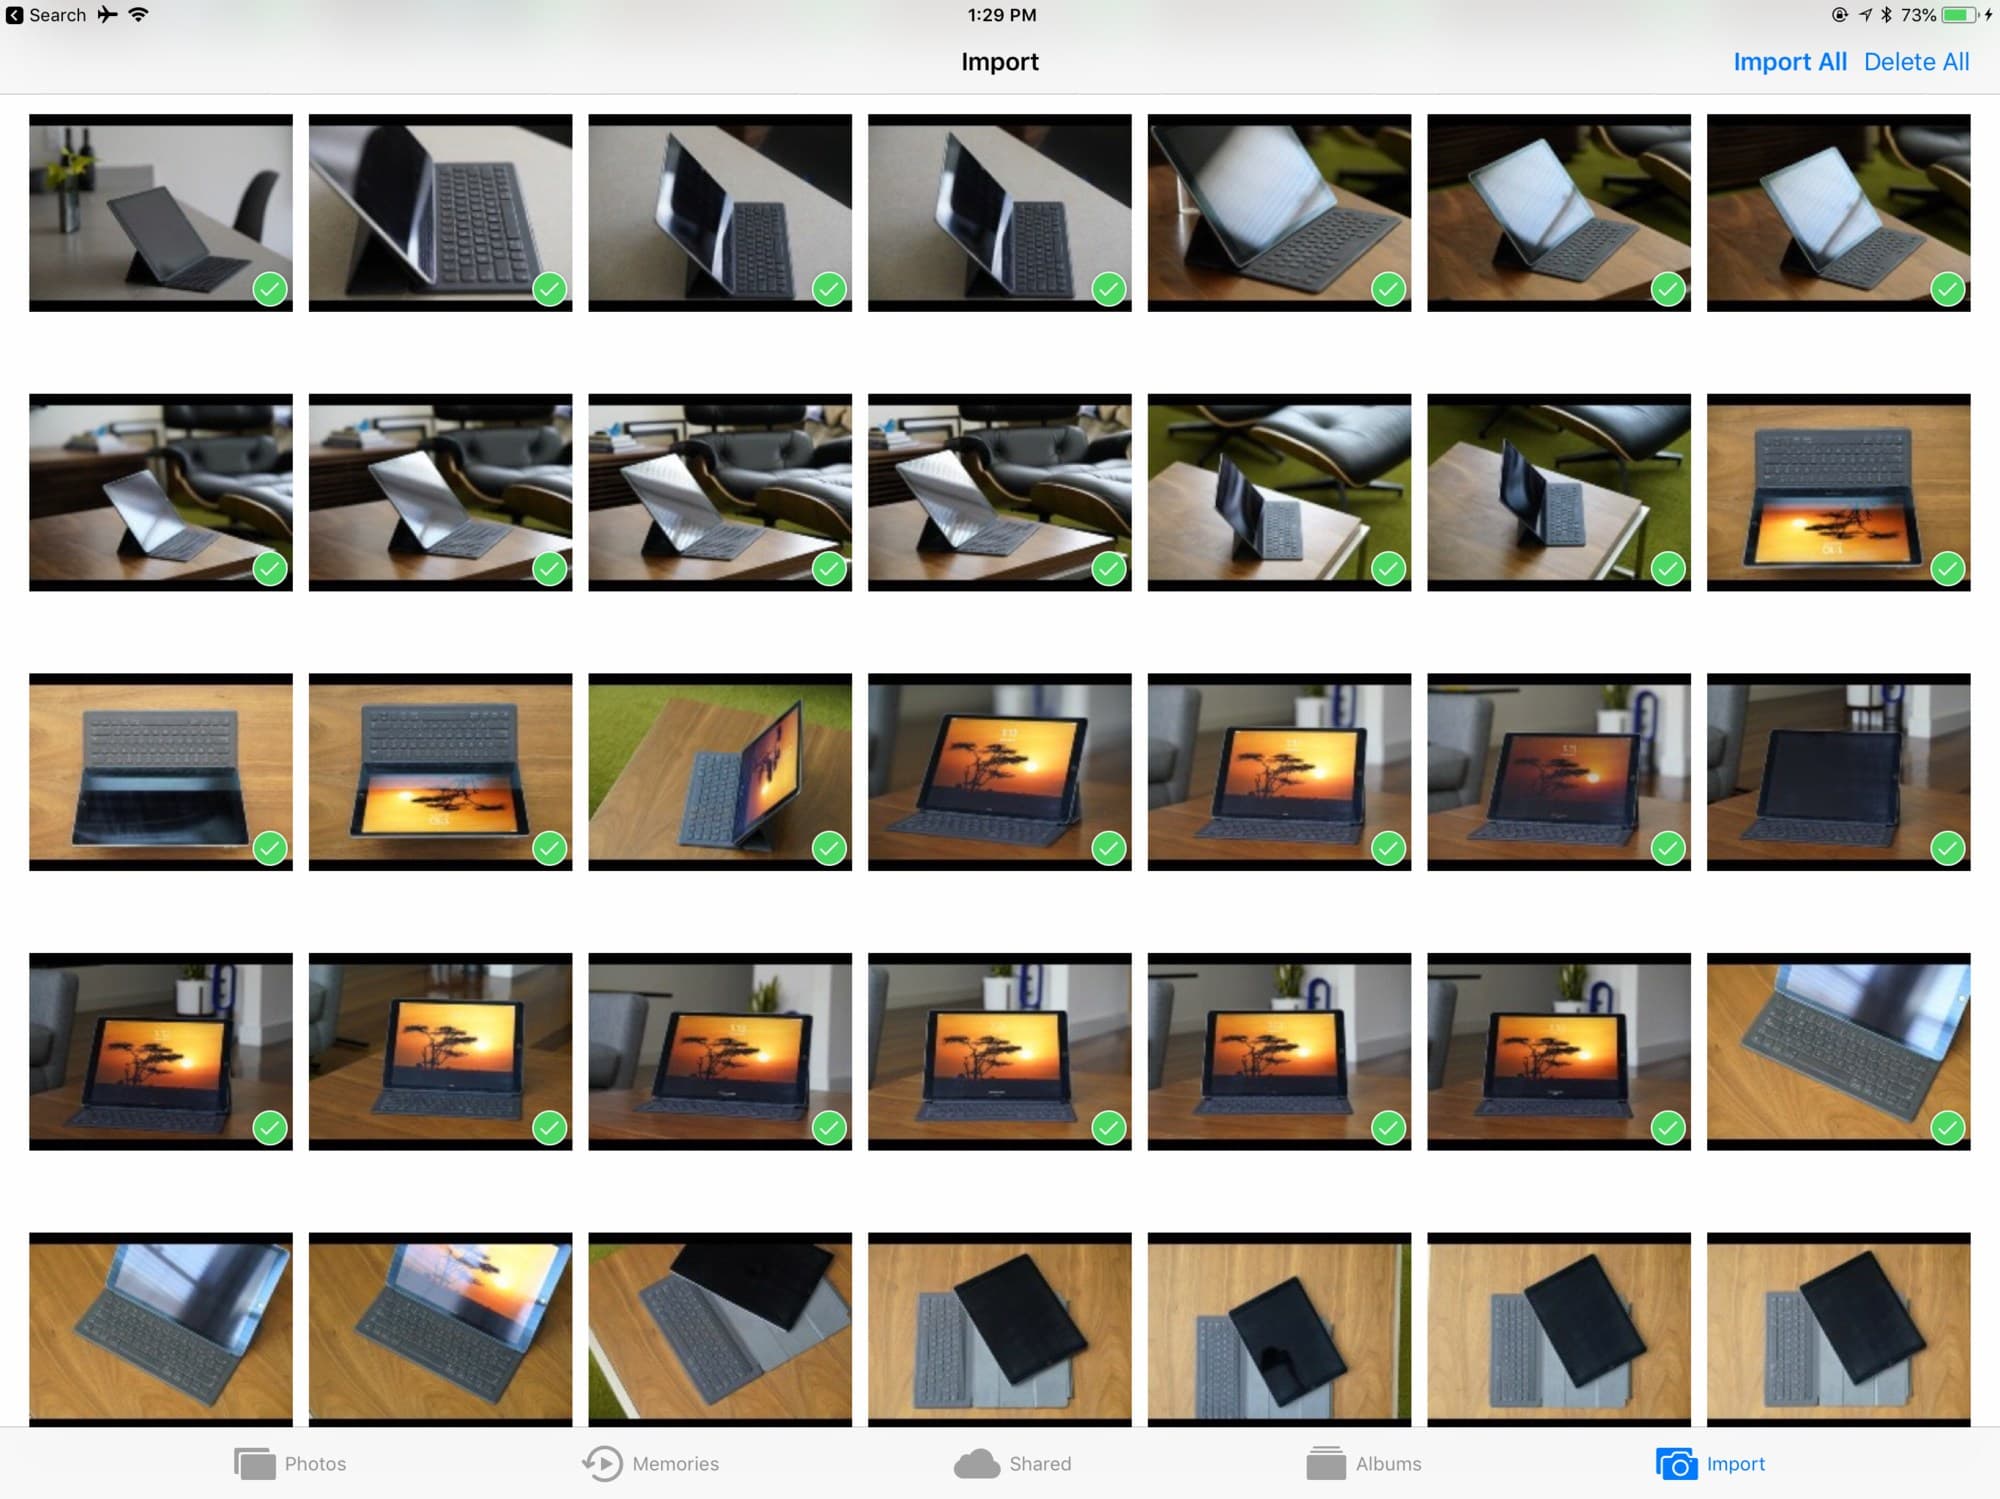
Once connected, the Photos app opens up to a new Import tab that only exists when a device or SD card is connected. I didn’t even want to use the Photos app to manage the photos, but you don’t have a choice. All externally-stored photos must be imported to the Photos app first. The first sign of trouble was that even just the thumbnails for the photos from the camera in the Import tab took forever to load. I can’t imagine how painful it would be if you only wanted to select a few shots to import from the end of the list.
I tapped to select and import the 2,500+ 42-megapixel RAW photos on that SD card. I quickly learned that you cannot do anything while importing photos. If you background the Photos app, the import pauses.13
Update: iPadOS 13 changes all of this for the better! You can now import photos directly to your editing app of choice. And if you have a newer iPad Pro with a USB-C port, the updated Files app can access all your files on an external drive so you can easily copy files to/from SD cards and external drives easily.
Long story short, it was so extremely slow that I gave up after an hour or two. It wasn’t worth it for me.14
Note: iOS 12 will improve RAW photo import speed among other things, but I don't think it'll be enough to change my mind on this. I'll be sure to update this if things change when iOS 12 comes out of beta.
For fun I decided to open some of the shots in the Lightroom CC app. I expected that the photos would just be there, ready to edit as they were already on the device. Unfortunately, there’s yet another step—I had to import the photos to the Lightroom app. And this is not a simple "add" type of import that just keeps the references to the files. I think it actually copies the files over again. Great. So that took another eternity.
I began tinkering around Lightroom CC on the iPad Pro (I talk about the desktop version in more depth at the end of my Lightroom PC post). The mobile version is quite similar to Lightroom CC on the desktop and quite fun for browsing around your shots, especially on a large magic slab of glass. Though, I quickly learned that even though I have the RAW files on device, Lightroom CC is only showing the Smart Previews. This means I can’t zoom in 100% to see if a shot is tack sharp.

I have quite a few shots to go through from my Rwanda and Tanzania trip.
Does this mean the iPad Pro is not realistic when it comes to RAW photo editing?
Not entirely. If you are 1) shooting with a camera with more reasonable RAW file sizes, 2) you plan to only use the native Photos app and don’t need to import the photos to another app and 3) will be shooting and managing smaller sets of shots each time, then there’s no reason that an iPad Pro workflow couldn’t work for you.
It just wasn’t a good fit for me. So where does that leave me?
Well, I did love having my photos (even if they were just lower resolution previews) accessible on my iPad Pro with Lightroom CC. I usually don't upload unedited RAWs anywhere accessible (just file-only cloud backups and the NAS) until after I've edited and exported the selected shots.
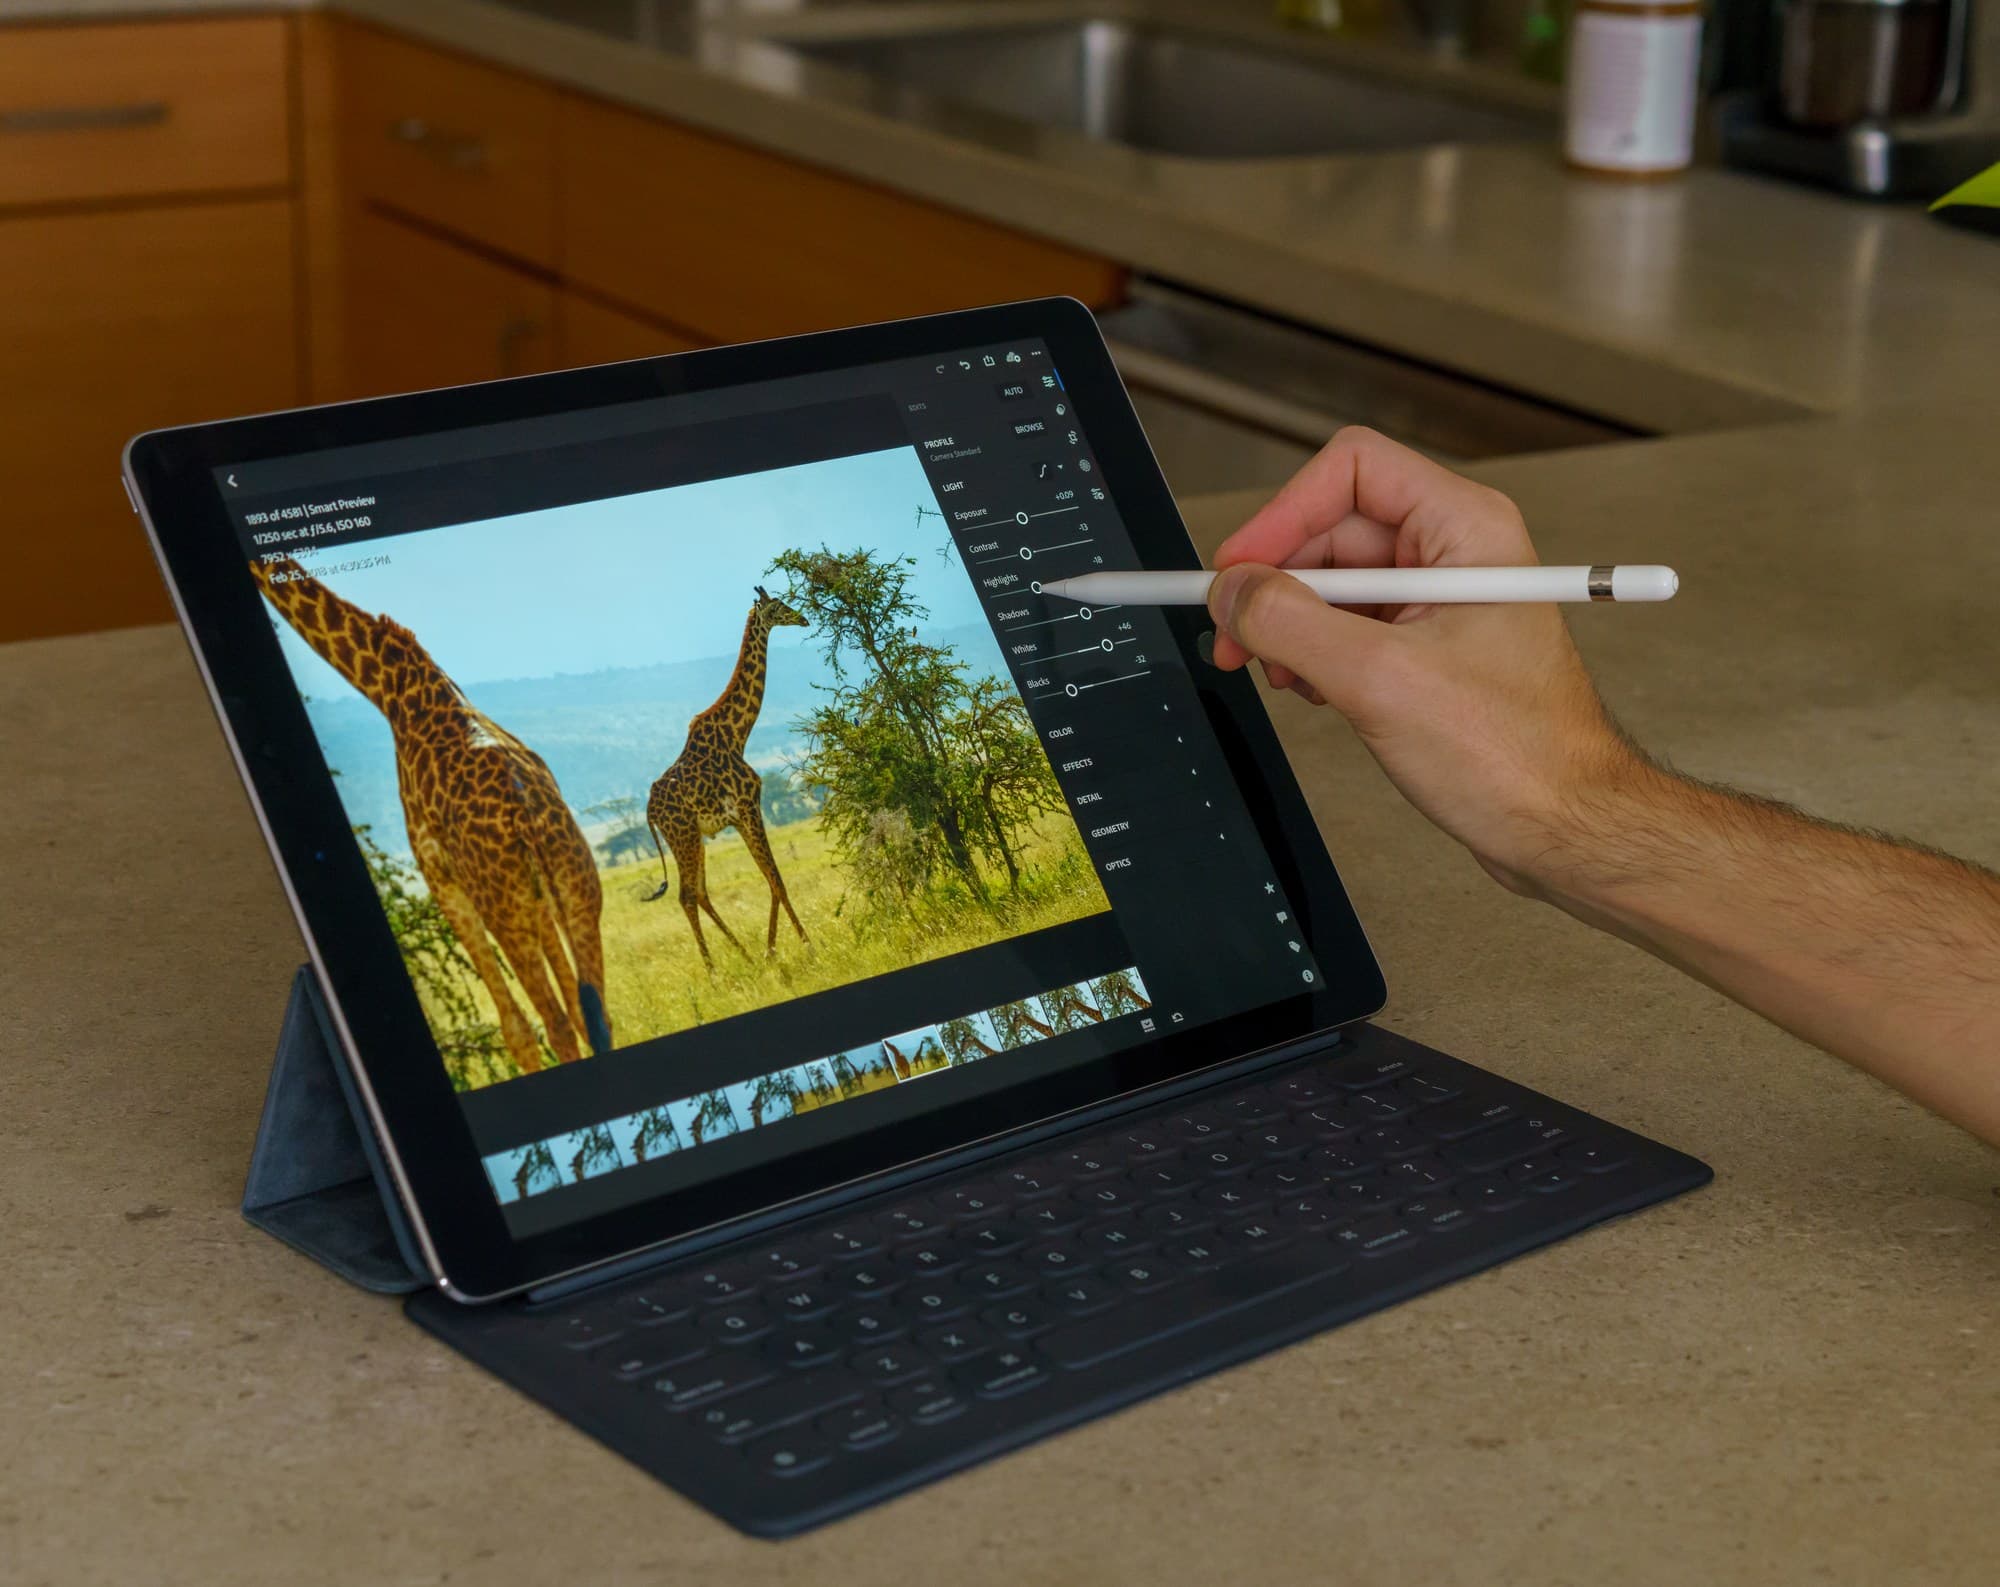
Giraffes in the Northern Serengeti.
I started to use it browse and curate some of those unedited shots, even doing a quick slider adjustment or two along the way. I was able to set the album to only show unflagged items, then when browsing the shots I could just slide my finger up or down on the right side of the screen to pick/reject each shot. My only real complaint with the whole thing was that importing the RAW photos from the camera was a gigantic pain in the ass.
I decided to have the best of both worlds. I still use Lightroom Classic CC on the desktop for all the heavy lifting and laborious editing, but also to import the photos and create my collections. After importing a set of photos on the desktop PC, I can just right-click on each new collection and enable "Sync with Lightroom CC."

After uploading, the photos just showed up on Lightroom CC on the iPad Pro. It’s not sharing original size files with the iPad Pro, just smaller Smart Previews, but that’s enough for viewing and organizing. Since it’s all synced, edits on my desktop PC and iPad Pro propagate to each other fairly instantly.
Does this actually save time for my overall editing flow? It's too early to tell. While I don't do all of my culling on the iPad Pro (for that I would need more shortcuts and original resolution photos..), it's nice to have the ability to do it whenever and wherever I want.
My development & writing workflow
How I blog with Jekyll with my iPad Pro
I had one remaining task that would determine if I could just about completely get rid of my laptop. I wanted to see if I could at least write and edit blog post drafts with my iPad Pro.
Sounds easy enough, right? Unlike most blogging setups, my site is static and utilizes a static site generator called Jekyll (and has been since about 2010 when I moved from WordPress). Instead of just logging into a website admin dashboard to write and publish a new article, I need to run some commands in a terminal to process all of the templating and generate the HTML, JS and CSS files for my site. I then run another command to deploy this to Amazon S3 and CloudFront where this site is hosted.
This setup is a cumbersome and nerdy way of doing things but:
- I like having the project. It gives me some new tech to learn (Route 53, CloudFront, et cetera) and stay up to date with. And I will always self-host. I need all the endless customization options at my disposal.
- I prefer the peace of mind of knowing I don’t have to backup any blog databases regularly (once you deal with a corrupt MySQL database backup, you never want to deal with that again) and that my site should be easy to manage over the years as it’s just a set of files — no database migration scripts to write should my blogging tool of choice change in a decade (well, maybe some template migration scripts..)
- I love the peace of mind that should one of my articles ever endure lots of web traffic, scaling is not an issue with the S3/CF hosting.
When I’m writing an article I usually have Jekyll and a local server running in the background so I can casually preview my article draft in the browser and fix formatting as I go. Unfortunately, it’s not exactly possible to install and run Jekyll along with my required ruby gems and other node packages on an iPad as far as I know.
Now, if you’re only working with basic HTML/CSS/JS files that don’t need any generation, it is possible to use Coda in Split View with Safari to get a live preview as you’re editing. There is also console access in Coda’s own web previewer to poke around if you need. It’s actually a pretty nifty way to operate if you can get by like this:

The generally accepted workflow for any software development on an iPad is... not do it on the iPad. Most folks that need to do some kind of development on an iPad do it remotely on a VPS via a terminal app on the iPad (Prompt 2 by Panic and Blink Shell are rather popular options). Even then, using anything like a web inspector or debugging JavaScript in the browser on an iPad will be a chore.15 While this route is acceptable for the kind of coding you can do remotely in a terminal, if you need a graphical IDE for your development work, it will be much more involved and tantamount to just using a VNC client.
I could do the same and fire up a staging server (like with AWS Lightsail that I’ve used in the past for simple VPS needs) to do this with a git post-commit hook. I could set up basic HTTP auth so I could just access the VPS in a browser to preview my generated drafts. Or just log in and edit the file remotely as Jekyll incrementally generates the site continuously.
But that’s no fun.
I wanted to see if I could continue using Amazon S3/CloudFront for this. The only hard requirement I had for a staging webhost was the ability to password protect it so my staging site doesn’t get indexed by Google as duplicate content or have my drafts publicly accessible. Turns out there is a way to add Basic HTTP Authentication functionality as a Lambda function on CloudFront. Then I could use AWS CodeBuild to listen for new git repository commits, fire off a build and have it deploy to my S3 bucket. Boom!
So that’s exactly what I did.
Update (Nov 2019)
I ended up moving to a far better coding solution. I have an AWS Lightsail server that hosts my code editor in the cloud and I can do everything I need right from Safari on iPadOS.
This is largely thanks to iPadOS bringing an improved Safari with "desktop-class" browsing that's good enough that it can support a complex web app like my self-hosted VS Code instance via the code-server project.
Doing a step by step tutorial would take quite a bit to describe here and isn’t the point of the post, but here were the general steps I took:
-
Create a new S3 bucket and enable static web hosting to host staging files.
-
Make a new CloudFront distribution to host that bucket. Under Behavior settings for redirect, set object caching TTLs to 0. Set price class to only U.S., Canada and Europe (just a staging host for me, no need for more expensive coverage). Under Origin settings, set Restrict Bucket Access to Yes to make the S3 bucket private.
-
Create new Lambda function to add Basic HTTP auth to the new CloudFront distribution. Copy Lambda function ARN.
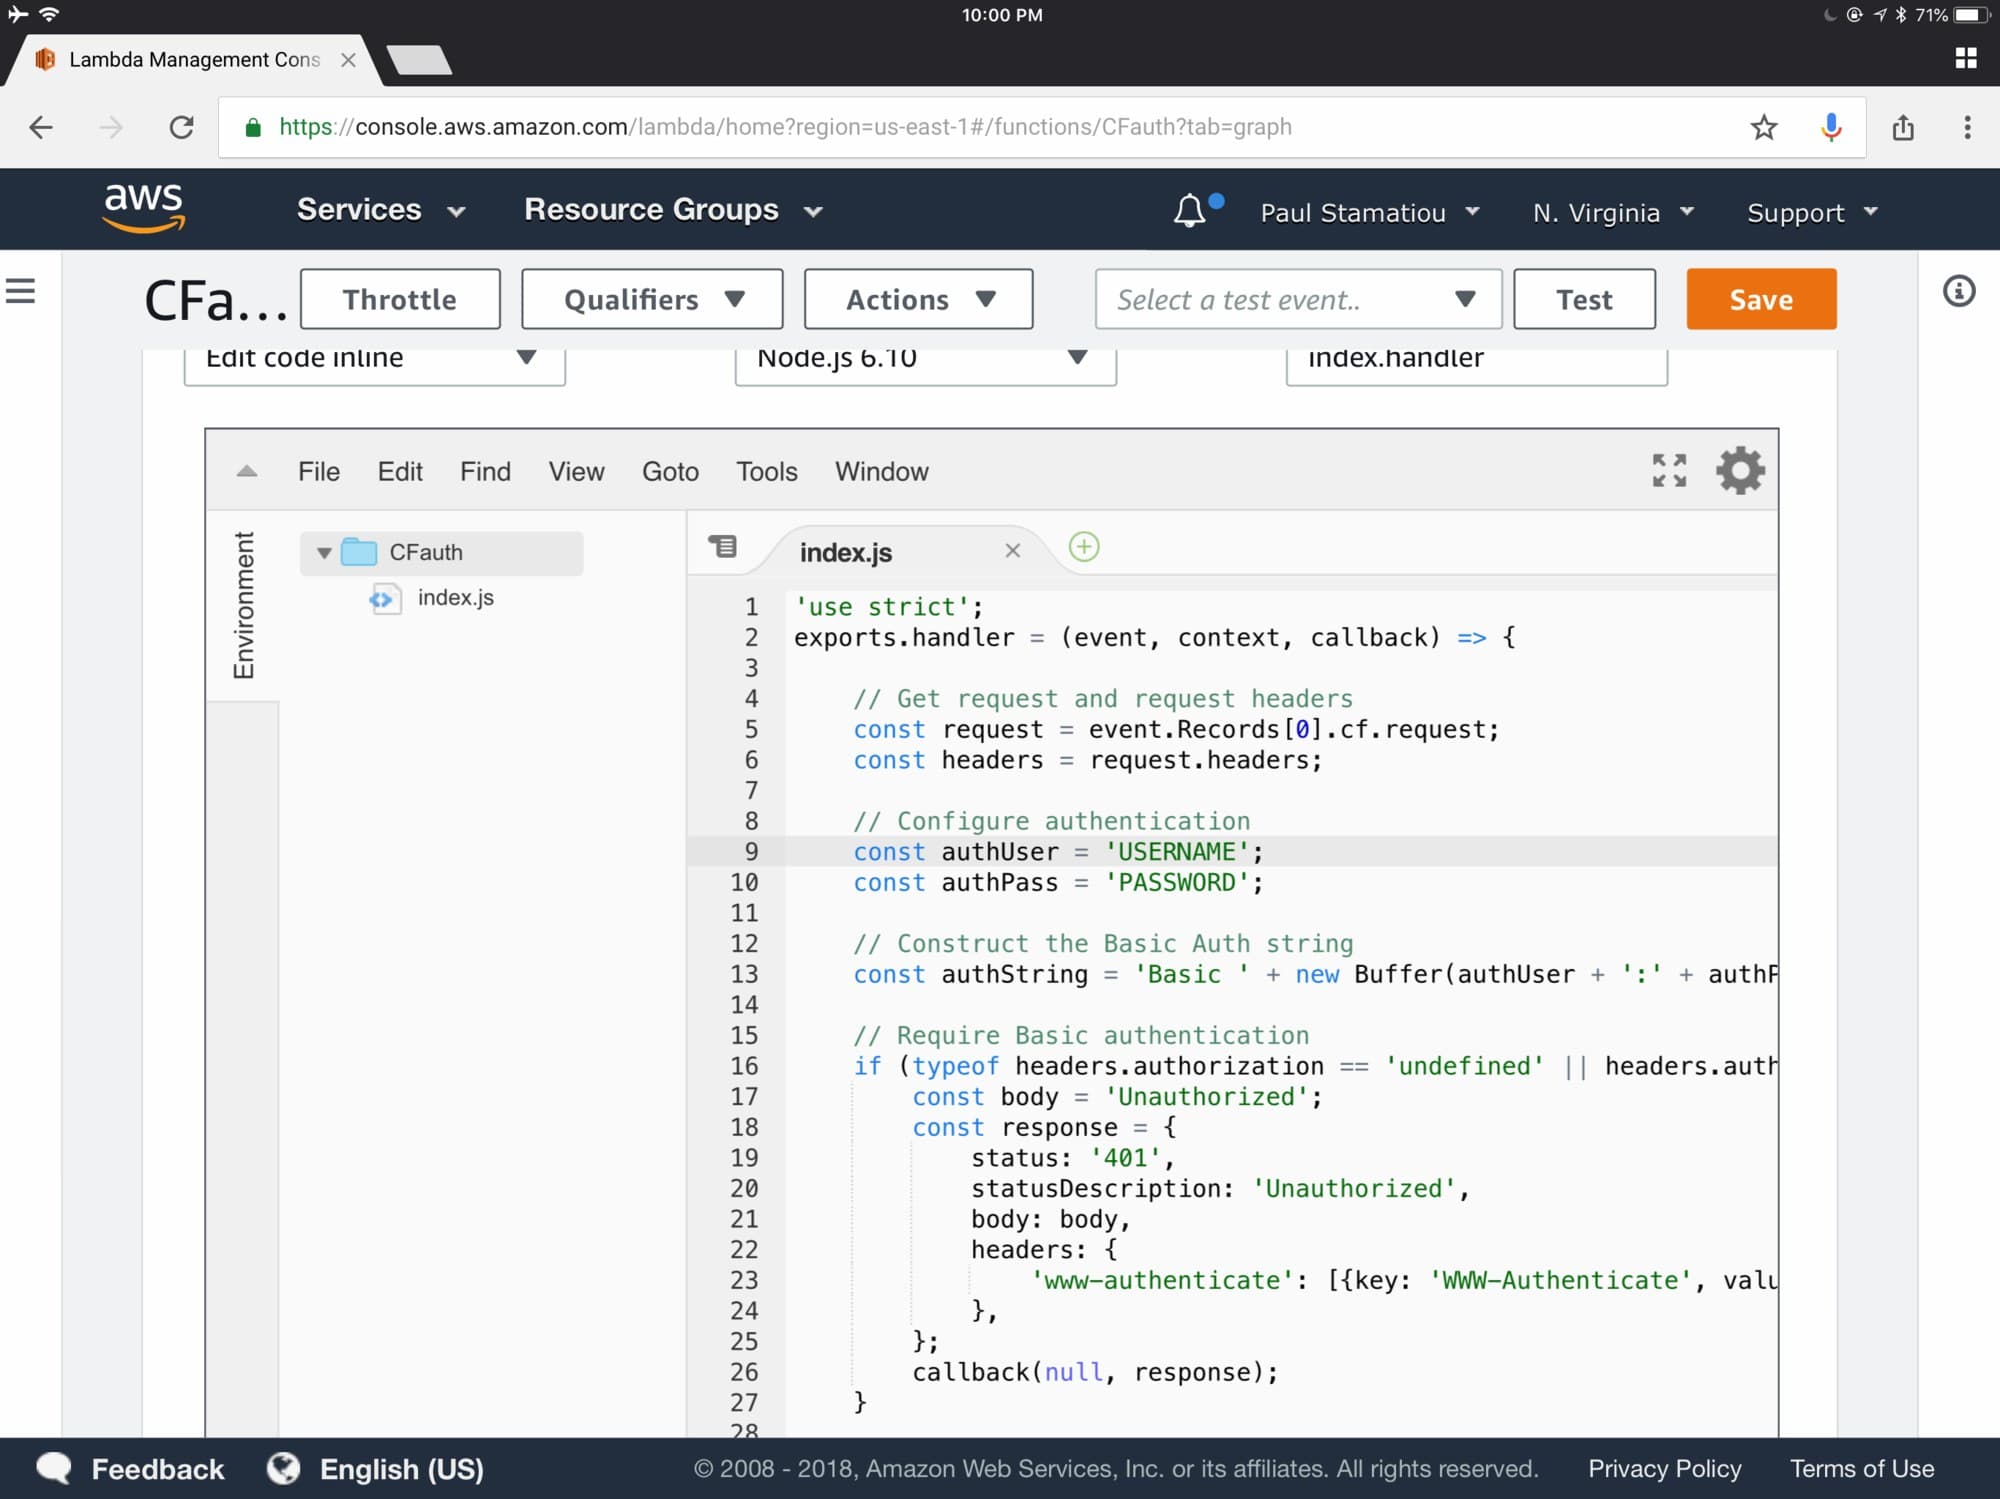
Creating the Lambda function to attach to CloudFront.
-
Edit CloudFront distribution Behavior settings and create new Lambda function association for "Viewer Request" and paste the Lambda function ARN from the previous step.
-
Create new AWS CodeBuild project and add git repository from GitHub. Enable webhook to rebuild every time a change is pushed to the repo. Select a Ruby image. Specify a buildspec like the following, either in the CodeBuild config or add a
buildspec.ymlfile to the repo root. Create a new role and attach appropriate S3 and CloudFront permissions.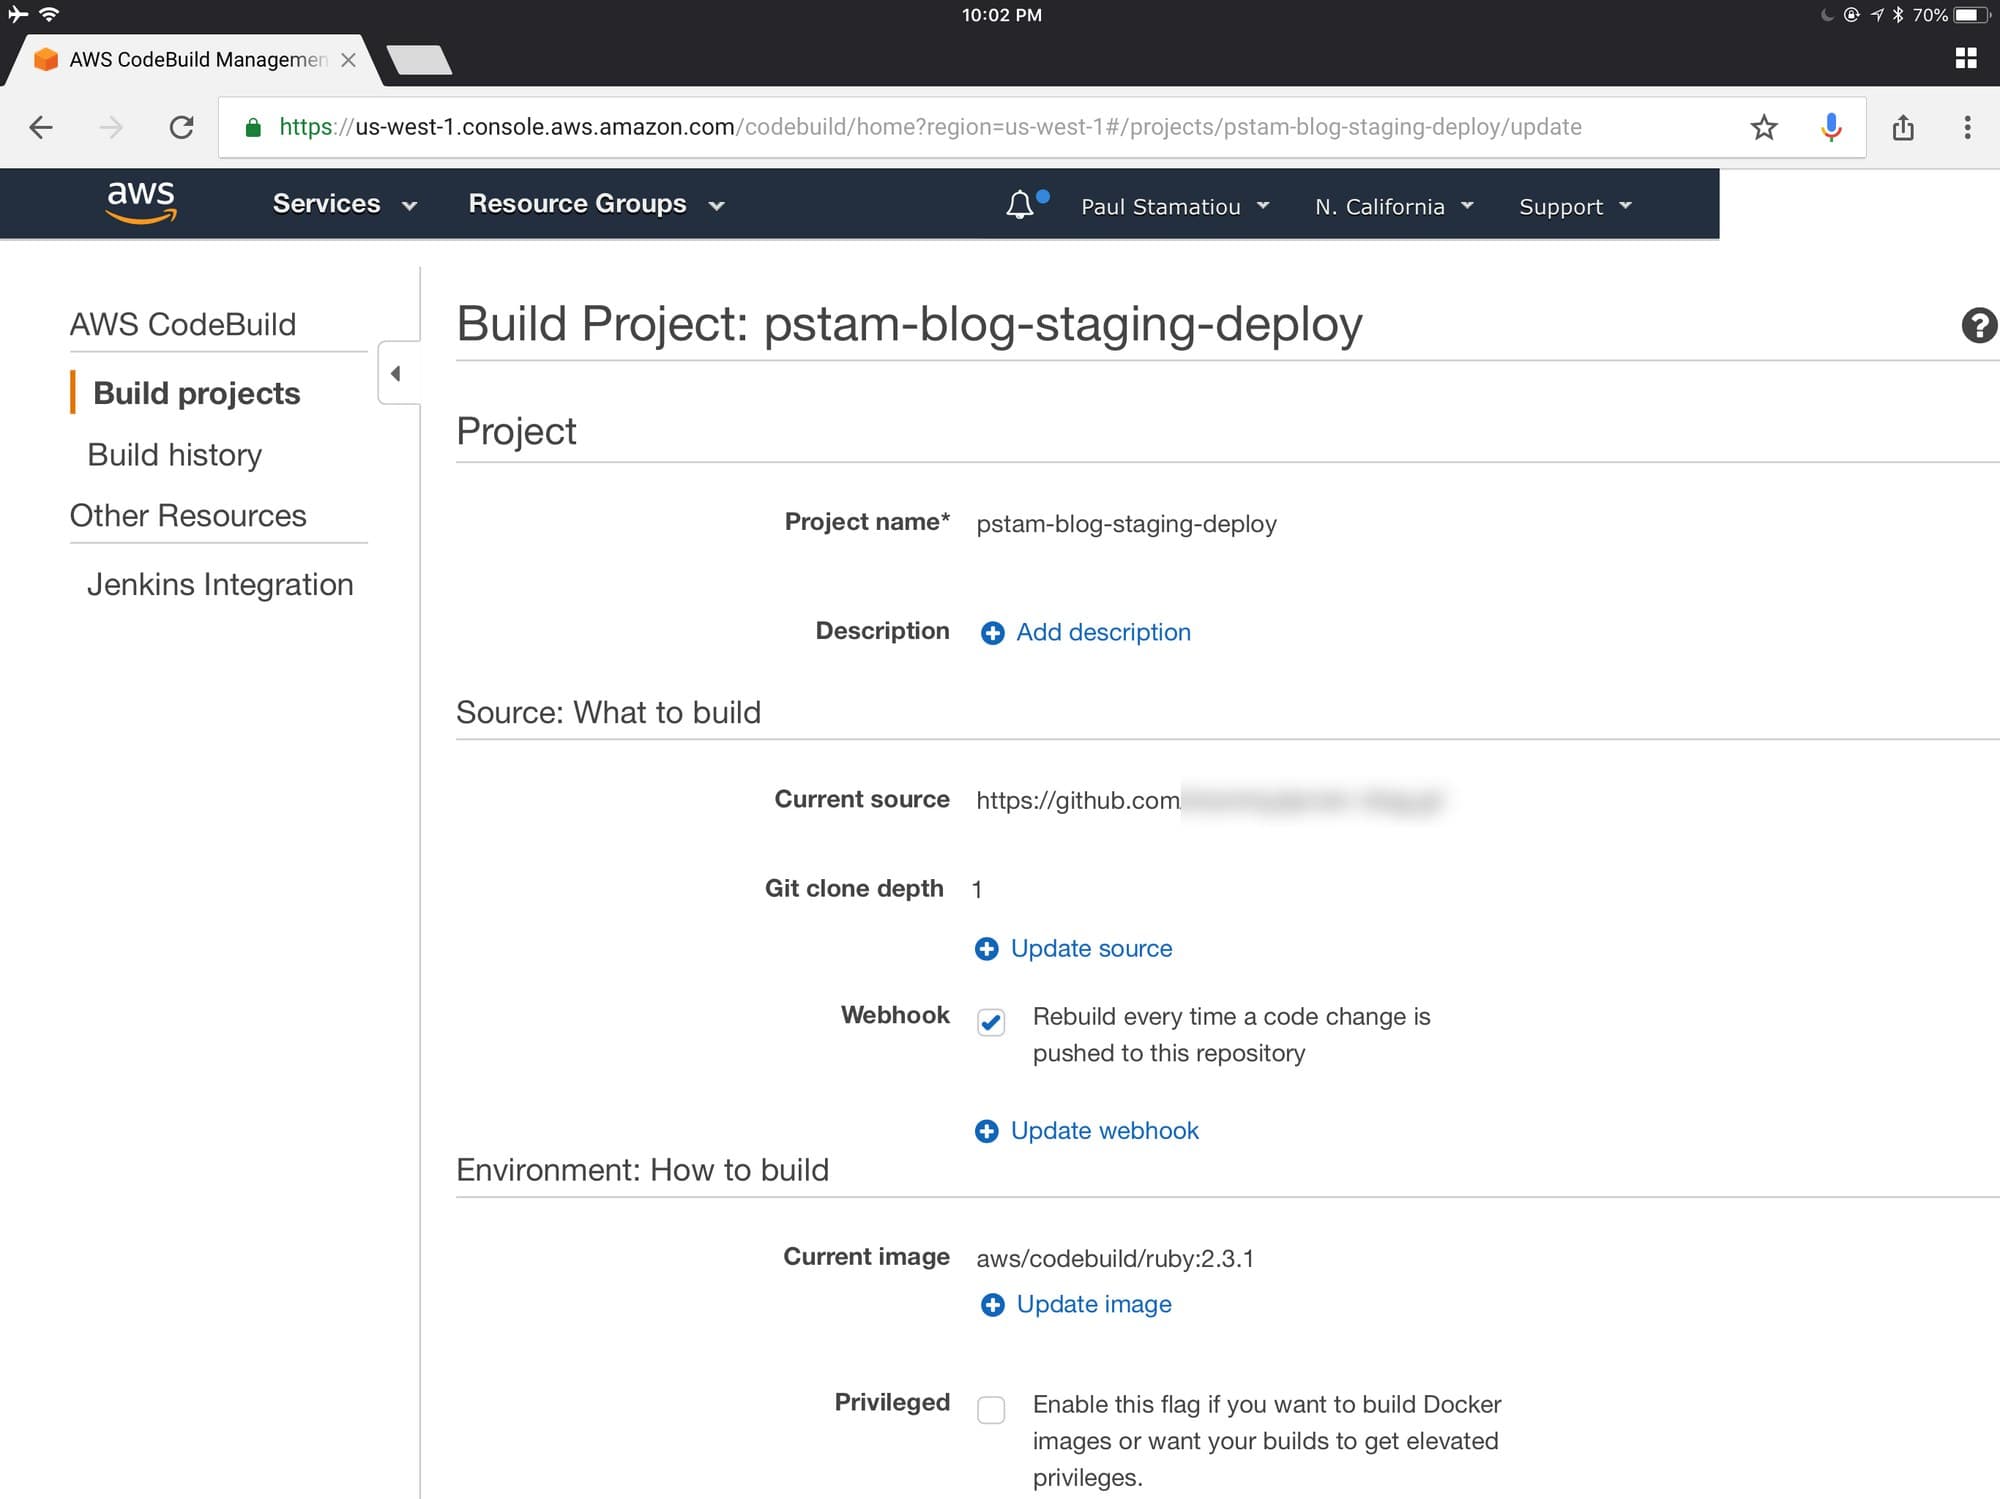
Creating the CodeBuild project
# buildspec
version: 0.2

SITEBUILD: "yes"
phases:
  install:
    commands:
      - echo install phase
      - apt-get update -y
  pre_build:
    commands:
      - echo prebuild phase
      - gem install bundler
      - bundle install
  build:
    commands:
      - echo Build started on `date`
      - bundle exec jekyll build
      - aws s3 sync _site/ s3://MY-STAGING-BUCKET
  post_build:
    commands:
      - aws cloudfront create-invalidation --distribution-id DISTRIBUTION_ID --paths /made-on-an-ipad-pro/index.html
      - echo Build completed on date
-
Optional: Integrate AWS Simple Notification Service to alert your phone when builds are initiated and completed. I haven’t done this yet but seems like a neat thing to add.
-
Commit a change to the repo, watch the CodeBuild automatically fire up and deploy the new site in about 1-2 minutes (probably faster with a smaller Jekyll project).
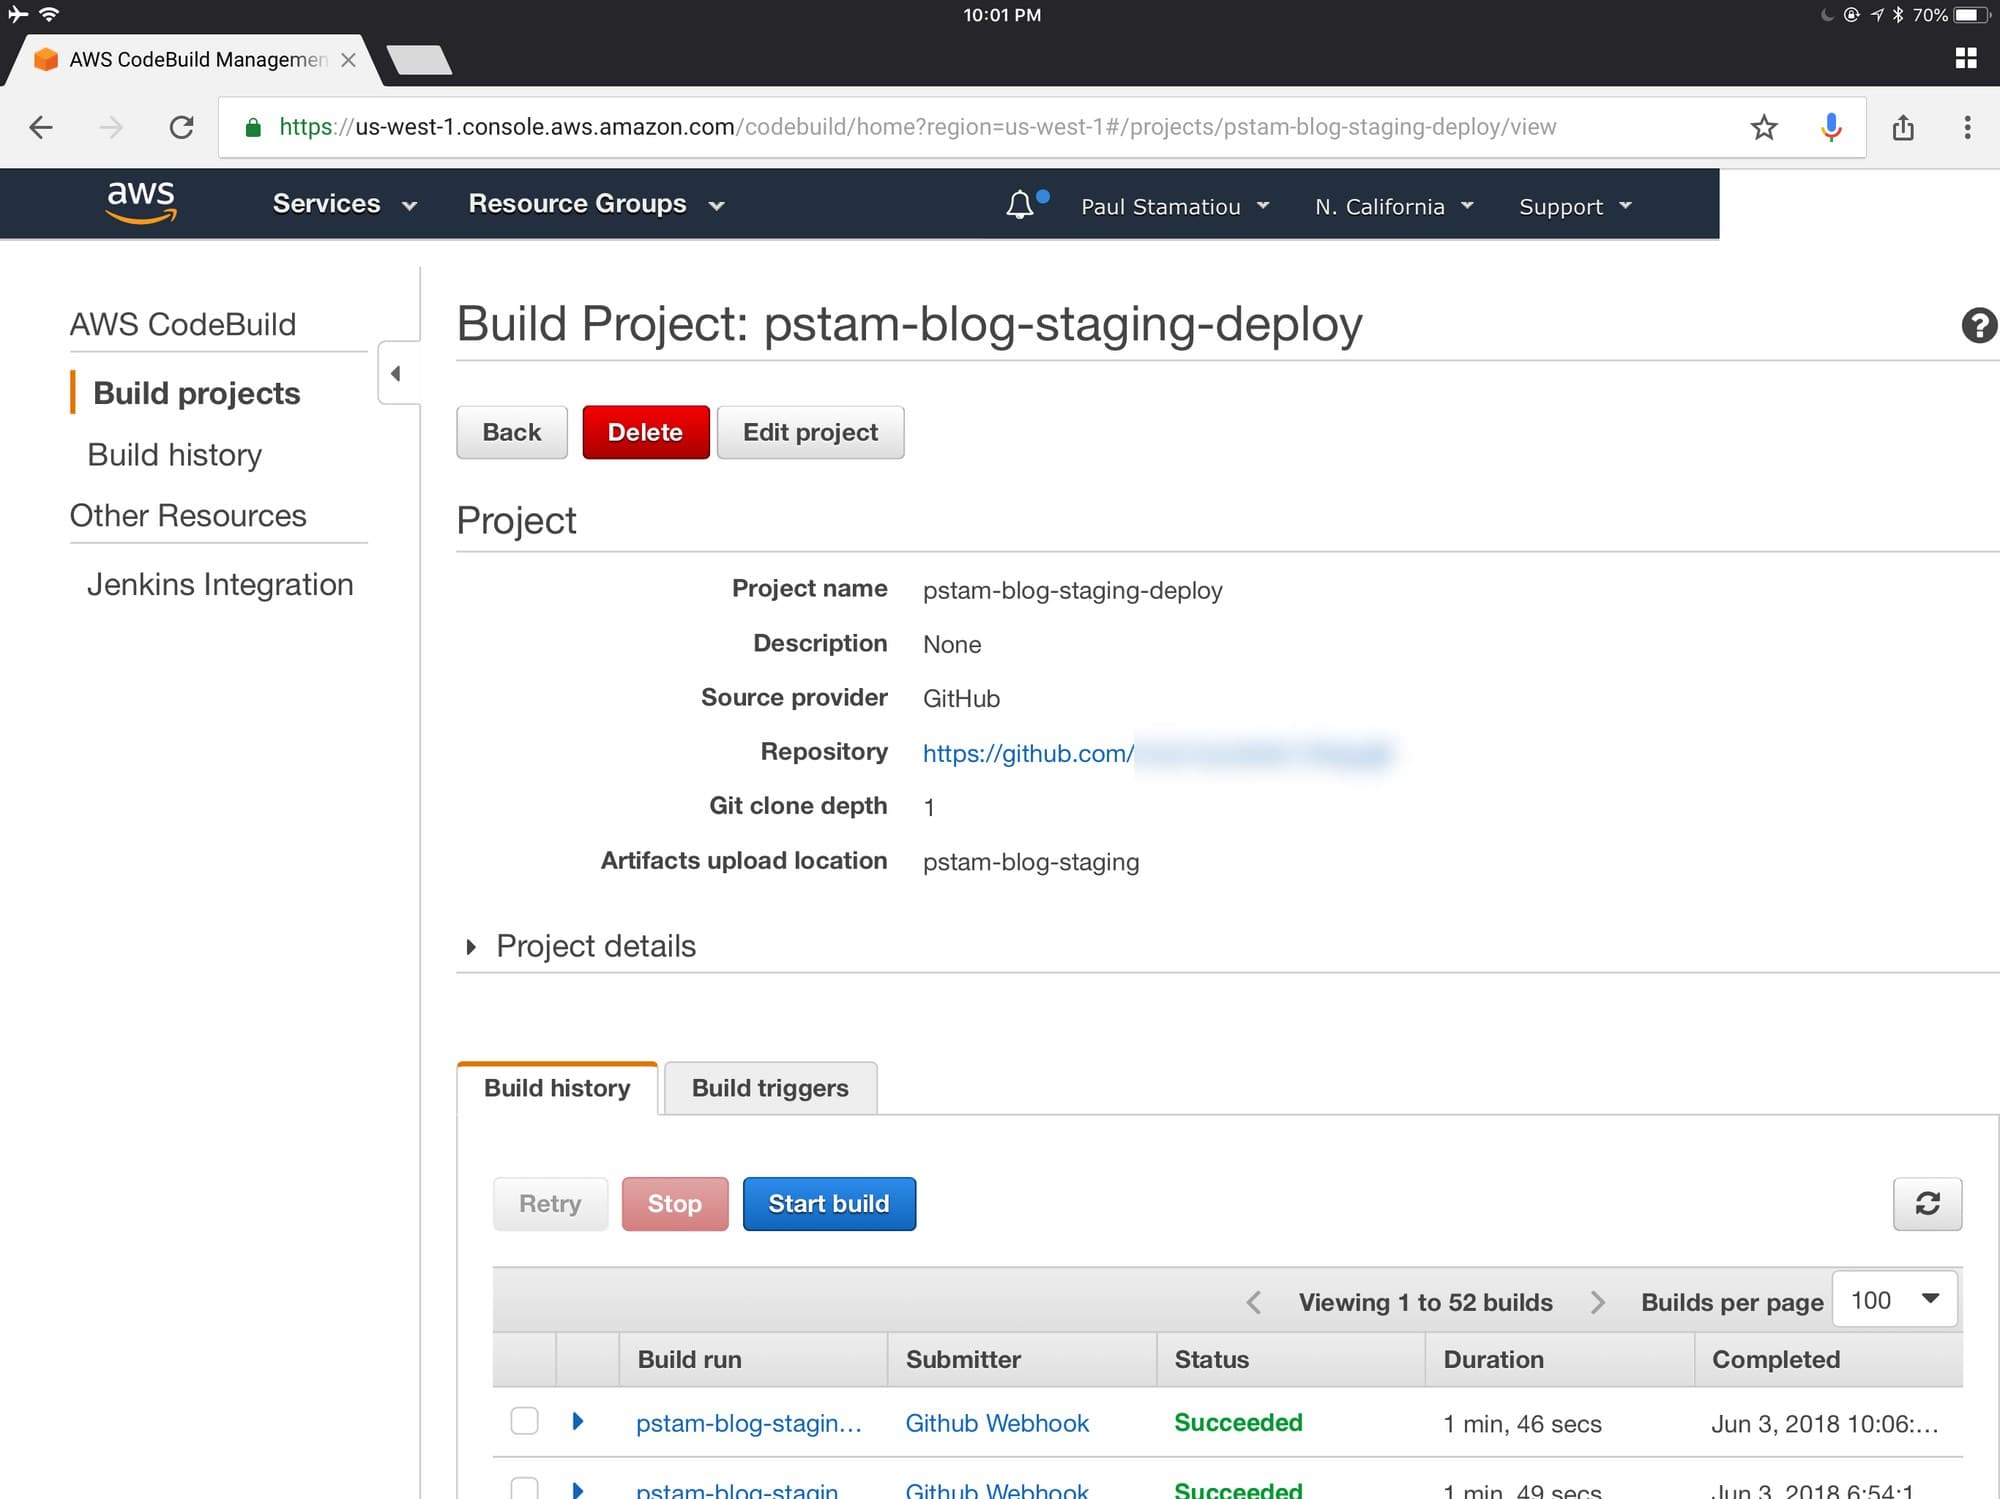
Dashboard showing CodeBuild project build history.
Since I’m using CloudFront in a rather unorthodox way and don’t want anything cached and want things to get updated instantly with each deploy, I manually call for CloudFront to invalidate the one file I’m working on with each build. A bit hacky but lets me preview items quickly.
I do have some things left to figure out with this system though. I use some node packages (via Grunt.js) for things like CoffeeScript compiling, merging and minimizing some JS libraries, compiling Sass and so on. I’ll need to get the equivalent of those running with Ruby in CodeBuild, or explore some other options.
With site generation taken care of I only had one thing left to do: find a robust app to edit files and work with my blog's git repository. It didn’t take long to find Working Copy. It’s a powerful git client for iPad with support for iOS 11 functionality like drag and drop, as well as the new Files app.

Working Copy showing the git history for my blog's repo.
While it has an integrated text editor, I was looking for something with a bit more customization. I initially figured I could just use Coda with the git repo that I had Working Copy manage. Unfortunately, the current version of Coda does not play well with this workflow and requires individual files to be exported and then imported; not quite what I was looking for. I just wanted to open the whole repo as a project in a code editor.
I eventually found Textastic and love it. It has the few features I need: Files app support, basic theming, Split View support, TextExpander support and some nice-to-haves like easy ways to see how many words have been written in a file so far. Other alternatives include Buffer Editor and GoCoEdit.

Editing this post in Textastic. The Symbols menu makes it easier to jump around long files.
Overall, I'm rather pleased with how this setup came to life. It’s not instant draft previewing but I don't need to check how my article looks that often anyways.
Made on an iPad Pro
When the iPad launched in 2010, Steve Jobs described that a third category of device—one between the smartphone and laptop—could only exist if it was able to do some key tasks far better. That third category of device was the tablet and Apple launched the iPad that day billed as the best way to browse websites, tackle email, view photos, play music, videos and games as well as read eBooks. The vast majority of those tasks revolve around largely passive consumption.
Early iOS and iPads had a flurry of software and hardware constraints preventing iPads from even being thought of as a way to create meaningful digital artifacts. But it was always in Apple’s DNA to want all of their creations to help others create.
Two decades ago you might have seen "Made with Macintosh" graphics on Apple's website and elsewhere online. A decade ago it became easier to spot websites created with iWeb sporting little "Made on a Mac" badges. Now, the iPad is ready to be taken more seriously as a creation device with the iPad Pro.

The iPad Pro features a large and stunning ProMotion display, more mature multitasking functionality, performance to put it in the same arena as larger laptops, a lag-free new input capability with the Pencil and a growing collection of iPad-optimized productivity apps. All while having an impressive battery life, making it a device that can effortlessly feel at home at a coffee shop just as much as on a plane, couch, Eames lounge chair, kitchen counter.. anywhere.
Can it replace my laptop?
Yes, and it did. I just wiped my 13-inch TouchBar Macbook Pro and am getting it ready to ship to my sister, whose current laptop is my old 2008 MacBook Pro.
As you’ve noticed in this article, getting the iPad Pro to replace my laptop was not without some compromises and workarounds. And lets be cognizant of the fact that I still do have a huge desktop PC to fall back on when I need to do heavy photo editing.
However, there are definitely areas where an iPad Pro does not make sense at this time. For one, there's no way to transfer files between an external hard drive except for a few constrained workflows. Doing any real web dev and design is going to be a challenge and slowdown without a dedicated desktop browser and inspector/dev tools, along with the ability to install and run background processes as needed. I can't yet do my day job on this iPad Pro where I need to design and develop with an advanced prototyping tool for macOS called Framer. Even if my mockup design tool of choice (Sketch) existed for the iPad Pro, the speed with which I can create and manage dozens of mockups with the precision of a mouse would be sorely lacking.
That leaves me to my final comment about the iPad Pro. It’s such a fantastic platform for a wide variety of tasks that I wish there were more developers creating robust apps for the professional market along with customers demanding them and creating with them.
Perhaps the Apple Pencil is a step in the right direction—not for drawing but as a way to offer higher input precision that a finger tap can't. That could mean apps made for Pencil-input only, with room for more controls on-screen for that class of applications.
What this device does is extraordinary. —Steve Jobs

Made on an iPad Pro in London, New York, Houston and San Francisco.
1 Which I would say is fairly useless on a huge iPad aside from FaceTime (do you really want to be the person using a massive iPad as a camera in public??) but iOS 11 brought a new Document Scanner feature inside the Notes app, which combined with the Apple Pencil makes it's a powerful productivity combination... Scan a document, mark it up with the Pencil and send it off as a PDF.
2Although it now has an oleophobic coating to help with fingerprints, that slab of glass will still be covered in fingerprints forever.
3 At least that's what it sounds like to me.. I've spent too much time listening to music and rotating my iPad with my ear fixed to each speaker.
4 My biggest gripe is that Google Chrome does not reliably support Command + C/V for copy and paste for selected URLs in the address bar (it only seems to work if you unselect/select all it first if you had used Command + L to open the address bar which I always do). Also, when using the address bar the arrow keys do not function to let you move the cursor horizontally or let you move down to select a URL autocomplete suggestion.
5 While the regular iPad (2018 version) now supports the Pencil, it doesn’t quite bring the same experience without the ProMotion 120Hz fully-laminated display.
6 There’s one app I didn’t try yet but plan to at some point: Astropad. It lets you use the iPad Pro as a drawing tablet and second display for your Mac, so you can use it with any desktop tool like Photoshop and Illustrator.
7Though you can always get a textured screen protector to help with this, but who would want to reduce the quality of this stellar display by covering it with some plastic?
8 Well, except the ability to put it on another side of the screen.
9 If the app is supports Split View.
10 To add another cloud storage provider all you have to do is install their app (assuming it has been updated to support Files integration), then open Files to the Browse tab, tap Edit and toggle that provider on).
11 Though once you’re in the middle of a drag (especially when holding multiple files one by one) there's no easy way to cancel the drag.
12 There is also an SD card adapter but I don’t think it can read from UHS-II cards so I thought the USB 3 adapter would be faster.
13 While I had also shot quite a few 4K video clips, they are stored in a non-standard directory that the Photos app is not sure how to deal with. There are ways to import the video clips but they involve third-party apps and adapters it appears.
14 I just now retried importing to see what the speed is like. Importing 50 42MP RAW files to the Photos app took just over 2 minutes to import. That was with the Sony A7R III connected via a micro-USB cable. I tried again with a USB-C cable and the import took just 43 seconds. Then importing into Lightroom CC took about a minute more.
15 You can use Firebug Lite or I’ve heard there are some dedicated browser apps with rudimentary web inspector functionality. The Coda app from Panic also has some basic console functionality.