Over the last two years I have spent a lot of time on the photos section of this website. I have redesigned and refactored it a few times, along the way evolving it to a place to support and house my passion projects: in-depth photo stories from my travels. These photo stories are the perfect coalescence of my passions: design, development, travel and photography.
I've created three large photo story collections so far: Greece, France and Japan. While each trip only lasted a week or two, each collection took some 3 or 4 months of spare time on weekends to create, comprised of many photosets from each day or location. I have also started creating smaller photosets from day trips: Vancouver, Seattle, ZRH and Carmel & Monterey.


With each photo story I sprinkle in extra trip details to complement the photos. There are some interspersed autoplaying video clips, but also a few stats and location metadata. I've had much grander ideas for what can be done here but I never have enough time1.
This post hopes to provide more information about my process for creating these photo stories so that some of you can try to do the same on your next journey.
Why?
“I used to be a slave to my startups. If I wasn't working, I had a perpetual feeling of guilt that I should be working.”
When I was running my startups I had a period of no travel or vacations for about 5-6 years. I was burnt out and it was not healthy. Now that I'm in a happier place where I'm not worrying about my startup 24/7, I've begun picking up on some of the world exploration I've missed out on.
At the end of 2013, I started with my first visit to Asia to wander through Japan. Those two weeks were some of the best in my life. I love exploring new cultures, places, foods and finding ways to capture my experiences to share with others. But really, I create these photo stories for myself.
Many folks will argue that you can't travel and take so many photos because you won't be living in the moment and experiencing it first hand. I feel this actually enables me to easily relive the moment. Since posting my collections, I've revisited them on countless occasions both myself and also when telling a story from a trip to a group of friends.
The Process
From departure to published.
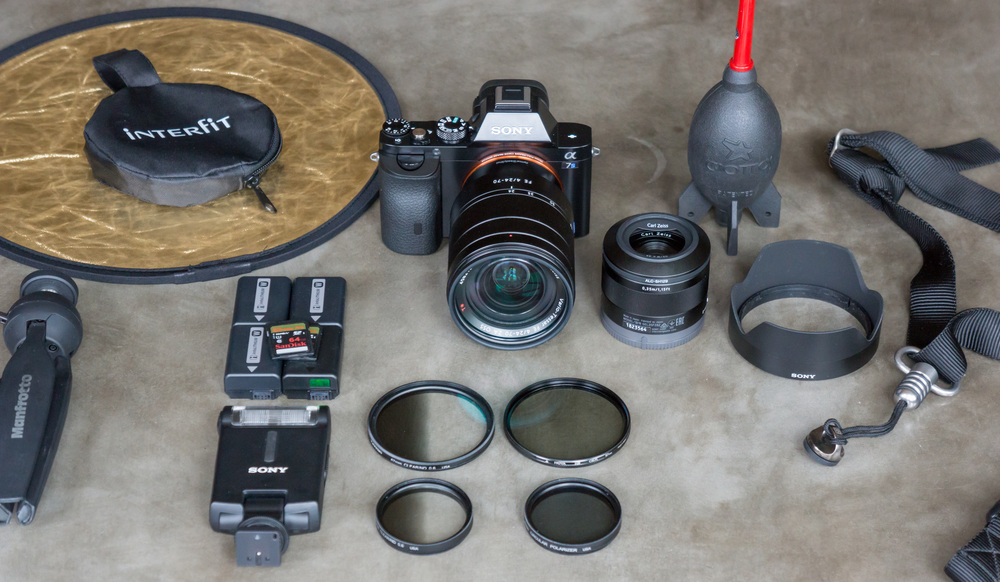
Photo gear
I'll be the first to say that the camera doesn't make the photographer, but the right gear sure does help. While all of this is mentioned on my photo gear page, I've found a few pieces to be particularly vital for a long trip.
Before I was serious about traveling I had a gargantuan Canon 5D Mark III. It was big enough that I didn't take it around as much as I wanted and definitely not on any long trips. When the tiny Sony RX1R came out, I jumped to it — the smallest full-frame camera with a great 35mm f/2.0 lens. It was such a relief traveling with a small camera and no extra lenses2.
Though I did encounter a few times where I wanted some more lens options since the RX1R does not have a removable lens. In particular, it was when I was trying to get this shot that I told myself I was going to get a different camera. I couldn't get back far enough to capture the whole thing! This could have been a great shot with a wide-angle lens up close looking upwards.

For my next trip, France, I began testing a Fuji X-T1 and some rented lenses (56mm f/1.2 and 12mm wide-angle) along with my Sony RX1R. I was not happy with the Fuji at all. The build quality was not first-rate and the shots were grainier and did not feel nearly as sharp as the Sony. Lugging two cameras around on that trip was a huge pain. Not to mention what a complete tourist I looked like.


I ended up selling both cameras and purchasing the Sony a7S. It's perfect. Battery life is easily twice as good as the RX1R. It's only about 20% larger but gives me the freedom to use more lenses. The flip-out screen is extremely useful, especially when wanting to capture discreet shots or wanting to frame your shot when extremely low or high. I also use the Wi-Fi photo transfer functionality with my phone often.
Despite having that tiny Sony flash, I never use or travel with it.
As for what lenses to travel with I try to keep it light and versatile. For me, this means traveling with two lenses: a great zoom and a small prime. I cannot overstate the usefulness of a high-quality zoom lens. I use my 24-70mm f/4.0 about 95% of the time. Yes, I know this is contrary to what many photographers say, that primes provide the best quality and you should only have them. I'd rather get the shot and not be stuck changing lenses every so often.
I generally use the 35mm prime when I go out at night and want a smaller and lighter camera. And while I love my 55mm f/1.8 lens for all-around portrait use at home, it has limited use on trips for me since I tend to shoot landscapes and architecture more than people.
Essentials
-
This mini tabletop tripod is the most versatile tripod I've found. It's even great for evenings out on the town when I'm not carrying a bag; I can simply slip it in my back pocket.
-
When I'm walking around new cities my camera is always on me, ready to shoot. This can get rather annoying after just an hour if you have a heavy camera and a bad strap. I've tried many but always come back to the Luma Loop. I have both the old and new generation Luma Loops and to be frank I love the first generation the most; it has a quick release and a swivel.
-
These are a must. I use at least two a day to remove and dust or debris from my lenses and filters. The other option is traveling with an air blaster but that takes up more space.
-
When I had my Sony RX1R, I used to go through 4 or more batteries per day. My current Sony a7S is much better with power, so it's closer to 2. I also always purchase extra chargers so when I come back to the hotel after a day of shooting I can charge all batteries at the same time and be ready to go in the morning.
-
When I travel I never delete photos from my SD cards after I import to my laptop. This is so I have two copies of my photos at all times until I'm back to a fast Internet connection and can properly back everything up. Memory is cheap so get a few. Just be sure they're all at least Class 10 or faster. I prefer SanDisk's 95MB/s Extreme Pro line. If you have extra money to burn and your camera supports it, go for the UHS-II cards.
Nice to have
-
You never know when it will come in handy, like on this random bridge in Tokyo where we took some portraits with the city and sun behind us.

-
Graduated neutral density filters are useful when shooting landscapes on sunny days. They darken the portion of your shot above the horizon where it's brighter to shift the dynamic range of the shot to something your camera can capture. Basically, it brings out detail in the sky and clouds that would normally be blown out.
And when it comes to lugging your gear around, I have tried a bunch of camera bags and nothing is as useful as my old weatherproof Timbuk2 bag. As such, I simply use a padded camera insert when I'm carrying my camera and I take it out when I'm not.
GoPro: Not just for extreme sports
I first started using a GoPro when I installed one on my Phantom 2 quadcopter. I quickly found myself using it more and more outside of the drone — it's such a versatile camera.
I've worn a GoPro while on long photowalks to create videos like this as well as nice timelapses of walking through airports or strapped to boats or my life jacket while jet skiing.

The real draw of the GoPro to me is the ease with which you can record timelapses. It's just a simple setting and the result is usually pretty darn good for minimal effort. I use my GoPro for video as well but I trim down the hour or so of footage I record at a time into the most interesting short clips I can publish here.


And with a ridiculously tiny footprint — even including the adapters and extra batteries (you'll need a lot) — the GoPro is the perfect travel companion for producing complementary media. The Wi-Fi functionality means I can also quickly pull footage and pictures I just took on my phone and share them out.
I've since upgraded to the GoPro Hero 4 Silver. The Silver has a very handy touch screen on the back but does not have 4K recording like the Black. However, the Black edition does not have a screen and appears to have worse battery life. Since I only post smaller videos to this website I have no need for 4K and the touch screen is perfect when easily wanting to frame shots without relying on the GoPro app.


There's a whole industry around GoPro accessories but I only use a few mounts. My roommate loves taking his GoPro scuba diving so he uses a red filter like this for underwater color correction. I have been meaning to buy a polarizing filter like this for some of my sunset timelapses on the beach.
Here's some of the GoPro gear I travel with:
GoPro gear
-
As mentioned above I recommend the Silver over the Black unless you absolutely know you'll need 4K and will do something with the footage. I only post videos in lower resolution to this blog so I'll never use 4K.
-
These are a must for when you have your GoPro in your bag while traveling. You get a large cap to protect the GoPro housing lens from scratches and a smaller one for protecting the bare GoPro lens when not in a case. I use the latter the most when carrying the GoPro around in my pocket.
-
As mentioned above, the GoPro chews through batteries. If you're lucky you'll get close to 2 hours per battery. I travel with around 3 in my bag on a busy day. There are popular generic brands like Wasabi Power and while I've used them in the past they always seem to provide lower power after the first few uses. One of mine even started expanding after a while. You'll also want an extra charger so you can charge multiple at a time when you get back to your room.
-
While not a GoPro-specific mount, it is by far the sturdiest I've found. You can probably find smaller ones made for GoPros though.
-
Oddly enough GoPro does not include this tiny tripod adapter.
-
GoPole (or equivalent selfie stick)
While I haven't taken this on a trip yet, I'm always up for trying new gear that may help me get a better perspective when it comes to recording. I probably won't actually use it for selfies but rather getting my GoPro to be high up for a better view or up close to something I can't reach.
-
I used this mount the most. It's sturdy and has a powerful spring for a good grip on anything like clothing all the way to car visors.
Trip planning
Planning begins after the tickets are purchased3. Half the time I will spend weeks reading up on cities, usually buying a thick travel book along the way. This is the most daunting task because you quickly realize there is so much to see that you’ll never be able to see it all. The other half of the time, I just wing it and walk around on my own.
With Paris for example, I did not want to mess around so I created a Google Map with dozens of places I wanted to visit and separated them out into days. I then loaded this on my phone and used it as a reference on the trip.

This was a little too ambitious and I wasn't able to hit every spot during my trip.
“Even though I wouldn't, the thought that I could move anywhere whenever I wanted is nice to think about”.
A result of moving apartments just about every year since 2004, I've been pretty good at keeping my posessions to a minimum (camera gear aside, obviously :D). I try to own fewer, higher quality items and often they're only items that augment my travel experiences — portable stuff like good clothes, camera gear or simply last minute airline tickets and car rentals. I'd rather spend money on experiences than things that will tie me down to one place.
I'm not (yet) the super adventurous backpack-only type traveler... I have too much camera gear for that. Though I do like to pack enough clothes for just half of the trip. Then I’ll find a place to do laundry on the trip. I'm also a huge fan of dry sacks to keep things separate and organize items inside my luggage.

I always travel with this 10,000mAh portable battery (not pictured).
Planning a trip also involves planning some shots. I will occasionally try to find shots online and see where people took them. For example, I learned about the 56th floor observation deck of Tour Montparnasse in Paris this way. It's that blue building on the left. And on the right was a shot I was able to get from it.


The trip
I'll be honest: I'm not that fun to travel with. I must see everything. I walk just about everywhere — I averaged about 11 miles walked per day when I was in France. I make very frequent stops to change lenses or capture shots that catch my eye — that often means waiting for other tourists to get out of my shot4. I'm probably best suited for solo travel.


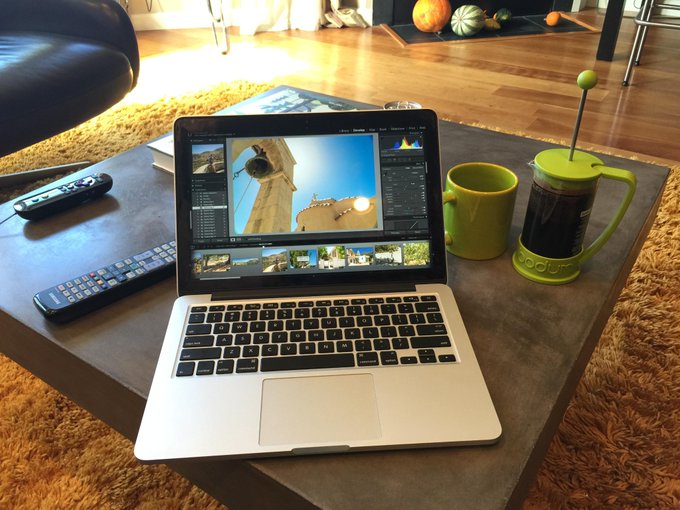
Every night I download all of my photos and videos from the day to my laptop. For GoPro files, I just drag them to a folder on my desktop with sub-folders for each day. For Sony a7S RAWs and videos, they get imported into Adobe Lightroom, where I create a collection for each day for easier culling later on.
However, I never delete anything from the SD cards. I prefer to keep backup redundancy while traveling and having two copies of every file. SD cards are cheap so I travel a handful of 32GB and 64GB cards.
Creating this much data on a trip can easily overwhelm the storage on your laptop. I previously traveled with an 11-inch MacBook Air but the 256GB SSD filled up far too quickly. I had to make a stop at Yodobashi Camera to get more SD cards. I've since sold the Air and now travel with a faster yet still portable 13-inch Retina MacBook Pro with a 1TB SSD.

How I shoot
I personally don't do much HDR, but very rarely I might enable bracketing on my camera and snap a few shots where I want to increase the dynamic range. I always use a polarizer when shooting landscapes when it's hazy, when shooting near water or shooting skies to make clouds punchier and bring out the blue in the sky as well as when shooting glass to reduce reflections. I also sometimes used ND grad filters for landscapes with obvious horizons where I want to make sure detail in the sky is captured.
I shoot in aperture mode most of the time, constantly adjusting the aperture between shots to get the desired effect or to align to the light and subject conditions . I move the focus square on my camera for most shots. For more particular shots I very often use DMF mode — the camera will focus on its own and then allow me fine-tune the focus myself. This is particularly handy for near-infinity shots like mountains where autofocus can never quite get tack sharp by itself or in very dark conditions when I have the AF illuminator light disabled to not bother others.
A camera is a tool for learning how to see without a camera. —Dorothea Lange
How to see
“In the right light, at the right time, everything is extraordinary.” —Aaron Rose
There are millions of photography guides out there so I won't spend too much time on this subject. If I could offer any tip for shooting, it would be look for interesting light, take lots of shots and in general be hyper-observant about the world around you.
Layering: Create a captivating composition with different points of interest filling the foreground, middle ground and background.


Leading lines: Guide the viewer's eye to either some point of interest or infinity.


Distinct geometry or symmetry: Leading lines draw the viewer to one particular part of the composition but interesting geometry can draw your viewer to many parts of the photo and still be captivating. If it's a building, try to get super close and low to create a pronounced sense of scale.


Too many tourists? Long exposure. If you have a tripod you can also take a bunch of shots and use Photoshop to delete the tourists. More on that in this footnote4.


Make tourists or locals your subject. Capturing part of the atmosphere helps convey more about your trip than just the landscape and scenery.


Be on the lookout for interesting reflections. It could be on water, windows, street signs or even silverware at a restaurant.


Long exposures: Why I always carry my mini tripod when I head out for the night.


Life: Capture the hustle and bustle of a Tokyo crosswalk, a lazy afternoon in Paris or the livelihood of an airport.


Use shallow depth of field sparingly. Bokeh shots are a bit overdone, but incorporating other elements of good compositions like leading lines or having interesting backgrounds can work.


And finally, don't forget to look up.


Photo culling and processing
After the trip is over and I fly back home to San Francisco, I make sure to fire up CrashPlan so it can start backing up all the new media files. My last trip ended up with 275GB of photos and videos — about 100GB of RAWs and 175GB of GoPro videos and timelapse photos5.
This part of the process takes a few months of spare time on nights and weekends. It's very tedious as I often prefer treating each photo on it's own rather than applying a batch style preset to all photos in a similar scene.
What exactly is photo culling? It's the process by which I pick the best photos out of each day. Picking the best photos is hard to do on it's own, but the other vector by which this increases in difficulty is that photos can look so different depending on the processing. So culling usually involves tinkering with photo settings in Lightroom to see how good the photo could turn out before putting real thought into the final look.
There are a few reasons this is extremely time consuming:
- I take many shots of the exact same thing. I do this for a few reasons: slightly adjusting composition, ensuring my shot is not blurry, focusing on different items or playing with different camera settings (usually different aperture).
- You need to tinker with Lightroom settings to see the full potential of a shot before discarding or selecting it. I won't know which photo I want to keep until I play around a bit in Lightroom. Adjusting levels, reducing shadows and highlights, adjusting color temperature, vibrance, et cetera.
- Is it really in focus? I know this is listed above, but this one is worthy of reiterating. I zoom into the focal point of each similar photo then going back and forth between them to find the sharpest one. In Lightroom zooming into RAW photos can take some time. Verifying focus is especially important on shots where I manually focused, like far-in-the-distance landscape shots where autofocus is not terribly effective.

Zooming in to find the sharpest shot.
When deciding to keep or discard a photo during this process, I continually ask myself: What do I want the viewer to look at? What's the dominant focal point? If there's not one strong focal point or a leading line guiding the viewer, I tend to discard it. It's hard to justify a scattershot composition with lots of small, unimportant subjects if there's not one good thing that draws the shot together.
However, I have three exceptions: 1) If it helps provide a sense of the environment or immerse the viewer in the story I'm telling, even if it's not a particularly high-quality shot, 2) if the subject is captured using framing or layering to create an interesting composition or 3) the shot contains some extremely well-timed subject/occurrence, nice colors or some amazing symmetry or other aesthetic desire.
On a good day I will have taken around 750 photographs. My goal of culling is to try to get that down to around 50-60 good shots. An entire trip can have over 7,000 photos so this takes some time.
There's nothing special about my culling process. I create a Lightroom collection for each day and remove photos from the collection I don't want. Sometimes I will enable Auto-Stack by Capture Time to make it easier to browse when I have tons of similar photos. I don't really use the Lightroom star rating system but will occassionally label good shots with a color (press any number past 5).
You can see an example of how many shots I take for each scene in this video I made of every single photo from my Japan trip:
After the shots for each day are culled down significantly, I start going back over each shot to figure out what kind of adjustments need to be made to the photo. My personal style tends to be slightly warmer temperature, reduced highlights (sometimes), reduced shadows and slightly increased vibrance. Beyond that I manually tinker with the tone curve, individual HSL values and clarity (super rarely) along with any cropping or rotation I may warrant.
As for noise reduction, I try to walk the line here. A decent amount of noise reduction will definitely clean up grainy high ISO night shots but can very quickly make the photo feel like detail has vanished.
Just like my tip for photography is to shoot a lot, my tip for Lightroom is to process a lot. Move every slider and curve until you find something you're happy with. Over time you'll get much faster.
It would take me forever to do all this unless I had VSCO keys — it's the only way I know of to create keyboard shortcuts for Adobe Lightroom. It lets you assign keys or key combinations to adjust just about everything in Lightroom. For example, it makes copying and pasting develop settings a breeze. I fiddle around with one photo and if I like the way it looks I hit , to copy and then . to paste. Easy.
If I end up liking a particular set of develop settings enough on a set of photos, I'll end up saving it as a preset. I'll then apply that preset on similar photos as a starting point.
When it comes to the rare situation where I want to create an HDR image, I select the bracketed photos in Lightroom and then use the "Merge to 32-bit Plugin" by Photomatix to do tone mapping.
Perspective correction settings inside of Lens Corrections is one relatively new Lightroom feature I use often. It allows me to skew photos so they appear to be shot from a more ideal, centered perspective. For example, if you were too far below a large building, you can use perspective corrections to make it appear as if you had shot the building a bit higher and in the center. It's surprisingly useful for a variety of photos. Here's one example:


Next
In Traveling and Photography (Part 2), I will cover more about the technical implementation of the photo stories themselves as well as how I process videos.
1 I've been wanting SVG animated paths of routes taken (I had been tracking a GPS location every 2 minutes) as you scroll down the page for example.
2 However, what I didn't carry in lenses I carried in batteries. It chewed through up to 4-5 in a good day and the autofocus was slow at times.
3 A few years ago I decided to start taking advantage of airline rewards programs and start flying with one airline exclusively. I now fly only United and Star Alliance when I can.
4 Removing tourists can also be done by taking a ton of shots (like 10+) with tourists in various places, then using Photoshop (File » Scripts » Statistics, selecting all your files and setting the stack mode to Median). It will only keep the areas that remained the same. However, this only really works when you have a big tripod which is why I haven't used it much.
5 And that was with my 12MP Sony a7S — if I had the 36MP Sony A7R, that number would be closer to 300GB just for the RAWs themselves.