I take a lot of pictures for reviews on this blog, most with a Nikon D90 DSLR camera. A good chunk of my time on larger reviews is actually spent reviewing hundreds of images, then fine-tuning the best ones in Photoshop (case in point, my upcoming car review is taking forever). I've been using some version of Photoshop since the Mac OS 8 days. However, I mainly used it for the same basic image manipulation techniques — cutting people out of backgrounds while I was on my high school's yearbook staff, and lots of cropping, levels tweaks and some basic filter work for this blog.
Whenever a new version of Photoshop comes out, I generally upgrade fairly soon (well, when I had my student discount), tinkered with some of the new features and then went back to my old workflow. I would not consider myself terribly proficient with Photoshop. That's why I was pleasantly surprised (and shocked that I didn't notice this sooner) when I recently discovered the perspective crop option.
Perspective Crop, Huh?
Perspective crop is like a regular crop, except that when done properly it can readjust the perspective of an image to look as if the picture was taken head on, if that's the look you are going for.
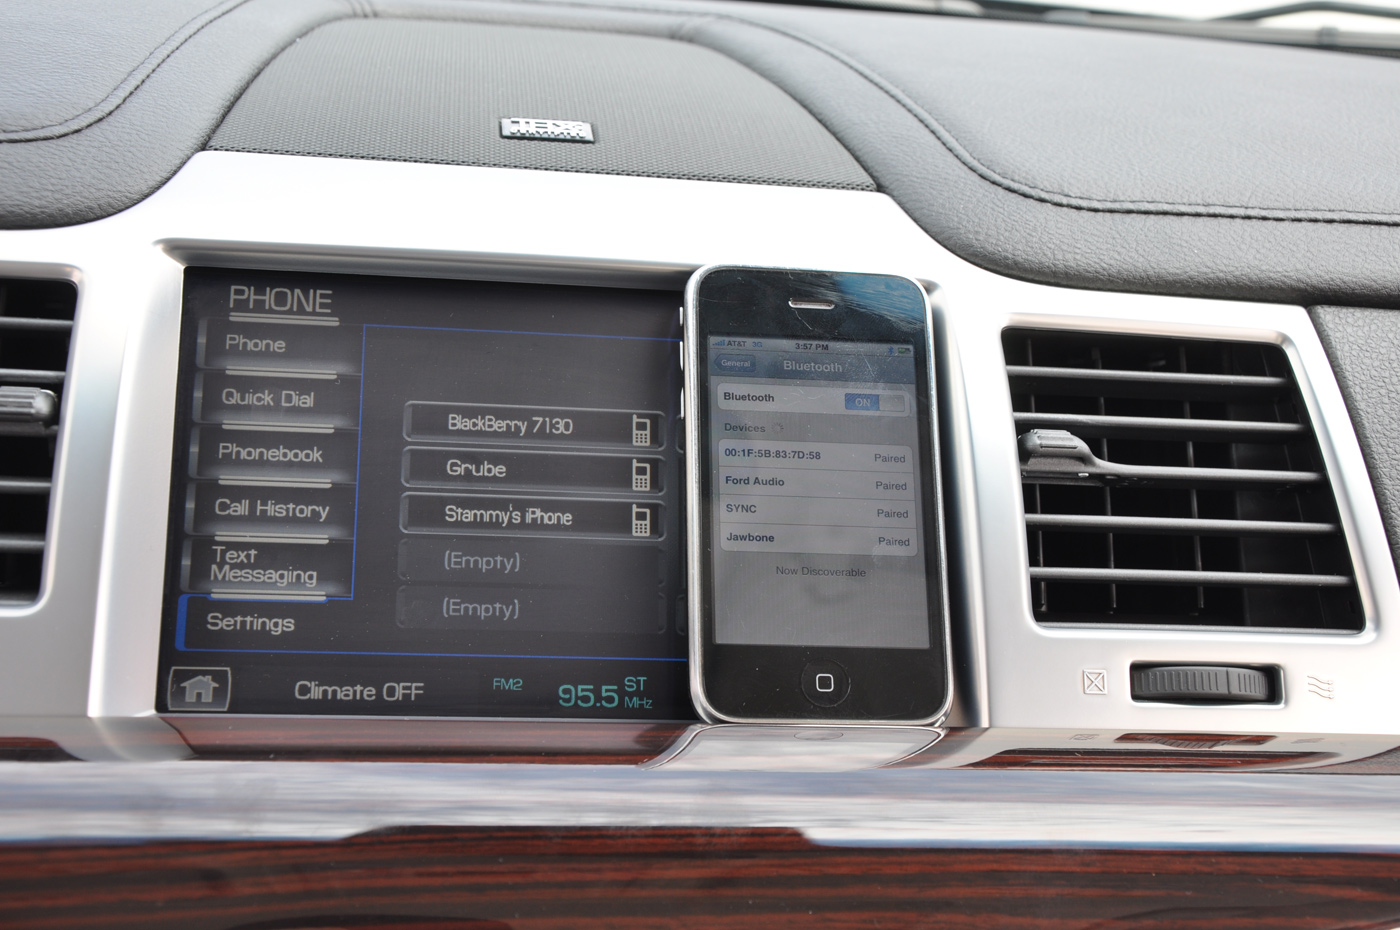
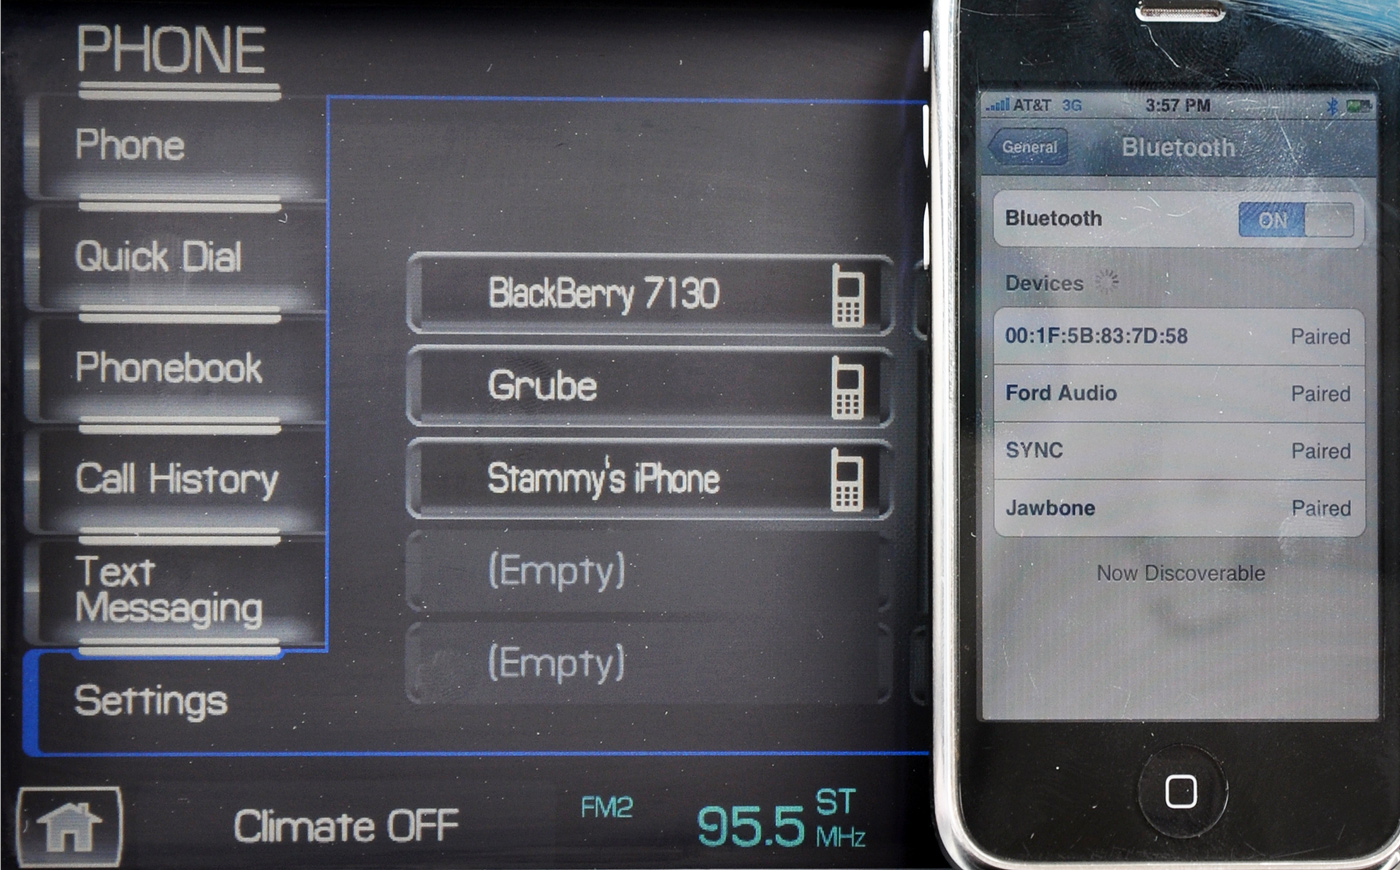
I'll let the pictures do the talking. Below we have the before and after of the dashboard of a 2009 Lincoln MKS for an upcoming review. Let's ignore how I was even able to take such a bad photo in the first place, and move on to the after picture, with the perspective crop successfully (for the most part, I didn't measure) executed.
Before:
After:
 Yes, my iPhone gets abused.
Prior to my discovery of perspective crop in Photoshop, I did the best I could with rotating the crop but that still leaves the perspective untouched. Typical symptoms were that bottom of the object I was cropping was nicely horizontal but the top remained skewed due to the perspective of the shot.
Perspective Cropping is Easy

Step 1: Select the crop tool and begin doing a crop like you usually would, rotating your crop boundary as necessary.
Step 2: Click on the Perspective box in the options bar.
Step 3: Drag each crop boundary corner around individually! Hit enter and you're done!
Overall
I realize this post might not be relevant to everyone, but when I learned about this yesterday it was a definitely a wow moment that I thought I should share. I wish I had known about this a long time ago! Thanks to my Twitter followers that answered my question and pointed me to the perspective option.
What simple Photoshop tricks do you use on a daily basis?