Amazon EC2 is among the more potent items in Amazon's web services arsenal. You've probably heard of many of the other services such as S3 for storage and FPS for payments. EC2 is all about the "elastic compute cloud." In layman's terms, it's a server. In slightly less layman's terms, EC2 lets you easily run and manage many instances (like servers) and given the proper software and configurations, have a scalable platform for your web application, outsource resource-intensive tasks to EC2 or for whatever you would use a server farm.
There are three different sizes of EC2 instances you can summon and they're all probably more powerful than the server currently running your blog. Unless you're offloading video processing or something intense to EC2, the default small instance with its 1.7GB of RAM and 160GB disk should be more than fine. It's just nice to know that if for any reason I need a farm of machines each with 15GB of RAM, I can get that easily.
EC2 has been around for a while but has gained interest in the last few weeks as Amazon released an elastic IP feature. One of the larger EC2 issues deals with data persistence on instances. There are many limitations with EC2 that make it difficult to use unless you carefully build around the EC2 architecture and don't just assume that you can move your app to EC2 flawlessly. If an instance crashes and you run it again, you'll loose data and when the instance comes back up it will have a new IP, adding another hurdle with DNS issues. Fortunately, the elastic IP feature lets you assign a static IP address to your instances.
As the title of this article implies, this article is meant to be a beginner's look into tinkering with EC2. Just because you will be able to host a page on EC2 at the end of this article does not mean you should start using it as your only server. Many considerations need to be made when using EC2 to get around the data persistence issue. If your startup is looking to use EC2 as a scalable platform, fortunately there are many services that have already built stable systems on top of EC2, ready for your consumption: WeoCeo, Scalr and RightScale. Enough talk, shall we jump right in?
Note: Most of the information below (and more) is available in the EC2 API doc if you enjoy reading those things.
Getting Started
In order to interact with any EC2 instances, you'll need to install Amazon's command line tools and download your X.509 certificate from Amazon. Let's start with the certificate. Login to your Amazon account and visit the AWS Access Identifiers page. In the X.509 certificate section near the bottom, click Create New. You'll be greeted with a page allowing you to download both the private key file and X.509 certificate. Both of these are very important, download them to your desktop so you don't lose them.

Next up, grab the EC2 command line tools. Extract them and you should be left with a folder named something like ec2-api-tools-1.3-19403. We'll move those to a directory where we will also store the private and public keys.
The commands below assume you are working on an OS X machine in the Terminal.
mkdir ~/.ec2
cd ~/Desktop
mv *.pem ~/.ec2
cd ~/Desktop/ec2-api-tools-1.3-19403/  #depends on ec2 tools folder name
mv * ~/.ec2
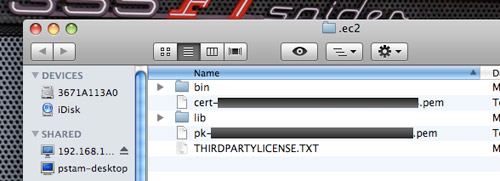
This is what your .ec2 folder should have now.
Next up, we'll set some paths in your bash profile so the OS knows where the EC2 tools are located.
sudo vi ~/.bash_profileAdd these lines, replacing "YOURKEYNAME" with the actual file name of your private and public keys, then save.
export EC2_HOME=~/.ec2
export PATH=PATH:EC2_HOME/bin
export EC2_PRIVATE_KEY=pk-YOURKEYNAME.pem
export EC2_CERT=cert-YOURKEYNAME.pem
export JAVA_HOME=/System/Library/Frameworks/JavaVM.framework/Home/
To get the changes noticed by the OS immediately, run source.
source ~/.bash_profileNow we can actually use those helpful EC2 command line tools.
AMIs, Keypairs and Instances, Oh My!
Before proceeding, you'll need to grok the concept of AMIs. They are Amazon Machine Images and whenever you create an EC2 instance, an AMI is quickly loaded on the machine. They're essentially images of the OS. If you terminate an instance and bring it up again, your machine will only have the data initially included in the image. That's why lots of work goes into making ("bundling") a good image you will always use that has the configurations and software you need so you don't have to do much whenever you load the image. This article won't delve into creating your own AMIs but fortunately there are many great, public AMIs available for use. To SSH into the instance we'll create from an AMI we find, we'll need to create a keypair. This is a different key from the one provided to us by Amazon. That was for using the EC2 tools and interacting with the instances in terms of creation and management. To actually SSH into an instance, a separate keypair is required as there are no passwords by default.
cd ~/.ec2 #we pretty much always need to be here
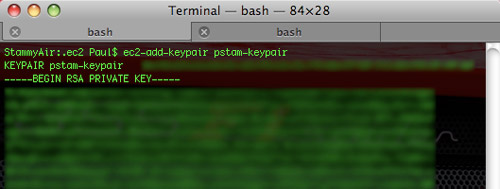
ec2-add-keypair pstam-keypair
That will print out the private key, which you'll need to copy and paste into a file manually.
vi ~/.ec2/id_rsa-pstam-keypair
#now paste the private key and save
sudo chmod 600 id_rsa-pstam-keypair
Now we can find which AMI we want to toss on our yet-to-be-created EC2 instance.
cd ~/.ec2
ec2-describe-images -a
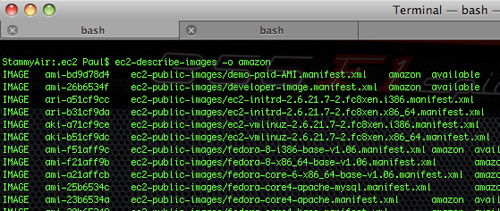
Using the -a option will list all of the AMIs you have access to, and there are a lot. Alternatively you can list just the images Amazon has:
ec2-describe-images -o amazonI found an AMI that I'll try out.
ami.yyang.info/gentoo-nginx-php-mysql-06feb2008.manifest.xml
It's a Gentoo Linux install with PHP, MySQL and nginx. When looking at AMIs, you need to find the AMI ID. In this case, it's ami-6138dd08.
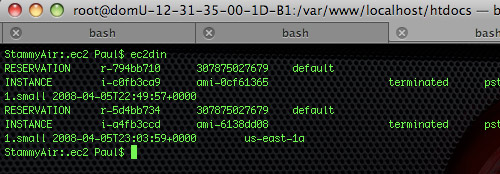
ec2-run-instances ami-6138dd08 -k pstam-keypairThe instance is now being loaded with the AMI I selected and booting up. It should output some text with "RESERVATION" and "INSTANCE" rows. On the instance row, it will say something like pending pstam-keypair until it has fully booted up. When an instance is ready to go, its URL and internal address will be supplied with the ec2din command below.
ec2-describe-instancesIf you try to access the URL in a browser, nothing will happen just yet as the firewall blocks all ports by default. You'll have to open up the ones you need. We'll do port 80 for HTTP and 22 for SSH. If the AMI you are running doesn't have a web server installed, accessing the EC2 URL in a browser won't bring up anything regardless.
ec2-authorize default -p 22
ec2-authorize default -p 80
If you want to undo any port authorizations you've made, you can use ec2-revoke. Now if you access your EC2 URL in a browser you'll get something like a default Apache page, or in the case of the AMI I'm using, a phpinfo() page.
The next step to actually using your new EC2 instance is SSHing into it to get full root access. Run the line below and replace the EC2 URL with the one provided to you by the ec2-describe-images command earlier.
ssh -i id_rsa-pstam-keypair root@ec2-XXX-XXX-XXX-XXX.z-2.compute-1.amazonaws.comIf you run into the problem I did, this won't work and you'll be asked for an EC2 instance password that doesn't exist. I found out this was because I initially created the id_rsa-pstam-keypair file as the root user but ran the ssh command as a regular user which was not able to access that keypair. That was easily fixed with sudo chown Paul id_rsa-pstam-keypair but you won't have this issue if you followed this guide.
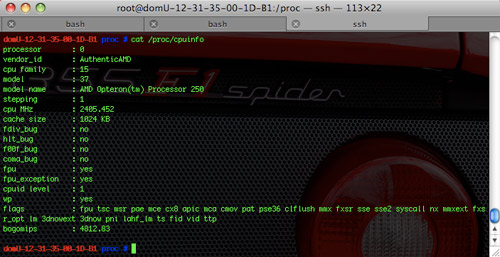
Otherwise, you should be logged into your EC2 instance as root over SSH. Now that we're in, we can tinker with the system however we like and even see what kind of hardware we're running on, setup FTP and drop a web app into /var/www/localhost/htdocs or whatever. Having full root access in any OS you wish is one of the boons of using Amazon EC2.
Static IP Time
If you plan on running your instance for good, you'll want a static IP. Let's get one for you.
ec2-allocate-address
Now we just need to tie that IP address to the instance ID of the instance you wish to give a static IP. You can grab the instance ID (not to be confused with the ami-* AMI ID) by running ec2-describe-instances.
In the line below, replace XXX.XXX.XXX.XXX with the IP address you were given above and replace i-yourinstance with your actual instance ID.
ec2-associate-address -i i-yourinstance XXX.XXX.XXX.XXX
Give it a few minutes and your instance will be accessible through that new IP in addition to the longer EC2 URL we were previously using. Please note that if you terminate the instance, the IP does not remain tied to the instance, to the best of my knowledge. Terminating an instance seems to be a nuclear option compared to simply rebooting an instance via regular unix commands over SSH.
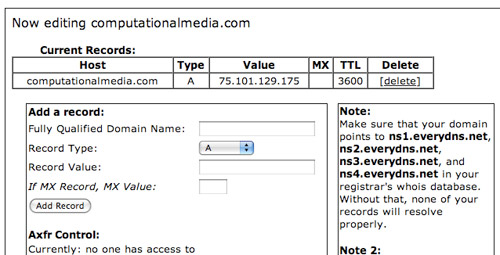
Now that the instance has an IP you can setup a domain name with it if you want. The easiest way I've found of doing this is through a DNS service like EveryDNS. Just provide your domain name registrar with EveryDNS's domain name servers, create an EveryDNS account, add your domain and create an A record with your newly associated EC2 instance IP address.
The TTL on EveryDNS seems to be fixed at 3600 so it might take a while for propagation, especially if you're used to pushing down TTL to 300 when doing DNS work.
Terminating Your EC2 Instance
Killing your instance for good can be done, like every other action, through an EC2 command line tool. This time, it's the appropriately named ec2-terminate-instances (ec2kill). Just provide it with the instance ID of your instance (get it from running ec2din).
ec2-terminate-instances i-yourinstance
It should return with a "shutting-down" status but you'll definitely want to check back in a few minutes with ec2-describe-instances to make sure it shutdown successfully and comes up as "terminated". There are a few cases where instances will hang on shutdown and you will continue to be charged for instance hours.
The Next Step
Now that you've successfully launched your first Amazon EC2 instance, you're ready to begin exploring the endless EC2 possibilities. I'm still learning about taking the next step but overall, EC2 really isn't something to mess with unless you have quite a bit of sysadmin and development experience. Actually using EC2 as an elastic compute cloud usually involves setting up an instance as a load balancer and giving that instance access to an array of active EC2 instances which it can hand work to. Other hurdles include providing multiple instances access to the same database, using Amazon S3 as a persistent filesystem and employing highly redundant backup systems given the relatively volatile nature of instances.
Thoughts? Do you have anything you'd like to use with Amazon EC2?
