It was just a year and a few months ago that I first began learning about and tinkering with Swift and SwiftUI. I followed tutorials and learned through lots of trial and error as I worked on my stocks tracker app, Stocketa. Picking up SwiftUI was one of the best decisions I’ve made.
SwiftUI is a massive advancement in making iOS development more accessible for all. I don't consider myself a seasoned developer but I know enough to build somewhat polished prototypes and sites for my projects. I've tried to get into iOS development years ago with Objective-C and UIKit but it was just not for me.
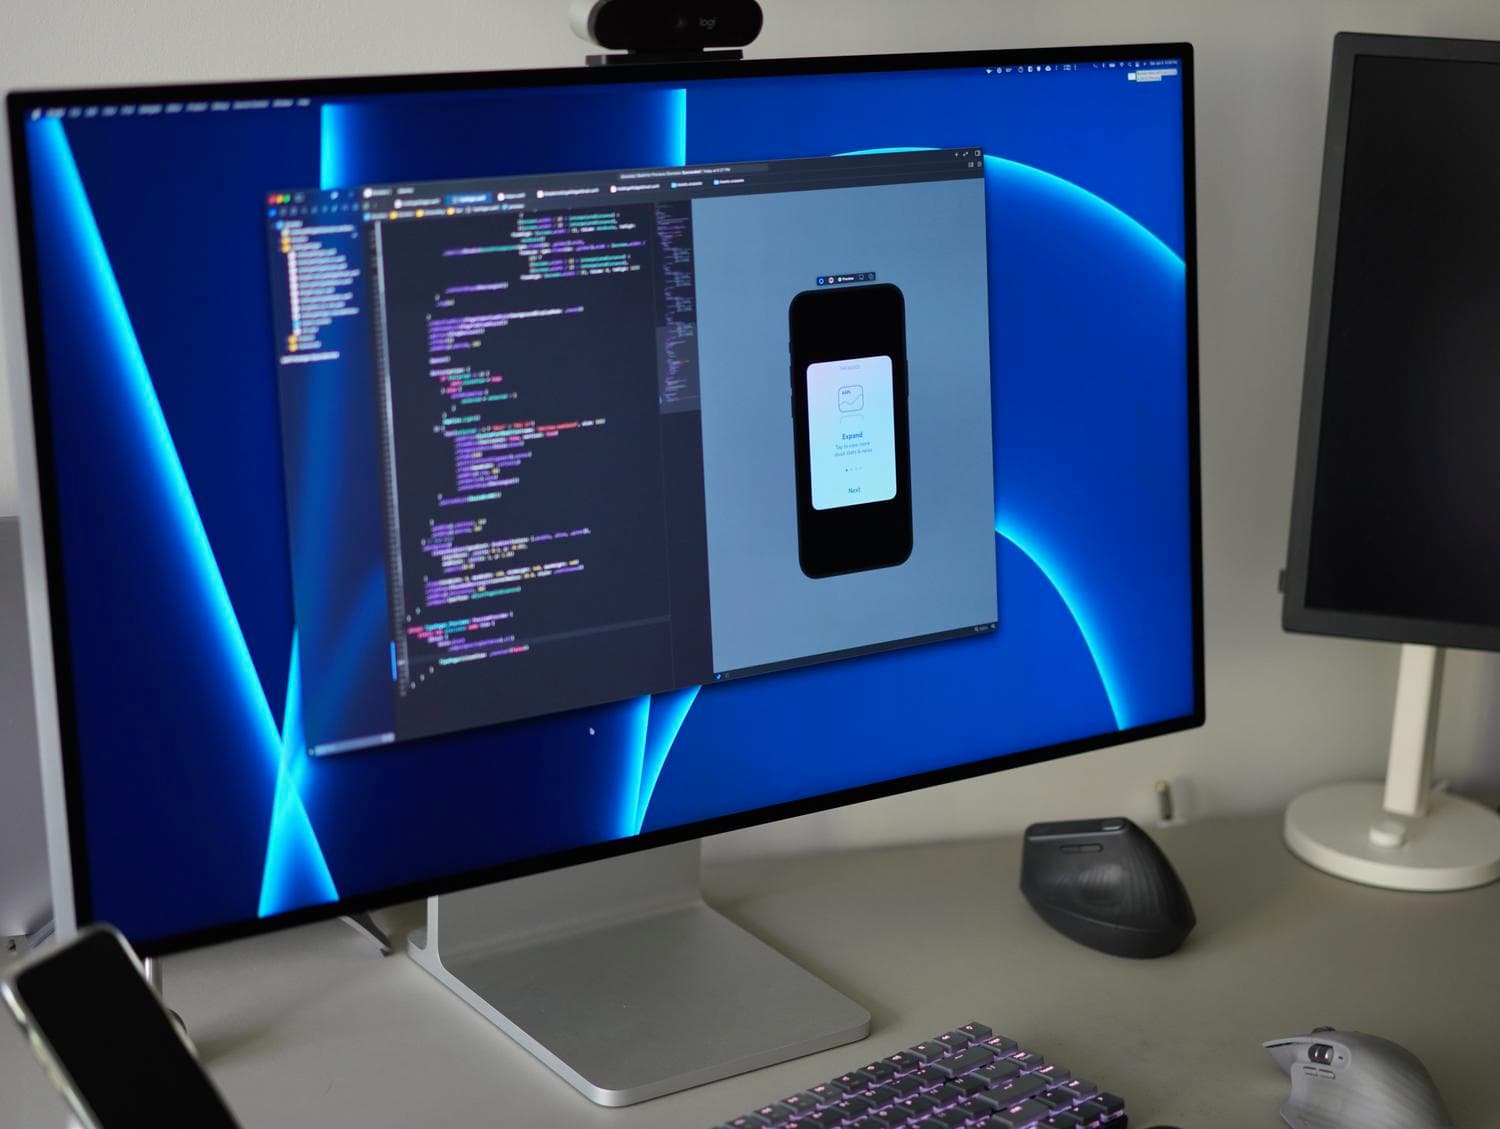
My Xcode setup. SwiftUI live preview on the right pane.
As a designer with many years of experience designing mobile interfaces, I always felt one step removed from the process and the final product. I could prototype a ton of stuff with web technologies and preview on mobile devices but it wasn't the same. I've always wanted to design and build natively, with Apple's own tools.
I love sweating the details of interactions and motion, but my ability to express myself and try out concepts using native devices and OS affordances always felt limited by my lack of knowledge of these tools. Sure, I could describe what I wanted to an engineer in many ways, but I wanted to build it myself.
There’s nothing quite like just doing it yourself, natively and SwiftUI has made this a reality for me. I'm here to share my enthusiasm and some resources so that it can be attainable for you too.
This is not meant to be a comprehensive guide or tutorial, but rather a brief reflection on my time with SwiftUI and some pointers on getting started.
Stocketa & SwiftUI
SwiftUI is not some beginner's toy for getting into iOS development (though some long-time UIKit developers may say otherwise). You can make beautiful, full-blown, real iOS apps with all the motion, delight and flourishes you want. And this will only continue to improve as Apple invests more into SwiftUI in the coming years.
I have only had to use UIKit for a few minor things like getting more control over custom textfield designs and interactions. I've built custom bottom sheets, menus, onboarding flows and much more purely with SwiftUI. Here are some examples of what I've been able to build with SwiftUI:
What is SwiftUI?
Let me take a step back and explain what SwiftUI is in the first place and why I think it makes iOS development much more accessible to all.
SwiftUI is a framework for creating interactive user interfaces for iOS and macOS. It goes beyond just the visuals of how the interface looks and helps with everything from taps and gestures to accepting data input via things like text fields, color pickers and date pickers to working with your iPad's trackpad pointer. And it does it in a way that, to me, feels very natural and fast.
It feels natural because SwiftUI code just feels like you're writing some new type of HTML markup. It's definitely way more than that, but when you're just getting started it doesn't feel foreign. You're not trying to figure out what "super" means, what function overriding is or trying to grok what viewDidLoad() is for.
And it feels fast because you're writing SwiftUI side-by-side with a live preview, so you see your changes as you type them. You don't have to compile and send a build to your device or the simulator to get an interactive preview of your view.
SwiftUI was introduced two years ago with iOS 13 and brings a declarative style of programming for your user interface. The general idea is that all views of your app are based on the state of your data. Instead of telling a view exactly how and what you want it to do with imperative programming, with SwiftUI you tell it what you want and the view will react automatically based on the underlying data changing.
Want a circle to move across the screen when the user taps a button? You have a value on the object that it reacts to, along with an animation between the old and new value. This declarative style is similar to React web development too.
I'm flying through this but once you wrap your head around the declarative style it really just speeds up development.
SwiftUI example in Playgrounds
My SwiftUI first impressions
It's important for me to add the context here that my impressions of diving into iOS development with SwiftUI are based entirely on me being a designer, not an iOS developer already familiar with UIKit development. I've just been given keys to a Ferrari. Everything is amazing and I'm just happy to be in the driver's seat and press that red engine start button. I have everything to finally build an iPhone app myself.
Contrast this viewpoint with, say, an existing iOS developer. My perception of the broader iOS developer community is that SwiftUI isn’t exactly universally loved. SwiftUI does not have feature parity with UIKit. The SwiftUI alternatives may not be as performant or may not be possible yet. It's an entirely different way of crafting user interfaces and it has a few bugs here and there. I get that.
But SwiftUI is getting better every year and WWDC 2021 starts next week. With each iOS release we get more and more SwiftUI updates bringing us closer to parity. Swift 5.5 is coming soon and that brings lots of very intriguing improvements like async/await as well as #if for postfix member expressions (lets you do conditional view modifiers easily) that will be fun to explore.
But I digress... my first impressions of developing with SwiftUI along with some of my current thoughts:
SwiftUI live previews:
-
First impression: Writing SwiftUI view code on one side of Xcode and then seeing the live, interactive preview of your interface is very slick and a fun way to learn as you figure out the ins and outs of SwiftUI.
-
15 months in: SwiftUI Previews get extremely slow to load and refresh once you start having a larger app. They also get more complex as you have to do more work to manage the example data to use for the preview. Especially if you have certain things that rely on user state (such as a logged-in user from Firebase). And due to the static nature of the preview code, if you want to change a @State for example you have to resort to tricks like wrapping the view.
The key is to know what to use previews for. They can be very helpful for smaller subviews that work totally fine with static data. But it's up to you if you want to spend the time to get it working well for more complex views. I tend to use it for smaller subviews and then just test on device for the rest.
On SwiftUI giving you native access
-
First impression: SwiftUI gives you access to so much. Native UI components. Advanced gestures (of which you can use multiple at the same time!). The ability to animate virtually anything. The ability to use lots of views however you like, even applying a mask over them at once. Access to device things like gyroscope, accelerometer and haptics. The list goes on. It's real, native app development and it's great.
-
15 months in: Yea this never gets old.
Building for native mobile vs Web
-
First impression: Designing and developing natively for iOS feels so much faster and guaranteed compared to Web. There are only a few types of iOS devices so for the most part what you see on your device is exactly what someone will experience on their iPhone, down to the animations. You don't have to worry about testing across many browsers and viewports compared to Web, nor worry about heavily optimizing file sizes.
-
15 months in: You have to care about performance once your app does more. You'll have to think about what thread you're using else you may drop frames and introduce some scrolling jank. You'll have to think about optimizing your views and heavily using sub-views to reduce what gets redrawn to the screen. You'll have to care a bit about what functions do heavy computation and when.
But for performance with animations and masks, that's still good. Most of the time when I drop some frames it's due to some underlying data issue, not me doing something too crazy with lots of views, animations and masks.
SwiftUI's modifier syntax
-
First impression: Writing view code with all these chained modifiers (the .frame(), .foregroundColor() and other things chained under objects) is a bit funky and seems messy. Compared to web development where you actively try not to put too much style code in the view layout markup and abstract much of the styling out to a separate CSS file.
-
15 months in: The way SwiftUI does things with modifiers is great but you need to get into the habit of abstracting commonly used groupings of modifiers into custom view modifiers (think of it like using a class in CSS.. kinda).
Working with a strongly typed language While this is more about Swift than SwiftUI, you'll run into it regardless: Swift is a strongly typed language.
-
First impression: It's extremely annoying. I was dealing with non-stop warnings and errors that I wasn't using the correct type when working with some data (Types are things like Bool, Int, Double as well as many other object types you can create). It was very confusing, especially trying to figure out why Optionals are a thing, how to unwrap them and so on.
-
15 months in: I'm very comfortable now with Swift's strong typing and really think it helps write faster, safer code. I'll still run into various issues but most of the time it's just Xcode looking out for me.
Learning SwiftUI
It's clear to me that SwiftUI is a powerful way to develop apps, especially for people with no prior iOS development experience. While there is always a learning curve with new frameworks and tools, especially code-based ones, SwiftUI is a fresh take on this with the Xcode live preview canvas that lets you see your UI as you're writing it.
My goal with this article is share my high-level thoughts on SwiftUI and pointers on how to get started with some great resources that have helped me along the way. I hope to write a much more in-depth post about Stocketa and SwiftUI in the future.
Where to start?
I learned Swift and SwiftUI like I learn most things: a few tutorials to get the swing of things, then trying it out with my own project and all the trial and error that follows. Fortunately, SwiftUI has a ridiculously healthy and active developer community so there are always places to turn to for help.
Here's the general flow you might follow while getting into SwiftUI:
-
Install Xcode or Playgrounds.app. While you'll need Xcode to get the most out of SwiftUI and build a full app, there's another option. Apple has a MacOS and iPad app called Playgrounds that's perfect for prototyping and playing with Swift and SwiftUI.
-
Get familiar with the SwiftUI basics. How to use frames, stacks and spacers to lay things out in your interface. Then how to use view modifiers to tweak visual elements of your designs.
-
Dabble with basic interactions Advance to hooking up some button interactions with
@Stateand bindings and trying built-in components like the ScrollViews, toggles and more. -
Play with animations. There's lots of fun to be had with .transition() and .animation(). Apple has a tutorial on the basics too.
-
Work with data and dive deeper into Swift. Up until now you could get pretty far with a minimal understanding of Swift itself but you'll soon need to have a stronger grasp. Learning how to structure your models for objects, learn more about optionals and types, manipulating arrays, making network requests and so on.
-
Getting better at manipulating data. At this point lots of your challenges will be around manipulating data and passing it around. Here you'll probably face some decisions for your app. How do you store your data: do you use Apple's Core Data, a SQLite library like GRDB or turn to a third-party solution like Firebase Firestore or Realm.
Resources
Okay, now to the actual resources I've learned from and come to rely on for staying up-to-date with all things Swift and SwiftUI these days.
Courses
- Apple WWDC Video: Introduction to SwiftUI — Start here and at least watch the first 10 minutes where it goes over SwiftUI layout basics. It pretty quickly starts going through states, interactions and gestures, which you might be better off learning more paced with some other resources if you're just getting started.
- Apple: Introducing SwiftUI — Apple has their own tutorial for getting up to speed with SwiftUI, but if this is your very first time I personally don't feel it's that great and that following along with a video where things are described step by step might be better.
- Design+Code — This is where I started. Meng To and the team at Design+Code have several SwiftUI courses for all levels of experience. When I took the course there was only one and it was great for me to get a solid understanding of view layout basics.
- Stanford CS193p - Developing Apps for iOS — Stanford has their own course covering SwiftUI, with all materials freely available online.
- Udemy SwiftUI courses — While I haven't done any myself, there's a lot of highly-rated SwiftUI courses on Udemy.
Hacking With Swift
You can't learn SwiftUI without coming across Paul Hudson and his website Hacking With Swift. It's a goldmine of material and practically every Google search I had when I was getting started had one of his articles in the top results. I recommend subscribing to get access to more of his tutorials.
Aside from a plethora of articles, Paul also has several Swift-related books and two amazing, free courses that break down Swift and SwiftUI into bite-sized videos:
I dabbled with both but never fully finished them; I got too eager to start building my own project.
There are a few solid sub-reddits I like to check occasionally to keep in the loop of things and sometimes share progress: r/SwiftUI, r/Swift and r/iOSProgramming.
Blogs
- Swift with Majid by @mecid — One of the first good Swift/SwiftUI blogs I found when just getting started. Lots of great articles written in an easy to digest way. Though some articles are definitely a bit advanced and not beginner friendly.
- Five Stars — An excellent resource from Federico Zanetello
- Peter Friese — If you end up using Firestore for saving your data, Peter (who works on Firebase) has some great tutorials to get started.
- Swift by Sundell by @johnsundell
- Donny Wals — He also wrote a book on Core Data and a book on Combine.
- The SwiftUI Lab — Not as many recent posts these days but I read a few while learning.
- Sarun Wongpatcharapakorn
- Medium — I wish there was a better way to link to this, but there are some occasional good SwiftUI posts on Medium if you search by tag. BetterProgramming is one Medium publication to watch too.
- Yet Another Swift Blog — A bit more on the advanced side but some good Swift and SwiftUI topics here.
- Ray Wenderlich — It's not a blog, but a sort of professional developer subscription service. But they have plenty of free tutorials related to SwiftUI. My only gripe is that much of the content is written from the perspective of a developer trying out Swift/SwiftUI things, not as an overall beginner for mobile development. For example their intro to SwiftUI makes various references to UIKit development.
Newsletters
-
Recreate Code — A newsletter with videos diving into using SwiftUI to build layouts of common UIs and apps from Navdeep Singh and Jordan Singer.
-
SwiftUI Weekly by Majid Jabrayilov
GitHub & YouTube
Whenever I'm really stuck on a problem and can't find any relevant info on Google results, I usually turn to searching on YouTube and GitHub. I'm frequently surprised at what I'm able to find there that I wasn't able to otherwise.
On GitHub you may find various examples apps showing the concepts you're looking for. A few YouTube accounts that consistently have some SwiftUI content are Code with Chris, Sean Allen, Rebeloper, Kavsoft and of course Paul Hudson.
Tips from my experience
So I just linked to a ton of resources. I wish there was one single thing I could recommend but for me I learned through a myriad of sources over time. Here are a few things I learned or wish I had known as I started getting the hang of Swift and SwiftUI:
-
Get inspired, find a project. I learn best when I have my own project to build instead of following tutorial after tutorial of a random app concept. If that's you, it may be helpful to try to pick an area of interest and see if there's a simple app you can build for it.
If you're looking for app inspiration, or just want to discover new patterns or seek UIs to build yourself, I suggest continually checking the App Store and trying out lots of apps.
For me, that was a stock tracker app, Stocketa. (Which is currently in limited Testflight testing now as I continue development). I’ve been so impressed with what I’ve been able to accomplish purely with SwiftUI in this app.
-
Learn a few Xcode shortcuts. I wish I had taken a bit more time to learn more about Xcode's capabilities when I got started. There are so many handy shortcuts and settings that can make your life easier.
Read this post on Xcode shortcuts from Peter Friese. Some of my faves:
-
Auto-indent code: ⌃ (Control) + i.
-
Refresh the preview canvas: ⌘ (Command) + ⌥ (Option) + p.
-
Open a file quickly: ⇧ (Shift) + ⌘ (Command) + o.
-
Customize Xcode to make ⌘ (Command) + d delete the current line.
-
Building a custom bottom sheet is harder than it looks. Lots of app these days use nice, custom bottom sheets with varying capabilities. In SwiftUI we have the native
.sheet()but you can't control things like how high it opens. I built a few custom ones and they're harder to get working flawlessly than you'd think. Especially if you want to be able to have multiple resting heights and seamlessly transition to scrolling with a single gesture when expanded. -
Use the
valueattribute for.animation()for more control over when something animates. I use this everywhere. I only discovered it after filing a SwiftUI bug with Apple and the Apple engineer suggested using this for a particular issue I had. -
Use a view model. Eventually you'll find yourself with increasingly more logic and functions in your views. It's time to move that to a separate View Model file. An example would be a class that is an ObservableObject that your view uses. Read up on MVVM (Model-View-ViewModel) for more info on this architectural pattern.
-
.mask()is very useful. Especially if you're using gradients to color certain elements or if you need to apply an alpha gradient on a view. You can also use stacks to use multiple elements in your mask. -
Customize SVG assets with "Template Image" render setting. Want to add an SVG to your Assets.xcsassets catalog and then be able to change its color directly in SwiftUI? You'll need to set "Render As" to "Template Image" in Xcode.
-
The
@AppStorageproperty wrapper is your friend when you need to store tiny, non-vital local settings for the user. Out of the box it only supports a few value types, but you can follow this guide on RawRepresentable to store any type of data to it. -
The
resetTransactionproperty of@GestureStatecan be handy to define the animation to use when a user releases their finger when doing a gesture (as opposed to applying a general animation for the entire view/object). -
Get to know the
.simultaneousGesture()modifier. If you're doing anything advanced with gestures, it's helpful to know that SwiftUI can help you manage multiple gestures with this view modifier. There's also.highPriorityGesture(). -
.contentShape()is your friend if some views are not tappable. Every so often you'll into a situation where you're trying to make a view tappable (either inside a button or with.onTapGesture()) and only a certain part of the view will be tappable. By placing.contentShape()on this view, say after any padding or other visual modifications you have, you'll make the entire area tappable. -
Disable interaction with
.allowsHitTesting(false)when needed. This may come in handy when you're doing more advanced things with gestures. -
Need more performance? Start by splitting your view into smaller sub-views. There are a lot of reasons why your app could see some slow downs or have some janky, frame-dropping behavior. But in my experience the best place to start is abstracting your larger views into smaller ones. SwiftUI updates a view whenever any part of the view state changes, so by splitting your view into a set of smaller views, you're giving SwiftUI the ability to only update smaller views depending on what data changed state.
-
Use
.compositingGroup()to help with animation and rendering issues. This modifier basically applies view modifiers on the ancestor views before rendered. A bit hard to describe but in particular it's helpful when dealing with opacity animations or shadows. And if the view doesn't need to be interactive, there's and.drawingGroup()which is similar but flattens your views and uses Metal rendering for increased performance. -
Consider caching slow functions with memoization. This only works for certain types of functions, but something worth knowing about. Here's a great article on memoization.
-
Core Data (storage) is not for everyone. I got it working in my early versions of Stocketa but then I wanted to have it sync with iCloud and found it to be slow and unreliable. The only answer was to do a lot of custom syncing another way. I moved to Firebase Firestore and was much, much happier (after figuring out how to best flatten my data structure a bit).
-
If you just can't get it to work.. quit Xcode. If you've tried everything and it should work but doesn't, try quitting and reopening Xcode. Try "Clean Build Folder" in Xcode. Try clearing Xcode cache files (I like DevCleaner.app for this). If none of that works, maybe it's Apple's bug: