Accessories
Filters, straps, tripods, monopods, remotes and more.
Lens filters
The first thing I do with any new lens is put on a UV filter. This is mainly to protect the lens from any accidental scratches or drops. I'd rather replace a cheap filter than the lens. I tend to prefer low-profile UV filters when I can find them as they're ideal for wide-angle lenses so it doesn't get in your shot. However, that usually means the lens cap doesn't quite fit as well and more easily falls off.
I also get a circular polarizer for each lens which I use when shooting outdoors with anything involving reflections (like buildings), sky, water or anything with glare. In a nutshell, it will cut through haze, increase color saturation and make sky shots more vibrant. When I'm traveling, most of my shots are outdoors so I usually entirely take off my UV filter and only leave the polarizer on for the duration of the trip. With a polarizer you always need to rotate it to get the desired effect and this depends on your direction with respect to the sun. It'a also advised that you try to avoid using a polarizer with wide-angle lenses as it can cause a weird effect where only part of the shot is polarized where the rest is less polarized (but I still use them on wide-angle lenses sometimes).
One more polarizer caveat: You usually want to take it off if shooting through a helicopter window. They tend to be plexiglass and any slight scratch in the plexiglass would be very apparent when using a polarizer. Also speed matters when you're moving that fast and you might prefer a faster shutter speed than polarizer effect.
I used to also travel with some ND grad filters to reduce the brightness of the sky in landscape shots on bright days. Graduated neutral-density filters look like a gradient and put your entire composition into the dynamic range of your camera by reducing clipping. Though I've found myself shooting more bracketed shots for HDR to fix this rather than carrying and putting on an ND grad filter.
So what brands to I typically purchase for my filters? There is a bit of a religous debate with respect to how much to spend on a filter in the photography community. The typical argument is that if you just spent a thousand dollars or more on a high-end lens you should not degrade the image quality by putting something in between the glass and the outside world; or that if you do, it has to be a pristine high-end filter as well. I definitely lean more towards the latter.
I have typically purchased B+W filters with multi-resistant coatings in the past. However, on my latest trip I tried out a relatively new brand called Breakthrough Photography. They boast some impressive claims and reviews seem positive but they are very expensive at around $150 each. The only issue I have with mine is that the ring on one of them is a bit larger than normal and it makes it hard to put the lens hood on for one of my lenses.
Camera straps
I typically prefer to have my camera straps only mount from the bottom screw position using one point. I just do not like straps that attach from the side as I feel like it gets in the way. My favorite camera strap of all time was the original Luma Loop that mounted on the bottom, had a swivel and also a super nifty quick disconnect feature. Unfortunately that model is now discontinued and after years of trusty service, I ended up losing mine.
When it came time to find a replacement I ended up going with a few BlackRapid models. First off is the wrist strap that I've had for over 5 years now. I use it when I'm using one of my smaller lenses and just going out for a night on the town while traveling and don't want to look like a super tourist with a bulky camera strap.


The other two straps are basically identical except for length: one is meant to be worth across the shoulders. I typically prefer to shoot off of one shoulder due to ease of taking the camera off and getting the strap out of the way quickly. However there are times when I'll use the longer strap, such as when hiking or out somewhere where I think it would be too easy for someone to grab the camera off of my shoulder and run away.
Small tripods
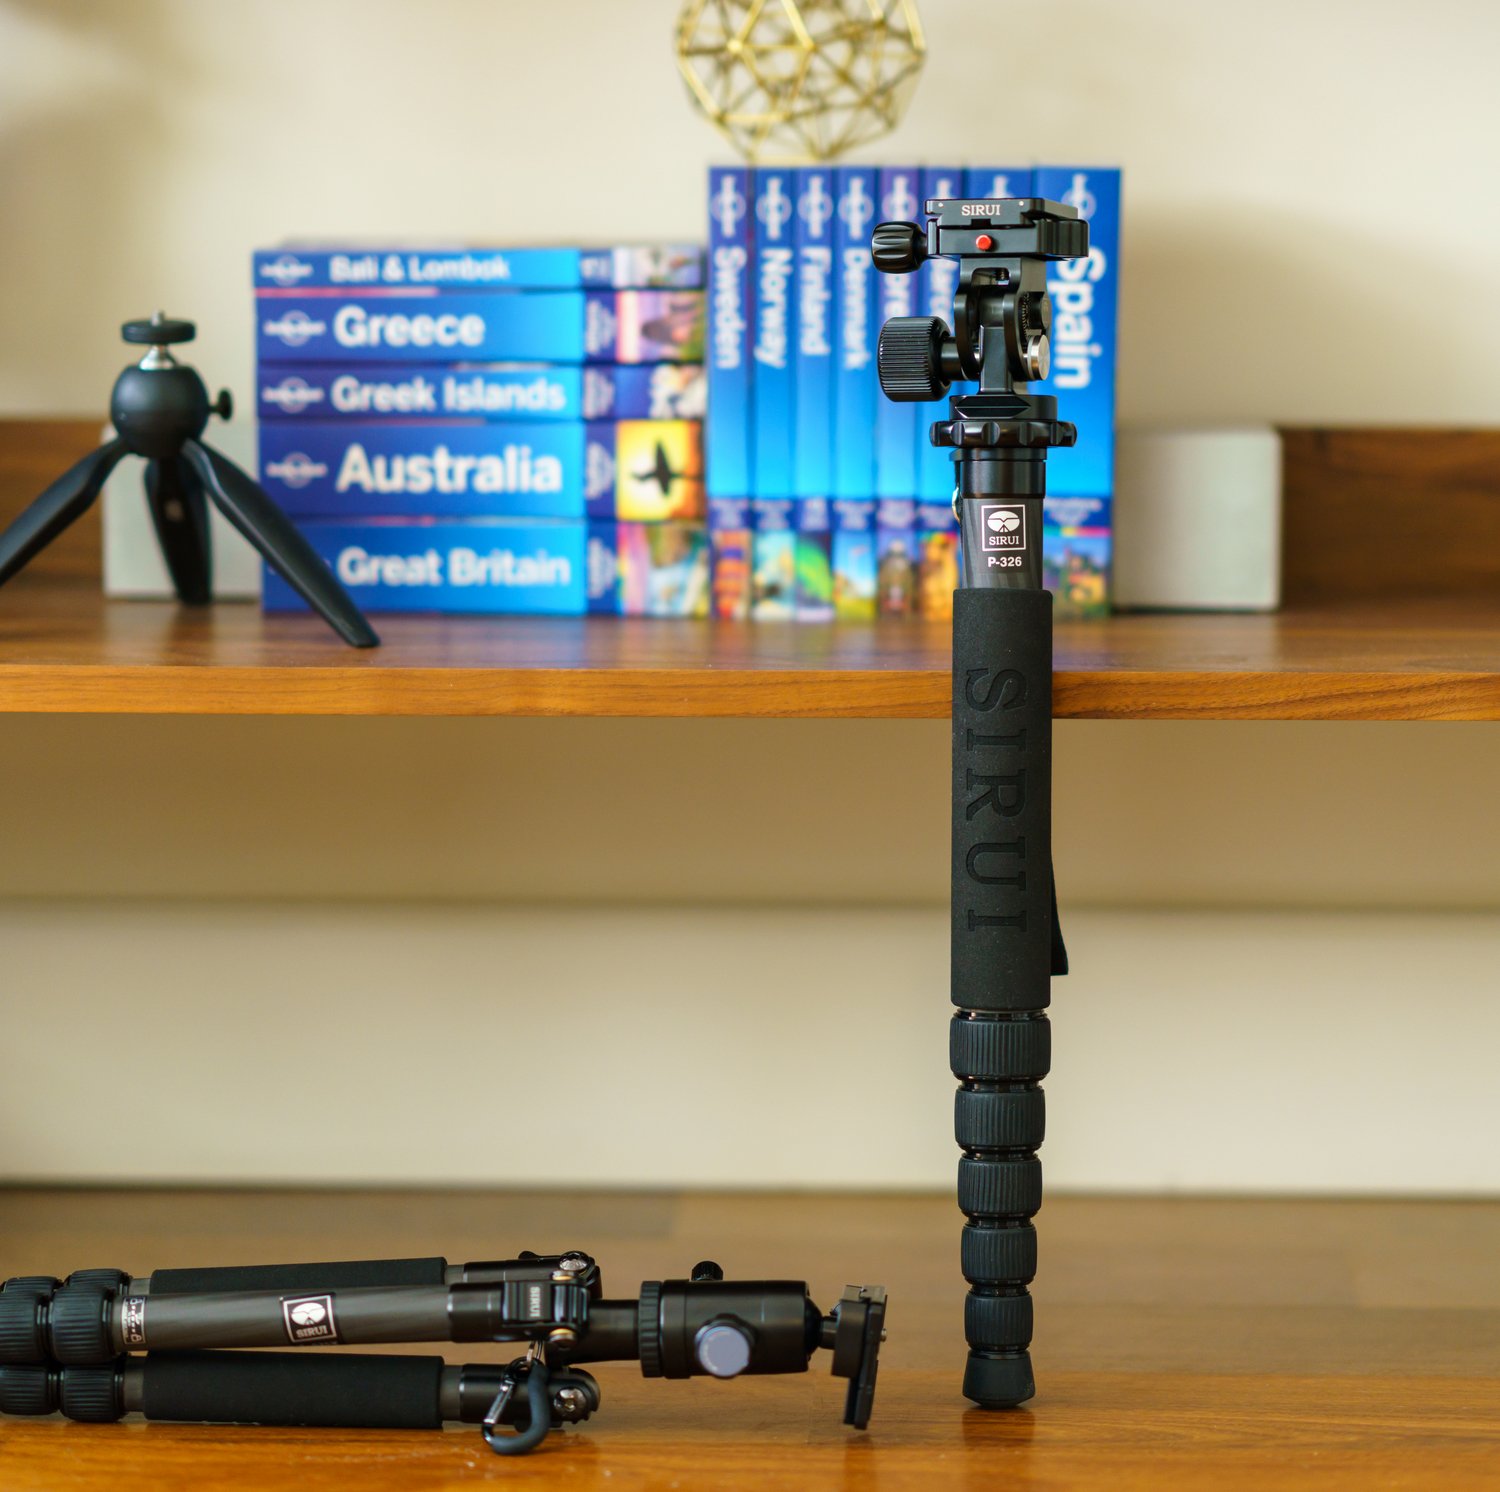
Having a small tripod is a requirement for me. I probably get more use out of these than a regular tripod. It's a tiny, hyper-versatile tripod that's sturdy enough for even a big DSLR. I've taken this on numerous international trips. It fits in a bag, in a jacket, hanging off of a belt loop, et cetera. It's all I need for a quick night timelapse shot while walking around a new town. I recently added the slightly larger but expandable PIXI EVO model.


Big tripod
While the tiny Manfrotto Pixi is my versatile city and street tripod I needed to complement it with a larger tripod on longer photo journeys. I needed something relatively small and lightweight and I'm also not a professional so I didn't want to spend $1,000+ on a tripod and ball head.
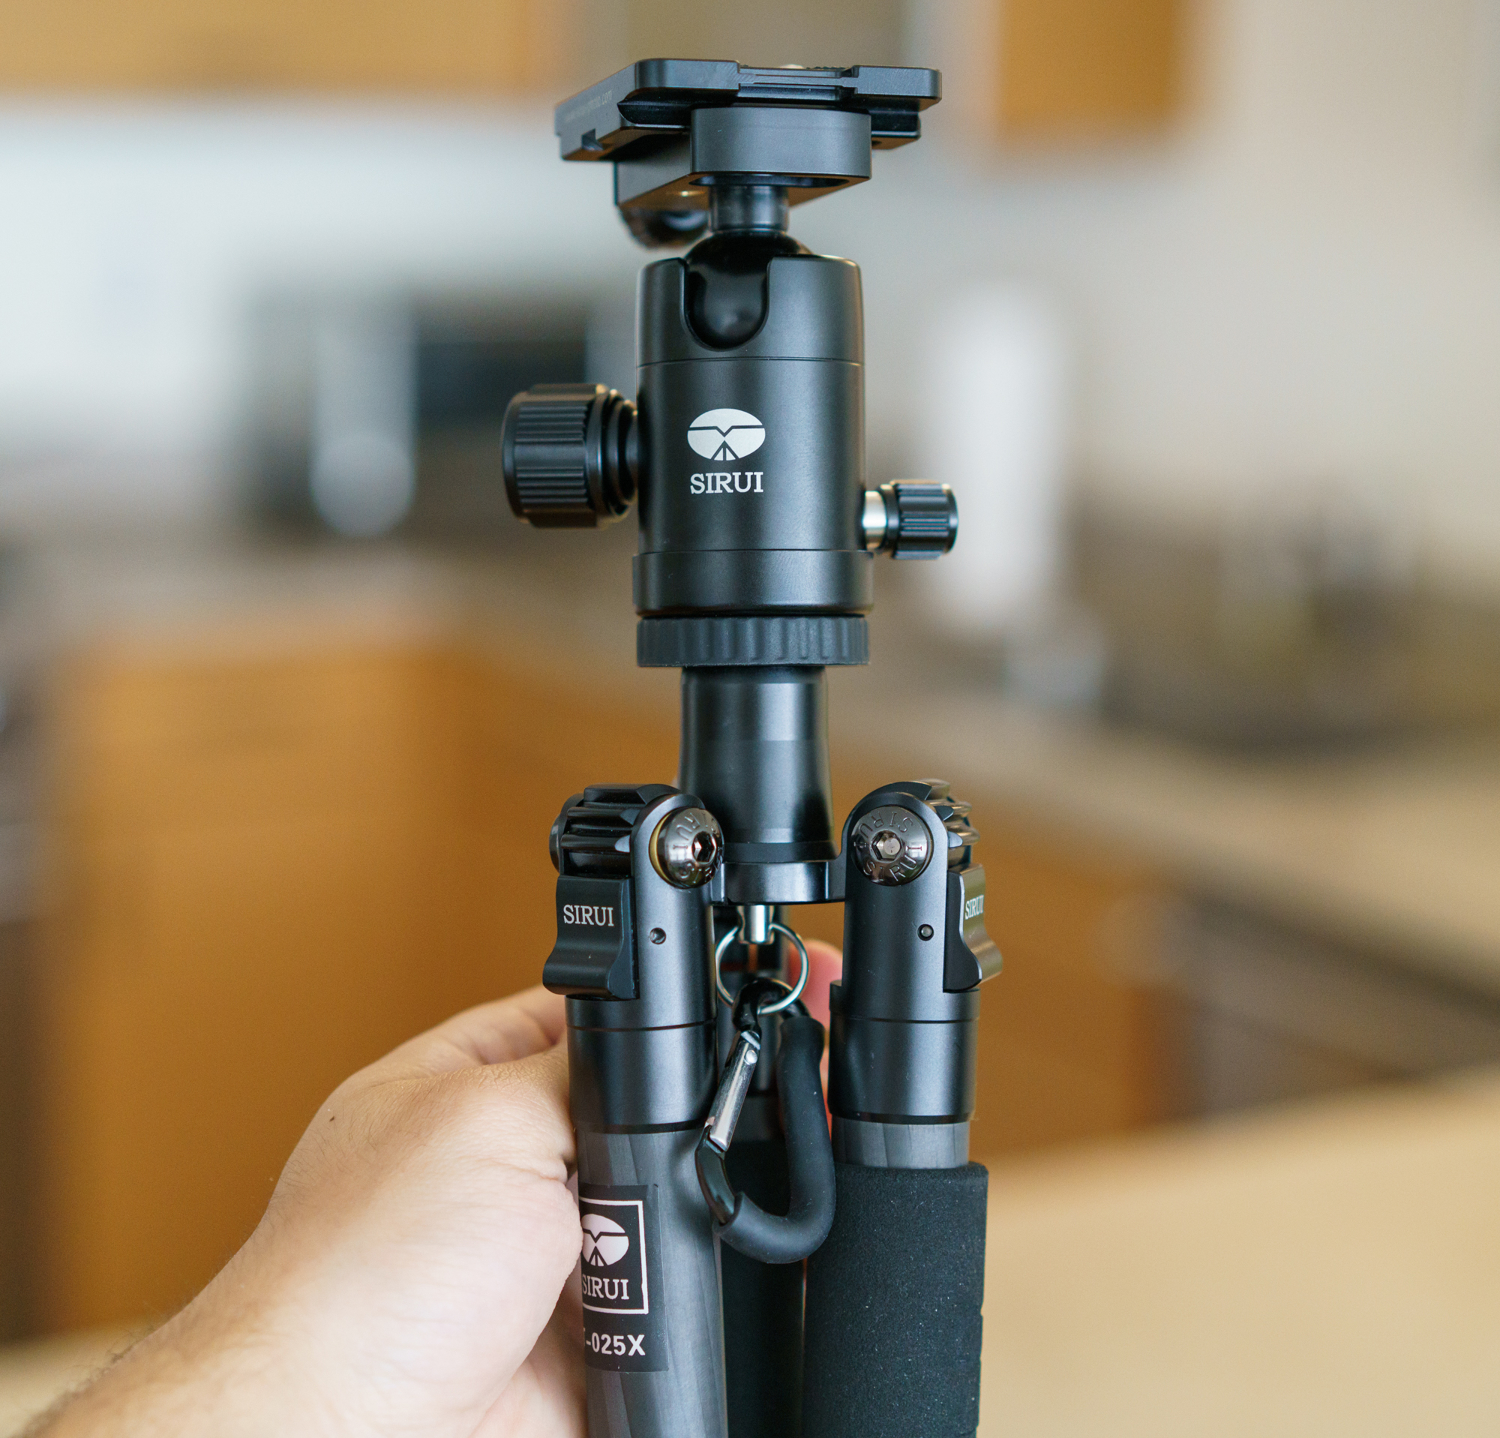
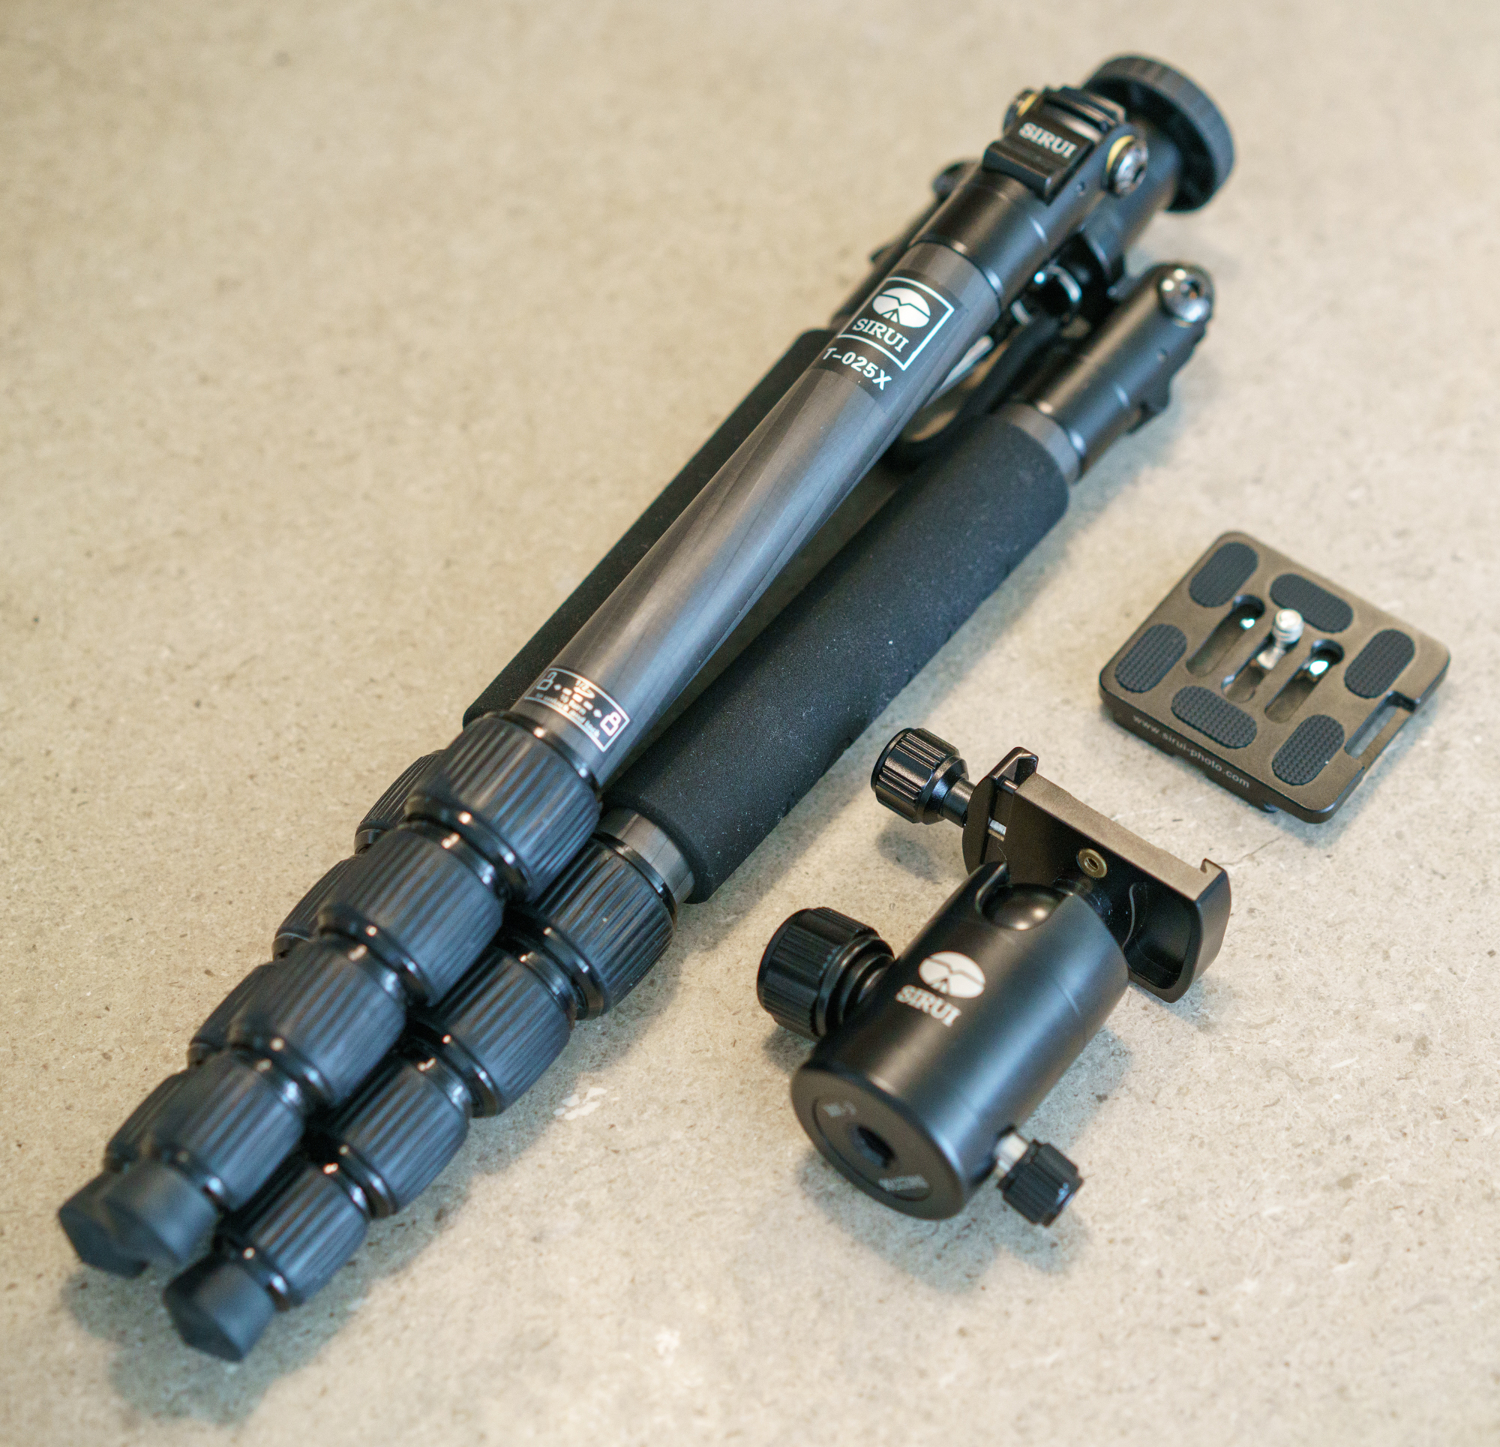
I eventually settled on this Sirui T-025X. It's just about the smallest tripod I could find that could extend a few feet and still collapse and fit inside my backpack and not require being strapped outside. This tripod also has a center column that I removed so that it packs down even smaller.


It also has a little carabiner under the camera mount so you can attach additional weight to further steady the tripod. I ended up just attaching a water bottle to it most of the time and this did a good job and keep it steady when shooting in the wind.
One thing I didn't like about the T-025X was the tiny mounting plate it came with. It required using a tool to screw into the camera. Too slow for me and I would quickly lose the tool. I purchasing a larger quick release plate which has enough room to use a D-ring screw so I don't need any tools to mount it to my camera.
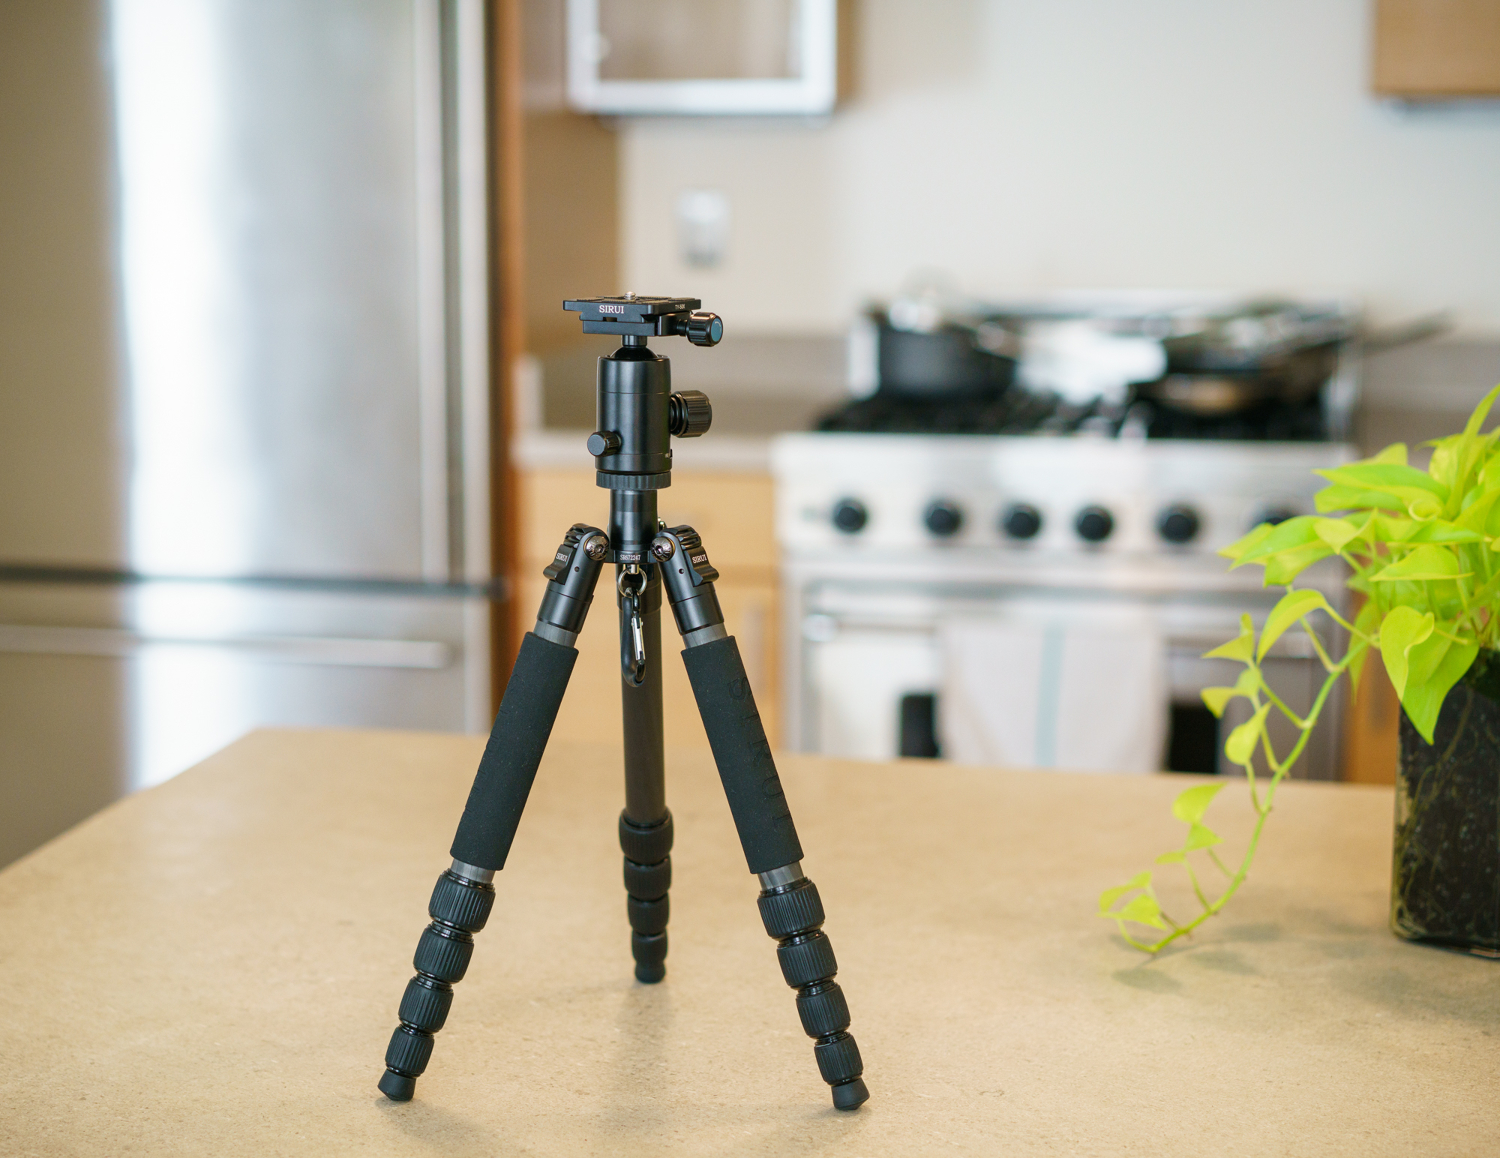


While this tripod is fantastic for traveling, it's really not a flawless all-around tripod. Even with a solid weight attached to it, it was still a bit shaky during breezy conditions while trying to shoot the moon with my heavy 400mm lens. But you just can't expect a lightweight travel tripod to excel in those conditions.
Monopod
This was a new one for me. I had been researching shooting on a safari game drive for my trip to Africa and there seemed to be two common ways to shoot, depending on the type of vehicle. For some vehicles that are more open it seemed like one of the most favored things to do was shoot with a large sand bag (travel with it empty and fill locally with beans usually) that you can rest on top of the vehicle or the window sill.
The other option seemed to just be shooting with a monopod. Tripods are a non-starter in this situations with limited room between seats; it would just be a massive hassle. But do you even need such a thing like this if you're shooting during a bright day? Yes! Aside from some vibration reduction, I found the main purpose to be more about shooting with comfort. Shooting with a heavy lens for hours at a time can get very tiring, so I welcomed anything to take some of that burden from time to time.


I opted to stick with Sirui and go for their carbon fiber model. Then I got their tilt head to make it easier to manipulate camera position. I appreciated the massive knob the tilt head has to adjust the tilt. The last thing I wanted was a tiny knob that would make my fingers sore after adjusting it countless times per day. The only complaint I have is that there is no way to set the end positions for safety. If you're not careful and the dial is even a bit loose, you'll have your camera tilt all the way up or down in an instant. That happened to me quite a few times.


Remote controls
While you can just have the camera always on a shutter release timer to reduce vibration from pressing the shutter button before beginning any long exposure, I find using a wireless control to be much easier.


While the Sony model works extremely well and has solid range, it is quite a bit larger and requires putting an external IR sensor on the camera. Sometimes I just want to toss something in my bag quickly on the off chance I'll need it or when traveling and for that the tiny Foto&Tech remote works fine. It does not have the best range and is hard to operate from behind the camera until you find the right angle but it's pretty cheap. That being said, Sony released a newer wireless commander remote that is Bluetooth-based.
Frames & photobooks
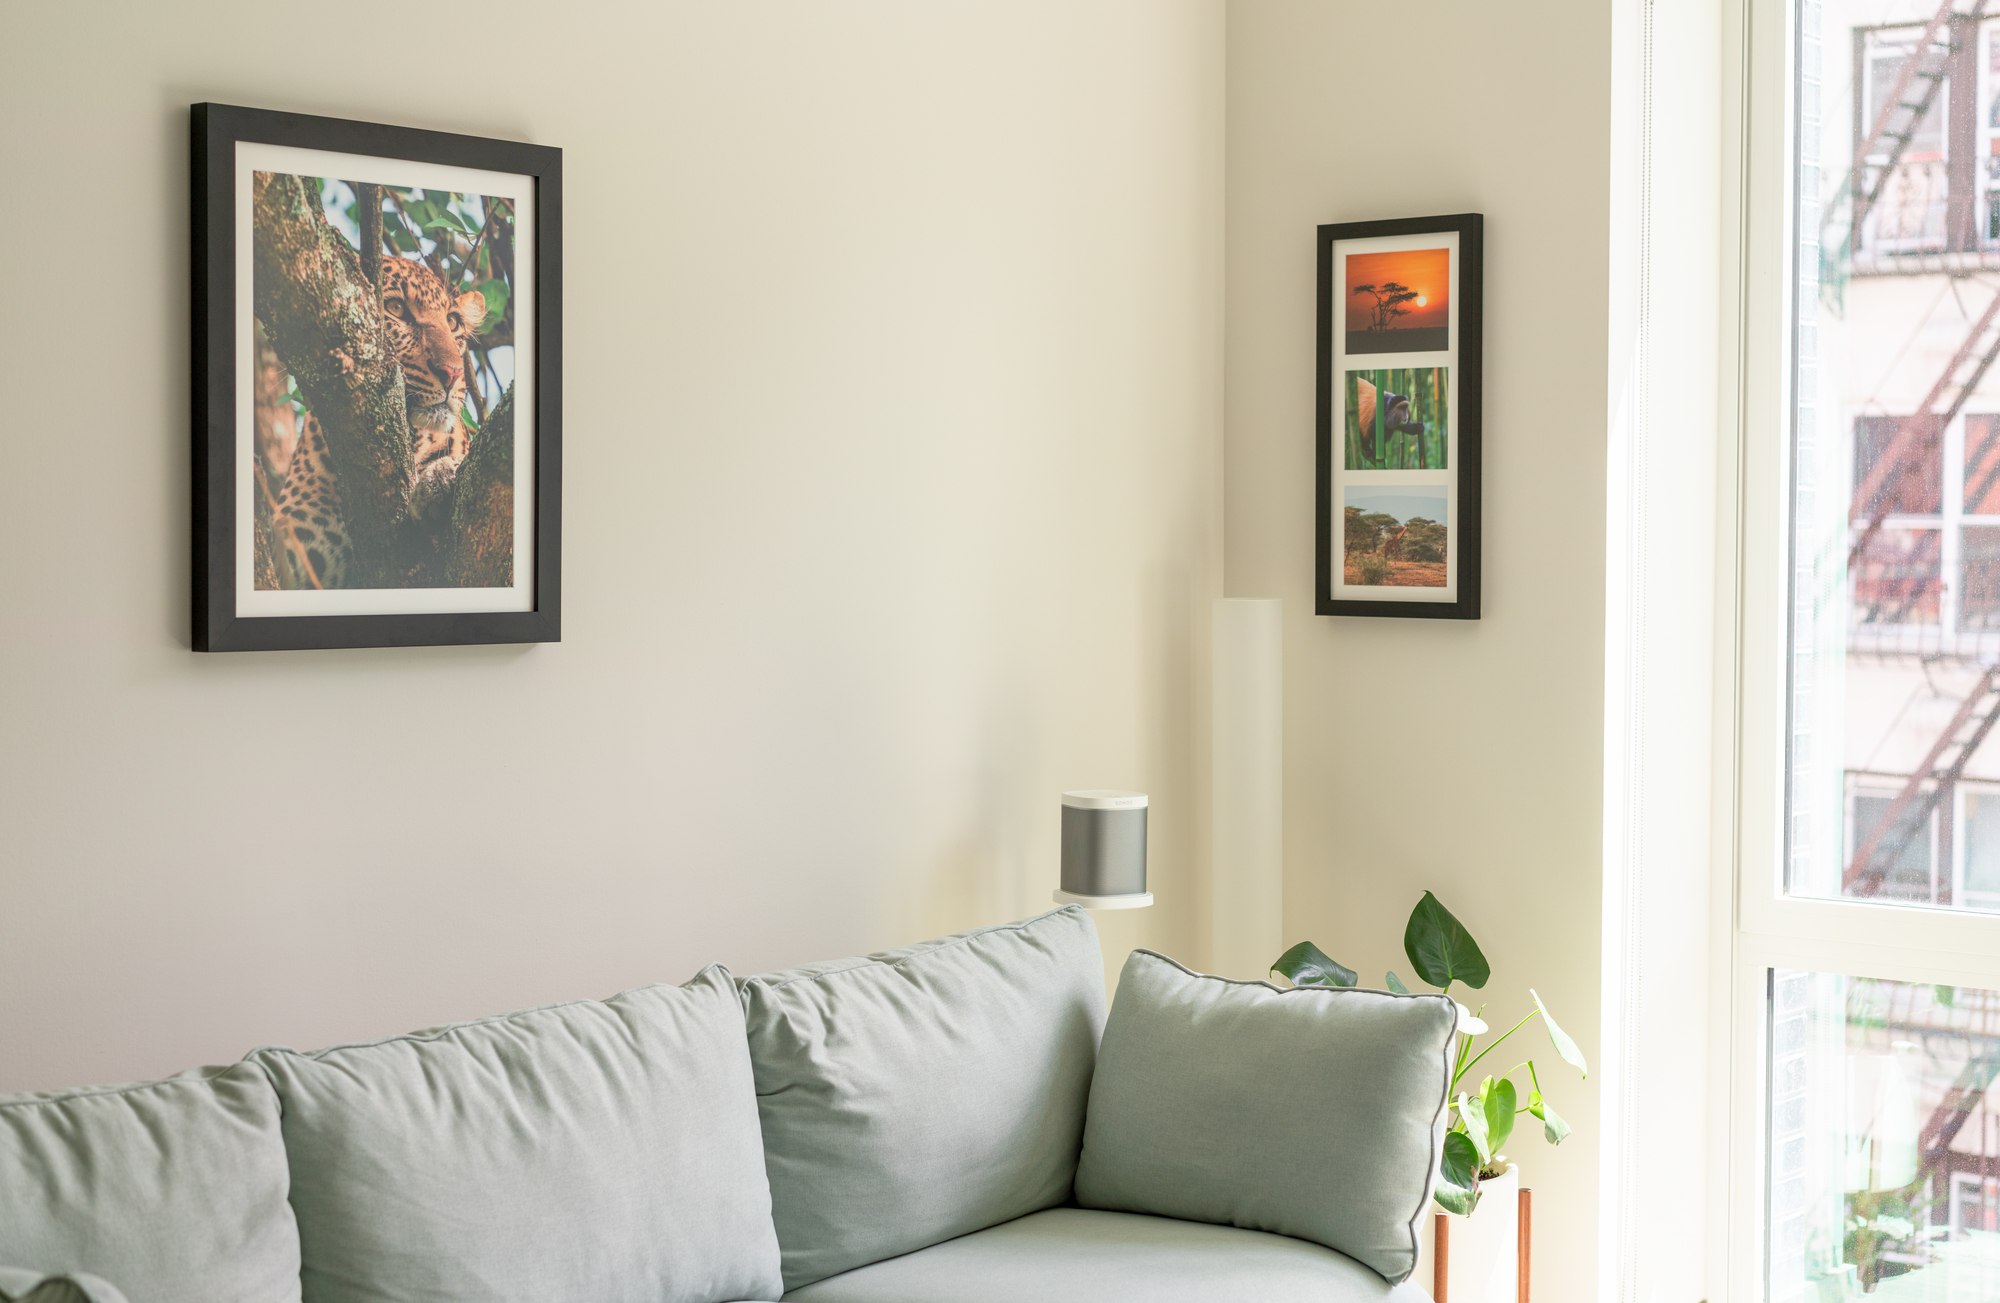
I use Level Frames to quickly frame some of my better travel photos to hang around my house. I have about 8 so far and love the quality and simplicity.
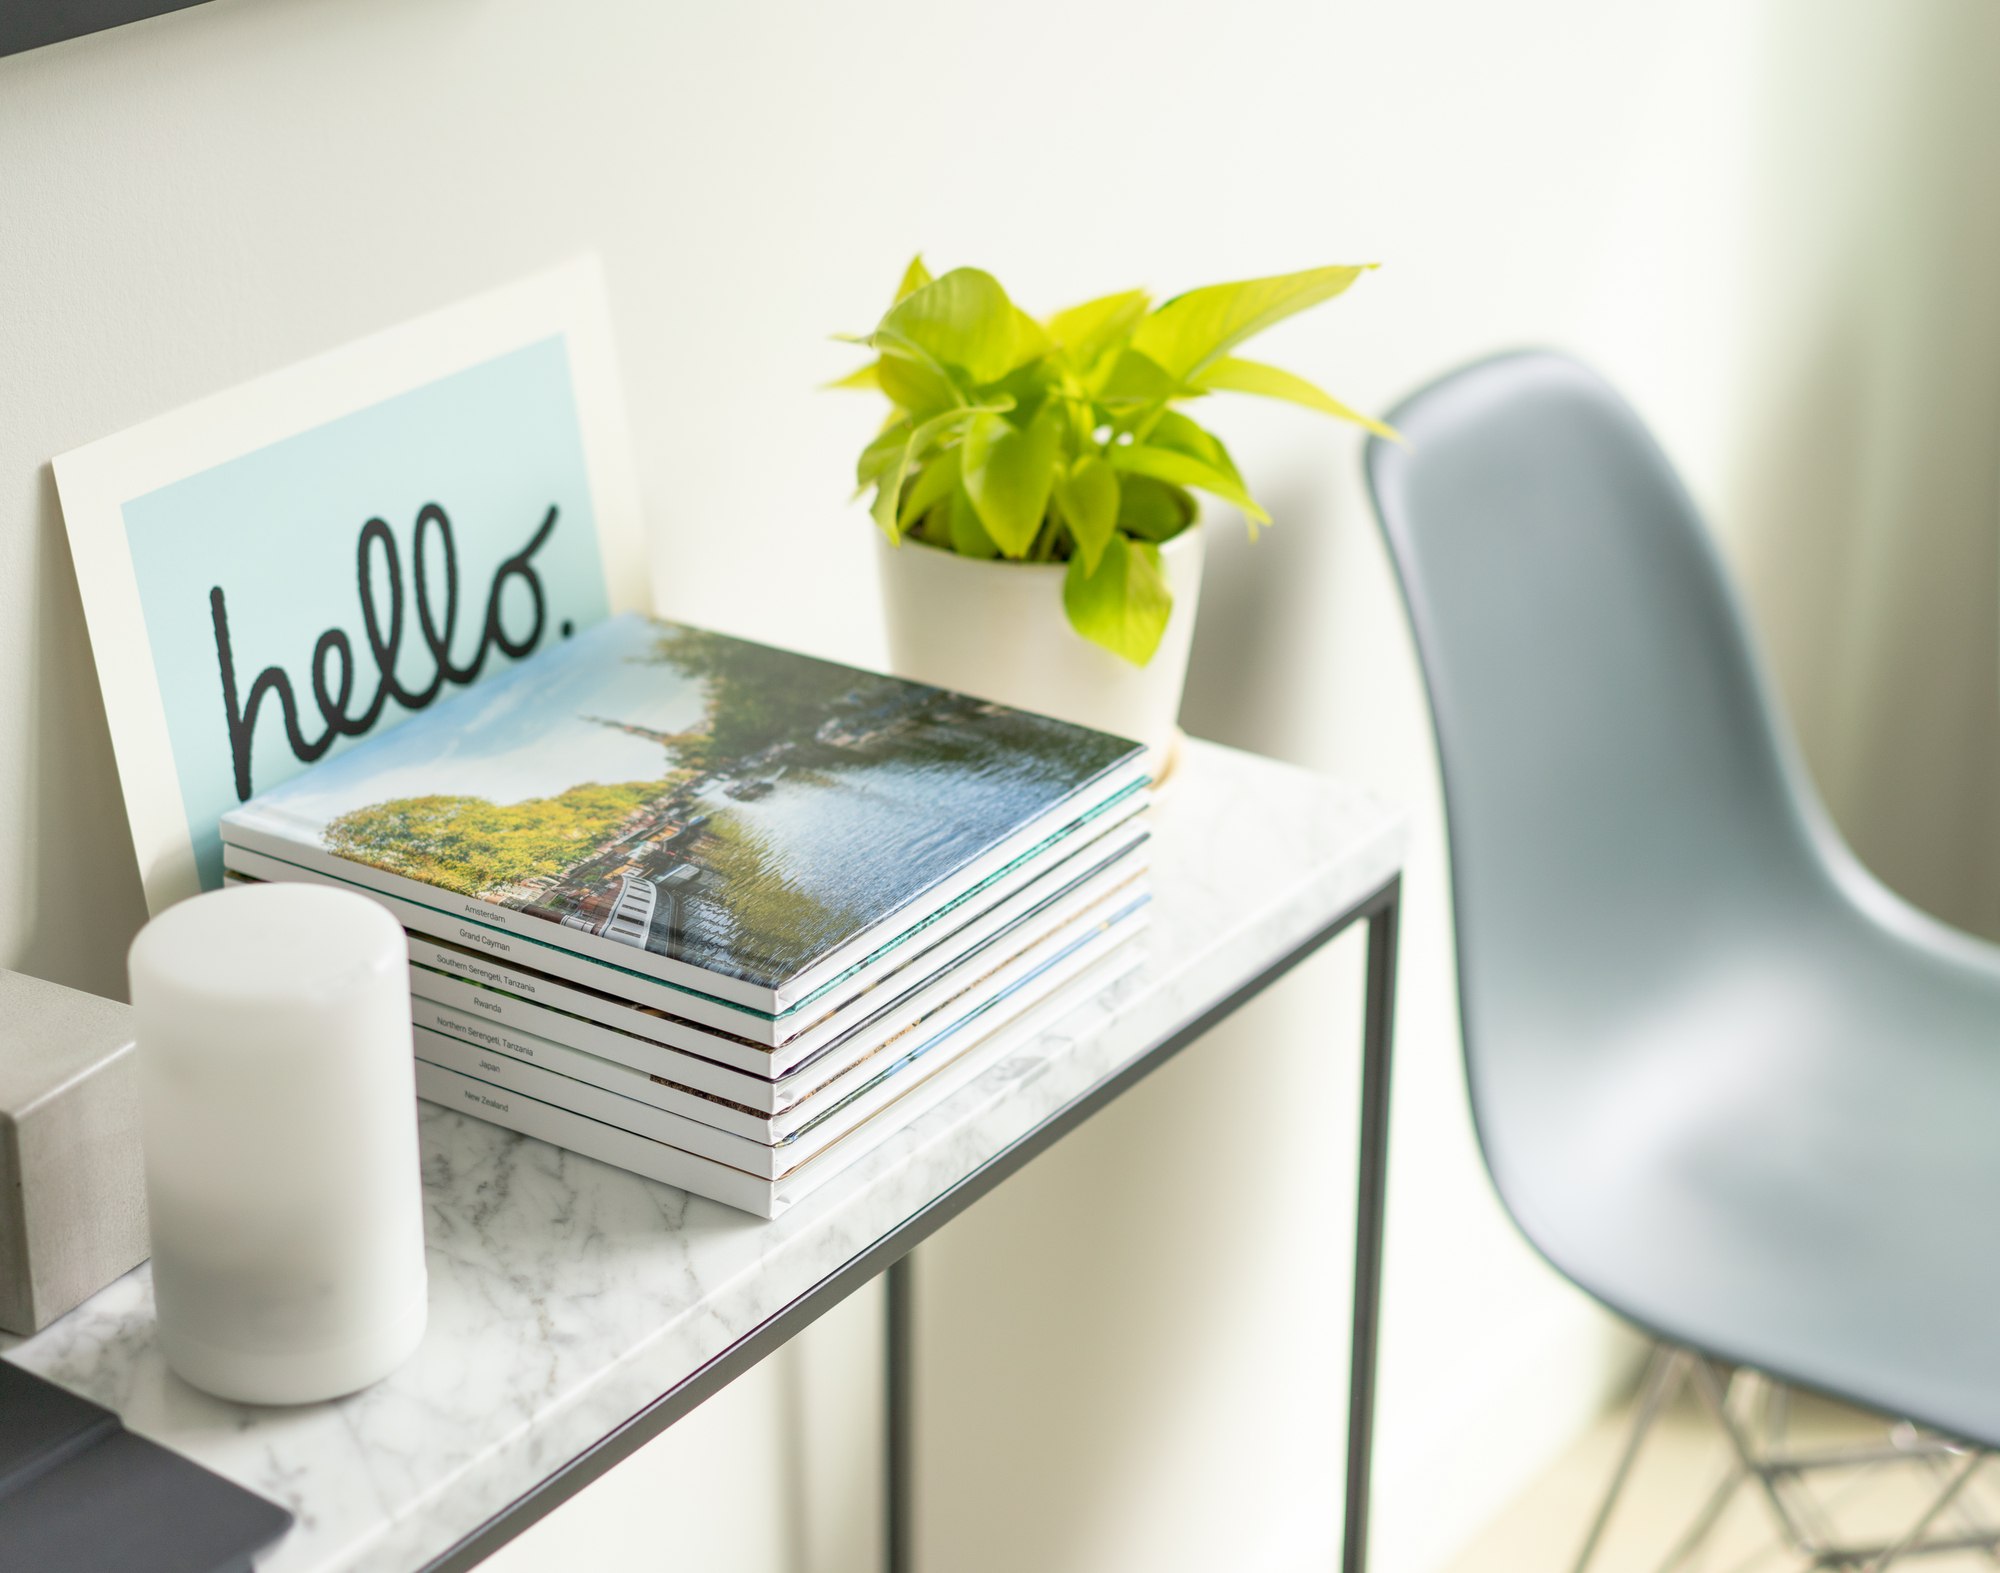
I have also started making simple photobooks of my trips using Google Photos. I've got a small collection so far and really love making new ones for each trip.