In late 2008 I wrote about my experience using the first generation 80GB Intel X25-M SSD — my first SSD. I had to pay the early adopter tax for that SSD, so it cost me around $700. The speed boost alone justified the price to me. Fast-forward about a year and that SSD stopped working. I’m not quite sure what died — the controller or something else — but I RMA’d it with Intel and they sent me a new, second generation X25-M that week. The second generation (G2) X25-M is based on 34nm fabrication compared to the 50nm first generation. The G2 is also substantially cheaper at roughly $299 and noticeably faster due to a new controller and firmware. Intel still claims the same “up to 250MB/s” sequential read speed and “up to 70MB/s” sequential write speed but the G2 brings improved (2x for 80GB, 2.5x for 160GB version) random 4KB writes.
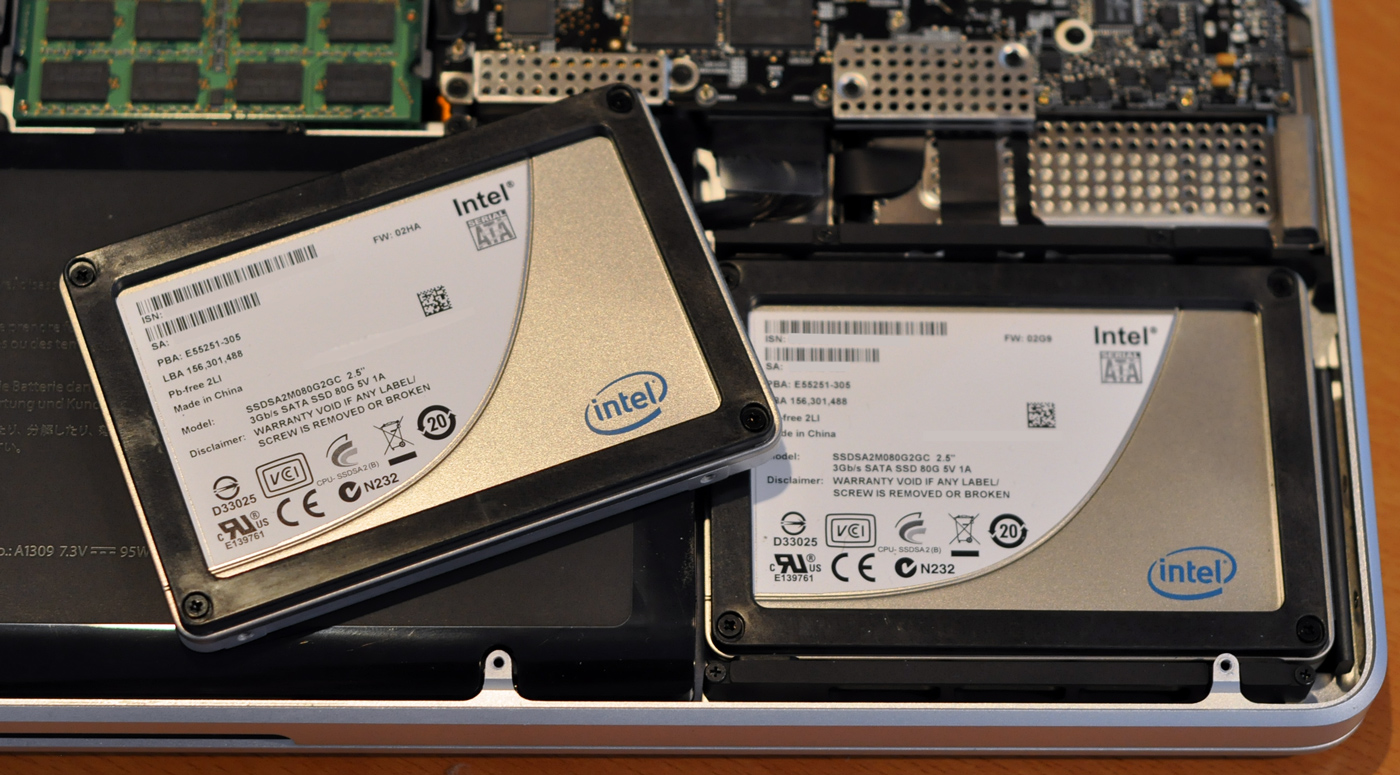
But I digress, this post is not about why I love Intel’s SSD, but rather how using just one SSD was not fast enough. (It should be noted that the X25-M will not be top dog forever and will be getting stiff competition from OCZ and their “SandForce” controller that can compress data beforehand in the Vertex 2 Pro SSDs.) Getting to the point, I put two 80GB Intel X25-M G2 SSDs in my unibody 17-inch Apple MacBook Pro and then set them up with RAID 0 — striped data for better performance.
How this is possible? MacBook Pro laptops only support one hard drive/solid state drive. Well, I had to remove the optical drive. Not a big deal for me as I rarely used it and if I ever need it I can use it with an external USB enclosure.
What You Need
- Laptop of your choice: that uses a SATA interface for its optical drive. If you’re using a Unibody MacBook Pro you should be good to go.
- 2 Solid State Drives of your choice: For optimal results, ensure they are the exact same brand, model, capacity and generation.
- Intel has the 80GB (~$289) and 160GB (~$489) flavors of the X-25M. Make sure to spring for the G2 second generation (linked).
- Kingston has their SSDNow V-Series: 64GB (~$149) or 128GB (~$269)
- I mentioned the new OCZ Vertex 2 Pro earlier but at the time of this writing I could not find one for sale to link to.
- MCE Optibay ($99): The Optibay is the special ingredient in this How To. It fits properly in the optical drive bay slot and lets you securely attach your second SSD to it. It is important to note that you need to buy the SATA version if you have the same Unibody 17-inch MacBook Pro as I do. Prior models used IDE for optical drives and the respective Optibays had onboard IDE » SATA converters that resulted in slower performance; definitely not what you want with a RAID setup. When I ordered my Optibay it came with a USB 2.0 enclosure for the SuperDrive I was taking out.
- Tools: The usual small (#00) Phillips head will do but there is also one screw that is very difficult to remove unless you remove a small T6 Torx screw in front of it. I have been quite happy with a small tool with changeable bits called the Teeny Turner.

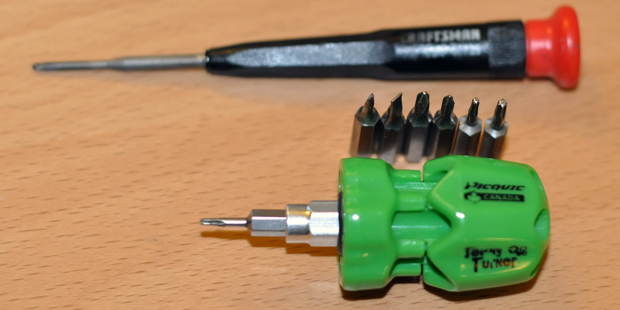
These two tools have helped me void many gadget warranties over the years.
- No regard for Apple warranty: Unless you are have mastered the art of deception, if you ever take your MacBook Pro in for warranty repair they will likely notice that you have opened it up before. You can always claim the work was done by a Certified Apple Specialist but they might call your bluff. Or you could meticulously undo the RAID setup and put the optical drive back before walking in for an unrelated repair.
- Blank disc: You will want to make sure your SSDs have the latest firmware. Most SSD manufacturers require that you burn a disc and boot your computer into their software. [Intel SATA SSD Firmware Update Tool]
- External USB/FireWire hard drive: It’s always a good idea to have an external hard drive drive dedicated to backing up your computer, not storing excess media files and documents. In this case of this guide, the external drive will be used to boot off of during a phase of setup. I use a cheap 500GB My Book I bought years ago, but anything large enough will work.
Hardware Install
Unfortunately, swapping/adding hard drives in the 17-inch Unibody MacBook Pro (without user-removable battery) is a bit more involved than the simple procedure on the 15-inch Unibody MacBook Pro with removable battery. You will need to be comfortable taking out the entire back panel of the laptop.
Detailed instructions for taking apart your MacBook Pro can be found at ifixit.com
For my MacBook Pro there were ten Phillips screws in my way before I could take off the back panel.
Since I had previously already installed an 80GB X25-M G2 SSD in place of the hard drive the laptop came with, my next objective was removing the SuperDrive.
The SuperDrive had a few more Phillips screws but there was also a display cable and Bluetooth module in the way. The Bluetooth module has a tiny cable that can be gently tugged and removed. Then you can remove the two screws holding the module in place. Push the display cable out of the way and remove the grounding pad near the hinge. Gently try to lift the optical drive up. When you have enough wiggle room disconnect the SATA cable from the SuperDrive.
Next, unbox the MCE Optibay and screw in the SSD into it.
Then position the Optibay, connect the SATA cable, screw in the Optibay, put the grounding pad back and reattach the Bluetooth module. Here’s the bad news — the screws for the Bluetooth module do not fit into the holes in the Optibay. The good news — the Bluetooth module is so tiny and lightweight that it’s not the end of the world that it isn’t screwed in. If you’re really worried about it use some Polyimide/Kapton tape to keep it in place or find appropriate screws.
And finally, reassemble the laptop and put the ten back panel screws back. Boot the laptop to make sure all is well. Open Disk Utility to see if the new SSD is listed.
Place the SuperDrive you removed into the external USB 2.0 enclosure provided with the Optibay.
Install the latest SSD firmware
So the new SSD is seen by OS X and all is well. Great! If you haven’t already burned the firmware updater tool provided by Intel (or whatever company makes your SSDs), do so now. Boot up to the burned disc by holding down C on boot when the gray screen is shown. Follow the on screen instructions and 5 minutes later both of your SSDs should be loaded up with the latest firmware.
Usual firmware updating precautions apply — make sure all of your data is backed up on the off-chance the SSD gets bricked.
Software Config
Now you have two working SSDs in your MacBook Pro. You are currently in either one of two situations:
- [My Situation] One of the SSDs has already been loaded up with OS X and the other is empty.
- Both SSDs are new and empty. There is no OS loaded on either.
If you are in situation #2, I am guessing (not tried it personally) that you need to:
- put your OS X disc into the SuperDrive you placed into the provided external enclosure and connect it to your MacBook Pro
- hold down C and boot into the installer
- close the installer window and go to the top menu to open up Disk Utility
- create the RAID array and proceed installing OS X onto it
However, I have heard of some issues where the computer will not see the RAID array when you are booted off of the OS X install disc. You might need to create the array while booted off of another external OS X install or on a working OS X install already present on one of the SSDs — that’s why I recommend having an external hard drive lying around just in case. To clarify, it seems if you have the computer booted off of OS X on another drive, insert the install disc, run the initial setup from the inside-OS X installer that auto-reboots for you, that it should work.. if that makes sense. If not, leave a comment.
If you are in situation #1 like myself, then things are a bit trickier. In a nutshell, I cloned my OS X installation onto an external USB 2.0 hard drive, changed the startup disk to that external drive then booted from it, created the RAID array, cloned the external drive onto the new RAID array, changed the startup disk to the RAID array and rebooted.
While you can do the drive cloning back and forth like I describe below I always recommend doing a fresh OS X install whenever possible.
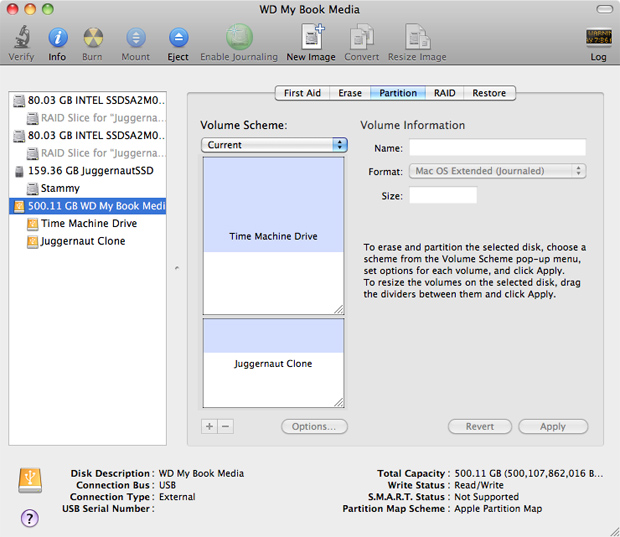
Alrighty, here we go. Download and install Carbon Copy Cloner (SuperDuper works too). Connect your external hard drive. I have had a cheap Western Digital My Book hard drive solely for Time Machine backups. I had plenty of extra space on the drive so I partitioned it so that I could maintain both Time Machine backups and a Carbon Copy Clone of my OS X install.
If you want to do the same and use your external drive for both Time Machine and a bootable OS X drive clone, connect the drive and open Disk Utility. Click the external hard drive on the left pane and then click the Partition tab on the right. Resize the current Time Machine partition to make room for a second partition. Apply changes and name the new partition.

Fire up Carbon Copy Cloner and select the internal SSD with OS X as the source drive and the new partition you just made on the external drive (if you did that) as the target drive. Make sure the drive will be bootable. It should say “This volume will be bootable.” Click Clone.

Somewhere around 30 minutes to a few hours later, drive cloning will be done.

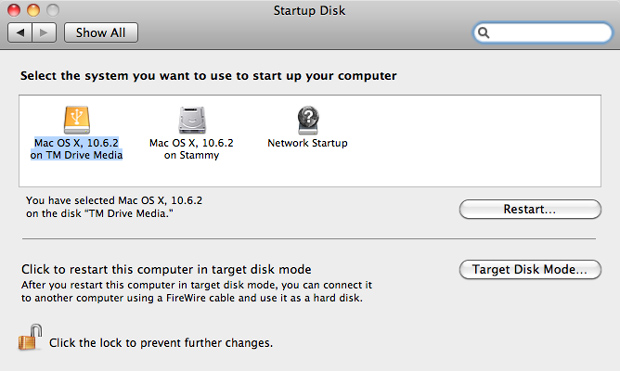
Now we want to boot OS X off of that new external clone. Go to System Preferences » Startup Disk and select the external drive. Click Restart.

After successfully booting into OS X on the external drive, open Disk Utility once again. You may opt to first erase both SSDs before proceeding. Select one of the SSDs in the left pane (the root device that says INTEL SSD…, not the partition disk1s..) and select the RAID tab on the right. Select Striped RAID Set for RAID Type, and keep Format as the default “Mac OS Extended (Journaled).” Drag each of the SSDs on the left into the open section on the bottom right.
Click Options. For RAID Block Size select 128K and then click OK. As for why I selected that value, I find it to be a great all around compromise for performance and versatility with files of all sizes. If the block size was smaller, it would perform slightly better with smaller files (versus just letting one SSD in the RAID 0 array receive the data of a file that is smaller than the block size) but it would not be as effective with larger files. If you’re still curious about this, feel free to ask me for a more in-depth explanation in the comments.
Click Create, then click Create again in the next window. Your new RAID 0 SSD array will be made momentarily.
Sweet! The RAID 0 array is working and online.
There’s still no OS on the RAID array so we’ll need to fire up ye olde Carbon Copy Cloner again. This time select the external drive as the source disk and the new RAID array as the target disk. Make sure “Backup Everything” is selected. Again, check to see that CCC says “This volume will be bootable.” Click Clone. If it gives you a warning about deleting files on the target volume, click Continue.

Don’t use the computer and go grab a bite to eat or get a quad-shot cappuccino or something. Or comment on this article saying how you’re following along and all is going well and you’re super excited about the new speeds your laptop is about to see.

Cloning OS X from external drive to new RAID 0 SSD array underway – Carbon Copy Cloner
After cloning finishes, open up the Startup Disk pane in System Preferences again. Select the new RAID array you made as the startup disk. Click Restart.

Boot off of your new RAID array
When the computer boots up into OS X again, this time from your new RAID array, eject and unplug the external drive. One last time, open up Disk Utility. Click on the RAID array, select the First Aid tab and click Repair Disk Permissions. After that is done click Verify Disk and then Repair Disk if deemed necessary.
Now, one last check to make sure everything is running a-okay. Select the RAID array in Finder and hit Command+I (Get Info). Expand the Sharing & Permissions section at the bottom. Click the little lock and type in your password to gain access. Make sure that both “system” and “admin” have Read & Write privileges set.
Performance
I’ll let the numbers speak for themselves. You may click any of these screenshots for a larger version. Benchmarks were carried out by QuickBench after a fresh reboot and the numbers presented below were calculated as an average of 10 runs. Tests from 4KB all the way up to 100MB are shown below.
Without Cache Effects and Asynchronous I/O enabled, standard averages varied slightly from the test above: 206.885 MB/sec (seq reads), 106.755 MB/sec (seq writes), 162.901 MB/sec (rand reads), 72.378 MB/sec (rand writes).
Without Cache Effects and Asynchronous I/O enabled, max reads and writes were 520 MB/sec and 170 MB/sec, respectively.
If numbers aren’t your thing, how about some typical day-to-day tasks:
- Photoshop CS4 loads in 2 seconds and only takes another 7 seconds to load 5 hi-res images (each around 5-8 MB)
- It takes 6.5 seconds to load Photoshop CS4, Illustrator CS4 and Fireworks CS4 simultaneously.
- What other daily tasks do you do? Let me know in the comments and I will update this post with the results.
However, bootup times are not remarkably fast as it seems to take a while for the RAID array to get recognized. Not the biggest deal if you only happen to reboot every 50 days or so like I do.
Verdict
This RAID 0 SSD setup in my 17-inch Unibody MacBook Pro is just the way I like my cars and computers: pricey, impractical but hellishly fast. I give the 2x80GB Intel X25-M RAID SSD setup in my MacBook Pro 9.0 out of 10 Stammys. It’s not a 10 out of 10 because:
- the X25-M is already outdated by the new SandForce controller SSDs, as well as offerings with Samsung or Indilinx drive controllers with caching, currently emerging on the market
- the 160GB version of the X25-M has faster sustained reads and writes than the 80GB X25-M
- the X25-M is MLC. while more storage at the expense of performance made it acceptable for a single SSD, having a RAID setup makes it easier to get two 64GB SLC SSDs and have much greater speeds
Q: So is this hardware or software RAID?
A: This MacBook Pro (or other Apple laptops for that matter) do not seem to have hardware RAID controllers, such as ICH10R and their ilk. As such, this RAID array is software. That just means that intense disk I/O is also accompanied with some increased CPU activity.
Q: OMG how do you live without an optical drive!!?!?
A: Easily. The last time I used my optical drive for anything was to burn a music CD for the car and that was just because I was too lazy to sync and charge my iPod Nano. Optical media is slowly dying. Although I would like to see the next Core i5 Apple laptops come with the option of a Blu-ray drive.
Q: But you’re running twice as many drives.. doesn’t that suck a lot of power?
A: I haven’t noticed any changes in battery life. Most SSDs have better power consumption profiles compared to their mechanical counterparts in most scenarios. For example, SSDs easily outperform spinning disks under high load situations in terms of power consumption.
Q: What about TRIM?
A: Well first off, TRIM isn’t even supported by OS X as of Snow Leopard so it’s not like that’s a big deal. However, while you could boot into Windows 7 previously if you had a dual-boot system and run TRIM from there (edit: but even that is of limited utility as Windows 7 can’t run TRIM on HFS+), that isn’t possible with an SSD RAID array. It is not possible to TRIM a RAID array now for a few reasons. No RAID controller (and this array is software too, so there is not a physical RAID controller) currently supports TRIM on RAID and it is not possible to TRIM each SSD separately since the file system needs to be seen and the RAID layer on top of that kind of abstracts it. This does not mean that TRIM on SSD RAID arrays will not be possible in the future but it requires that the OS, RAID controller and SSDs all support TRIM, which will invariably take some time.
In short: not being able to run TRIM is only a substantial concern once the entire volume has been written to once. I am currently using less than half of the array’s storage space so this is not a huge concern right now. Also this array will probably only exist on my computer for 9 months, then I’ll upgrade it with something faster.
Now that you’ve read all of this, here’s a bit of a warning: back up your stuff often. SSDs are kind of flaky in terms of lifetime. My first one died in under a year (I believe Intel claim 5 years of writing 100GB/day – correct me if I’m wrong – but still the controller can go out and random events), and it doesn’t help that I am now running 2 of them in RAID 0 without any way to run TRIM.
Thoughts? Is this something you would do with your laptop or desktop? Do you currently use a Solid State Drive in your main computer? Do you have the need for (computer) speed?
Follow me and my nerd musings on Twitter and FriendFeed.
This post was based on a Skribit suggestion. Have a good idea for a post? Let me hear it.


You win.
….
That’s a sick-setup
I’m not a mac person but seeing this uber-g(r)eek approach to supercharging your mac gear, I might convert.
Paul you are crazy. This is really awesome, i have been thinking about doing this on my desktop. I have the 160 SSD on the Intel. I am curious about the block size. I went with the standard block size (4kb) i think. Now it seems like I should reformat it with higher block. I did the bench mark and its about ~40mb/s average. Seems like If i went with a higher block size (128k?) it would double at least.
Few other benchmarks you should run for fun.
- Full text Search in Textmate (w/o ACK) on Skribit’s codebase. This operation is usually slow.
- Large DB (<200mb) Dump/load in mysql
- Install Windows/ubuntu using virtual box (this should be f'n fast)
- uhm… what am i missing?
Also noticed you reversed the comments display order. Any noticeable changes/improvements in terms of UX?
Actually comments aren’t reverse chron, but backtype notification stuff (twitter, friendfeed, HN comments) is forced to the bottom
Speaking of comments, what plugin did you use for threaded comments?
I am pretty sure this is just the default Thesis theme threaded comments.
I didn’t know Thesis had default threading…
yup it’s just Thesis and WordPress settings to enable it, nothing fancy.
Despite my “I’m not getting an SSD anytime soon” comment on your original review, I’ve been obsessing over getting one for the past few weeks. As part of my last repair, the technician identified my 5400 500GB WD Blue drive as the reason for my system’s recent abysmal performance (2 minute boot, very regular beach ball, etc.) and rather than get a 7200 drive, I remembered your X25-M review and re-read that. I’m sold. I’m just waiting to see if new models are released tomorrow, since I’ll be replacing my late 2008 immediately if that’s the case, and I’ll take the plunge.
I won’t be going dual SSD under RAID 0, but I was looking at the MCE adapter, so this post is quite relevant regardless. If the existing MCE adapters will work in the hopefully-soon-to-exist i5 MBPs, then I’ll be going 80GB SSD + a regular HDD. If not, 160GB SSD. Can’t wait.
“I’m just waiting to see if new models are released tomorrow, since I’ll be replacing my late 2008 immediately if that’s the case…”
I speak of MacBook Pros here, not SSDs. Proofread fail.
You mentioned that sometimes the OS X Installer doesn’t see RAID volumes created using Disk Utility on the install DVD. The fix is just restart the install DVD after creating the RAID set.
Also, your Mac might be starting up slower than expected if you don’t have the Startup Disk properly set. Check that it’s highlighted in System Prefs and then see if the very early startup phase (pre Apple logo) suddenly gets faster.
Some sick setup you have there. :)
I bought Kingston SNV225 64GB for my desktop last week (see blog for post on it). Kingston experiments with pretty much all SSD hardware around, from reviews that took it apart this specific model and capacity has Samsung internals. Performance gain comparing to hard drive is crazy.
Only thing I slightly worry about is that TRIM stuff (not supported, firmware not upgradeable). On other hand I am not upgrading to Win7 anyway (at moment).
Hi Paul,
Nice article once again. Enjoy reading them every time.
I’ve been using an MCE Optibay for a while now. I’m running my System off an OCZ Vertex 60GB drive and my Home folder is on a WD500GB drive in the Optibay. I’ve seen tremendous speed improvements on my MacBook 2.4GHz. Moving the Home folder was probably the trickiest part of the installation, but it all worked out fine.
I was wondering what kind of maintenance you suggest to keep the SSDs at maximum performance? Defragmentation, Erase Free Space?
I have two of the 160GB X25-M drives in RAID-0 in my Mac Pro. I love it. It was ridiculously expensive ($1,400 at the time), but I work and live on my computer, and anything that reduces my annoyance level is worth considering.
Here’s a PNG you can use as an icon for your drive.
And here is what Photoshop starting up looks like.
haha nice icon image but those are black drives, black = 50nm first gen X25-Ms? haha. thanks for the clip as well
did you need to use any 3.5-inch to 2.5-inch adapters for the SSDs to fit in your Mac Pro? @jordansatok was asking about that on twitter yesterday
Paul, any sleep issues? I recall some people having wake from sleep issues with two hard drives in RAID with the OptiBay, but an SSD might be a different story.
Hey Adam, thanks for the comment. Sleeping works fine on my MBP. It takes about 20 seconds to fall asleep though… so maybe just a few seconds longer? It does this in hibernatemode 0 as well as 3.
I’d love to do 2 SSD’s in my MBP… but heck, even with 1 SSD (I have a 60GB OCZ Summit) it’s blazing fast. OS X launches (from power to desktop) in 15 seconds, Photoshop and Dreamweaver is ready in less than 4 seconds… everything is just silky smooth. Sure, it’s not a lot of storage to work with, but I store all my music and media on the network drive — any files that I need to access with speed end up on my SSD.
Wow. It is indeed “pricey, impractical but hellishly fast”. That’s awesome exploration with the OSX Paul.
Pretty cool man, I’ve thought about buying the Optibay for my 13″ MacBook Pro, I’d probably go the SSD + 500GB route though.
Do me a favor, if you have any hardware trouble and want a warranty repair, remove the mods and bring the computer in as close to stock as you can get. That’ll save us all some time. :-)
Haha, will do! :)
OMG! This makes my want to have a mac and do what you just did. :D
Very impresive, but i think that if you include a normal computer basis in the comparison, we get (those not familiar with it) a better idea of the increase of the performance. Two questions: 1) it´s possible to do this without the mce bay ( is hard to get in other countries). 2.) If we do this with normal sata – not ssd – disks, the improvement is so good too?
Thanks
I don’t now any substitute for the MCE optibay. And yes, you can also RAID several regular SATA hard drives, but the performance won’t be as crazy as SSDs :) If you do that though, opt for 7200rpm drives.
The NewModeUS OBHD9-SATA-SATA-B is a suitable replacement for the OptiBay, and is quite a bit cheaper. They also carry PATA models for pre-Unibody MacBook Pros as well.
thanks for the reply Adam. Though it should be noted (and is mentioned in the post) that if you have an older MBP you don’t want to use a PATA adapter model for RAID.. as the array’s bottleneck will be the PATA->SATA converter. But it is fine for just adding another hard drive.
Really good chance that the adapter from NewModeUS that Adam posted will not fit properly in a unibody MacBook or MacBook Pro. I can tell you for sure that the one pictured on their website will not properly fit, so assuming they don’t ask you for your specific model at the time of your order, than this will be a disaster for Mac owners.
Also, just look at the list of manufacturers that they claim to support in the Categories selection on the left side of the site, the fruit is not mentioned. It’s not looking good.
There is another Mac friendly company that sells products like MCE’s OptiBay: MaxUpgrades. Their product is very originally titled MaxConnect. It’s $89, cheaper than the OptiBay but not by much, shipping could make the difference negligible.
I’m kind of surprised a product like this isn’t offered by Wiebetech and/or Other World Computing.
SWGS, despite you being certain of disaster, the NewModeUS caddy fits in a Unibody MacBook Pro 15″ (Late 2008) just fine. It requires removing some small screws to remove the plastic bezel on the edge of the unit (then replacing them). It also can only secure to the top case with one screw, versus the three that Apple uses on their Superdrives, but the camera cable guide and the bottom case keep it snugly in place.
How do I know? My MacBook Pro on my desk has one in it right now. A 500GB Western Digital HD in the NewModeUS caddy in the optical drive bay, and an OCZ Agility 60GB SSD in the hard drive bay.
Having disassembled a few 2009 Unibody MacBook Pros (13″, 15″ and 17″), I wouldn’t really be too concerned about fitment in those models either.
Maybe you test this configuration with virtual machines? As you say tha take only 2 seconds PS CS4, how much take load a windows xp machine using parallels o fusion?
Thanks for the suggestion I’ll try that out later this week. I don’t have an XP VM, but I do have Ubuntu 9.10 on my Fusion.
Paul, did you ever try running VMs with this setup?
I’m curious does PGP WDE work with Apple’s software RAID?
I am planning on doing an HDD + SSD combo. This tutorial was very helpful though. In your oppinion, which is the best location for the SSD? Stock drive location (in which case the HDD will not have the benefit of the sudden motion detector) or the optibay (in which case, as far as I am aware hybernation mode won’t function).
Thanks!
everything looks wonderful, and since you are not going to use this setup for a long time, TRIM shouldnt be a problem for you.
since this is high performance setup, i would really like to see the (small) effect of different RAID block sizes in the benchmark. so that in the future we could all know if it is actually worth changing the default value, when we set up a RAID 0 array.
Hi Paul,
Thanks for your article.
I just got my new macbook pro i7 with two x25 160Gb ssd and it’s working like a charm.
Mark – Congrats! That is one killer setup!!
TRIM issue can easily be solved.
you simply repeat the cloning process you described.
clone SSD to external Disk
boot from external disk
undo the raid array
format both disks with zero-fill option (1 pass is enough) YOU MUST DO a zero fill, a simple format won’t do the trick.
recreate the Raid array
clone back
I did it with my SSD (non raid though) and was able to reclaim the lost performance.
I have ordered an MCE bay and was wondering if their is a way to set up the raid without needing an external drive with a bootable setup. I keep a time machine backup, and I figure once I get the raid setup that I can do a fresh install of the OS on the RAID array and then reload everything from time machine.
If I had a second mac around could I just boot my lappy in firewire mode and format the raid array from the second mac? To me this seems to be more optimal than the external HD boot approach (if its possible). Otherwise I’ll have to start some copying!
new drive and mount should be in by the end of the week. Going for dual 7200 rpm raid, not brave enough for SSD with cost/reliability ratio skewed as it is nowadays.
Why not RAID-1? RAID-0 on a technology that is known to die relatively faster than HDD’s seems risky. Plus, you should get a read speed boost from it too.
This comment was originally posted on Hacker News
Hey Tim! I was just at Ignition Alley today, in the loud room, working on this post.I have lots of backups in place – files I don’t touch in more than a week get moved to S3, as well as Time Machine and a working clone of the drive made every week.
That being said, RAID 0 gives me more space and is faster for reads and writes (that are larger than the block size that is)! Risky indeed though. I touched up on this aspect at the end of the article, and also noted that this setup will only exist on my MBP for 9 mons or so, at which point I’ll upgrade to some faster SSDs.
This comment was originally posted on Hacker News
I love paul because he is crazy. @stammy RAIDed 2 80GB Intel SSDs IN his Macbook Pro. http://bit.ly/ceOFpk #freak #Blazing #Fast
This comment was originally posted on Twitter
Why RAID-anything in a laptop? A single Intel SSD is pretty darn fast, and the second bay is more useful as a large-capacity spinning hard drive (unless you need the optical drive, of course). I have my MBP set up this way and I’ve been very pleased with it.
This comment was originally posted on Hacker News
How To: Apple MacBook Pro RAID 0 Array with 2 Intel X25-M SSDs: Comments http://url4.eu/1EbdP
This comment was originally posted on Twitter
How To: Apple MacBook Pro RAID 0 Array with 2 Intel X25-M SSDs http://bit.ly/bN9pza
This comment was originally posted on Twitter
IIRC, Intel specify a lifetime of at least 5 years for "normal use", with a warranty of 3 years. In my experience, you’re pretty lucky if your laptop hard disk lasts 5 years; of course, the SSDs haven’t been out for that long, so who knows.
This comment was originally posted on Hacker News
For me at least: the single SSD got boring after a while and I wanted to get better speeds. As for storage I have a 2TB (RAID 0 as well) HTPC ( http://paulstamatiou.com/how-to-build-microsoft-windows-7-in…; ) that keeps most of my media and usenet junk, then an external for other stuff.
This comment was originally posted on Hacker News
RAID 0 everywhere? No RAID-1 or RAID-5 anywhere?
Performance is more important than data security for me. I have redundant backups to online services. That and most of the large data (the TBs) is media, movies, music, et cetera that can easily be reacquired should I lose them. IE no real sentimental/personal value.
The article somewhat implies that running TRIM from Windows 7 on a dual-boot (with OS X) system is useful – wouldn’t that not be the case though since Windows 7 is not going to know what blocks are in use on the HFS+ partitions?
This comment was originally posted on Hacker News
The article somewhat implies that running TRIM from Windows 7 on a dual-boot (with OS X) system is useful – wouldn’t that not be the case though since Windows 7 is not going to know what blocks are/aren’t in use on the HFS+ partitions?
This comment was originally posted on Hacker News
HNews: How To: Apple MacBook Pro RAID 0 Array with 2 Intel X25-M SSDs http://bit.ly/cHraco
This comment was originally posted on Twitter
How To: Apple MacBook Pro RAID 0 Array with 2 Intel X25-M SSDs: Comments http://url4.eu/1EbdP http://bit.ly/bh1rWt
This comment was originally posted on Twitter
17”MBP の光学ドライブ外して SSD の RAID 0 組む猛者がいた http://paulstamatiou.com/how-to-apple-macbook-pro-raid-0-array-with-2-intel-x25-m-ssds
This comment was originally posted on Twitter
I want to do this to my MBP so much. http://paulstamatiou.com/how-to-apple-macbook-pro-raid-0-array-with-2-intel-x25-m-ssds #ssd
This comment was originally posted on Twitter
It’s true that Windows can’t trim HFS+, but the free space created by Windows will make the SSD faster even when you boot back into OS X.If you really really feel the need for speed in OS X, I recommend the host protected area trick since it’s a one-time optimization.
This comment was originally posted on Hacker News
@jordansatok http://paulstamatiou.com/how-to-apple-macbook-pro-raid-0-array-with-2-intel-x25-m-ssds @Stammy does
This comment was originally posted on Twitter
@jordansatok http://bit.ly/ceOFpk @Stammy does
This comment was originally posted on Twitter
Can you elaborate on what the "host protected area trick" is?
This comment was originally posted on Hacker News
My first SSD (first gen X25-M) died in ~9 months. Still not sure if it was the controller or just mass failure of the flash mem. Either way Intel sent a new one in just a few days.
This comment was originally posted on Hacker News
So much easier to do this with a Thinkpad and Linux. http://tr.im/LIGC
This comment was originally posted on Twitter
http://www.mail-archive.com/misc@openbsd.org/msg82811.htmlSetting the HPA (immediately after secure erase) ensures that some LBAs always remain unallocated and should give the GC more candidate erase blocks to work with, increasing random write performance. Or at least that’s how I understand it.
This comment was originally posted on Hacker News
How To: Apple MacBook Pro RAID 0 Array with 2 Intel X25-M SSDs http://bit.ly/ddqcXH
This comment was originally posted on Twitter
How To: Apple MacBook Pro RAID 0 Array with 2 Intel X25-M SSDs: http://bit.ly/ceOFpk
This comment was originally posted on Twitter
2 SSDs in RAID 0 in Macbook http://paulstamatiou.com/how-to-apple-macbook-pro-raid-0-array-with-2-intel-x25-m-ssds
This comment was originally posted on Twitter
lolz, i have an optibay too, but i won’t be doing RAID. i’d like to have an SSD for boot, and a good ole 7200rpm 500GB for archive. still waiting on TRIM support in snow leopard.
This comment was originally posted on FriendFeed
Performance I’m jealous of http://paulstamatiou.com/how-to-apple-macbook-pro-raid-0-array-with-2-intel-x25-m-ssds
This comment was originally posted on Twitter
what’s better than an ssd in a mbp? 2! for diyers: http://bit.ly/dnkmOO
This comment was originally posted on Twitter
2 x SSD’s in RAID0 in a Macbook Pro Unibody model, she’d be speedy: http://bit.ly/am9zhL
This comment was originally posted on Twitter
hey @ajordens , this looks promising :) RT @KentBeck: what’s better than an ssd in a mbp? 2! for diyers: http://bit.ly/dnkmOO
This comment was originally posted on Twitter
Might be a good way to have an SSD for OS and still have the huge spinny drive for data http://j.mp/as5iMg (via @KentBeck)
This comment was originally posted on Twitter
Tentant (surtout qu’un lecteur cd sert tellement à rien) : How To: Apple MacBook Pro RAID 0 2x X25-M SSDs http://bit.ly/c9FFgP
This comment was originally posted on Twitter
Green with envy RT @KentBeck: what’s better than an ssd in a mbp? 2! for diyers: http://bit.ly/dnkmOO
This comment was originally posted on Twitter
This is basically my dream machine: http://bit.ly/cHAFYU (via @geek4christ)
This comment was originally posted on Twitter
How To: Apple MacBook Pro RAID 0 Array with 2 Intel X25-M SSDs … http://bit.ly/9OoZm3
This comment was originally posted on Twitter
Stammy is such a pimp: http://bit.ly/am9zhL RAID 0 SSDs in a Macbook Pro.
This comment was originally posted on Twitter
What’s sad is that the chipset in the MacBook Pro he has can do hardware RAID, Apple just doesn’t support it in EFI.It’s Nvidia’s MCP79 (of the nForce 790 SLI)
This comment was originally posted on Hacker News
For @maxheadroom RT @KentBeck: what’s better than an ssd in a mbp? 2! for diyers: http://bit.ly/dnkmOO
This comment was originally posted on Twitter
“How To: Apple MacBook Pro RAID 0 Array with 2 Intel X25-M SSDs …” http://tinyurl.com/y95syun
This comment was originally posted on Twitter
How To: Apple MacBook Pro RAID 0 Array with 2 Intel X25-M SSDs …: Author: Paul Stamatiou , Categories: Default ,… http://bit.ly/bTLUBQ
This comment was originally posted on Twitter
Mir würd erstmal eine reichen… | RT: @KentBeck: what’s better than an ssd in a mbp? 2! for diyers: http://bit.ly/dnkmOO
This comment was originally posted on Twitter
RAID-1 is a (very expensive in this case) waste of space when you already have a perfectly good backup system in place.
This comment was originally posted on Hacker News
StartupNews: How To: Apple MacBook Pro RAID 0 Array with 2 Intel X25-M SSDs http://bit.ly/awQsOe
This comment was originally posted on Twitter
Ahh cool! RT @KentBeck: what’s better than an ssd in a mbp? 2! for diyers: http://bit.ly/dnkmOO
This comment was originally posted on Twitter
Apple already has a RAID implementation. It’s software based but the performance is just as good as the hostRAID. It also has the benefit of being swappable to any other Mac system unlike hostRAID which is chipset dependent.
This comment was originally posted on Hacker News
cool! RT @KentBeck: what’s better than an ssd in a mbp? 2! for diyers: http://bit.ly/dnkmOO
This comment was originally posted on Twitter
Must try this! Siren call for IO speed on a laptop. http://paulstamatiou.com/how-to-apple-macbook-pro-raid-0-array-with-2-intel-x25-m-ssds
This comment was originally posted on Twitter
However, there already is a certain amount of free space allocated for this task. On the Intel drives, it’s the difference between 80GiB and 80GB; the latter is the maximum addressable by the OS, the former is the actual capacity of the flash chips. Flash chips always have a power-of-2 capacity, and there are 5, 10 or 20 chips in the various intel drives.
This comment was originally posted on Hacker News
@jqr Did you catch the raid-0 SSD MBP? http://bit.ly/ceOFpk
This comment was originally posted on Twitter
How To: Apple MacBook Pro RAID 0 Array with 2 Intel X25-M SSDs – http://su.pr/169hCf
This comment was originally posted on Twitter
「How To: Apple MacBook Pro RAID 0 Array with 2 Intel X25-M SSDs」 http://is.gd/7bNWb 興味深い
This comment was originally posted on Twitter
This is sweet! RT @fxs: Must try this! Siren call for IO speed on a laptop. http://bit.ly/c9FFgP
This comment was originally posted on Twitter
How To: Apple MacBook Pro RAID 0 Array with 2 Intel X25-M SSDs – http://bit.ly/ceOFpk
This comment was originally posted on Twitter
excellent, merci pour le lien ;o) RT @gonzague: How To: Apple MacBook Pro RAID 0 Array with 2 Intel X25-M SSDs – http://bit.ly/ceOFpk
This comment was originally posted on Twitter
How To: Apple MacBook Pro RAID 0 Array with 2 Intel X25-M SSDs — PaulStamatiou.com http://goo.gl/fb/bvRq #wullon
This comment was originally posted on Twitter
これは非常に興味深い…いつかやってみたい http://bit.ly/b7rSMB How To: Apple MacBook Pro RAID 0 Array with 2 Intel X25-M SSDs
This comment was originally posted on Twitter
Forgot link : http://bit.ly/bKRDNr
This comment was originally posted on Twitter
Apple MacBook Pro RAID 0 Array with 2 Intel X25-M SSDs http://bit.ly/ceOFpk #apple
This comment was originally posted on Twitter