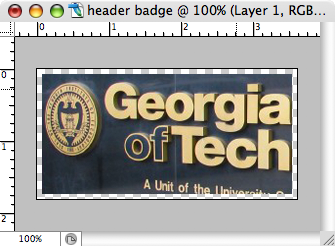
Several people have asked me how I created the header image in my sidebar, so I figured I would make a post out of it. Most of the stuff is easy to do, the only area of contention being the creation of the shape layer. To start out, find an image or color of your choice and crop it to a respectable size. In Photoshop make a new file that is roughly 10 pixels larger in the X and Y directions than the cropped image. This is just to accommodate the drop shadow we're going to apply.
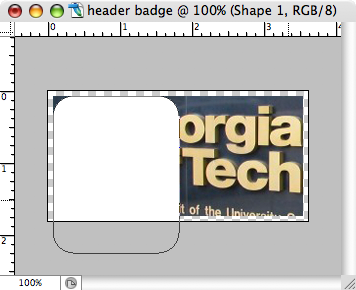
Once you've got the new file created, with a white or transparent background, select the Rounded Rectangle Tool from the Tools window. Set the tool's Radius setting to 20 pixels, take the tool and create one rounded rectangle starting at the top left of the picture's corner. However, don't let it go all the way to the right side of the picture. Extend it down past the bottom left corner. It will look like this:
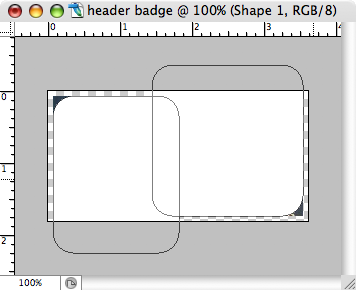
Now do the same with the bottom right corner, except this time hold down the shift key to add it to the current shape layer. You should end up with something like this:
By now your layers window should look like the image below on the left. What we want to do at this point is get to the point of the image at the right. This can be done by dragging the vector mask thumbnail in the shape layer onto the image layer below. Then we delete the remaining shape layer.
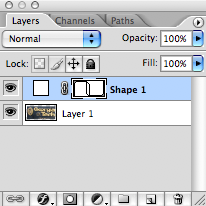
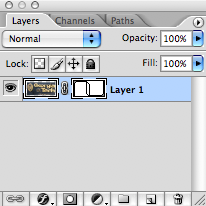
It should look like this:
Now that we have the shape down, the next and final step is tweaking the styling. Head over to the layers window and click the macromedia "f" icon, then select Blending Options.

There are two things we want to do to style the header badge - apply drop shadow and stroke. In the Drop Shadow menu, set the Opacity to 100%, Distance and Spread to 0 and keep Size at 5 pixels.
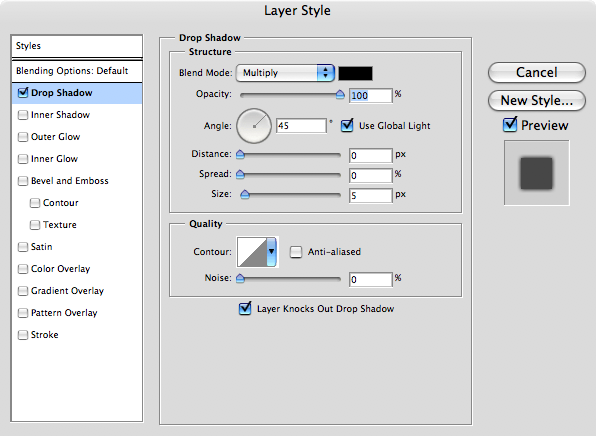
In the Stroke options, you'll want to set the stroke to 2 or 3 pixels oriented inside. Set the color to white or whichever color looks best in your specific application.

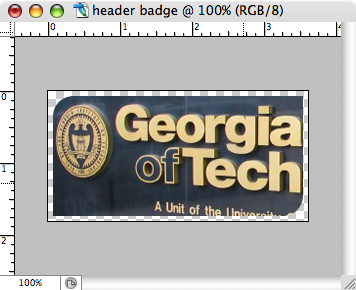
The final product lies below. Using these basic steps you can create similar graphics. The most important thing is getting the shape layers down. If you have any questions please leave a comment and hopefully I can answer any questions you may have.

The last time I made a photoshop tutorial I got at least 30 emails from people asking how I did something.. so this time I've accompanied a screencast. I recorded it using a handy OS X application called iShowU. Enjoy.